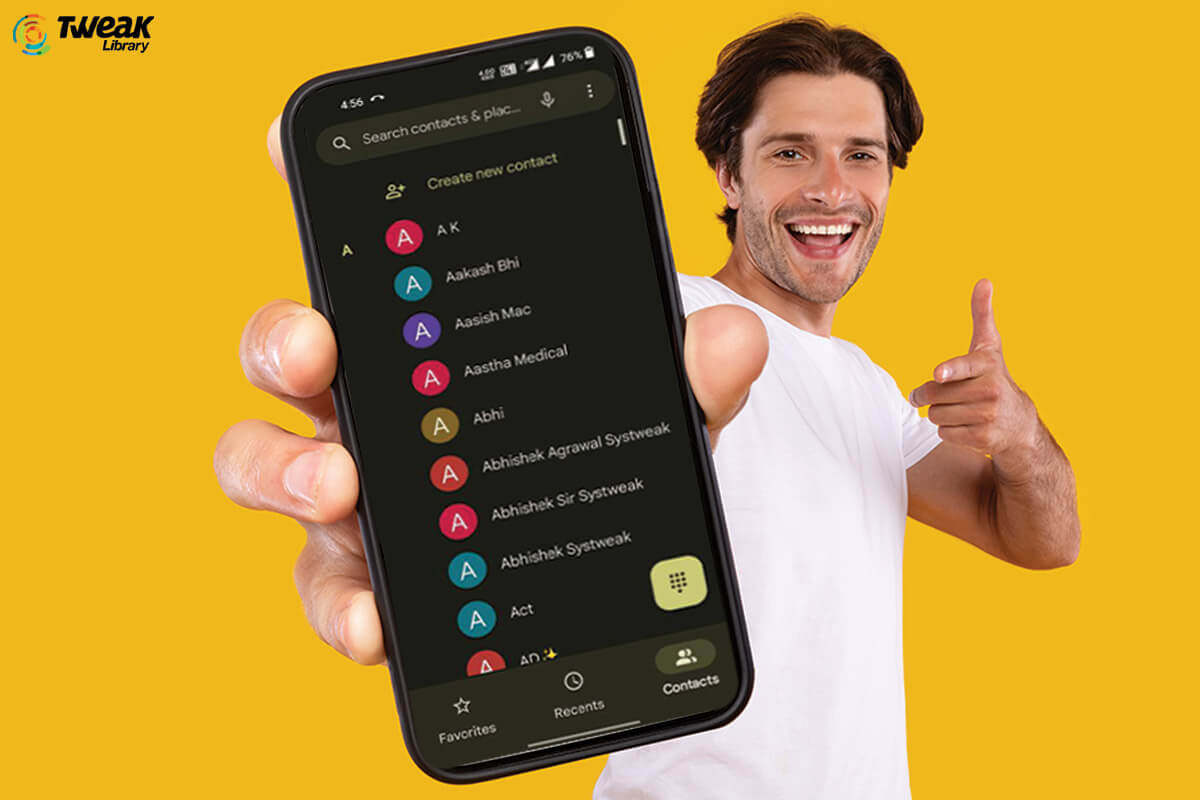
Tell me honestly, when was the last time you memorized a contact number? Well, thanks to the smartphone’s built-in Phonebook app, you can stuff unlimited contact names, numbers, email addresses, nicknames, company names & other information in the respective fields.
But over time, this Contact list can get disorganized. You may rack up duplicate entries, store outdated information, and probably have a smaller number of people you talk to & a greater number of people you ever talk to. That’s why it’s important to learn how to organize contacts on iPhone & Android.
In this guide, we’ll learn several tips to clean and make your iPhone/Android Contacts App properly organized. So, without further ado let’s begin!
Must Read: Best Apps To Fix Multiple Contacts On Android And iOS
Pro Tips To Manage Contacts On iOS & Android Devices (2023)
To keep your list of friends and family organized, here’s what you need to do:
Tips for iPhone Users
1. Clean Your Contacts List with Built-In App = Anyone with an iOS phone should be using Apple’s built-in Contacts app. The app flawlessly syncs information across all Apple platforms. Using its basic management tools, you can clean up your phonebook using options to edit, delete, sort & change the display settings of how contacts appear.
2. Get Rid of Redundant Entries = To eliminate duplicate contacts on iPhone, you can use the “Link Contacts” feature that will let you merge identical contact cards into one.
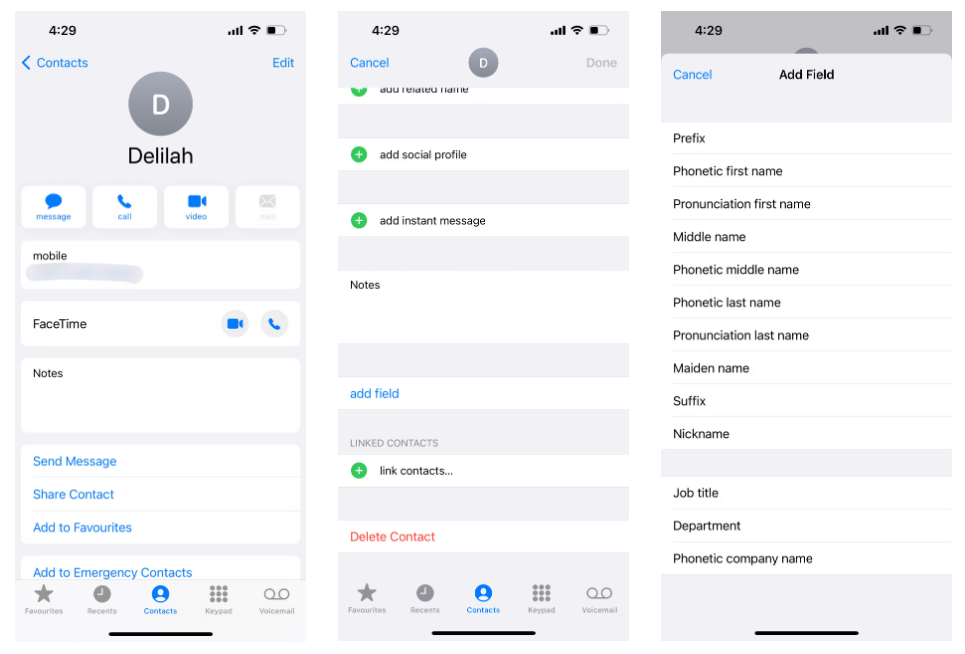
3. Add Nicknames or Emojis To Your Contact Names = Doing so, will add a unique identifier to your contacts. Emojis and nicknames certainly add more life and fun to your plain contacts list. (To add a nickname to an iPhone contact, simply tap the contact you wish to nickname for > Edit < Add Field > Nickname > Type the game > Done.)
4. Add Profile Photo For Your Contacts = iOS offers a way to automate adding photos to contacts. Doing so will help users quickly identify when someone calls as their image will appear. (Make sure you are logged into your Facebook account > Under the settings screen simply tap the ‘Update All Contacts” button.
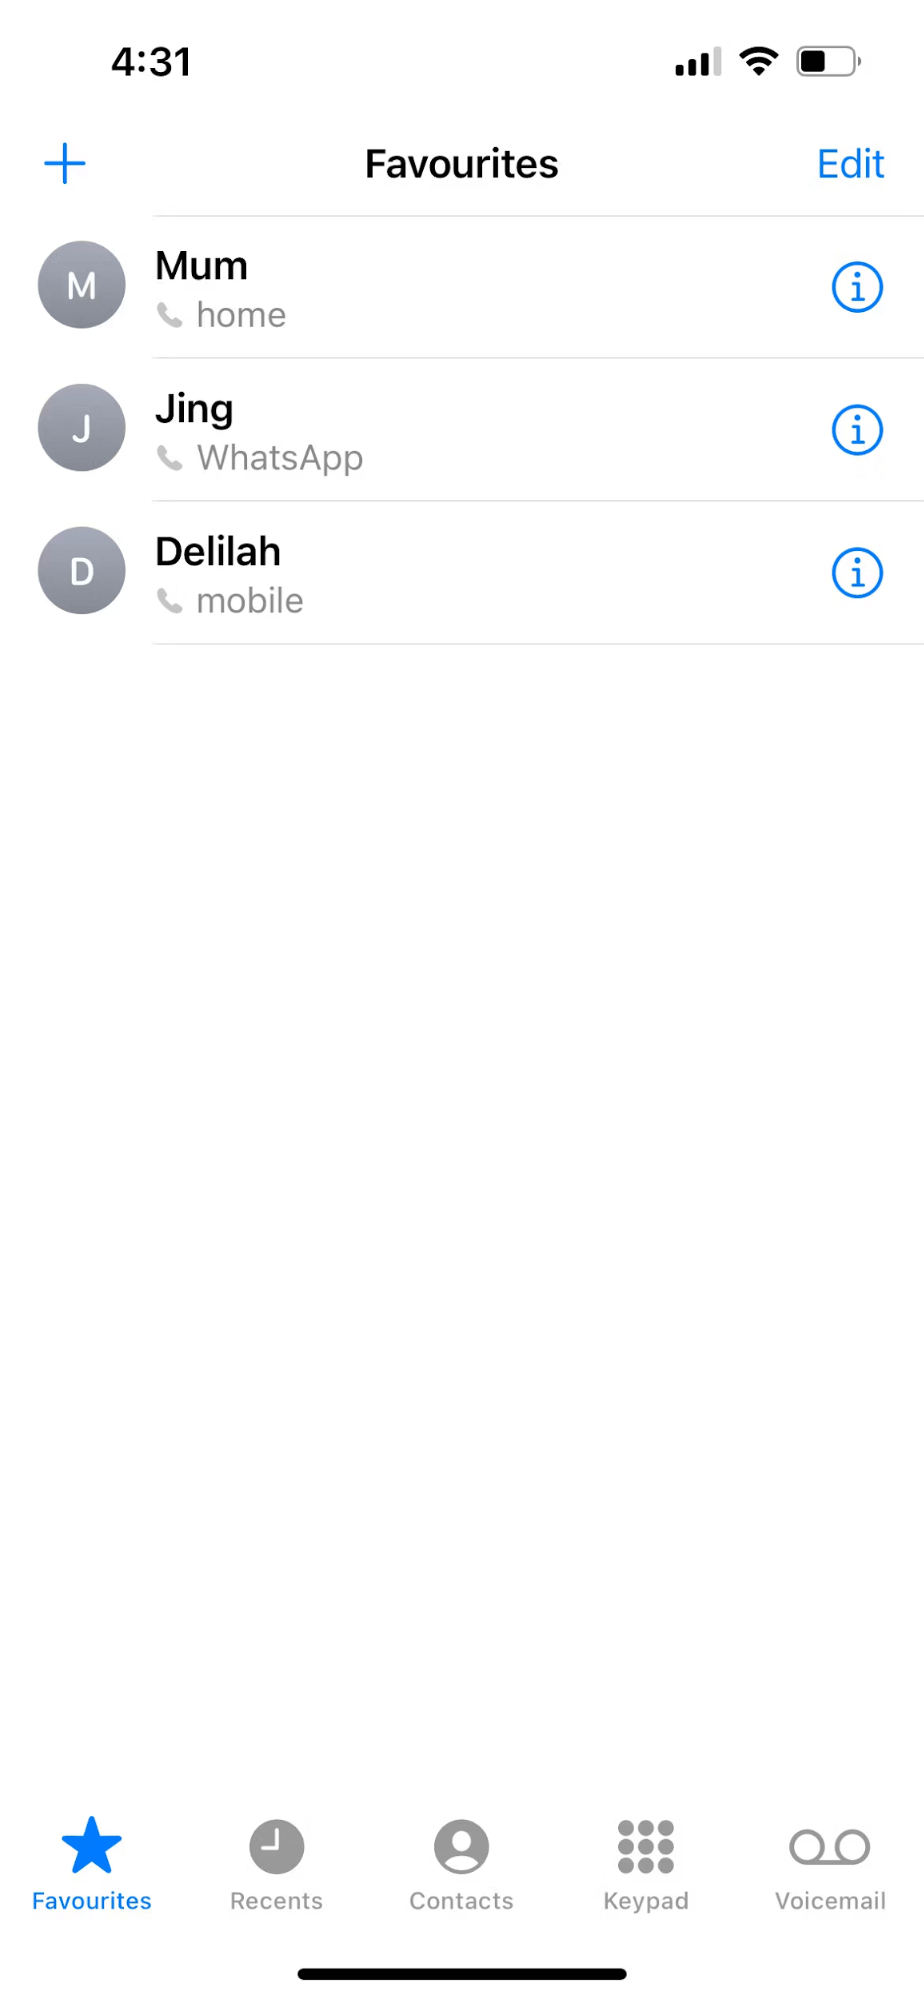
5. Add Contacts To Your Favorite List = Does it take forever to find people you want to call from your long list of contacts? Well, you must consider using the Recents tab to get your frequent contacts. (To add the contacts to the Favorites list, simply go to the Recents tab > Information > Contacts tab > Tap on the contact you frequently call > Add to Favorites)
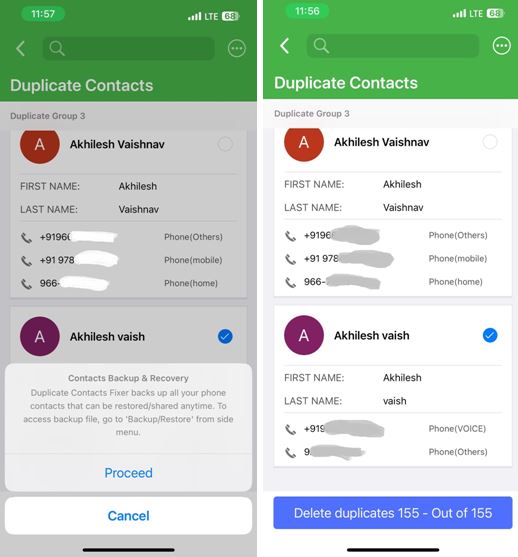
6. Use A Contact Organizer/Manager App = With the help of a dedicated contact management app like Duplicate Contacts Fixer you can easily keep your large contacts list neat and tidy. It does so by merging duplicate contacts and backup the entire address book before deleting the unwanted ones. Download this excellent application right now, to declutter your iPhone & Android contacts list!
Tips for Android Users:
Besides following the aforementioned tactics to organize contacts on Android, you can try the following things as well:
1. Organize Your Contacts By First or Last Name = Although, there’s no right or wrong way to have your contacts displayed. You can make your contacts appear by their first & then last name or vice-versa. This can be easily set up by navigating the Display section under Contacts app settings.
2. Add Contacts To A Specific Label = Another effective way to manage contacts is by categorizing them via labels. You can separate your work contacts & personal ones by adding them under different labels. (Open the contacts app > tap the three-lined icon > tap on the Create Label option > Add a name to the label > press the OK button. Once the label has been created, open it and start adding your preferred contacts to the list.)
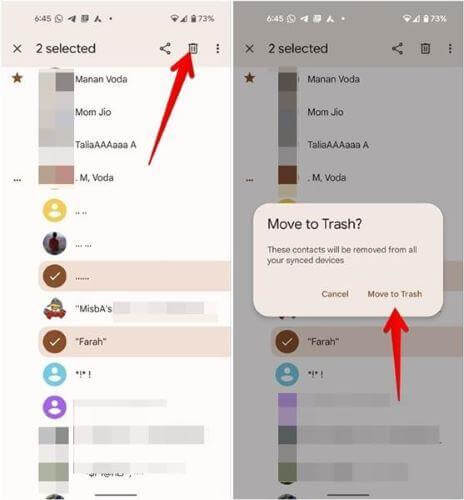
3. Delete Multiple Unwanted Contacts = Using the default (pre-installed) Google Contacts application, you can easily remove needless contacts in batches. (For this, open the Contacts app > tap the three-lined icon > hit the Select button > Choose the contacts you wish to remove > Hit the Trash icon.)
During the decluttering process, if you accidentally delete an important contact, read this: How To Recover Deleted Contacts On Android Via Gmail
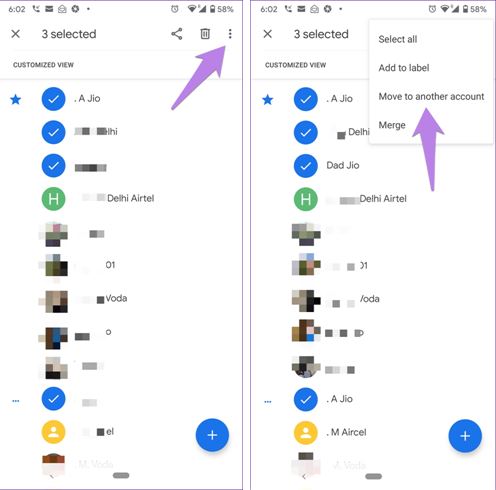
4. Move Contacts To Another Account = If you’ve accidentally saved someone’s contact to a wrong contact, you don’t have to delete it and then save it again. Instead, you can move it to your desired account. (To move a contact, simply press and hold the contact’s name > tap on the three-dots icon > hit the Move to another account > select the account where you want to move it.)
Must Read: How To Transfer Contacts From Android To iPhone
Bottom Line:
If you’re someone who regularly adds new contacts to their Phonebook, it’s essential to have all your contacts in order. This way, you can easily identify them, especially when you need to get in touch with a specific person urgently. You can use the integrated contacts app on your iPhone/Android or a third-party contact manager app like Duplicate Contacts Fixer to tidy up your address book.
If you know any other effective way to organize iPhone/Android contacts, feel free to share your suggestions with us in the comments section below!
NEXT READ:
Troubleshooting Duplicate Contacts Problem on Android
Android Apps for Sending SMS Messages in Bulk


Leave a Reply