We all have been using Facebook for a long time even before our smartphones came in. Previously, we didn’t upload as many videos and photos as we do now. Additionally, if you are using Facebook from long like from the beginning, you must be having this whole big set of memories which you often look at. Sadly, as of now, Facebook does not provide any cloud photo services. But, the good news is that we can now move Facebook photos to Google photos just in a second with easy steps. Recently, Facebook launched a tool wherein you can transfer your Facebook photos to Google Photos. The great thing about this feature is that it does not remove or delete any of our collection from Facebook.
Also Read: Best Photo Management Software
The tool is pretty simple and easy to use because it is directly connected from Facebook which is why it does not involve use of any sci-fi hack. Below-mentioned are the easy steps for How to move Facebook photos to Google Photos.
Steps to move Facebook photos to Google photos
1. Open or log in to your Facebook Account
The newly launched transfer tool is an independent-platform feature which can be easily accessed through your browser, iOS and Android applications. I have used the browser for the demonstration of the steps.
- Launch or login to Facebook page and click on the drop-down like icon available on the top right corner of the screen nearby notifications icon.

- After clicking on the drop-down icon, click on Settings and Privacy.
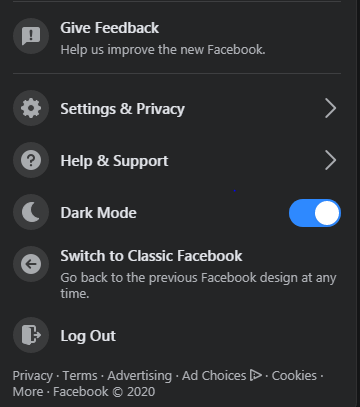
- Now, select the Settings
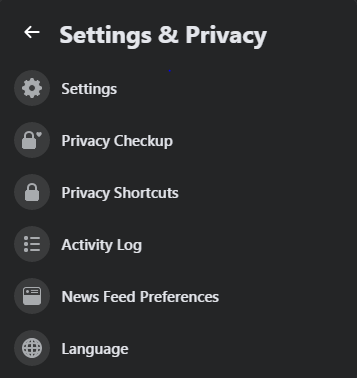
2. Transfer the copy of your collection
While you are using Facebook from a browser or an application, it is quite confusing sometimes. But, glad that photos and videos are easily accessible in the settings section. You don’t have to go through various options and menus.
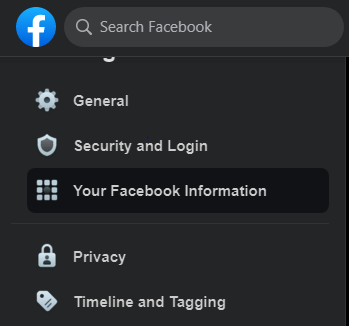
- Once settings page loads completely, go to “Your Facebook Information”
- After loading, go to “Transfer a copy of your photos or videos”
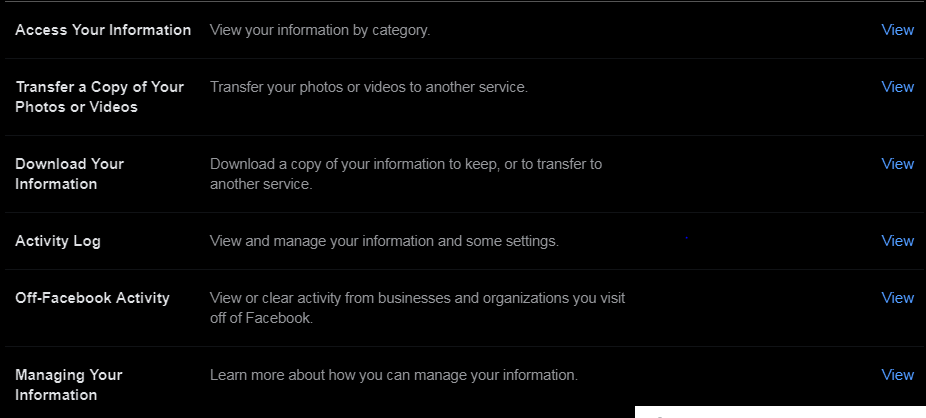
- Tap on View from “Transfer a copy of your photos or videos”
After tapping or clicking on View, you will be directed to a new page wherein you can set date range, format, and media quality in order to create a new file in your Google Photos.

Additionally, you can make selections from your posts, photos and video, comments, likes, and reactions… you can filter out everything you wish to keep or deselect.
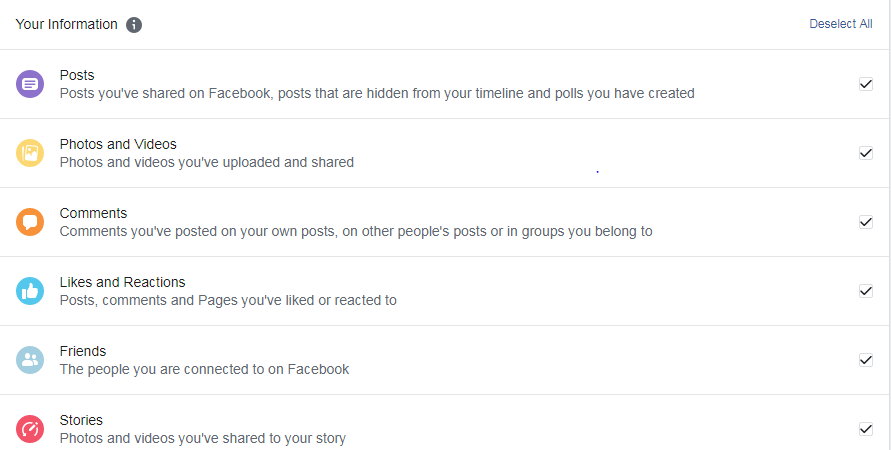
- After selecting the inputs, go on Create File.
- After clicking on Create File, Facebook will start creating a copy of your selections.

- You can also click on Cancel this process if you wish to not create a copy in Google Photos before the file upload is complete.
- Along with the steps, you will also have to choose a destination for Facebook photos.
Also Read: How To Recover Deleted Photos From iPhone
3. Choose Destination and move photos
As of now, Facebook only allows for copying photos from Facebook to Google. I am optimistic that Facebook is soon going to launch more services in the future. The process is going to take a little bit of time, have some patience, and let the upload complete.
After selecting Google Photos as your destination, you can easily access your Facebook photos from Google photos.
After the upload, you can view your Facebook photos anytime on Google photos without any hassle. Additionally, once the upload is complete, Facebook will notify you that you can now view your file in Google Photos.
I hope you like this blog. Comment down and let us know if you face any issue while sharing photos from Facebook to Google Photos. For more such tech-related content, follow Tweak Library on all social media platforms.
Thanks for reading!
Next Read:
How to Password Protect Photos on iPhone
How to Recover Deleted Photos From Android Gallery


Akriti Singh
Amazing information. I was unaware that we can transfer our facebook photos to google photos with so much ease.