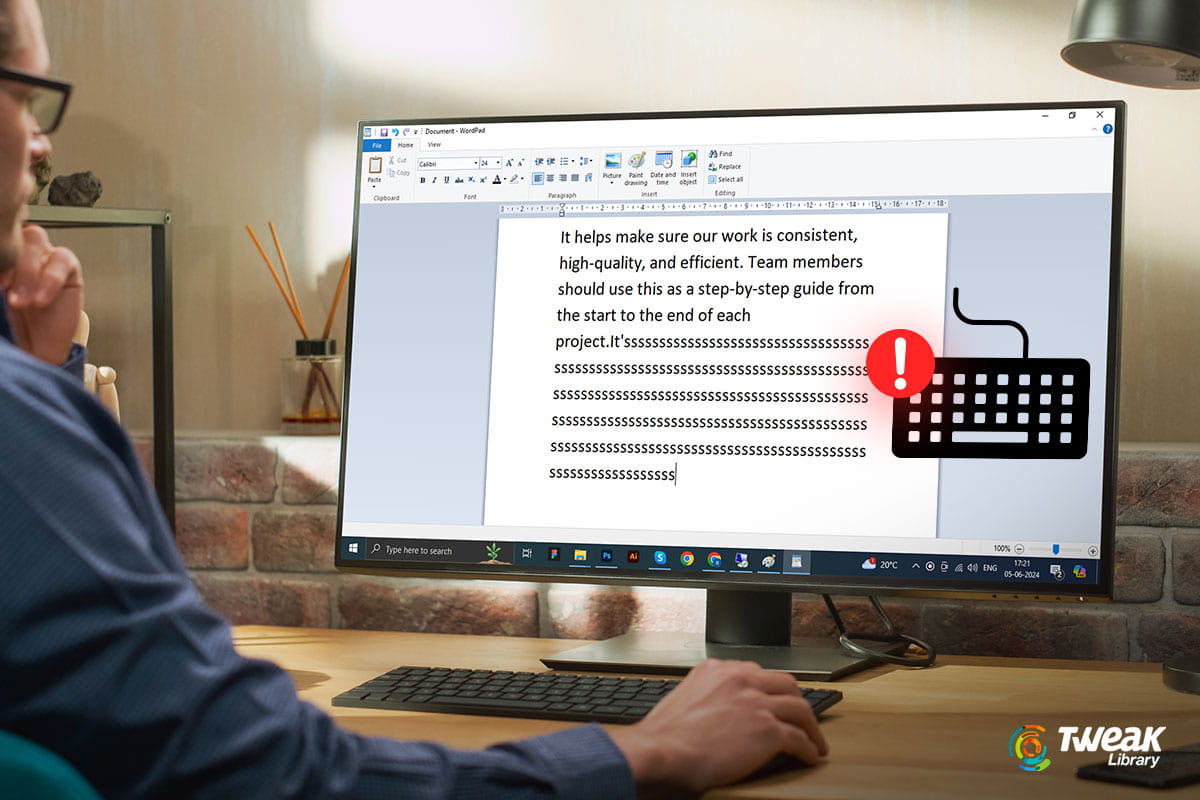
It is normal for keyboards to malfunction from time to time. If you ever feel like your keyboard is typing on its own, then my friend you know how frustrating and annoying it can be. There can be many reasons behind it, including hardware problems, software glitches, and even malware.
In this blog, we will guide you through the best methods to fix this ‘auto keyboard typing’ or ‘automatic keyboard typing’ typing issue on your Windows PC/Laptop.
So, without further ado, let’s get started.
The keyboard is not Responding on Windows 10/11 Desktops/Laptops? Here is How to Fix It
It doesn’t matter if you are facing this issue on your Desktop or your Laptop, the solutions we are going to tell you will work on both. Here’s how to fix it:
Method 1: Disconnect and Reconnect your Keyboard
If you are facing this issue while working on your Desktop, the first thing you should do is disconnect your keyboard and then reconnect it. Also, while it is unplugged, check if the connecting wire is not broken or has cracks/chips along the length.
Also, check the connecting pins on your Desktop/laptop to see if any connecting pins are bent, loose, or broken. The same goes for your keyboard connecting wire, check if the pins are loose, bent, or broken.
Method 2: Restart Your Computer
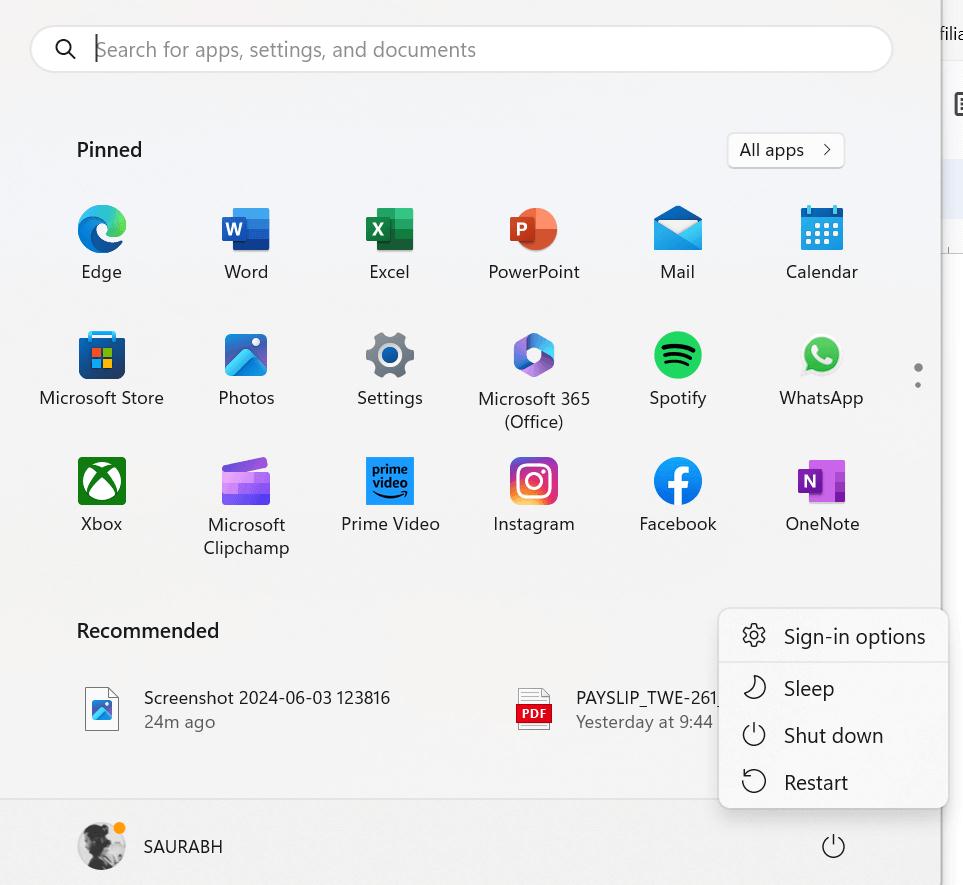
Yes, this old-school method works like a wonder. A simple restart can clear out any software glitches creating issues with your keyboard. Restarting the computer can fix a lot of technical issues. So, it is a good idea to refresh or restart your computer whenever you face these glitches or problems with your computer. Here is how to do it:
Step 1: Press the Windows key on your keyboard and then click on the Power icon.
![]()
Step 2: Click on Restart.
If the problem is still not resolved, then jump on the third method.
Read Also: What To Do If Windows 11 PC Randomly Restarts?
Method 3: Run Keyboard Troubleshooter
For almost every Windows problem, there is a dedicated in-built Troubleshooter. So, related to the keyboard problems in Windows PCs/Laptops we have a Keyboard Troubleshooter. And chances are that you can solve this problem by using Keyboard Troubleshooter. Here is how to use it:
Step 1: Press the Windows + I keys together to open Windows Settings.
Step 2: From the left-hand side click on System or Update & Security (In Windows 11), then click on Troubleshoot from the right-hand side.
Step 3: Now choose Other Troubleshooters or Additional Troubleshooters.
Step 4: Scroll down and choose the ‘keyboard’ option from the list. Hit the Run the troubleshooter button.
It will then identify & fix the keyboard issue. In case, it fails to do so it will tell you that the keyboard troubleshooter is not able to do that. Then you can try the next method.
Read Also: How To Fix Windows Update Troubleshooter Not Working
Method 4: Update your Keyboard Drivers
You can also try this method to deal with this problem and that is to update your keyboard drivers. It is possible that your keyboard’s drivers are outdated or got corrupted somehow. To clear out this possibility, here is how you can update your keyboard drivers:
Either you can do it manually or you can do it automatically. The reason to pick on the automatic driver updater is simple, it will give you an efficient and fast solution to your problem.
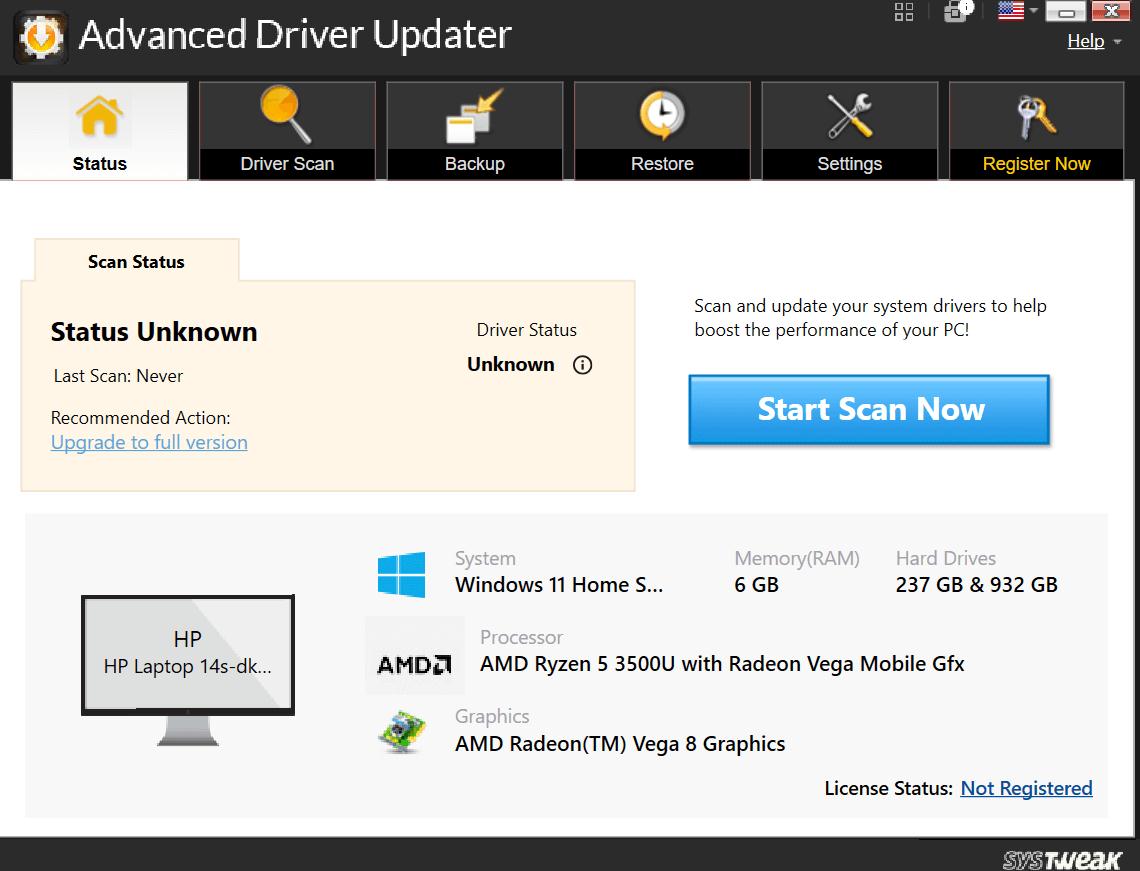
Or this task we suggest you use Advanced Driver Updater. With just a few clicks you can update your keyboard drivers to the latest version. To do so follow the steps below:
Step 1: Download and install the Advanced Driver Updater from the button down below.

Step 2: Once installed, open it and right from the dashboard click on Start Scan Now.
Step 3: Let it scan your whole PC for outdated drivers. Once the scan is finished it will show you a list of all the outdated drivers.
Step 4: Look for the keyboard drivers from the list and then click on the Update button right in front of it. This will initiate the download and install for the latest driver for the keyboard.
Step 5: After the whole process, reboot your PC/Laptop and check whether the issue is resolved or not.
Method 5: Turn Off Sticky and Filter Keys
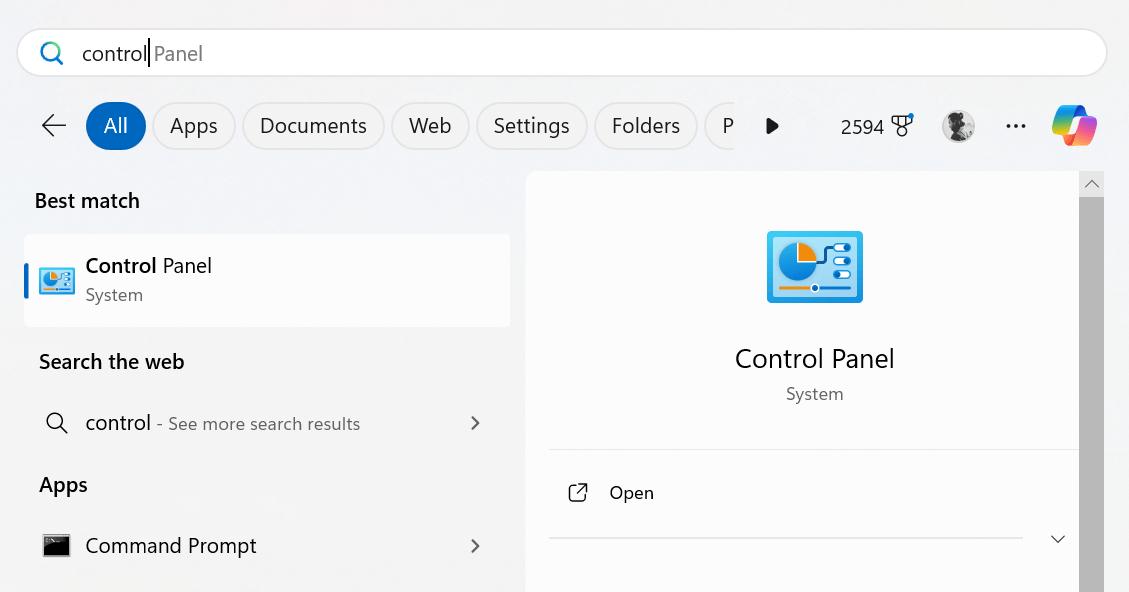
Sticky Key and Filter Keys are designed to make typing easier. But in some cases, it can cause problems like we are facing here, the ‘auto keyboard typing’ issue. To rectify this you will have to make some changes in your keyboard settings. Here is how to do it:
Step 1: Press the Windows key, type the control panel, and open it by hitting on the Open button.
Step 2: Find and tap on Ease of Access Center.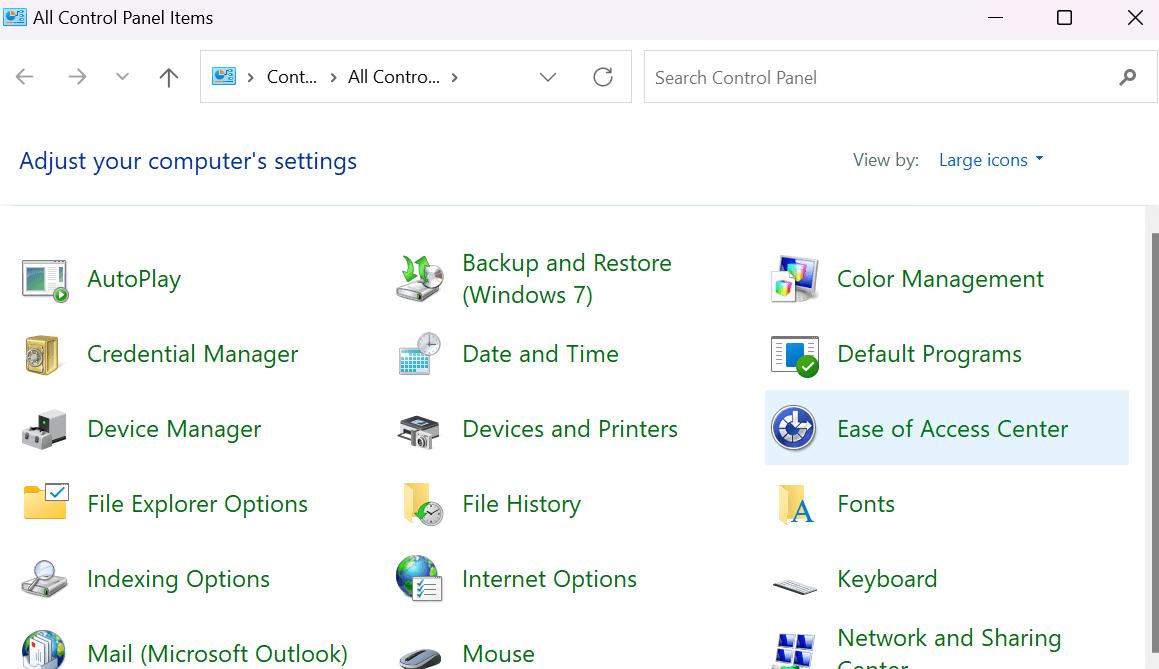
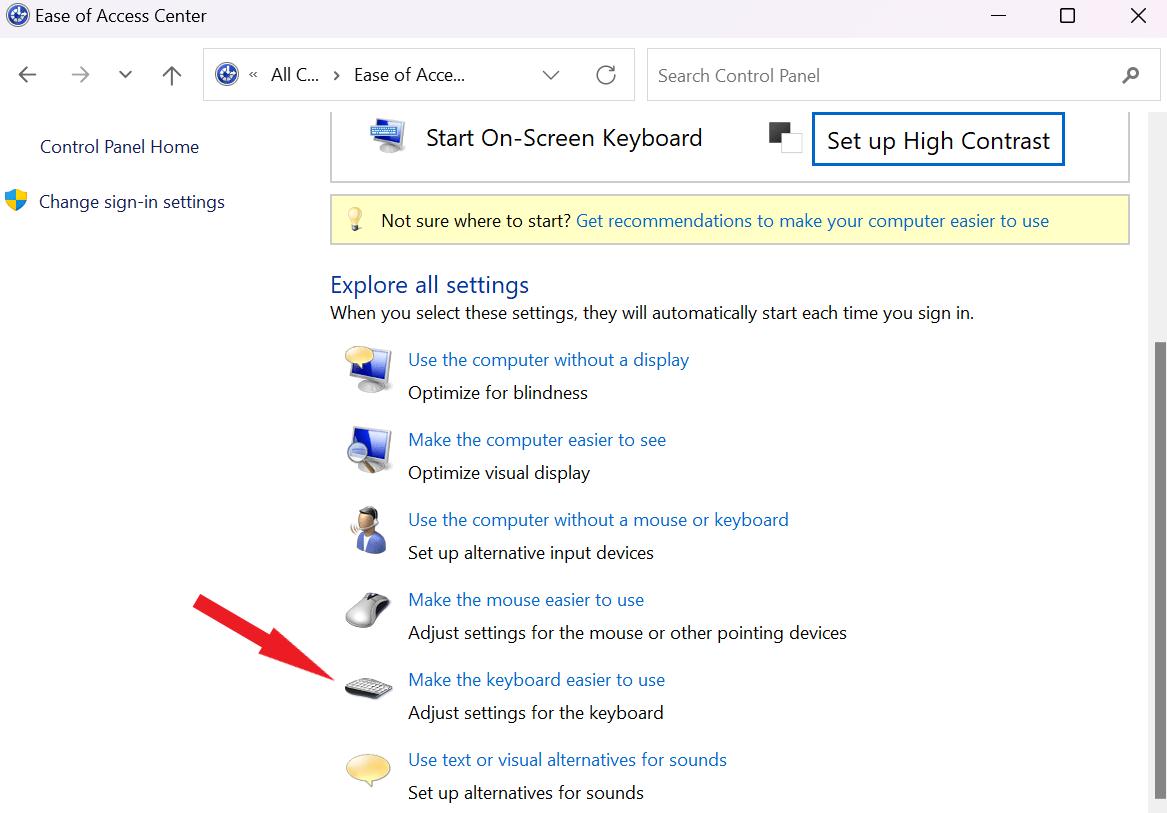
Step 3: From the right-hand side, scroll down and choose Make the keyboard easier to use.
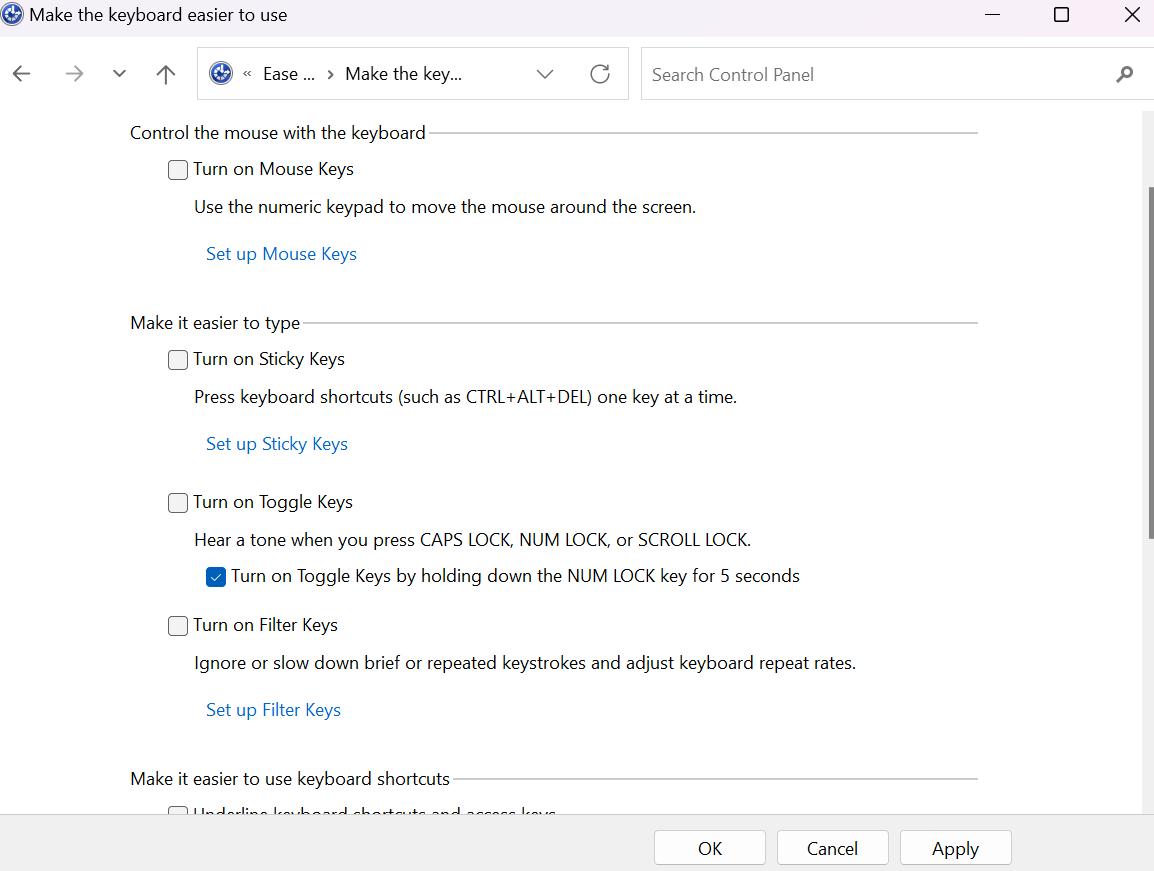
Step 4: Make sure the boxes of Turn on Sticky Keys, Turn on Mouse Keys and Turn on Filter Keys are unchecked.
Step 5: Then click on Apply followed by OK.
Method 6: Run a Malware Scan
Malware or viruses can hamper the functionality of your keyboard. It can be helpful to find and get rid of any type of malware or viruses lurking on your computer.
To do so we suggest you use an industry leading antivirus software – T9 Antivirus. It is among the most trustworthy and lightest antivirus software you can ever use. To know all the features and benefits of using T9 antivirus software, read the full review of T9 Antivirus.
Read Also: How to Delete Undeletable Files & Folders in Windows 11/10/8/7
Method 7: Run the SFC Scan
The ‘keyboard automatically typing’ error can occur due to corrupted system files as well. To ruled out this possibility, follow the steps below:
Step 1: Press the Windows key and type ‘cmd’ and then tap on Run as administrator to open the Command Prompt window.
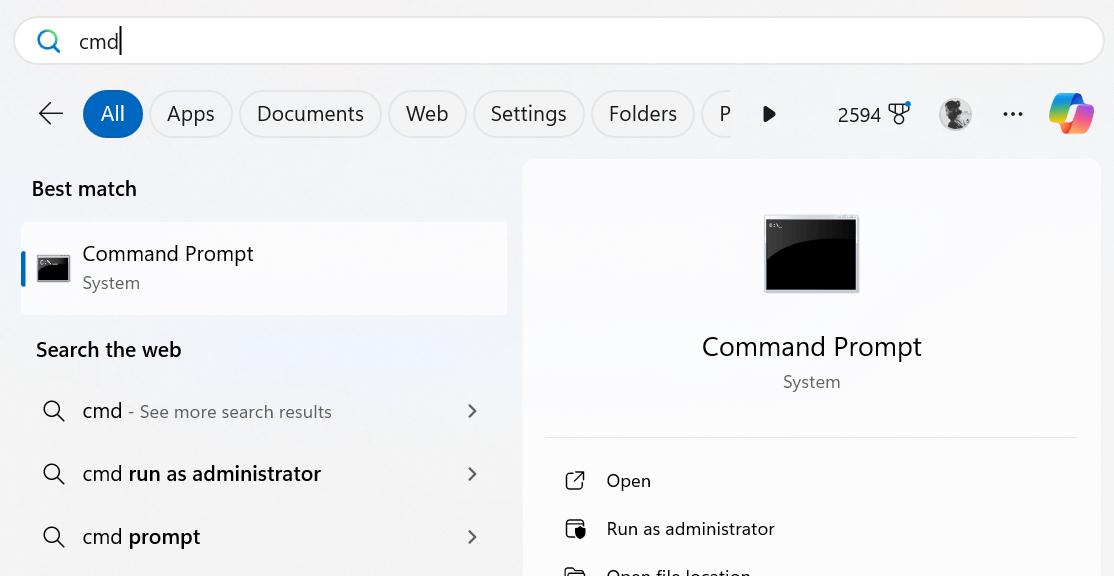
Step 2: Now type this exact command and press the Enter key.
sfc /scannow.

Once the verification process is finished, you will be notified of any problems found. While some problems might be solved automatically, some you will need to fix manually.
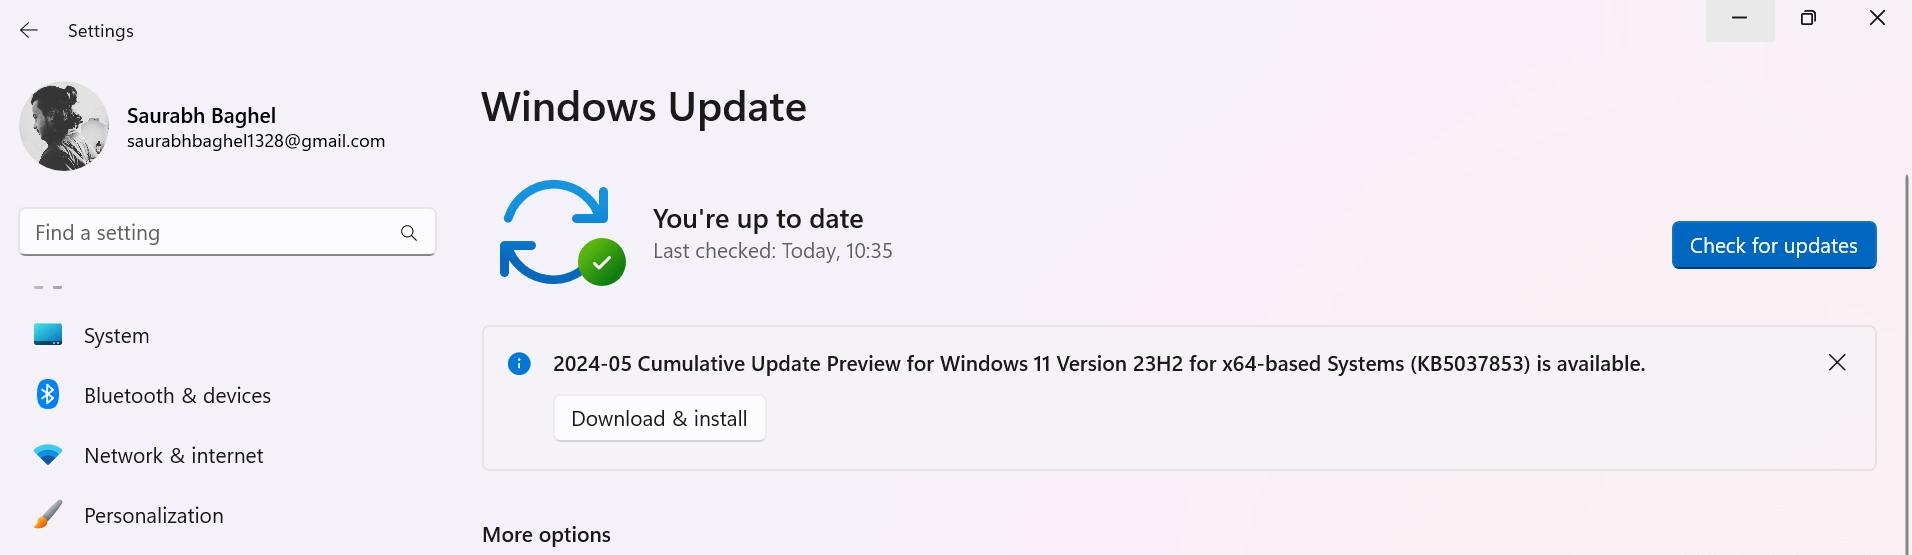
Method 8 : Update Your Computer’s OS
You can also update your system OS to ensure that there are no compatibility issues between your keyboard and the system’s OS. Which is creating this keyboard automatically typing issue in the first place. To do so follow the steps below:
Step 1: Open Windows Settings > Windows Update.
Step 2: If there is any update, click on the Download & install button.
Read Also: How To Fix Windows Update Troubleshooter Not Working
Automatic Keyboard Typing Issue on Windows is Fixed for Good
This problem can really be annoying but it doesn’t mean that you can’t fix it. It is no big deal anyone with or without technical know-how can rectify this error on its own. Just follow our guide and try these above-mentioned methods in order.
If you have gone through all the methods but are still stuck with ‘keyboard typing on its own’ issue, it could be the time to replace your desktop’s keyboard or help from an expert if you are a laptop user.


Leave a Reply