Backing up data on Windows 10 from time to time is always recommended and using the File History option is one of the ways to do just that. It is an easy way to back up your files regularly. The File History feature requires you to have a drive connected on which the file can be backed up. However, there are times when users have to deal with errors such as –
Reconnect Your Drive. Your File History Is Disconnected. Reconnect and Try Again
Here are the probable reasons why this issue may surface –
- Backup drive is corrupt or has bad sectors
- You have mistakenly turned the File History feature off
- The backup drive is disconnected due to some reason
In this blog, we’ll discuss all the ways you can get rid of the issue in a fast manner.
Also Read: How To Back Up Your Computer And Personal Data
Ways To Resolve The “Your File History Drive Was Disconnected For Too Long” Error –
List of Contents
1. Replug The Drive Once Again

Maybe you are getting the “Your file history drive was disconnected for too long” error because your backup drive got disconnected due to some or other reason. If that’s the case, the issue can be easily resolved by plugging your backup drive out and then replugging it back again. Then follow the steps mentioned above:
- Open Settings by pressing Windows + I
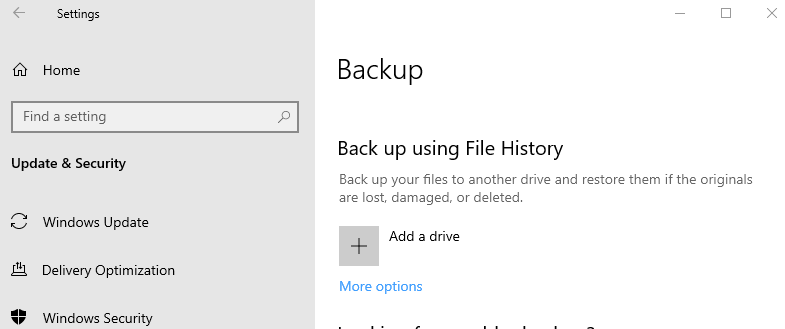
- Click on Update & Security > Backup
- Reselect the external hard drive
In most cases, this should be the exact solution you need and you won’t further be bugged by any annoying notifications or reminders.
2. Choose A Different File History Drive For Backing Up Files
One of the ways to resolve the “Reconnect your drive. Your file history was disconnected for too long” error is to opt for a different file history drive because your existing drive may be corrupt or may have some issues.
- Open Settings by pressing Windows + I, head to Update & Security, select Backup, and then click on More options
- Scroll down till you find the Backup to a different drive Then, click on Stop using the drive. This will switch off the File History backup. You will also notice that Add a drive options again appears under the Back up using File History
- We will now add a new drive as a way to back up files. So, head to the Control Panel by typing Control in the Windows search bar and then choose Control Panel from the right-hand pane
- Go to System and Security and select File History.
- Click the OK option and then further click on Yes
Also Read: How to Create Windows Files Backup to External Hard Drive
3. Repair Your Connected Drive With The Help Of CHKDSK

Oftentimes, the error may surface, when your connected drive is damaged. It could be that there are bad sectors on your hard drive. Immaterial of the error, we can take the aid of the chkdsk functionality in Windows 10, detect the corruption and then resolve it. To do that, follow the below-mentioned steps –
- Type cmd in the Windows search bar
- Select Run as administrator from the right-hand pane
- When the Administrative Command Prompt pops up, type the below-mentioned commands –
Chkdsk.exe /f H (press enter)
Note: When entering the command replace the letter ‘H’ with the driver letter of your backup drive. For example, if your backup drive is ‘G’, then the command will be –
chkdsk.exe/ f G (press enter)
- Let the process complete. Now, if you find that the value of bad sectors is not 0, then your drive might be damaged. If that’s the case, as a matter of data security, you can take a backup of your drive by cloning the corrupt drive to a new one.
4. Use An Alternative Instead
In case you are still looking for a fix for the issue meanwhile, you can go ahead with an alternative as a way to backup files. AOMEI Backupper is one of the backup solutions
that can help you in that respect.
How Does AOMEI Backupper Work?
Let’s say your computer is booting up because of damaged sectors. In that scenario, you can create a bootable USB on a workable PC using AOMEI Backupper. Now, consider the following scenarios –
- In case you want to clone a hard drive to another, follow these steps:

1. Install AOEMEI Backupper
Install AOMEI Backupper
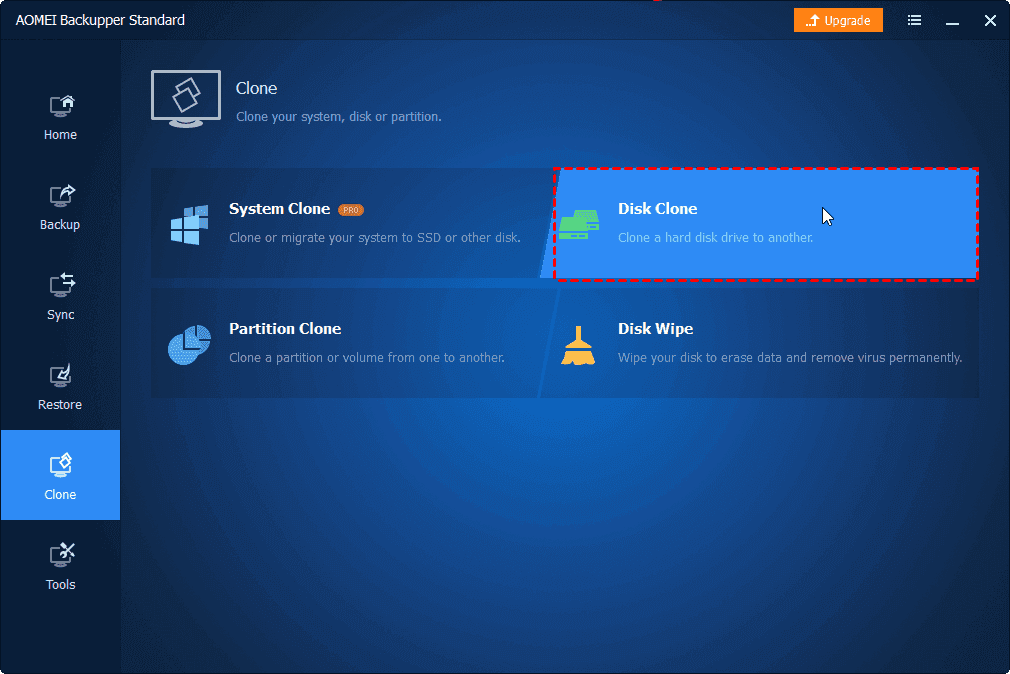
2. From the left-hand side click on Clone
3. From the right-hand side click on Disk Clone
4. Select source drive (the hard drive that is damaged or that has bad sectors)
5. Now, select your destination drive
6. Click on Start Clone
7. Replace your damaged drive with cloned drive
- For just backing up files and folders using AOMEI Backupper, follow these steps –

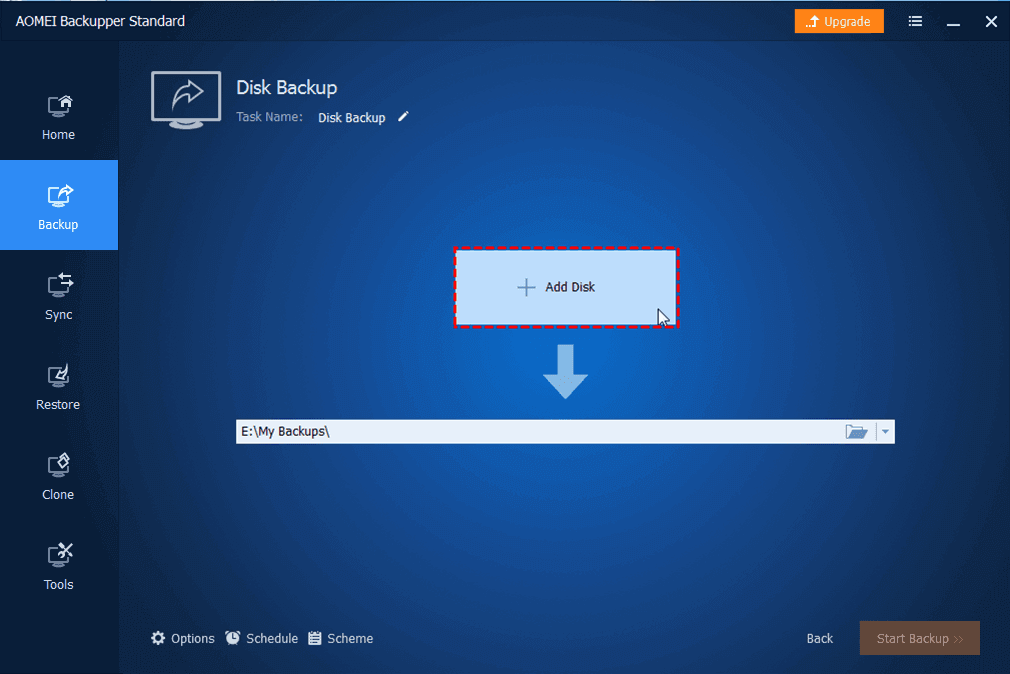
1. After you have installed AOMEI Backupper, click on Backup from the left-hand side
2. Click on either Add File or Add Folder
3. Choose a target drive
4. You can click on Schedule to set file backup task frequency
5. Click on Start Backup
Here are some of the other features of AOMEI Backupper:
- You can choose to create a full backup or choose to create differential or incremental backup
- Not only files, but, AOMEI Backupper also takes a backup of disks, partitions, and even your complete system as well
- You can even choose to schedule backups as well
- You can clone drives as well
Install AOMEI Backupper
5. Format Your Backup Disk

Now that you have the backup in place, you can even proceed with formatting your existing backup disk, should it still flash “Your file history was disconnected for too long”. The reason why a backup is advisable is that once you format the drive, every file or folder will be gone forever. To run the formatting process –
- Press the Windows + E button to open File Explorer
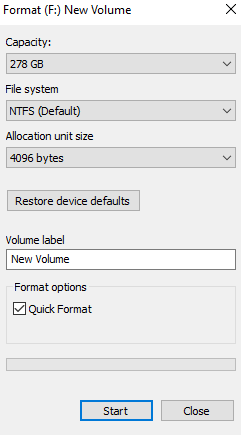
- Locate the problematic drive, right-click on it and then further select Format
- Click on Start and let the process complete
Now, head to File History and run it. It should function without any glitches.
Wrapping Up:
Backing up your computer’s personal data helps you tackle mishaps where you can comfortably leverage your existing backed-up data. And, in that regard, if you are facing errors such as “Reconnect your drive, your file history was disconnected for too long” needn’t jitter and refer to the fixes above. You can always bookmark this blog and more troubleshooting blogs from Tweak Library for future reference. For more such updates, keep reading Tweak Library.
Recommended Readings:
- How To Take Full Backup Windows 10 Computer?
- Backup Drivers in Windows 10 and Restore Them
- How To Backup Registry in Windows 10


Leave a Reply