
Everyone knows how important it is to regularly backup your important data of your computer. Fortunately, Windows 10 comes with one of the easiest ways to automatically backup your data using the feature called File History. File History isn’t new to Windows 10 as it was in Windows 8 as well. However, this improved version comes with an enhanced user interface and several new capabilities.
The File History feature automatically backs up your files to another drive and allows you to restore them if your original data gets lost, damaged, or deleted. All you need is an additional storage device, such as an external hard drive or an SD card, you can even use a network location, such as a shared folder on another PC in your network for backups. File History will not only back up all the files in your libraries (Documents, Music, Pictures, and Videos), it will also take a backup of your Desktop, Contacts, Favorites, and your OneDrive folders.
Here’s how you can enable and use the File History features in Windows 10.
- Connect an external hard drive to your system on which you want to take a backup.
- Now, click on the Start button. (i.e. Windows icon on the bottom left corner of your screen).
- Go to Settings, and click on Update & Security.
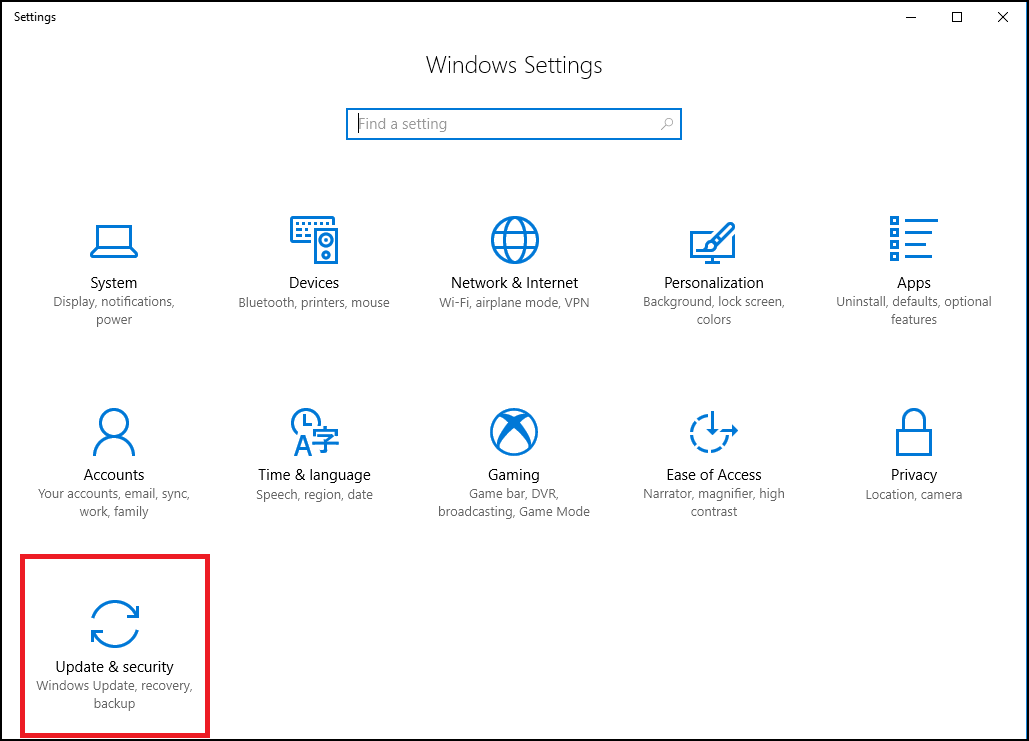
- From the Update & Security window, click on Backup on the left pane.
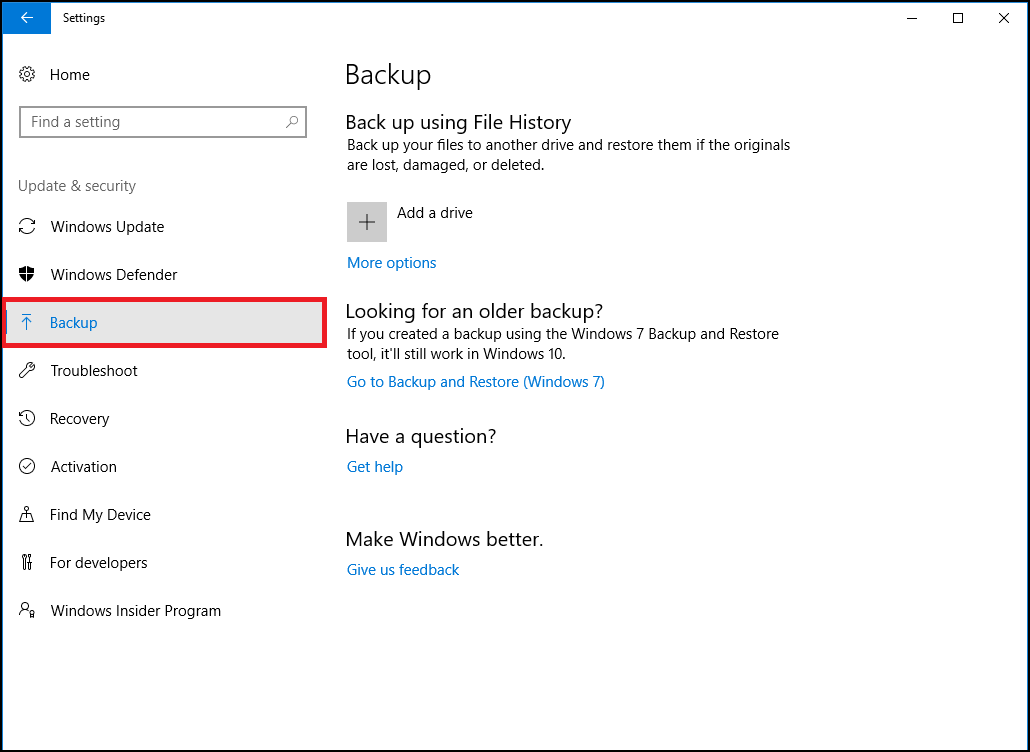
- Tab on Add a drive option from the Back up using the File History section to add an external drive that File History will back up to. It’ll list all the external drives connected and give you the option to backup.

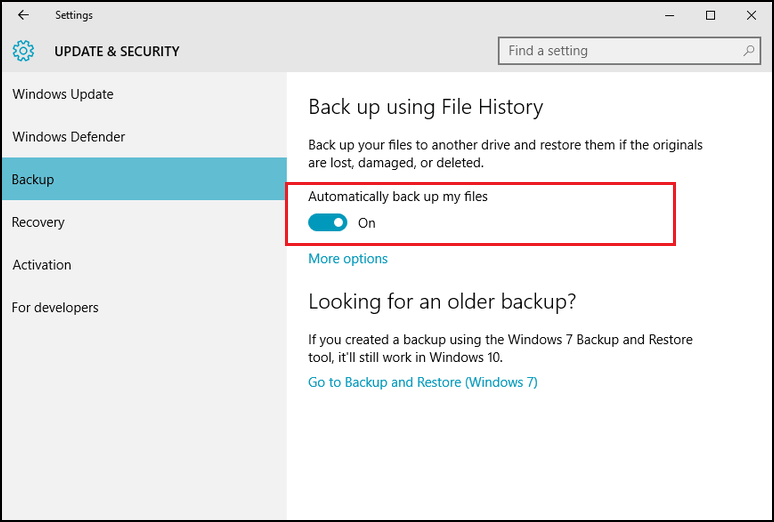
- Select a drive, and Windows will use it for File History to backup your data. The Automatically backup my files option will appear and will automatically turned on.
Once it is done, Windows will automatically backup your data to the external hard drive.
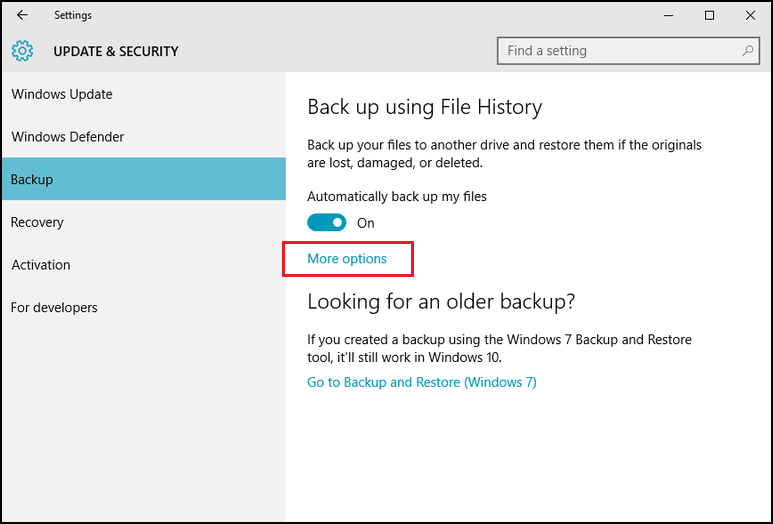
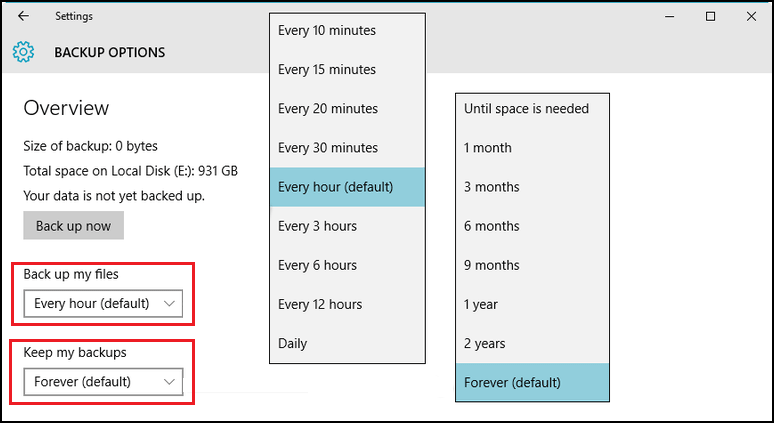
- You can even customize the File History settings as well such as which files or data that needs to be backed up, for how long the backup copies will be maintained or you can also set up a backup schedule for every 10 minutes, 15 minutes etc. Just select the More options to configure these settings as per your requirement.
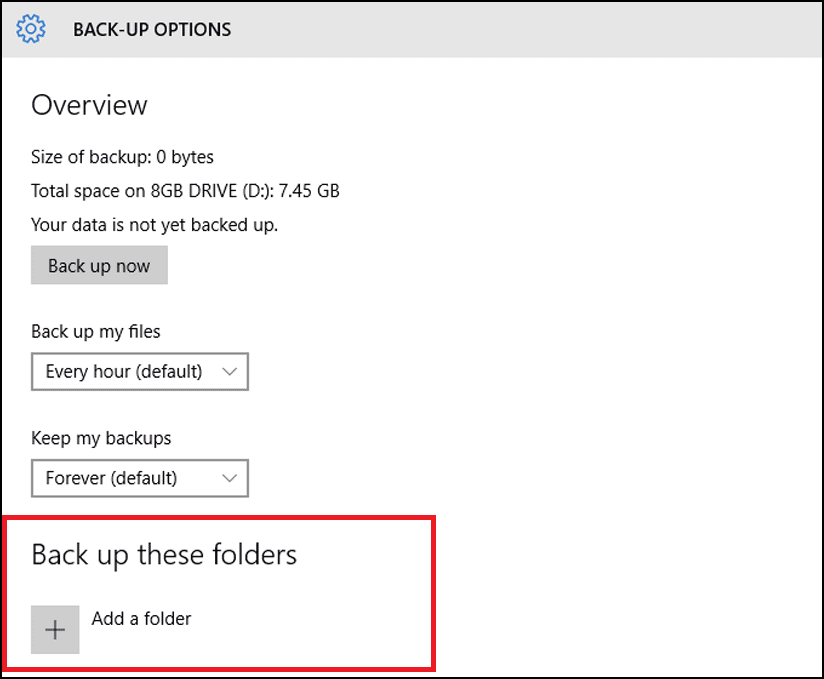
- File history is by default set to backup your important documents from Desktop, My Documents, and My Pictures. However, you can add more folders by simply clicking on Add a folder option and you’ll be able to choose any folder from your computer to backup.
File History is truly a brilliant feature that has proved to be easy to use and quite intuitive. Once you have set it up you can be rest assured that your files have been safely backed up so you will always be able to get back the file or folder you accidentally deleted or lost.


Leave a Reply