To fix different bugs, add functionality, and address users’ concerns, Windows releases updates regularly. However, due to several reasons, Windows Update frequently fails. One of the common issues faced by users after updating Windows 10 is when Windows says it’s “undoing modifications to your computing.”
This error again can be a result of various issues. For example, if the Windows Update service terminates while the update is still being installed, Windows may attempt to reverse the changes since it is unable to complete the installation. It’s also conceivable that your Software Distribution folder is faulty, preventing Windows from correctly applying the updates. Fortunately, correcting the problem isn’t difficult, so let’s look at all of the options.
How to Fix Undoing Changes Made To Your Computer
1. Try Booting Into Safe Mode
You may not be able to use Windows properly to install any repairs if you’re locked in a boot loop. As a result, boot into Safe Mode before attempting to repair your computer.
Safe Mode can be accessed in a variety of ways. If you are unable to boot into Windows, you must utilize the Windows Recovery Environment.
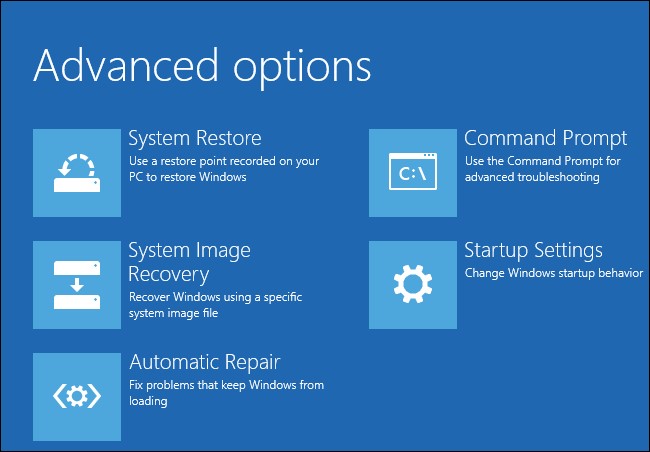
To enter Windows Recovery Environment, hard reboot your PC two times in a row (don’t worry, hard reboots aren’t hazardous). After that, go to Troubleshoot > Advanced Options > Startup Settings > Restart.

When your computer restarts, hit one of the matching numbers to select one of the advanced boot options. Press 5 to enter Safe Mode with Networking, which is the best option.
You may begin applying the patches after you’ve entered Safe Mode.
2. Uninstall Recently Installed Updates
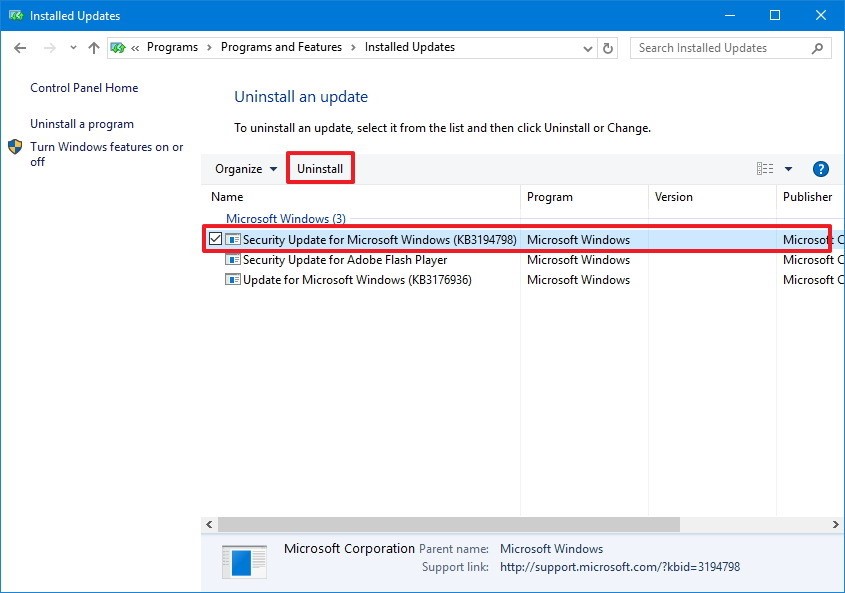
By manually uninstalling updates, you’re assisting Windows in accomplishing its goal of removing any updates installed during the last update session. Press Win + R, enter appwiz.cpl, then press Enter to delete recently installed updates.
The Programs and Features area of the Control Panel will now appear. From the left, select View installed updates.
To arrange updates by the date of installation, go to the Install On tab. Uninstall all recently installed updates by selecting them all and clicking Uninstall.

Restart your PC normally once you’ve deleted all current updates.
3. Delete the Software Distribution Folder
When you update Windows, the Software Distribution folder is used to temporarily store installation files by the Windows Update agent (also known as WU Agent). If the folder has become corrupt or is preventing Windows from updating correctly, try removing it and see if that helps.
Search for the Software Distribution folder in the C: Windows folder. To permanently erase it, click it and hold down Shift + Delete. Windows will regenerate the folder, once you restart your computer.
Stop the Background Intelligent Transfer Services and Windows Update Service, if you can’t remove the folder. This may be done with the Command Prompt. Ctrl + Shift + Enter after pressing Win + R and typing cmd. Then, one by one, run the following instructions (pressing Enter after each one):
After you’ve disabled these services, try deleting the folder again; you should be able to do so. Then, to test if the remedy succeeded, restart your computer normally.
4. Run the Windows Update Troubleshooter
Windows offers a number of built-in troubleshooters, including one for Windows Update difficulties. If the previous two solutions didn’t work, try running the troubleshooter to see if it can automatically repair the problem.
To open the Settings app on Windows 11, hit Ctrl + I and go to System > Troubleshoot > Other troubleshooters. Find Windows Update and press the Run button next to it.

The troubleshooter will attempt to locate problems with Windows Update. If feasible, the troubleshooter will attempt to automatically resolve the issues. Otherwise, it will inform you of difficulties that it was unable to resolve or that it found no problems.
5. Use System Restore
System Restore is essentially a time machine for your computer. It will return your computer to the state it was in when you made a restore point.
The most prevalent issue with this procedure, however, is that many users do not have a system restore point. Because Windows doesn’t make restore points by default, you won’t have one on your computer until you set it up to do so or manually create one.
The System Restore wizard can tell you if you have a restore point. Launch the Best Match by searching for Recovery on your Start Menu. From the pop-up box, choose Open System Restore.

The System Restore wizard will now appear on your computer. Then press the Next button. If your computer has any restore points, this is where you’ll find them. Skip to the following procedure if you don’t have a restore point. However, if have, select it and click Next if you had a restore point made before you encountered the undoing changes problem the first time.
Confirm that you wish to restore your PC using the restore point on the following screen, and then wait for the procedure to finish. You’ll most likely have resolved the problem after you’ve finished.
6. Reset Windows
If you’re still having problems undoing changes, you might want to try resetting your computer. You can choose to remove everything if you want Windows to be in perfect condition, but you can also keep your files intact. Whatever solution you use, you should always back up your data in case something goes wrong.
To open the Settings app, press Win + I and go to System > Recovery. To begin the reset procedure, press the Reset PC button.
The reset wizard will be launched as a result of this action. Choose to Keep my files if you wish to keep personal files, or remove everything if you don’t. You’ll need to reinstall all apps on your PC in any situation.

Using these steps you can fix undoing changes made to your computer.
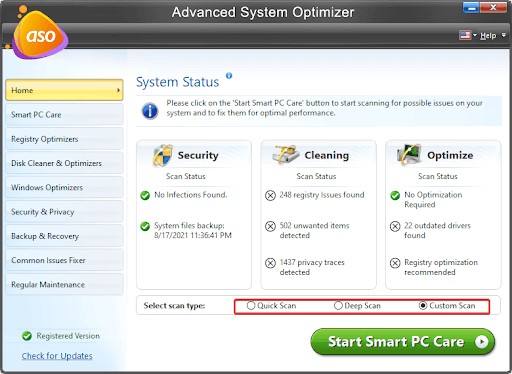
| Writer’s Tip: We recommend suggest using Advanced System Optimizer, one of the best PC optimization tools that help clean junk files, declutter the system, remove duplicates, keep your computer free of infections. This PC optimizer comes with a lot of modules, including Registry Optimizers, Disk Cleaner & Optimizers, Security & Privacy, Backup and Recovery, which covers all the things which a good cleaner utility must-have.
To know more about the tool, click here.
Liked the tool, click on the button below to download and try it: |
So, this way you can fix undoing changes made to your computer. We hope you will try all the troubleshooting steps mentioned in the blog. Also, to keep your computer optimized, we would recommend you to get an optimization tool such as Advanced System Optimizer. If you liked this blog or have any queries, please let us know your thoughts in the comments box below.


Leave a Reply