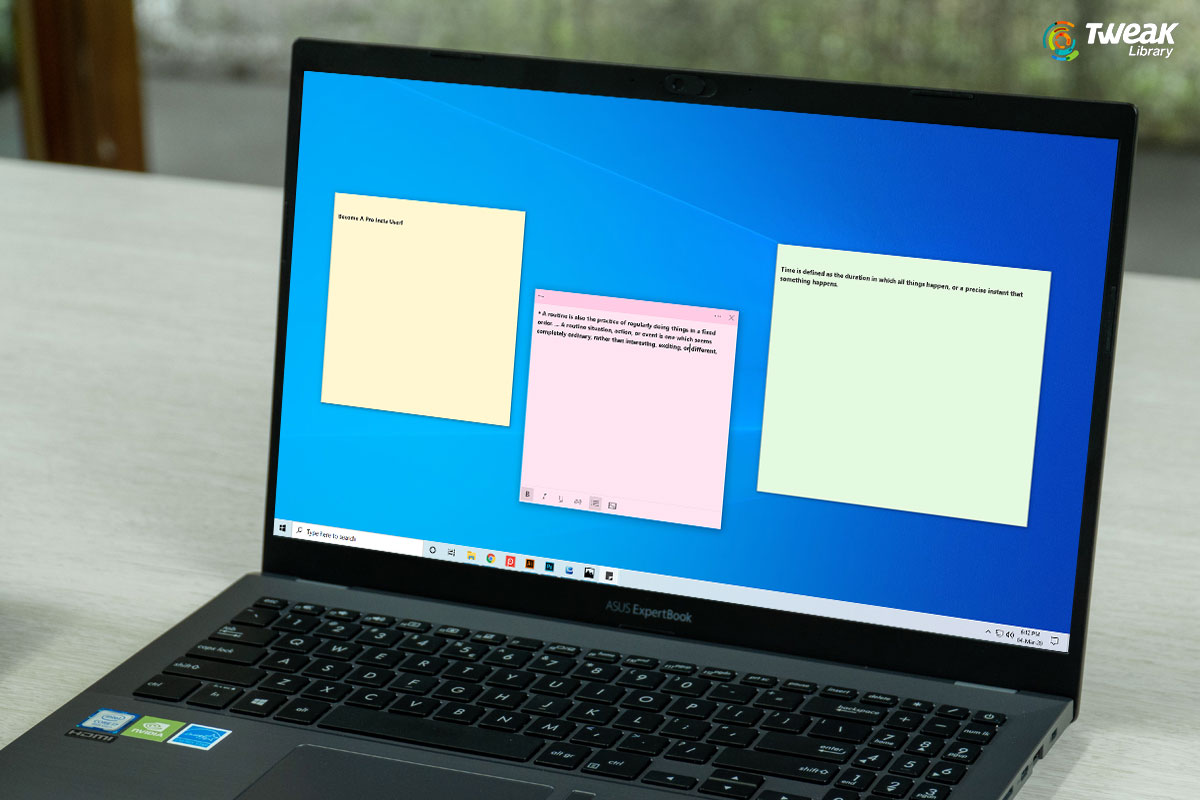
Whenever you want to note something whether it is a telephone number, account details or any other information, you have to find a pen and paper to note it down. But, if you are doing something on your PC or laptop and want to note something, Sticky Notes is the best option.
Sticky notes in Windows allow users to take notes using post-it-note (small piece of paper with an adherable strip of glue on its back) on their desktop. It’s a lightweight application that comes packed with Windows 10 \ just add a note in sticky note tool and forget about it.
Sticky notes are best to save all your important reminders and notes on your desktop or laptop so that you can access them easily with one click. Microsoft sticky notes supports almost every Windows operating system. In fact, it has been with Microsoft since the introduction with Windows XP Tablet Edition (2002). There are plenty of features that comes with windows 10 Sticky notes that you can utilize, however, we have mentioned some very useful tips and tricks to
Use For Sticky Notes In Windows 10
How To Open Windows 10 Sticky Notes App?
But first learn, how to access Desktop Sticky Notes on Windows 10 PC.
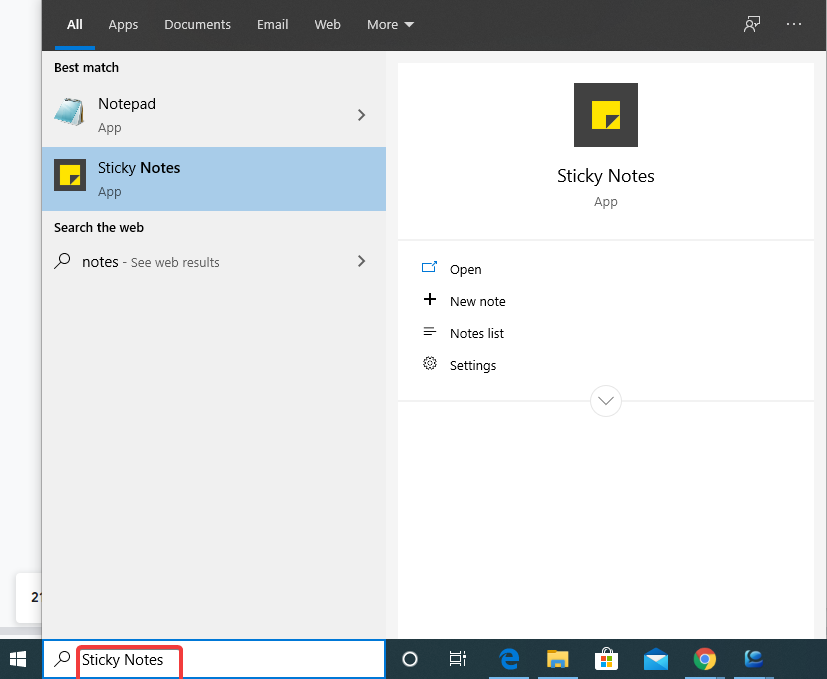
To open the Sticky Notes app in Windows 10, click on the Start button, type and search for the “Sticky Notes” app and open the first result that displays. Now, you can create any note and save it as a reminder on your desktop screen.
Also Read: Must Have Software For Windows 10
Create New Windows Sticky Notes In Windows 10:
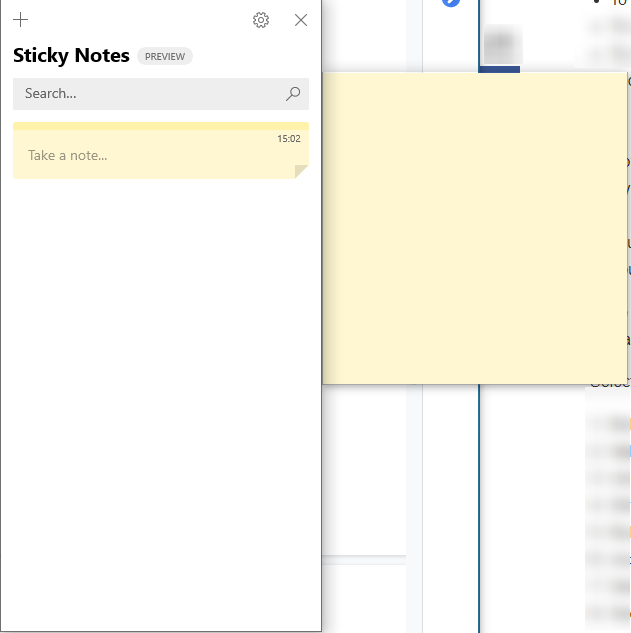
After opening the Sticky Notes app, you will see two windows, on left and on the right. To create a new note, press the + button at the top-left corner of the app and write anything from appointments, to-do-lists, and whatever else you want to make a note for in the sticky notes app.
Windows 10 Sticky Notes: Sync With Cloud And OneNote:
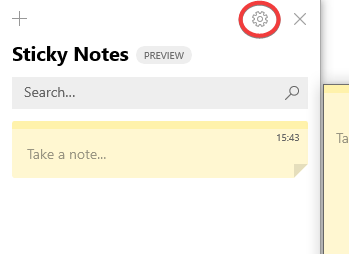
Best thing about using the Sticky note app is, you can sync and save all the data with OneNote and Cloud. To sync your notes, you need to log in with Microsoft account and you can sync all your sticky notes easily. Click on the gear icon and sign in with your Microsoft account and that’s all. Restore Sticky Notes That You Have Deleted Recently:
Don’t worry, if you’ve accidentally deleted your important windows 10 sticky notes from your system, you can restore it easily. Since all your sticky notes data are saved on Cloud you can easily review & retrieve all your data from the cloud. Don’t worry if your cloud is not synced with your sticky notes, you can still restore the lost data by following the below steps:
- Open File Explorer and go to
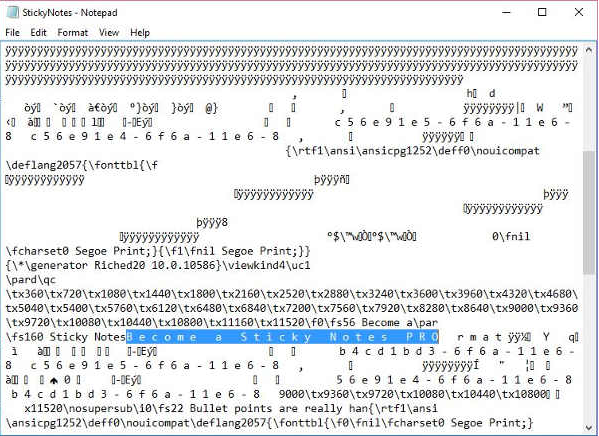
“C:\Users\admin\AppData\Roaming\Microsoft\Sticky Notes”. - Now, open .snt file using Notepad and you can see all your deleted sticky notes in there.
- If you are facing issues while searching any deleted keywords or specific text from sticky notes, go to “Format > Word Wrap and press Ctrl + F together in a Notepad app.
Startup Sticky Notes Along With Windows:
It’s easy to start up your Windows system with the Sticky notes app. To do so follow the steps below:
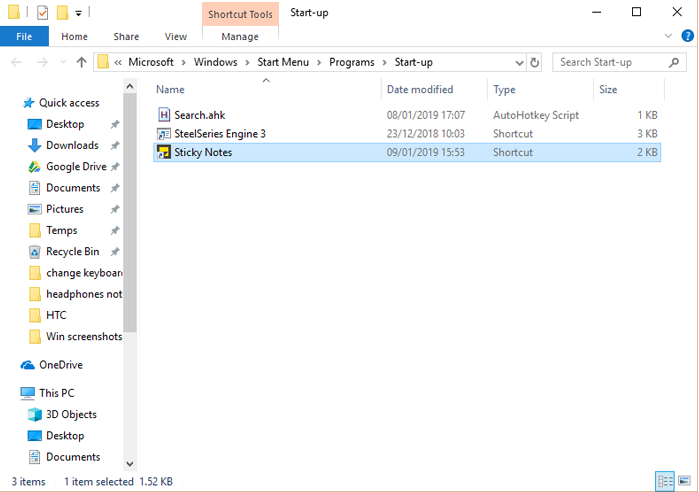
- Place your sticky notes icon on your desktop and it will remain in the same position until you restart or reboot your system.
- Or, you can still find out the sticky note app in the start menu, drag and drop the icon on the desktop to create a shortcut file.
(C:\ProgramData\Microsoft\Windows\Start Menu\Programs\Startup).
Sticky Notes Keyboard Shortcuts:
It might be boring using the mouse to use sticky notes while changing font and theme. If you are familiar with keyboard shortcuts, you can try windows sticky notes keyboard shortcuts below:
- Bold text- Ctrl + B
- Italic text- Ctrl + I
- Strikethrough- Ctrl + T
- Underlined text- Ctrl + U
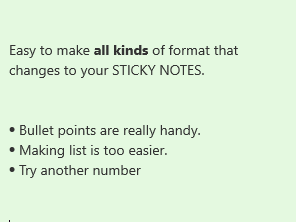
- Ctrl + Shift + L – Press once for bullet-points, 2x for a numbered list, 3x for Small Alpha list, and so on through a whole number of list formats.
- Select all- Ctrl + A
- Toggle caps- Ctrl + Shift + A
- Align text left- Ctrl + L
- Align text right- Ctrl + R
- Align text center- Ctrl + E
- Single-spaces lines- Ctrl + 1
- Double-space lines- Ctrl + 2
- Set 1.5-spaced lines- Ctrl + 5
Easy To Set Reminders In Sticky Notes Using Cortana:
Some of us often forgot to set reminders and we missed the date and time. However, if you have already saved a reminder on sticky notes, you will never miss any opportunity. Thanks to Cortana, Microsoft integrated voice assistant who takes care of such issues.
When you add any particular note, make sure you have included the date, time and day as well. Once the system recognizes the reminder, you will see an Add Reminder option and details will change to the blue color.
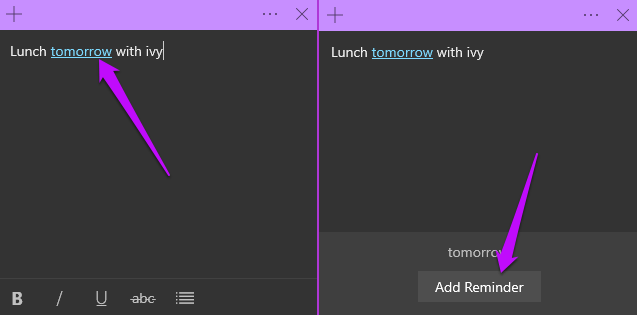
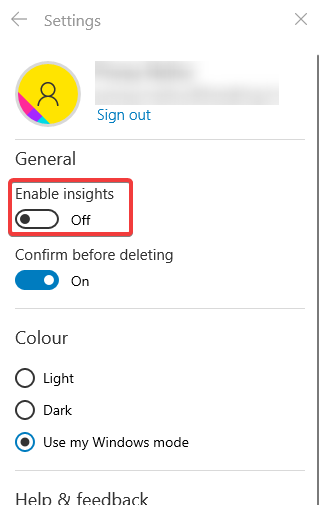
Click on Add Reminder and select Hit Remind button and the feature will work. To pop up the saved reminder, you have to turn on Enable insights options through windows 10 Sticky Notes settings.
Note- Apart from adding reminders, you can make calls using Skype after adding phone numbers and open websites adding URLs.
Customize Sticky Notes With Different Color Codes:
If you don’t want to add or save sticky notes in the same color, try customizing windows 10 sticky notes in different colors. For example, work-related information in Green, shopping list in yellow, important information in black and so on.
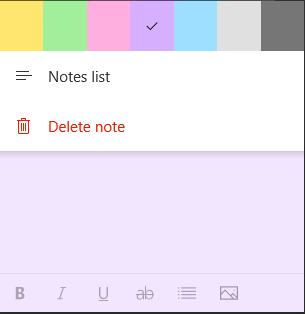
To change the color of the sticky note, select the three horizontal dots and select the color.
How Do You Make The Most Out Of Windows 10 Sticky Notes?
Above are all useful Windows sticky notes tips and tricks that can be used easily. Access them anywhere after syncing with your Microsoft account. Desktop sticky notes are easy to use & can be very useful tool if utilized properly. If you have any suggestions or questions related to Windows sticky notes, feel free to mention them in the comments section below.

Leave a Reply