Imagine this scenario: You have just bought a new webcam for your Windows 11/10 PC. You plug it in, install the driver from the CD that came with it, and expect it to work flawlessly. But instead, you get a black screen, a distorted sound, or an error message. So, what went wrong?
The problem is likely the driver. The driver is the software that enables your webcam to communicate with your PC and other applications. If the driver is faulty or incompatible, it can cause various issues and prevent your webcam from working properly.
The same thing can happen with any other device that you connect to your PC, such as a printer, scanner, mouse, or monitor. Sometimes, even the drivers for the built-in components of your PC can cause problems.
To fix these problems, you need to completely uninstall or remove the driver that is causing the issue. This way, you can restore your PC to its normal state, or install a new and compatible driver for your device. But how do you do that? In this blog, we will show you how to uninstall or remove drivers in Windows 10 using different methods.
Why There’s a Need to Rollback Drivers On Windows 11/10 PC?
You may need to remove drivers in Windows 10 PC if:
- The driver is faulty, incompatible, or unnecessary for your device or system.
- The driver is conflicting with another driver or software on your PC.
- The driver is infected with malware or viruses that harm your PC.
Removing drivers can fix problems such as:
Microphone not working on Windows 10
Mouse Not Working On Windows 10 PC
Realtek HD Audio Manager Missing from Windows 10
Windows Cannot Connect to the Printer Issue
PS4 Sound Not Working etc. then updating the old driver or rolling back the driver update becomes a must. This is required to fix any issues caused by the old driver or driver update.
But doing so manually is time-consuming and not all are that well versed with Windows drivers.
Therefore, if you are facing any driver issue using the best driver updater tool is suggested.
How To Remove Drivers In Windows 11/10 PC (2023)
1. Remove The Drivers Of Hidden Devices
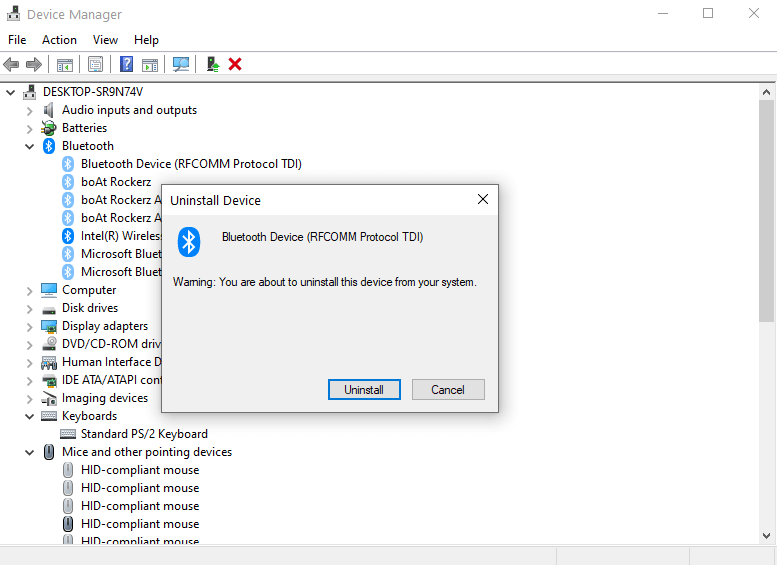
One way to remove or uninstall old drivers in Windows 10, is to bring hidden devices to the forefront and then uninstall their drivers. To do that follow the steps mentioned below –
1. Type Device Manager in the Windows search bar, click the search result to open Device Manager
2. Now, click the View menu and click on Show hidden devices. This step will show all the hidden devices. After you have clicked on this option, you will see faded icons
3. Right-click on a faded entry and click on Uninstall device
You shall now be able to remove any old driver. Now, to verify this you can click on the properties of any hidden device and you will find the message, Currently, this hardware device is not connected to the computer. To fix this problem, reconnect this hardware device to the computer
2. Delete The Registry Keys
Note: If you are not comfortable making changes to the Windows registry please skip this step. An incorrect change might make your Windows inoperational. Therefore, use it only when you are sure and confident.
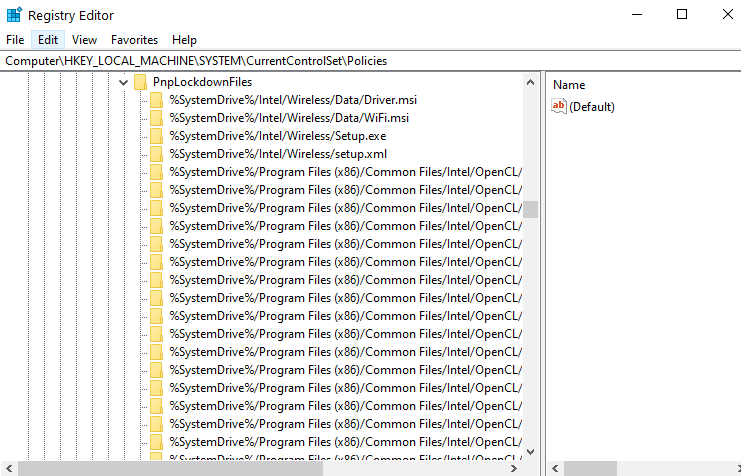 In addition to this, before making changes to the registry take a backup of the Windows Registry. Once done, follow the steps to delete driver-related keys.
1. Open Run dialog box by pressing Windows + R keys
2. Type Regedit
3. Navigate the following path
HKEY_LOCAL_MACHINE\SOFTWARE\Microsoft\Windows\CurrentVersion\Setup\PnpLockdownFiles
4. Now, you will be able to find all driver-related keys
5. Delete all these keys by right-clicking on them and then pressing delete
3. Using Device Manager
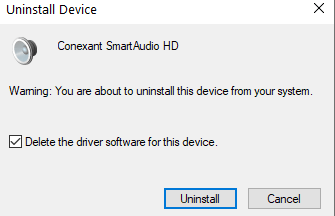
You can uninstall Windows 10 drivers using the device manager. The steps for the same are mentioned below –
1. Right-click on the Windows (Start) icon and select Device Manager
2. Go to the device whose driver is old or problematic
3. Click on the dropdown (down arrow key) and right-click on the driver
4. Select the Uninstall device
5. The step is not yet completed, check the box that says Delete the driver software for this device
6. Now, click on Uninstall
7. Restart your computer and check if the driver for your desired device has been removed or not.
4. Roll Back Driver
It could be that your intent behind removing old drivers is to replace the corrupt driver with a new one. Instead of removing the old driver, you can roll back to a more stable version. For rolling back –
1. For this again open Device Manager
2. Click on the device whose driver you want to roll back and click on the arrow icon
3. Right-click on the device and then click on Properties
4. Click on the Driver tab and then on Roll Back Driver
5. Use Driver Store Explorer
Driver Store Explorer is a free and open-source tool that allows you to view and manage the drivers stored in the Windows Driver Store. The Windows Driver Store is a repository of drivers that Windows uses to install and update drivers for your devices. Sometimes, when you uninstall or remove a driver using Device Manager or other methods, some files and registry entries of the driver may still remain in the Driver Store. This can cause problems such as:
- The driver may be reinstalled automatically by Windows Update or Plug and Play.
- The driver may interfere with other drivers or software applications on your PC.
- The driver may occupy unnecessary disk space and memory on your PC.
To avoid these problems, you can use Driver Store Explorer to delete the driver completely from the Driver Store. Here are the steps to do it:
STEP 1 = Download Driver Store Explorer from its official GitHub page and extract the ZIP file to a folder on your PC.
STEP 2 = Run the Rapr.exe file as administrator from the extracted folder.
STEP 3 = In the Driver Store Explorer, you will see a list of drivers stored in the Driver Store. You can use the filters and columns to sort and find the driver you want to delete.
STEP 4 = Select the driver you want to delete and click Delete Package at the bottom of the window.
STEP 5 = A confirmation dialog box will appear. Click Yes to proceed.
STEP 6 = Wait for the process to complete and then restart your PC.
This method will delete the driver completely from the Driver Store and your PC. However, it requires more caution and attention, as deleting the wrong driver may cause your PC or device to malfunction. Therefore, you should only use this method if you are sure about the driver you want to delete, and you have a backup of your PC or device.
Additional Tip: How to Update Old & Outdated Drivers ?
The quickest, safest, and fastest way to update old drivers is to use Smart Driver Care – an ultimate driver updating tool for Windows. Using this tool you can not only update outdated drivers but can also take a backup of old drivers.
Moreover, this tool also helps update outdated programs the most common reason responsible for malware attacks.
To use Smart Driver Care and update outdated drivers follow the steps below:
1. Install Smart Driver Care
2. Click on Start Scan Now. Your PC will now be scanned for old and outdated drivers
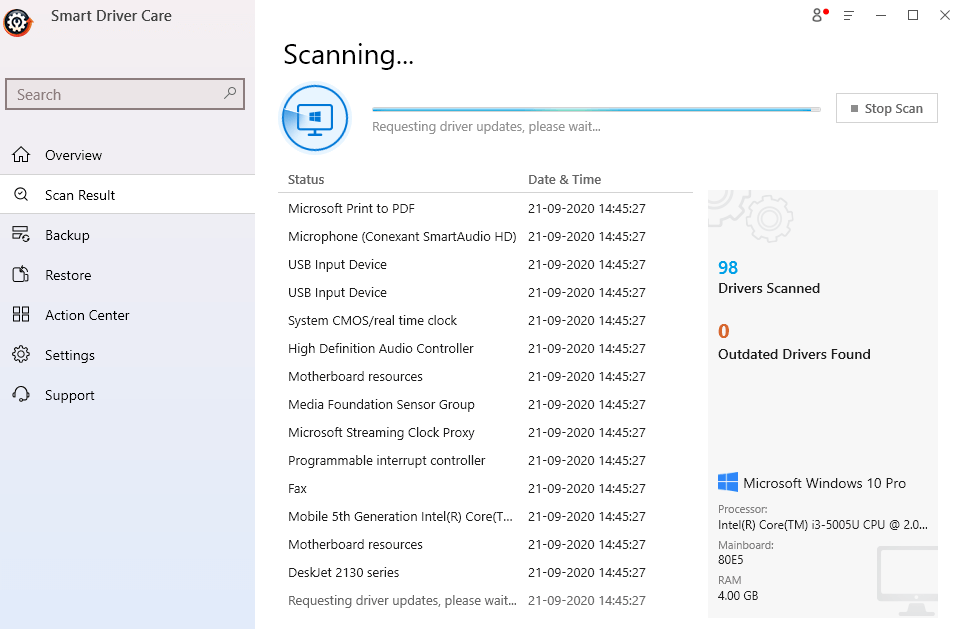
3. Once the scan is finished you can update the driver. If you are using a registered version of the product click Update All and fix all outdated drivers. However, if you are using trial version you will have to click the Update Driver option against each driver. This is can be time-consuming but this is the limitation of the trial version.
4. After updating the drivers restart your system to apply changes and see a performance boost.
In addition to this, if you are using a registered version of the product you can use the Backup feature and take a backup of old drivers or selected drivers.
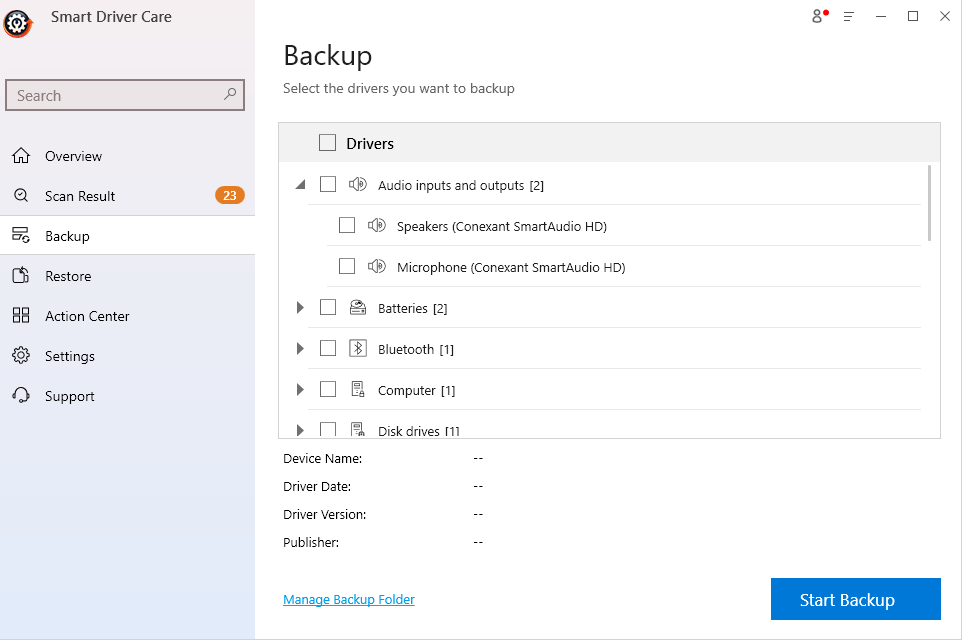
In case updating a device driver doesn’t solve the problem and you wish to uninstall drivers you can follow the steps below.
Conclusion
We hope using, the steps explained above when required you will be able to completely uninstall or remove old drivers in Windows 10. Though, we highly recommend updating drivers first, for this you can use Smart Driver Care for installing and updating drivers. This Windows driver updating tool is designed to scan your PC for incompatible, outdated, or missing drivers and replace them with new ones. If you liked the blog, do give it a thumbs up and for more such content keep reading Tweak Library and follow us on Facebook and YouTube as well.
Recommended Readings:
Device Driver Descriptor Request Failed On Windows 10 (Error Fixed)
How To Fix Driver Power State Failure In Windows 10 PC
How to Disable Automatic Driver Updates Windows 10


Amara Smith
How much driver it can remove for free?