Every big Windows update adds a slew of new features and improvements. However, you should expect a few small issues to accompany it. When the sound stops operating on Windows 11, for example, it might be quite inconvenient for any user.
There’s no need to be alarmed; sound problems on Windows are more likely to be caused by incorrect settings or malfunctioning drivers than by broken hardware. Whatever the case may be, this article should make it simple to resolve any of your sound difficulties on Windows 11.
So, let’s have a look.
Best Ways to Fix Sound Not Working on Windows 11
1. Check The Volume
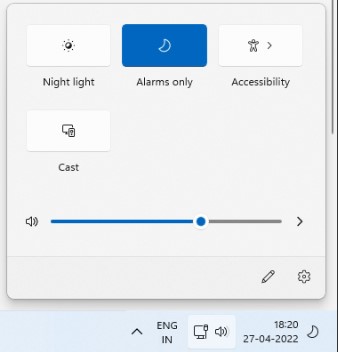
To begin, check your Windows 11 computer’s volume. Although it may appear self-evident, it’s worth double-checking prior to actually moving on to other possibilities.
Click the speaker in the Taskbar and move the slider up or down to change the level. Make sure any headphones or speakers you’re using have volume controls.
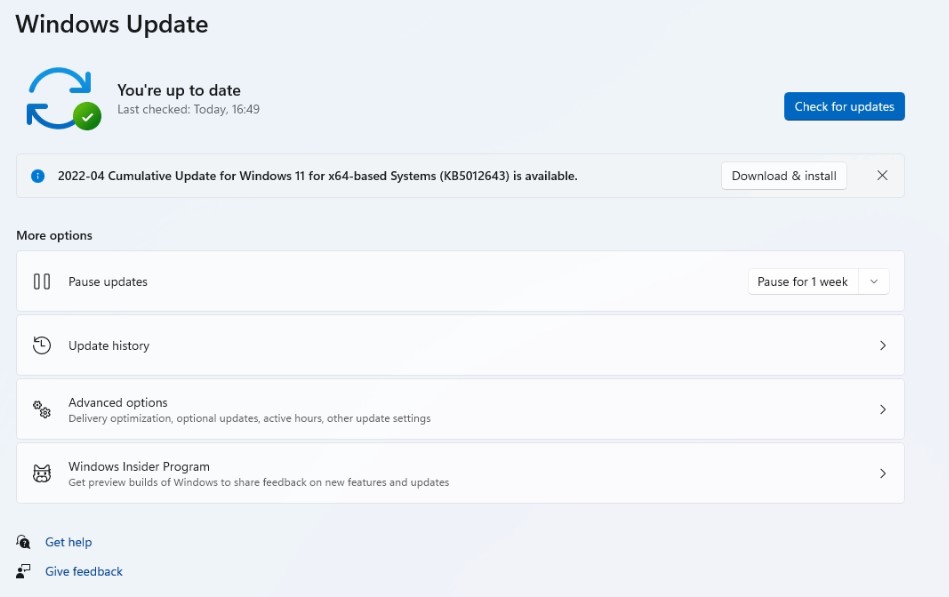
2. Windows Updates
When it comes to addressing bugs and mistakes, Windows is typically fast to respond. Windows might have already published an update to fix the sound problems you’re having. As a result, you should check for and install any outstanding updates for your Windows 11 PC.
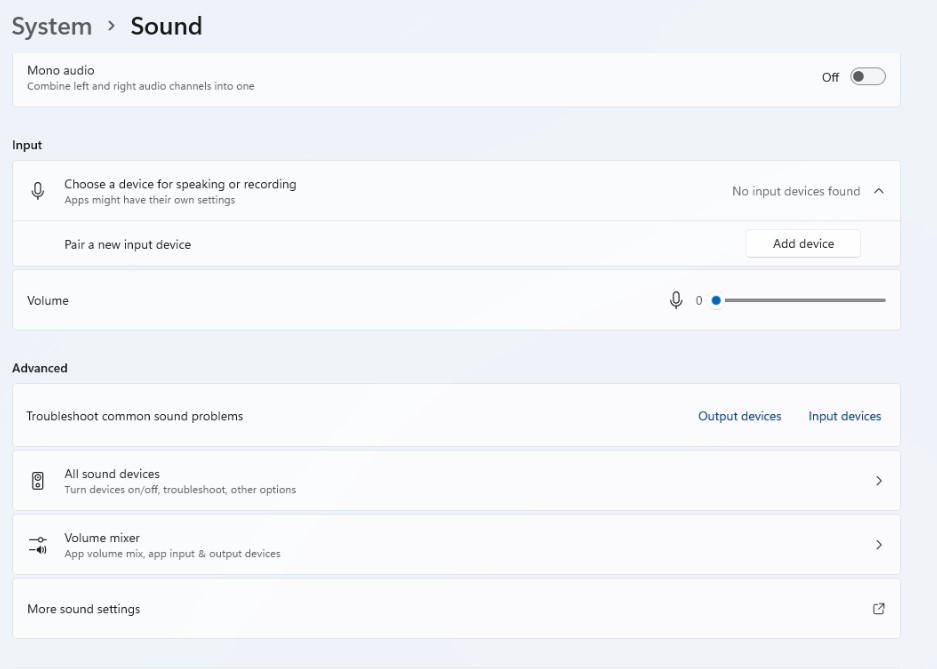
3. Change Playback Device
If you have many audio devices connected to your computer, the audio may only come from one of them. To make sure your selected device is configured as the playback device, right-click on the speaker icon in the Taskbar & select Open volume mixer.
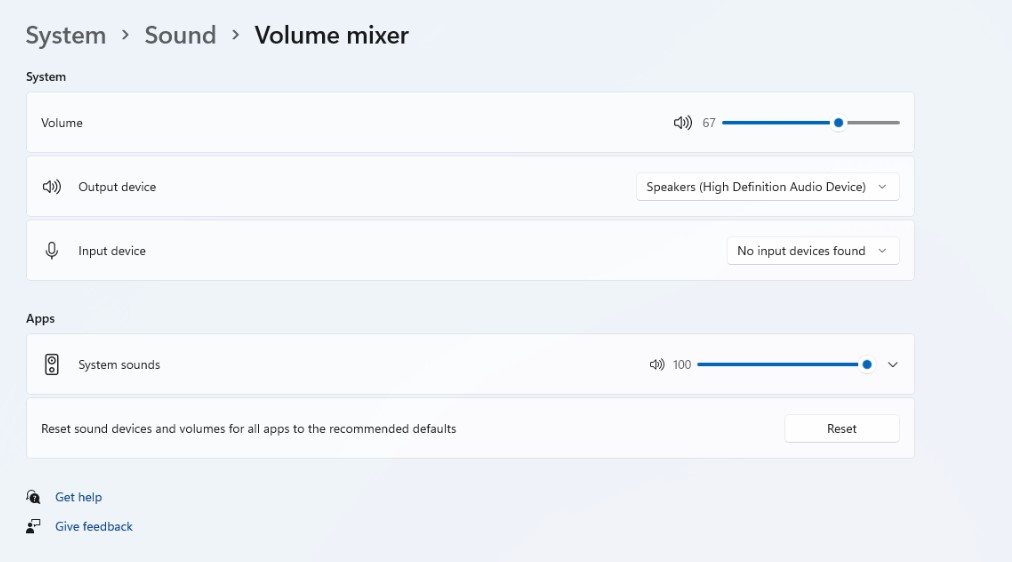
Make sure that the Input & Output devices are set to your desired audio device in the next window.
4. Restart Audio Services
Every function in Windows has a service that starts every time your computer boots up. Likely, the audio service did not start properly, causing the sound issue you’re experiencing. To test if that helps, you should restart the audio service. How do you do it?
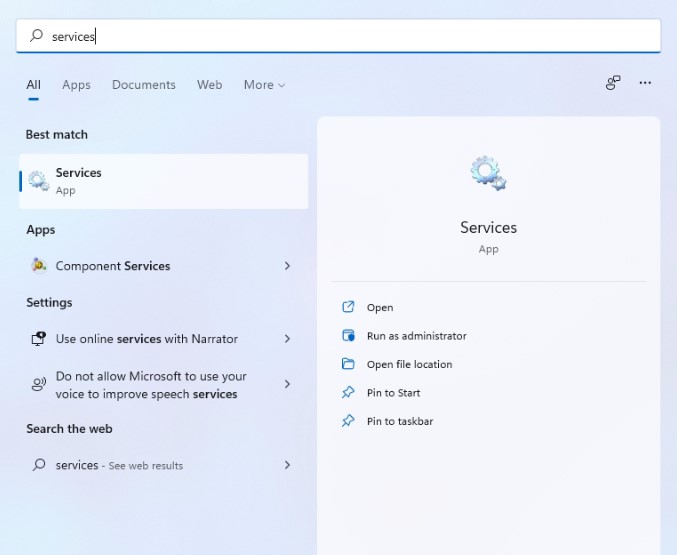
Step 1: Press Enter after opening the Start menu and type services.
Step 2: Scroll down to Windows Audio in the Services panel. Select Restart from the menu when right-clicking on Windows Audio.
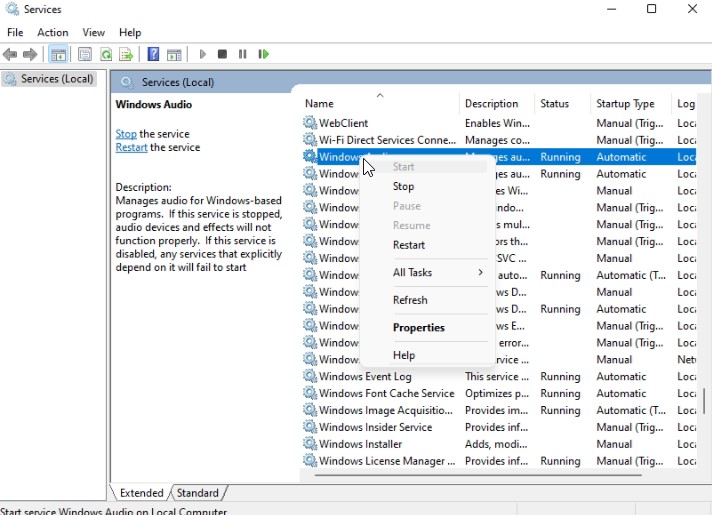
Restart the ‘Windows Audio Endpoint Builder’ and ‘Remote Procedure Call’ services by repeating the procedure described above.
5. Initiate The Audio Troubleshooter
If the problem persists, you can use the Windows Troubleshooter to help you. It has a built-in audio troubleshooter that can detect and fix small audio issues automatically. Here’s how to put it together.
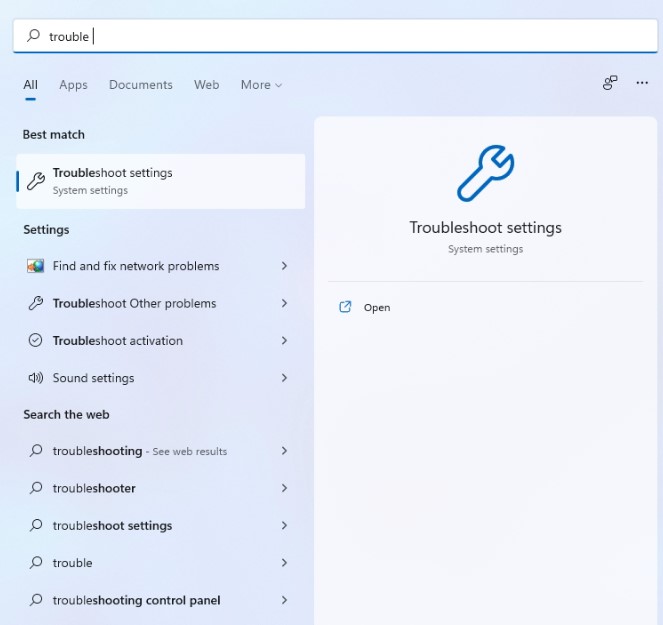
Step 1: Open the Start menu, type in troubleshoot settings and click on the first result.
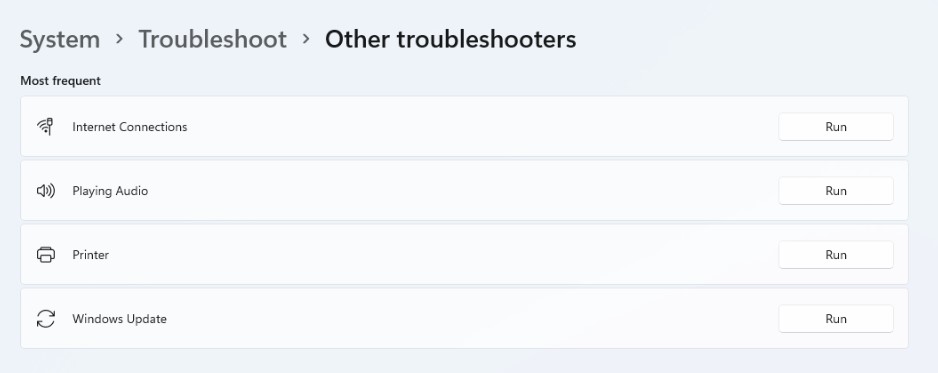
Step 2: Select Other Trouble-shooters from the drop-down menu.
Step 3: To complete troubleshooting, click the Run button next to Playing audio and follow the on-screen instructions.
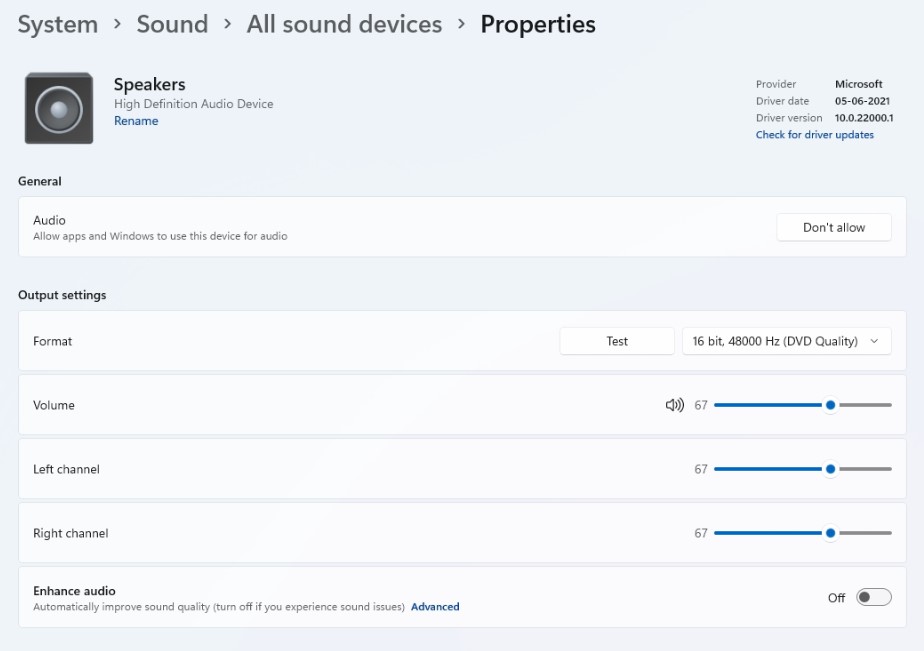
6. Turn Off Sound Enhancement
You can utilize the audio improvements packages that come with the Windows 11 PC to get the greatest sound quality. However, if you’re having sound problems, Windows suggests turning them off completely. Here’s how to do it.
Step 1: On Windows, open the Settings app and select Sound.
Step 2: Go to the Advanced section and choose All sound devices from the menu.
Step 3: Choose the Output device with which you’re having problems.
Step 4: Toggle off the switch next to Enhance audio under Output settings.
If this doesn’t help, move ahead to the next step.
7. Update Or Reinstall Audio Driver
Your PC’s audio driver assists Windows in recognizing and interacting with your computer’s hardware. And it’s not uncommon for audio drivers to become obsolete or corrupt over time. As a result, you may try upgrading the audio driver to see if it helps. Here’s how to do it.
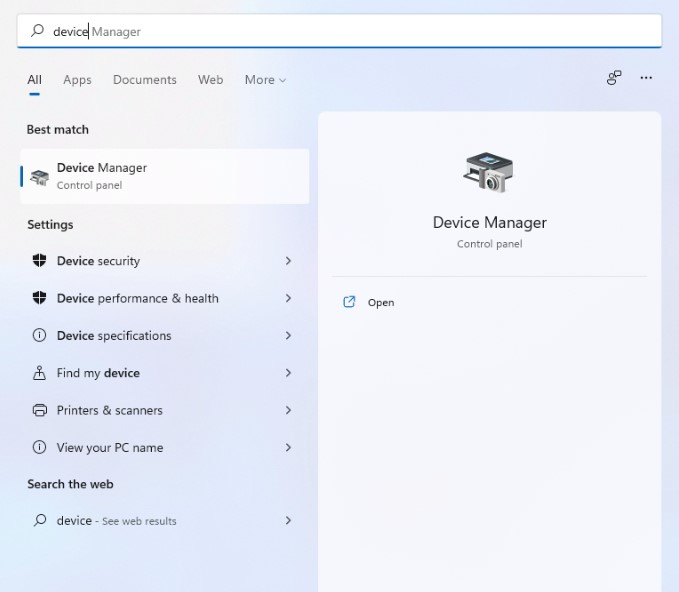
Step 1: Click on the Search icon from the Taskbar, type in device manager and click on the first result that appears.
Step 2: Look for ‘Sound, video, and gaming controllers and expand them. Then, from the context menu, right-click on the audio device and choose ‘Update driver from the drop-down menu.
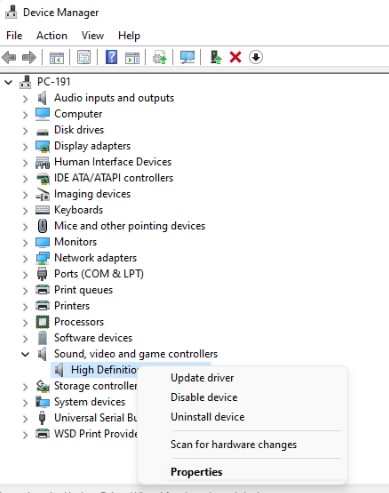
To complete the driver update, follow the on-screen instructions. If updating the driver doesn’t fix the problem, delete the problematic audio driver & restart your computer to let Windows reinstall it. If you are not able to follow these manual steps, you can use a third-party driver updater like Advanced Driver Updater.
Automatically Update Drivers —
Advanced Driver Updater makes updating incompatible or obsolete drivers simple. This driver updater detects out-of-date software and presents the most recent driver available for your Windows PC. This driver updating tool keeps your PC running smoothly while also backing up your drivers.
Want to know more about Advanced Driver Updater, read this in its complete product review
To update drivers with Advanced Driver Updater, follow these steps:
Step 1: To get Advanced Driver Updater, go to this link and click the download button:

Step 2: Double-click the setup file to install Advanced Driver Updater for Windows.
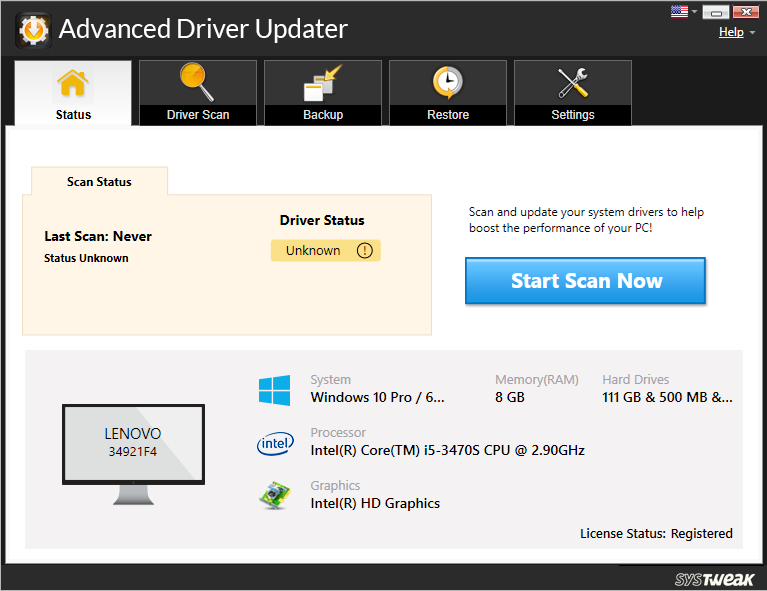
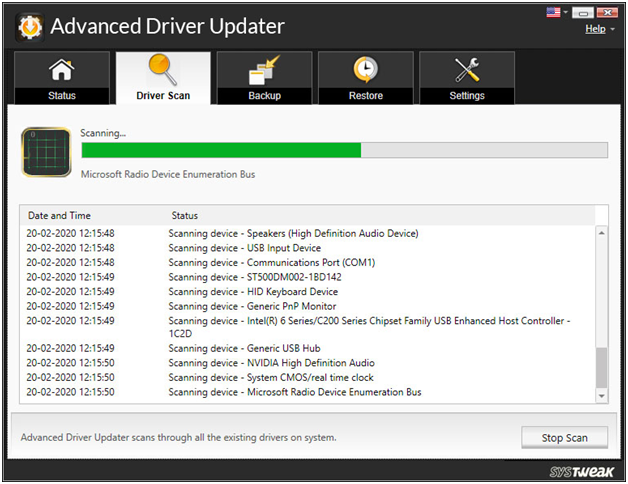
Step 3: Launch Advanced Driver Updater, then select Start Scan Now and wait for the scan results.
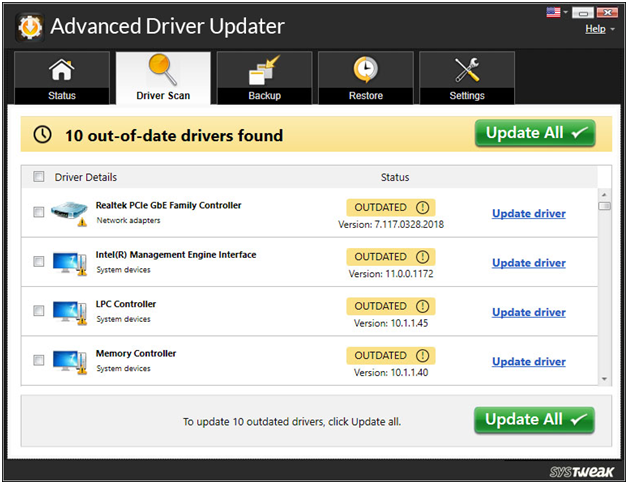
Step 4: Review the scan results > select Update Any to update all outdated drivers (for registered version users). Click the Update Driver button next to it if you’re using the trial version. In the FREE version, only one driver can be updated at a time.
Step 5: To affect the modifications, restart your computer.
This is how you can use Advanced Driver Updater to update outdated drivers.
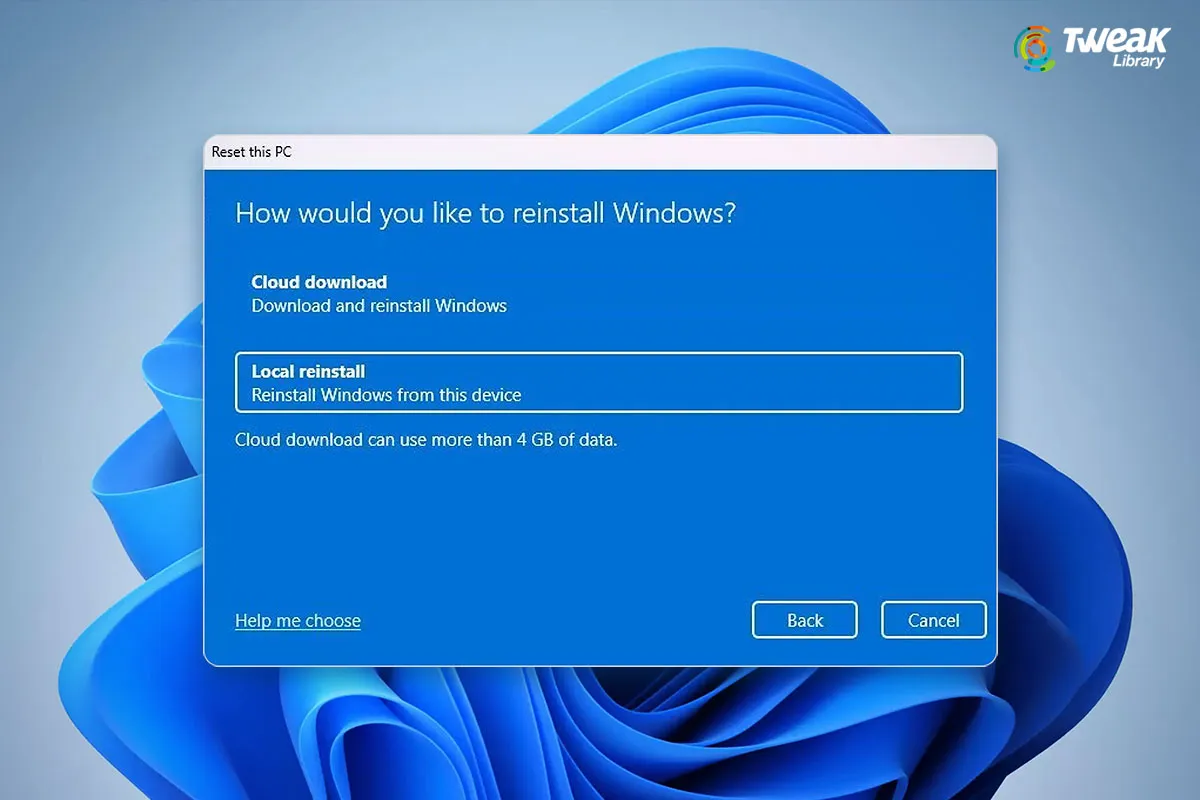
8. Reset The Windows 11 Operating System
Finally, if everything else fails, you may be forced to reinstall Windows. All of your options will be reset to their default values. This is how you do it.
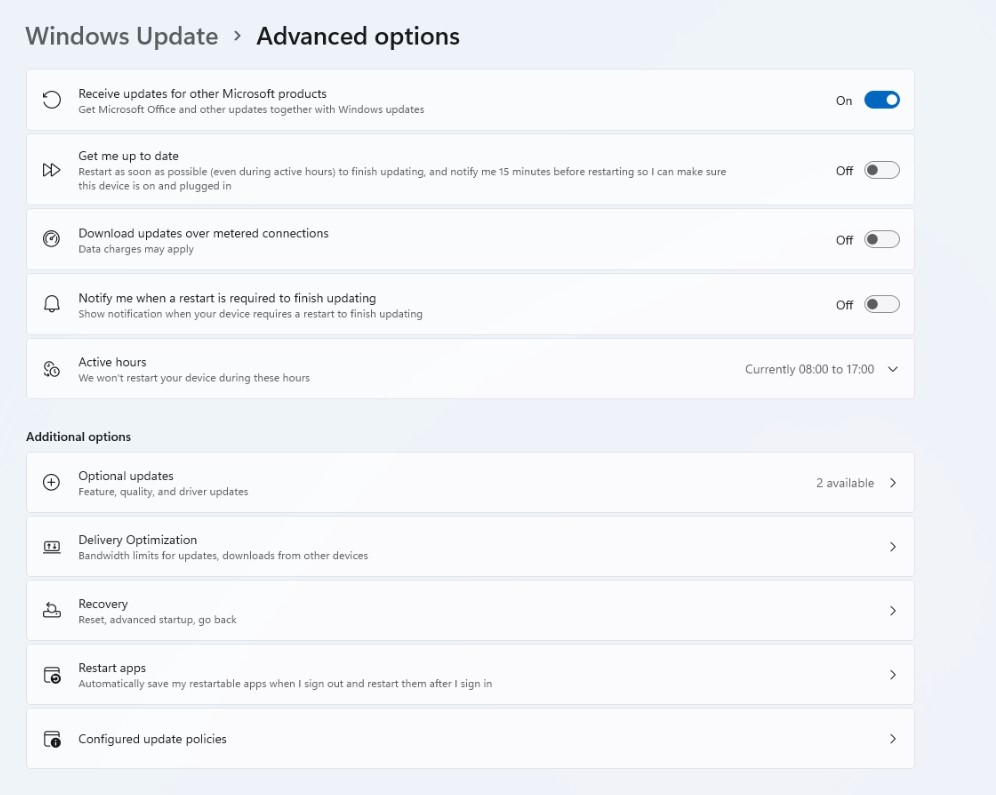
Step 1: Press Windows key + I to launch the Settings app. Now navigate to the Windows Update tab and select Advanced Options from the drop-down menu.
Step 2: Go to the Additional options section and select Recovery.
Step 3: Finally, under Recovery options, select Reset PC to begin resetting your computer.
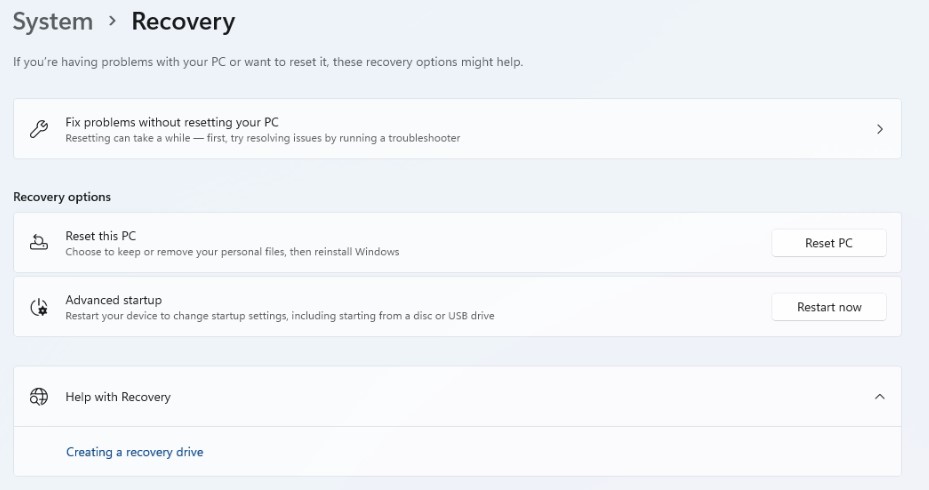
While resetting your PC, you have the option of keeping or deleting personal files.
Conclusion:
Sound not working on Windows 11 is an issue that is faced by many users. In this blog, we have mentioned all the possible fixes through which you can resolve this issue. Outdated drivers are a major reason for sound not working and using Advanced Driver Updater is the best tool to update all the outdated drivers in Windows. Try the steps mentioned in the blog and let us know in the comment section whether you were able to resolve the sound not working issue or not.


Leave a Reply