
Given the events occurred in 2018-2019, the rate of identity theft is increasing every year and so is the necessity of making identity secure.. Hackers now target kids, presuming them as a weakling and as a result, 1 million children were victimized for ID theft in 2017. Social security numbers, credit card numbers and other personal identity factors are mainly targeted from the perspective to monetize. Therefore, ensuring the protection of our identity traces and personal data is everyone’s concern. Question arises how to secure your identity ? One cannot really be sure of the troubles associated with cyber crime unless learn to take measures to protect yourself.
Recent reports also indicated Internet Explorer being the medium to get into your Windows. Usually, this in-built Windows web browser is rarely used, but it still comes as a native app for Windows. Hackers have found it as a source for creating a pathway to reach out to our data saved in other web browsers. We save our passwords to auto login in our systems for most online websites be it mail, shopping, or frequently visited websites. Moreover, even if you feel like you have used all the measures to keep yourself safe, it is not necessary that it is can provide us with the safety we require.
How to Secure your Identity?
We recommend you Advanced Identity Protector, an identity protection tool that will give you a secure vault to safe keep all your passwords in your system. It is an offline tool that scans your system forgiven all the secured accounts. It will show you how to protect yourself from identity theft.
In this blog, we have discussed the solution to protect your crucial information such as email accounts, bank details, and your personal photos. Thus, to secure your identity from the reach of hackers.
How to use Advanced Identity Protector?
Step 1: Download Advanced Identity Protector from the link below.


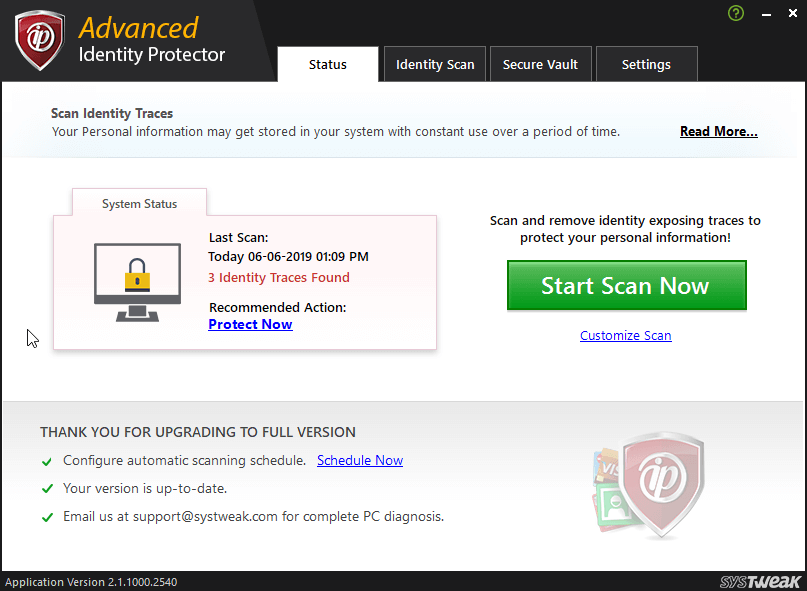
Step 2: The first window you will give you Status. This shows your scanned results, threats which are information that is vulnerable to attacks.
Step 3: Go to Identity Scan, and you can see all the accounts as a list.
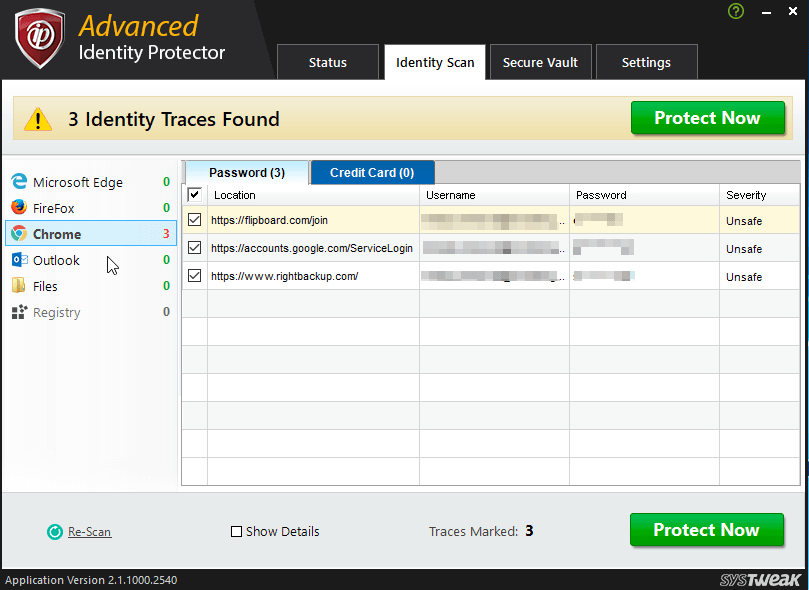
Sort the list as which one you wish to keep marked for transferring in a secure vault. The number of checked items will be seen as Traces Marked at the bottom. Once you have decided on this, click on Protect Now secure your identity.
Step 4: It will prompt a message on the screen, asking you to choose an action from the following –
Move to Secure Vault : This moves selected items in the previous step to an app in-built Vault.
Remove Traces Permanently : It will be removing items mentioned in the list permanently from your system. It can be used when you unsure of using this system ever again.
Add to Exclusion List : This can remove the chosen items to be excluded from the next scan. They are not deleted just saved in a form to be continued as it is.
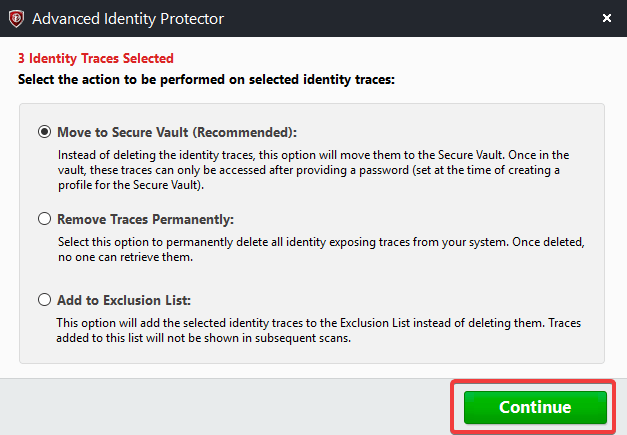
It is in the best interest to use the recommended option of moving items to Secure Vault. When you click on Continue.
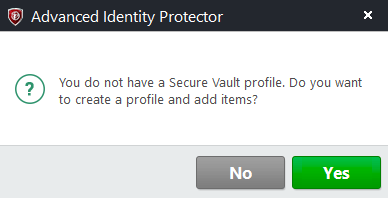
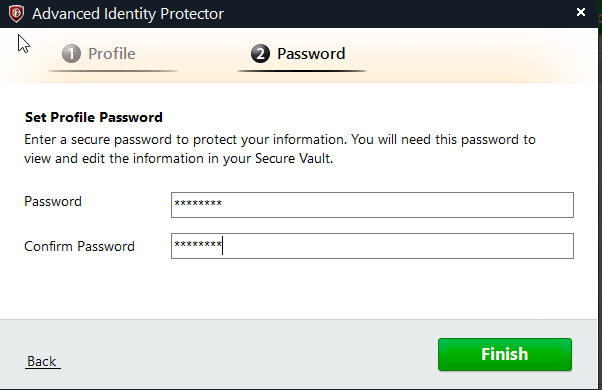
Step 5: Pop-up window will ask you to create a profile to add items, to do Click on Yes.
Step 6: Once you have entered your name and email address to the Profile, move to add a password to save the Profile for Secure Vault. Now you know how to protect your identity with Secure Vault.
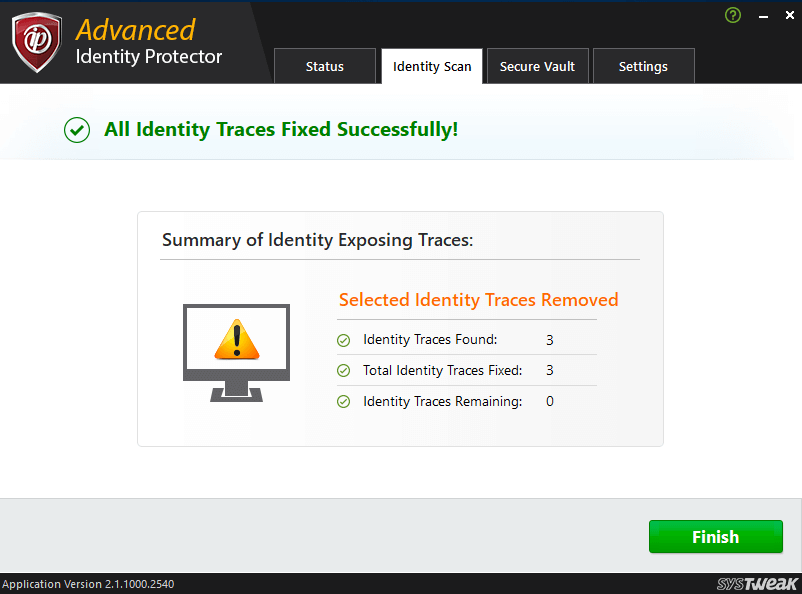
Step 7: Once the Secure Vault saves your information, you will see the window with a message “All Identity Traces Fixed Successfully”.
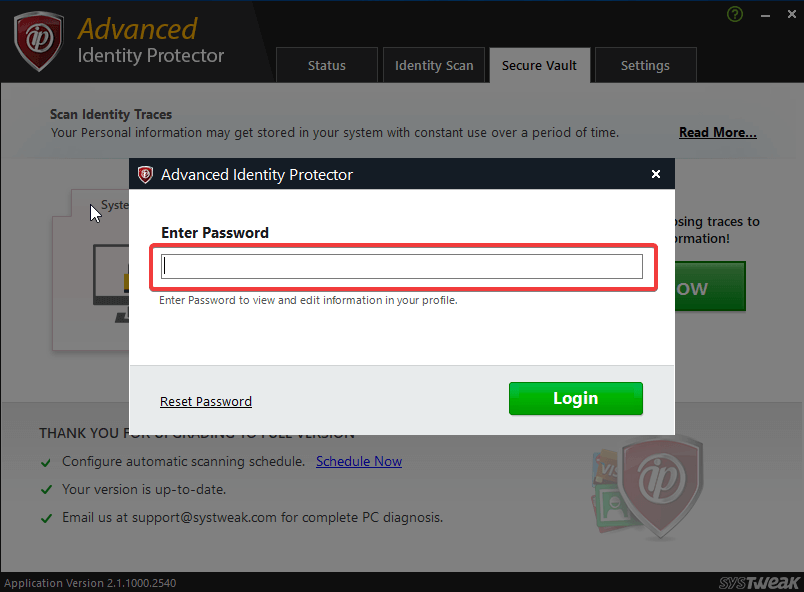
Step 8: You can open Advanced Identity Protector any time to check your saved personal details on it. But since it is encrypted now, it won’t get in the wrong hands.
To open your Secure Vault, you need to provide your Password every time for security purposes. This tool will be very helpful to secure your identity online.
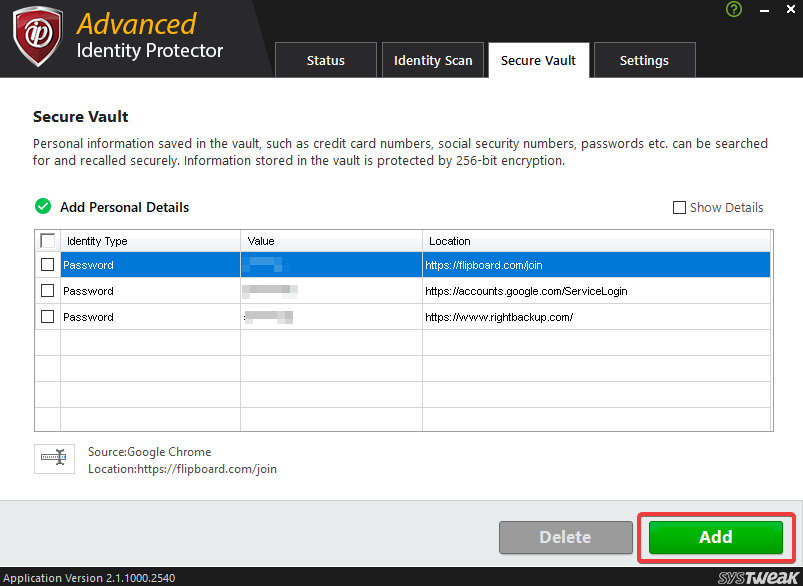
Thereafter, you will be able to see the list of items saved.
Step 9: Choose from Settings, to schedule the scan and update items on the list.
You can fix a day and time to run a scan or to run it every week, etc. Select do not schedule if you want to run a scan as per your convenience.
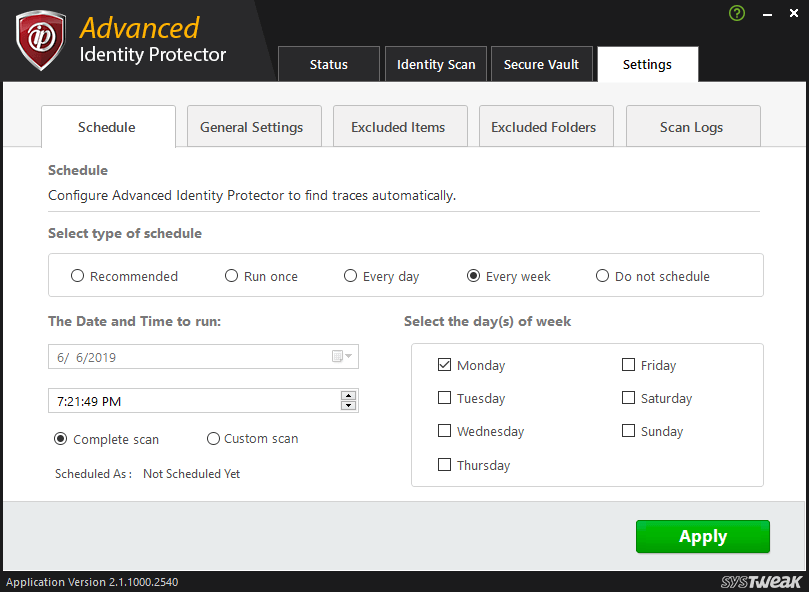
It also shows you the excluded items from your list, scan logs show you the previous scans with a date.
Under General Settings, you will get Auto Start, Auto Updater, Create Logs. It is suggested to keep all of them checked as on default to increase its efficiency. If you want to make changes uncheck the box beside the preference and click on Apply.
To conclude:
All the data we keep on our system is very important to us and wouldn’t want it to fall in the wrong hands. All your sensitive information can be transferred from your systems to online quick if you save your passwords on web browsers. Choose to learn more and save yourself from the alarming facts on cybersecurity.
Secure your identity with Advanced Identity Protector is easy and reliable, get it now for Windows.
Share this article with your friends on Facebook, Twitter, and YouTube. Also subscribing to our newsletter will keep you updated on the latest tech.


Leave a Reply