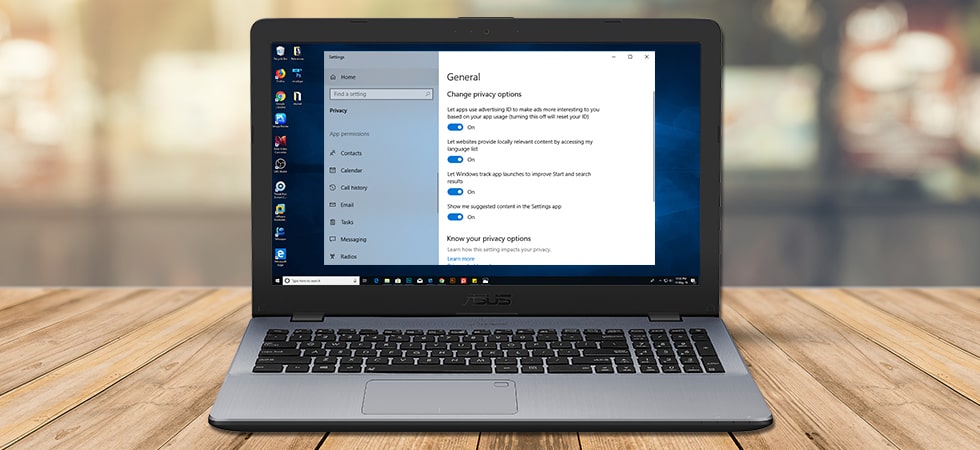
Although since inception Windows 10 is loved and appreciated by millions of users from all over the world. But still, there are millions that criticize it for its privacy policies and rules. It is believed, especially by security geeks that some of the Windows 10 features try to poke into our privacy. If you too feel the same, this article will help you protect your privacy in Windows 10.
Here, we share tips can be easily implemented and doesn’t require technical expertise. So, guys without further ado, let’s begin and learn how to protect your privacy in Windows 10.
Stop Notification from Appearing on Lock Screen:
Do you see notifications on your Windows 10 lock screen? If yes, then it’s a huge security concern. It is good practice to lock your PC while moving away from it. But this practice can be made better if you disable all the notifications on the lock screen. You can follow the below steps and stop notifications from prompting on your lock screen:
- Open Notifications & actions setting by clicking on the Windows Start button > Settings (gear icon) > System > Notifications & actions.
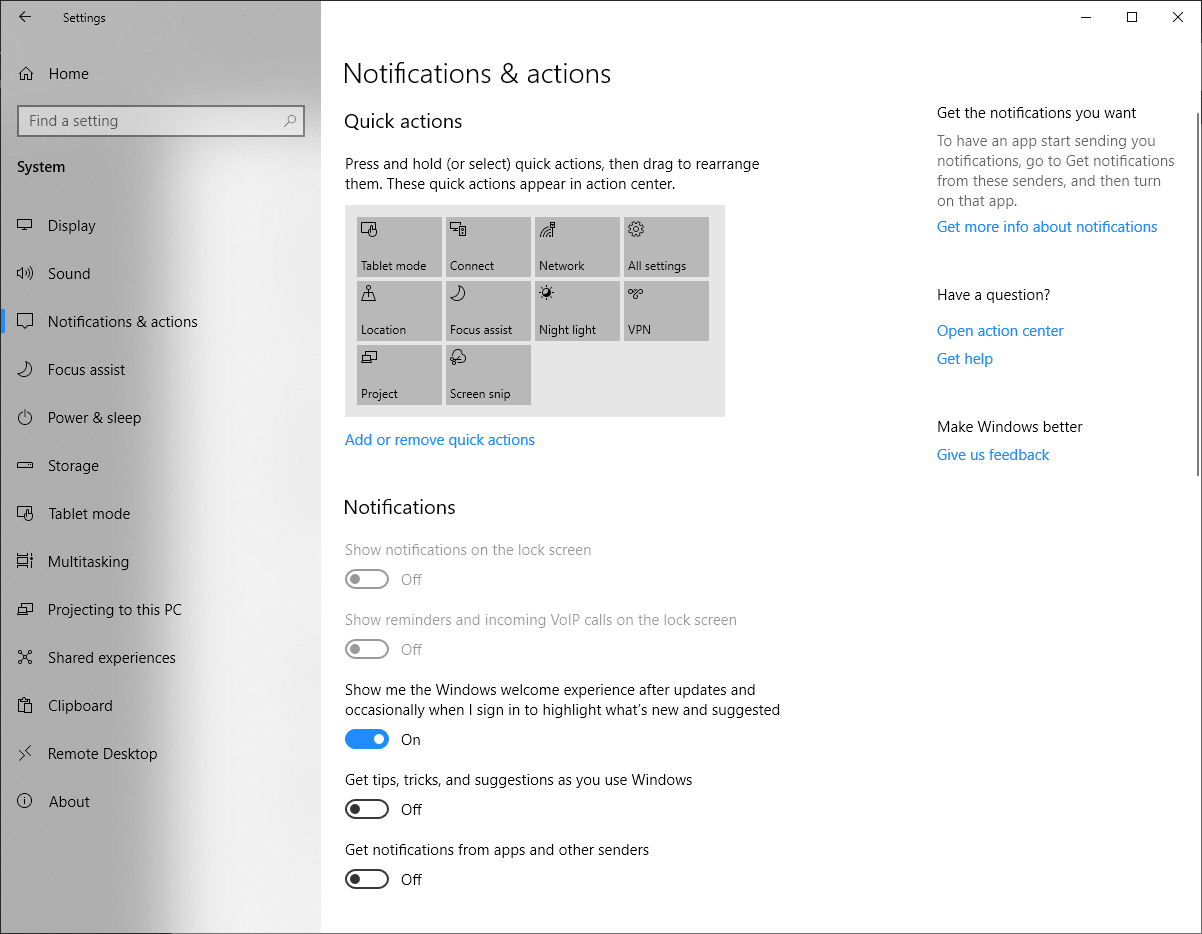
- On the Notifications & actions window toggle the slider to Off on Show notifications on the lock screen option.
- That’s it. Now, none of your notifications will prompt on the lock screen.
Also Read: How to uninstall program on Windows 10
Disable Location Access in Windows 10:
Most of you might be unaware that Windows apps and services can read your location if location access is turned on. Due to which you end up seeing location specific advertisements as a notification from Windows app. Therefore, to stop Windows from knowing your location you’d need to disable location access. To disable location access in Windows 10 follow the steps below:
- To get started, open location settings by clicking on the Windows Start button > Settings (gear icon) > Privacy > Location.
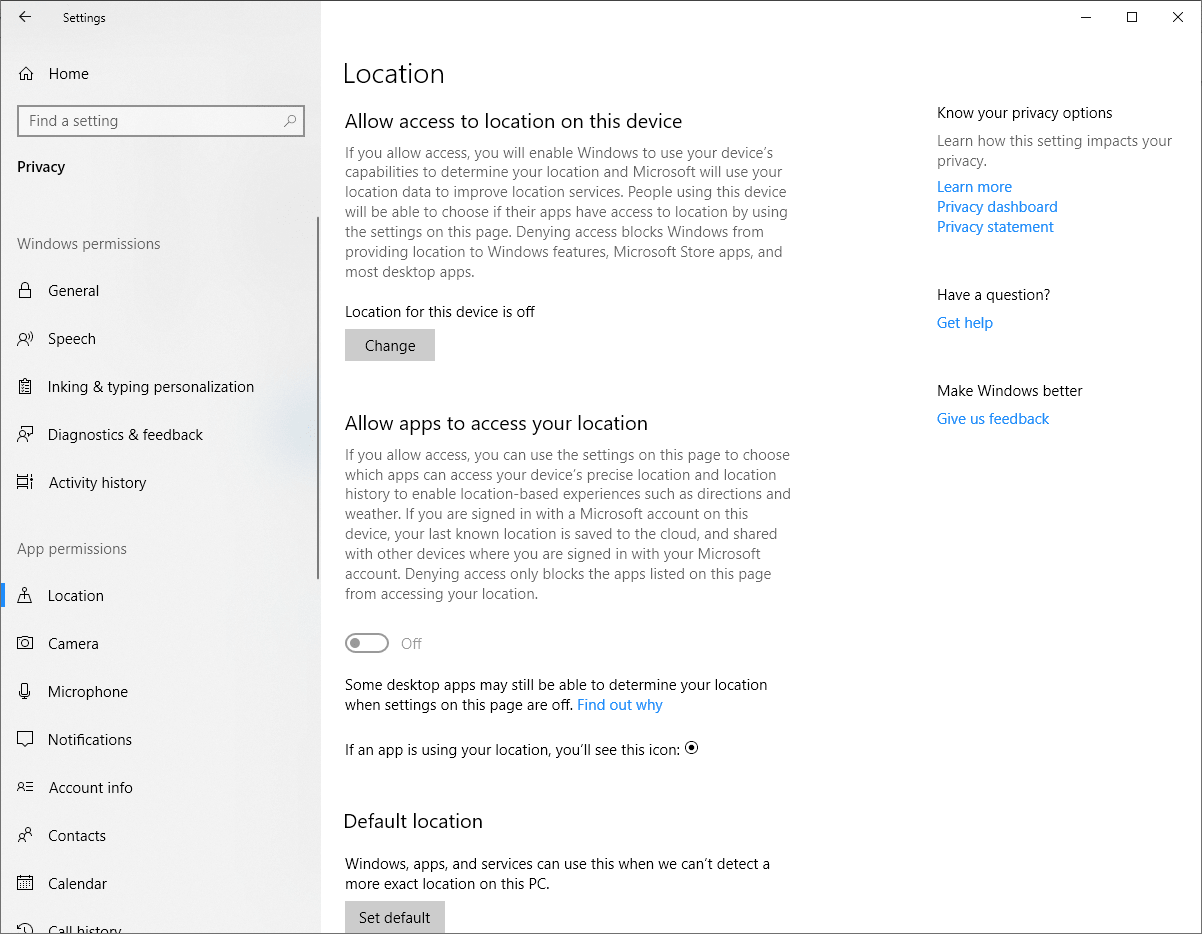
- On the window that opens click on the Change button and toggle off the slider in location service for this device option.
- This will disable your location access and keep your location private.
In case you wish some of the apps to access your location, you can provide them individually.
Avoid Making Your Account Information Public:
Keeping the account information public can not only be a threat to your identity but also raises privacy concerns in Windows 10. If you check around the installed apps then you will find that you have allowed access to lot many apps to your private info like name, picture, location and much more. Now, it can’t be a big issue until the database of that app is secure. But if any case that app is compromised, all the user information it holds along with yours will be at stake. Therefore, it is always a good practice to disallow the apps to access your personal information, by following the steps listed below.
- Click on the Windows Start button > Settings (gear icon) > Privacy > Account Info.
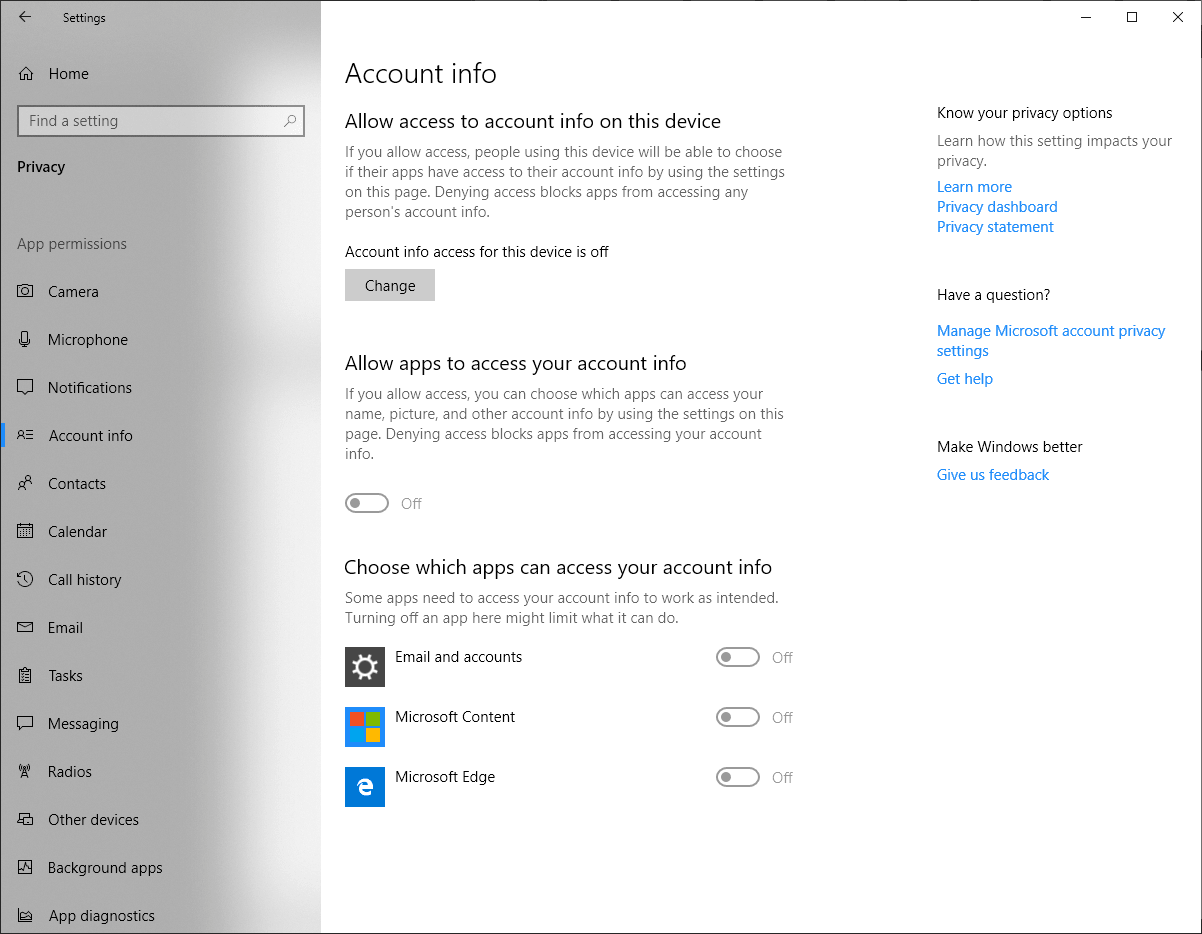
- Click on the Change button under Account info and toggle off the setting Account info access for this device.
- You can also toggle off access to account info to the individual app.
Must Read: Common Windows 10 Issues and How to Tackle Them
Turn Off Timeline in Windows 10:
On a personal note, I love using Windows timeline feature to keep track of every activity I have performed in the past. But, since it tracks all your activities performed not only on your home PC but on all PC’s that you are signed in. You might feel as an invasion to privacy. Hence, to turn this feature off, follow the below steps:
- Click on the Windows Start button and select Settings (gear icon) > Privacy > Activity history.

- In the Window that opens, uncheck the option, Store my activity history on this device.
- To stay more secure, you can also uncheck the option, Send my activity history to Microsoft.
This will stop Windows 10 from storing your activity history.
Manage Privacy via Microsoft Privacy Dashboard:
There’s a possibility that you too are unaware of Microsoft privacy dashboard. Once logged in to this platform, you can view all your data that is collected by Microsoft. And if required then you can also delete that data. To get started click here and when asked, use your Microsoft account credentials to sign in. After signing in you can perform the below listed tasks and much more:
- Easily clear the search history collected by Bing and Edge.
- Easily remove all your browsing history and cookies collected by Edge and Cortana.
- Easily manage all the apps that are accessing your account info in the present or in the past.
And in case you are still left with any other privacy concern then you can also directly contact the privacy team of Microsoft.
Protect your Privacy in a Simpler Way:
Until now all the steps that we have discussed to protect the privacy in Windows are manual. However, there is an amazing tool developed by Systweak Software named Advanced Identity Protector, that protects all your confidential details such as passwords, email accounts, credential details, credit card information along with social security number.
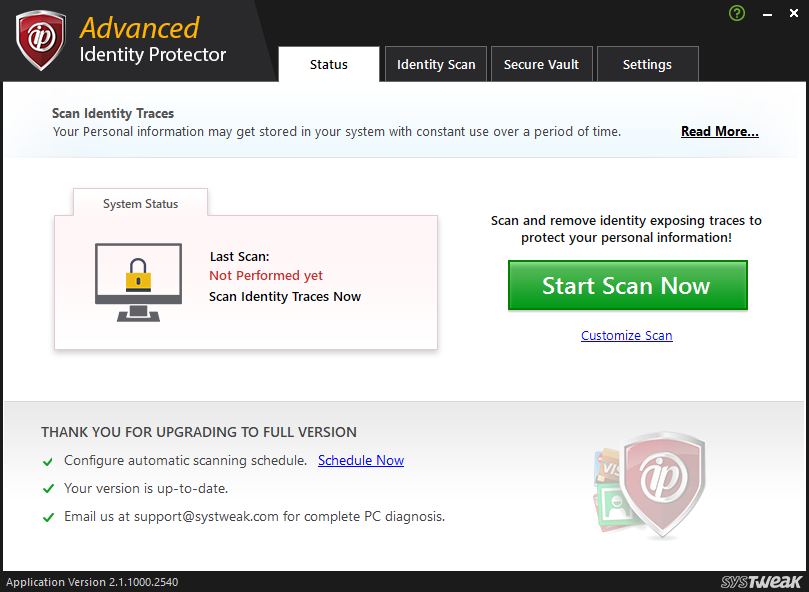
Download Advanced Identity Protector Here

Moreover, Advanced Identity Protector is extremely easy to use. Once the software gets installed > launch it > click on Start Scan Now button to start the scan. Now the product will scan your entire PC for all hidden privacy traces that resides on your PC. These hidden traces includes following confidential information:
- Email login ids along with their passwords.
- Other login ids and passwords
- Credit card number.
- Social security number.
- Contact Information.
Since all these are highly confidential information, therefore can pose a serious threat to your identity in case your PC gets compromised. Advanced Identity Protector detects all these traces and provides you with an option to either delete them permanently from your system or secure them in a Secure Vault. And once you move all your confidential information to Secure Vault, it gets encrypted and can only be accessed by a password known to you.
So, folks, that is how easily yet effectively you can protect your privacy in Windows 10.


Susan Hills
Thank, Very Informative. I just like your Key point. Everyone Should follow the step for windows Privacy.
Preeti Seth
Dear Susan, Thank you for your feedback.