So, you have finally got your hands on Windows 11 and you want to flaunt the new UI in front of your friends who are probably stuck with Windows 10. Or, are you an avid gamer who has a knack for recording streams? Whosoever you are, you might be wondering how you can record a screen in Windows 11? Or more specifically, how can you record a screen on Windows 11 with sound?
We have got it all sorted out for you. Here are some fairly simple ways to record a screen in Windows 11.
Also Read: 10 Best Screen Recorder for Windows
Here Are the Best Ways To Record Screen In Windows 11
Listed below are three effective workarounds that can help you record a PC screen with and without sound.
1. Use Microsoft PowerPoint To Record Windows 11 Screen
Chances that you don’t have Microsoft PowerPoint or don’t know what it is are very few. Although the application is majorly used to create impeccable and engaging presentations, not many users know that it can also be used to record screens as well.
1. Open new (blank) PowerPoint file
2. Head to the Insert Tab and find the Media area
3. Select Screen Recording
4. Click on the Select Area button from the box that appears at the top of the screen and then drag over the area that you want to record
5. This same menu can be used to enable and disable the audio, and also toggle the visibility of the cursor
6. Click on the Record button that you can see on the farthest left of the box
7. Click on the blue Pause button to pause the recording and then resume recording
8. Once done click on the Stop button to stop the recording or you can use the shortcut Windows + Shift + Q key to stop the recording
9. When the recording appears inside the slideshow, you can let it be or you can click on Save Media and save the screenshot as MP4
Also Read: How To Screen Record Zoom Meetings With Audio
2. Using Xbox Game Bar
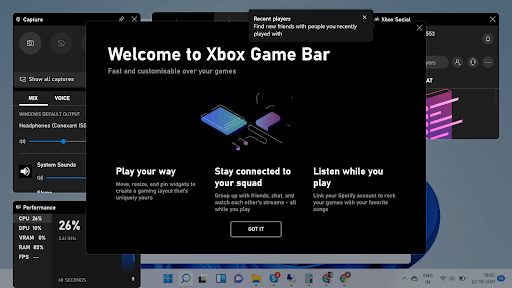
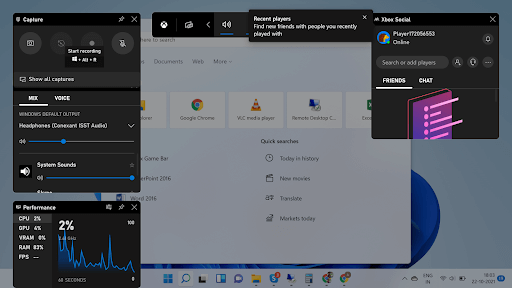
Xbox is a gamer’s paradise. The Xbox Game Bar comes default with your Windows 11 and it lets you record screen with ease apart from letting you share streams and chatting with fellow gamers amongst several other things. Here is how you can record screen on Windows 11 using Xbox Game Bar –
1. Open the program you wish to record

2. Select Xbox Game Bar
3. Click on the record button
4. You can get the Xbox Game bar by pressing the Windows key + G
5. Choose an action you want to perform and you can even record audio using your Microphone
6. If you wish to stop recording, press the Windows + Alt + R keys to stop recording.

7. Another way to stop the recording is to click on the stop button in the widget
3. Take Aid of A Dedicated Screen Recorder Utility
A dedicated screen recorder for PC provides tons of options that can help you capture a variety of screenshots and perform video recording with audio on Windows 11 and other operating systems. Additionally, using a reliable screen capturing tool can help you gain better control over editing, annotating, and highlighting significant parts of images and videos.
We recommend using the Advanced Screen Recorder for this purpose. It is an excellent screen recording utility, highly compatible with Windows 11, 10, 8, 7 PC. It not only lets you capture and edit the screen but also doubles up as an efficient screen recording utility. As a dedicated video recording software, It lets you choose the desired frame rate and quality as well.
Apart from that, you can also choose screen capture settings like whether you want to capture a single window, a rectangular region, full screen alongside performing video recording and webcam.
How To Record Screen On Windows 11 Using Advanced Screen Recorder?
Follow the instructions shared below to get started and perform screen recording on Windows 11:
STEP 1: Download, install and run Advanced Screen Recorder on your Windows 11 system.
Click Here To Download Advanced Screen Recorder
STEP 2: As soon as you launch the tool, you will be greeted with the Installation Complete screen. Hit the Start Now button to proceed!
STEP3: Advanced Screen Recorder comes loaded with a quick tutorial to guide you about the usage.

STEP 4: To initiate screen recording with it, simply hit the option Record.
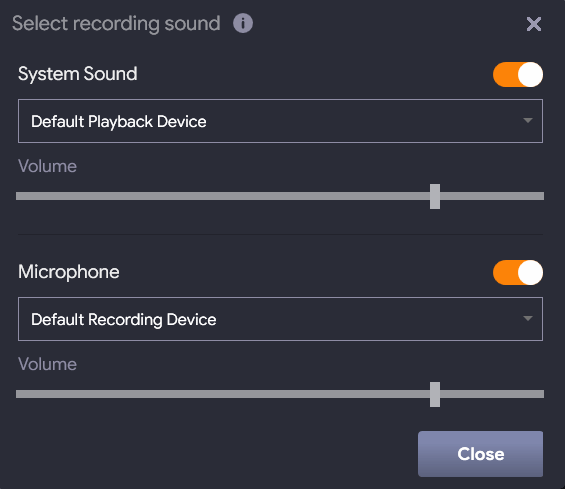
STEP5: As soon as you initiate the screen recording, you will see an instant pop-up window on the screen, asking you to select the System Sound, Set Microphone Settings, Volume, etc.

STEP 6: That’s it! As soon as you set the preferences, you can Close the Window and proceed with screen capturing on Windows 11 or another operating system. A countdown will be initiated before the screen recording starts!
STEP 7: A tiny tray would appear on the bottom-right corner of the screen, where you can see the duration of recording, alongside options to Stop and Pause the screen recording.

Wrapping Up – Get! Set! Record!
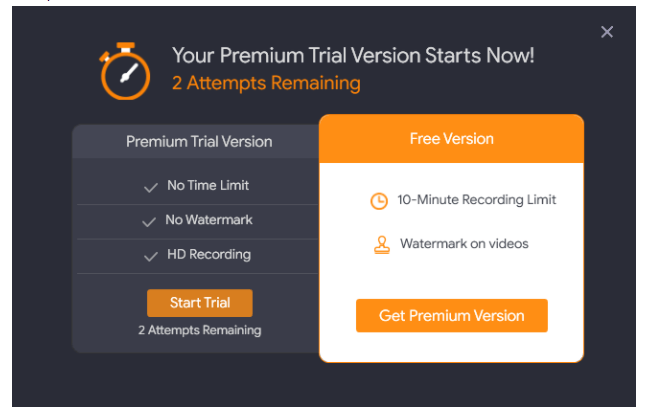
Once you are done, you can stop the recording and save the file according to your convenience. Individuals working with the Free version should note that the Advanced Screen Recorder allows recording for 10 minutes only with a watermark imposed on the final output. If you wish to record for long hours, then you need to switch to the Pro version!

You can switch to it’s Premium Version for just $39.95/Year. In case you’ve any queries related to the screen recording program, do not hesitate to share with us in the comments section below!
Frequently Asked Questions for Record Screen:
Q1. Does Windows 11 Have a Screen Recorder?
Yes, you can navigate to the Insert tab, locate the Media area and choose the Screen Recording option. Now, you can draw over the area you wish to record on Windows 11.
Q2. Why Can’t Screen Record On Windows?
In case you are not able to screen record your desktop, it’s probably because you don’t have a suitable window open for recording. This usually happens with the Xbox Game Bar that can be only used for capturing programs or video games.
Q3. Which Is The Best Screen Recorder for PC?
Advanced Screen Recorder is probably one of the most effortless tools designed for capturing different kinds of screenshots and recording an entire screen, specific window, or a particular region in a couple of clicks.
Q4. How To Record Myself And Computer Screen At The Same Time?
Well, using a third-party screen capturing tool like Advanced Screen Recorder can ease the entire task of recording yourself and the PC screen. It comes with a Webcam Recording feature that helps you achieve the task in a few clicks.


Leave a Reply