Everyone was anticipating the release of the new macOS version when Apple hosted its WWDC presentation. And we got what we were expecting: the all-new macOS 13 Ventura Beta for our Macs. And just like every beta version, macOS 13 has its flaws.
There are several features in the newest Apple macOS Ventura. Although it is currently in the testing phase, not every user will have a consistent or flawless experience. Many users want to roll back from macOS Ventura Beta to macOS Monterey.
Points to Consider When You Are Going to Downgrade macOS Ventura Beta to macOS Monterey
- You must have a working, reasonably fast internet connection.
- You should create a backup of your current data because after you downgrade macOS Ventura to macOS Monterey, all your data will be permanently lost. Utilizing Time Machine, you may back up all of your data and subsequently restore it.
- Make a bootable drive that can launch the macOS Monterey setup. It is a must step for you if you own a Mac with a Silicon-based processor.
- You must keep your Mac powered in when downgrading from macOS Ventura to macOS Monetary.
Why Do You Need to Downgrade macOS Ventura Beta to macOS Monterey?
Many applications, like Dropbox and the Magnet app, haven’t been adequately optimized for Ventura yet. Of course, this is a matter of time, but downgrading is the best option if you lose some essential capability. Apart from this, the following reasons could be the reason some users decided to rollback towards the macOS Monterey:
- macOS Ventura does not support several applications.
- Performance issues, such as app crashing or the Mac hanging.
Here’s How You can Downgrade macOS Ventura Beta to mac OS Monterey
List of Contents
Method 1: Factory Reset Your Mac to Downgrade macOS Ventura Beta
When you restore your Mac to factory settings, all of your data is erased, and the operating system is restored to the original macOS version. It is the simplest way to roll back towards the macOS Monterey edition onto your Macintosh and works with all compatible Macs. The only thing to remember is that you can lose all your data in this process. So you are advised to back up your data before downgrading to macOS Monterey.
Also Read: How To Backup Mac Using Time Machine
Method 2: Use Time Machine Backup
This choice is the easiest if your Mac has previously been backed up. A backup should come first with every significant macOS upgrade. So be ready for your external drive; Time Machine will be our mode of transportation.
- Connect the external disk containing the backup file.
- Select Restart by clicking the Apple icon.
- Afterward, access the boot selection panel.
- For Intel Powered Macs: Keep holding down the “Command” key + the key “R” until the Apple logo appears.
- For Silicon-powered Macs: Keep pressing the Power button. Hold on to the button until the starting screen shows up. After that, select “Options” and click on “Continue.”
- Click on “Continue” after selecting “Restore from Time Machine Backup.”
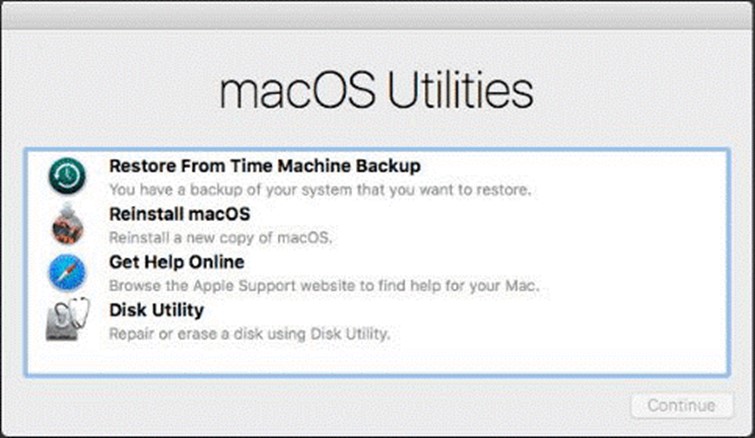
- After reading the steps, press “Continue.”
- Choose the “Backup Source,” then click “Continue” once again.
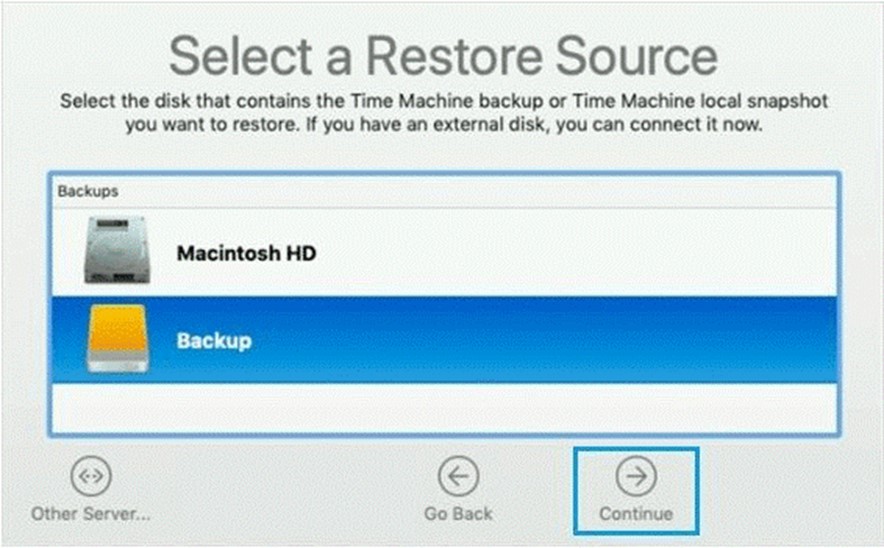
- Finally, click “Continue” after selecting the most recent macOS Monterey backup.
The procedure could take a while, so sit back and take some rest.
Method 3: Via macOS Recovery
You can restore your Mac to the most recent functioning state using macOS Recovery. You might also return to the OS supplied with your Mac when it was manufactured. You’ll need to perform various starting key combinations once again after you’ve shut down your Mac.
- From the Apple menu, turn off your Mac.
- Turn on the power by pressing the button. Now quickly input one of these:
- Press “Command”+ key “R” to reinstall the most recent version of macOS (Ventura).
- Press “Shift” + “Option” + “Command” + “R” keys altogether to reinstall the most recent version of macOS that was included with your Mac when it was new.
- Press “Option” + “Command” + “R” keys altogether to install the latest supported version of the macOS upgrade.
- Put in your password and then press “Continue.”
- After clicking on “Next,” select “Reinstall macOS” and then click “Continue.”
- Then stick to the guidelines appearing on the screen to downgrade macOS Ventura beta.
During the installation, keep your Mac plugged in and open the lid. While installing macOS Monterey, your computer may restart numerous times and go entirely dark, giving the impression that it has shut down. Even then, don’t shut off your machine. Your computer will start automatically after installing macOS Monterey.
To Wrap This Up
So, these are some ways to downgrade macOS Ventura Beta to macOS Monterey. We hope your return to macOS Monterey was simple. Backing up your Mac is always advised before making any decisions that might potentially affect your data. It eliminates the chance that your important data will be lost.


Leave a Reply