Google’s Android Device Manager helps you locate, lock, and even erase your device if lost or stolen. ADB, short for Android Debugging Bridge, is a command line tool that comes with the Google Developer Tools. It allows you to connect your computer to an Android phone locally over a USB connection so you can debug apps and diagnose problems. You can use ADB to debug, test, and release apps from your computer instead of your phone.
On Android phones, the ADB feature is deactivated by default. The User must manually switch them on from their Android phone. Android smartphone users complain about ADB difficulties and other problems, such as ADB device unauthorized error message. This article explains how to bypass ADB device unauthorized message to continue using these tools efficiently and without setbacks.
Read Also: How To Set Up Android Studio on Windows 10 and 11
But before we go ahead and learn to bypass ADB device unauthorized message, let us look at possible causes of this error message.
Reasons Behind This ADB Device Unauthorized message
- Your USB cable is faulty.
- USB driver problems.
- Unresponsive RSA fingerprint prompt.
- Fault in ADB connection.
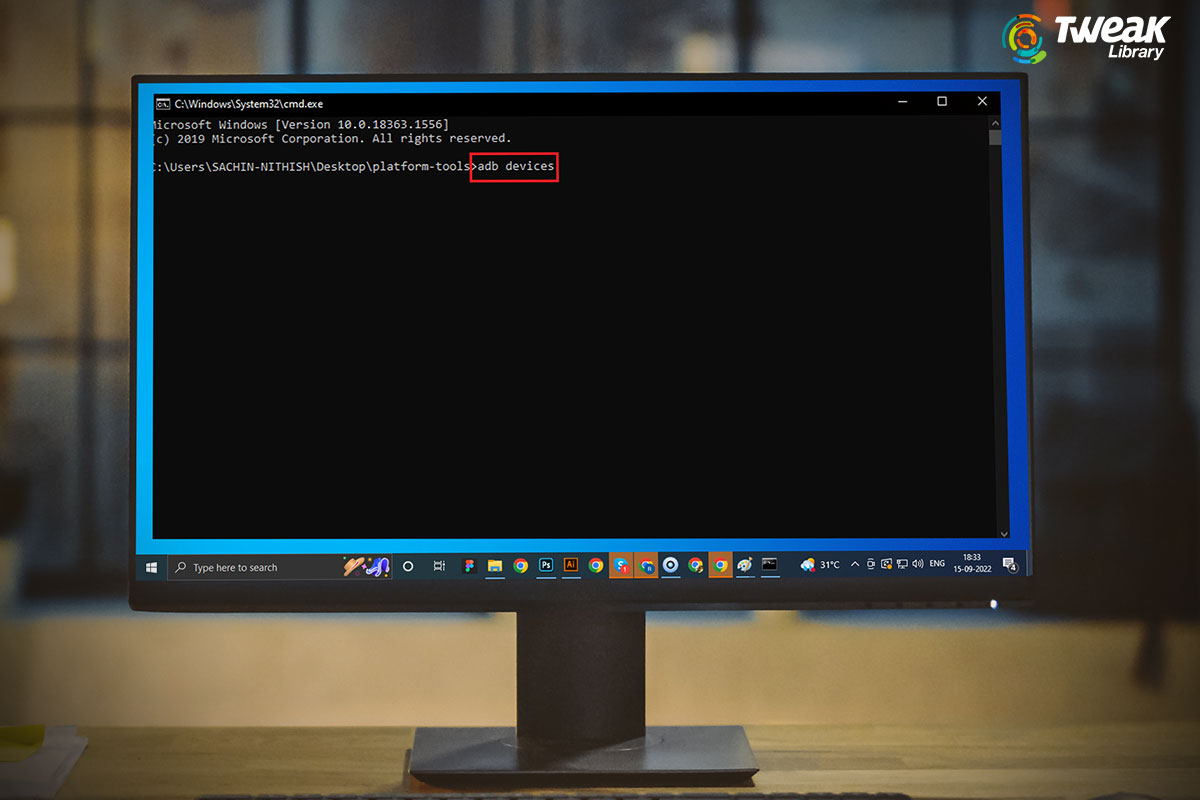
Let’s jump on the ADB device bypass process with that out of the way.
How To Bypass ADB Device Unauthorized Message
1. Replace The USB Cable
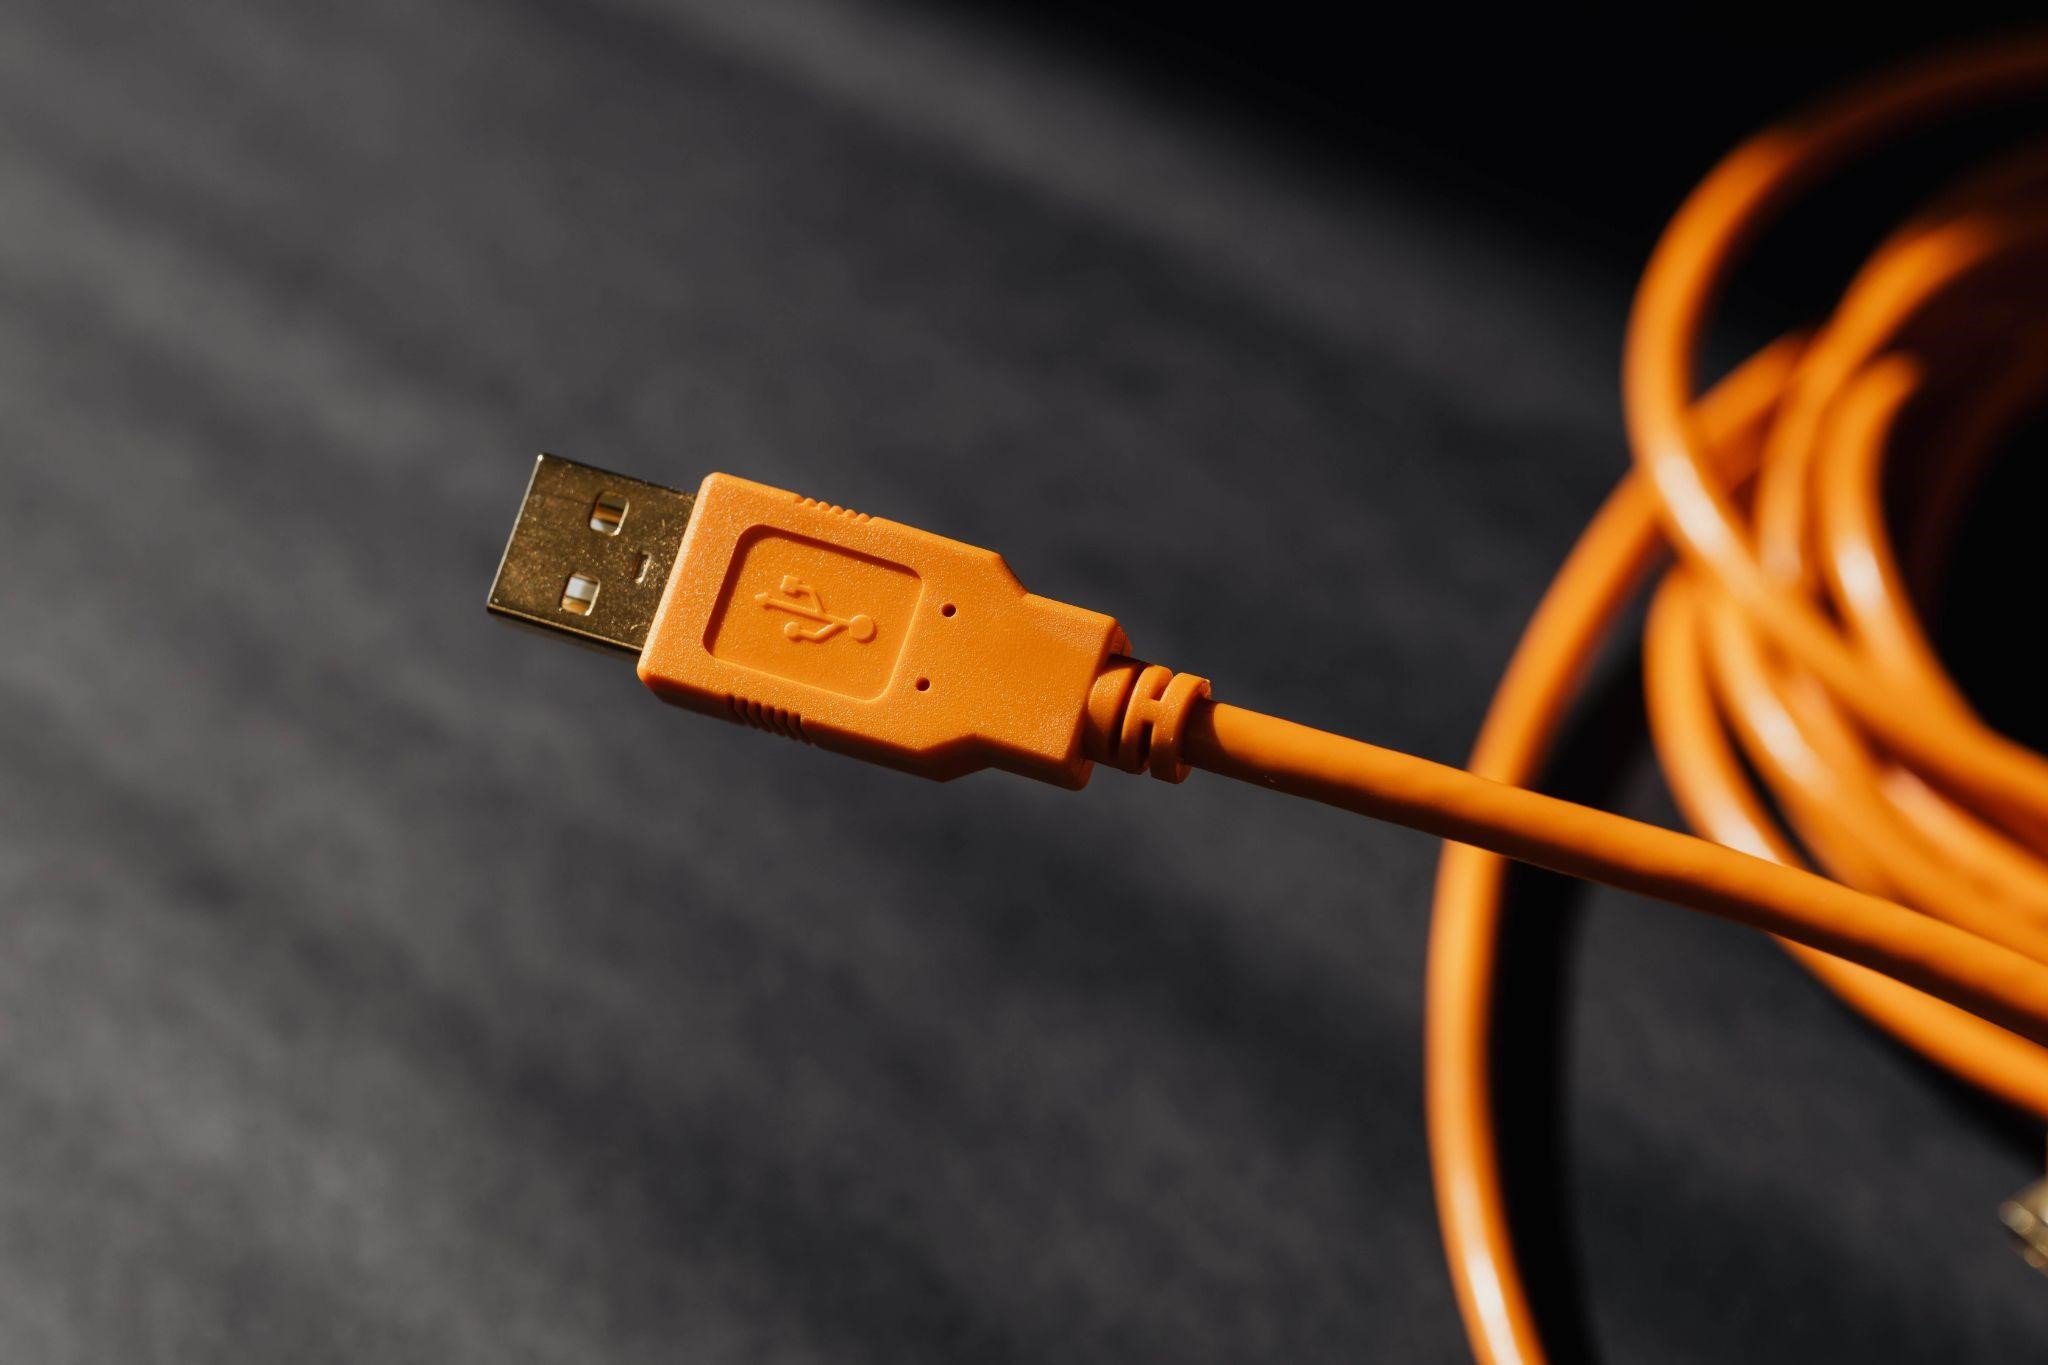
Android smartphone users complained that they did not get the proper instructions when conducting ADB operations. If the USB connection is broken in the midst, there is a risk that this ADB device’s unauthorized prompt may appear. The possible reason for this could be a faulty USB cable. Change the USB connection to check whether that fixes your problem.
2. Check For USB Updates
It might be possible that when you linked your phone to the PC, it wasn’t detected by the computer because of outdated USB drivers. In this case, upgrading USB drivers may be helpful. And you can do it in two ways.
A. Manually Update The USB Driver
For this, follow the steps below:
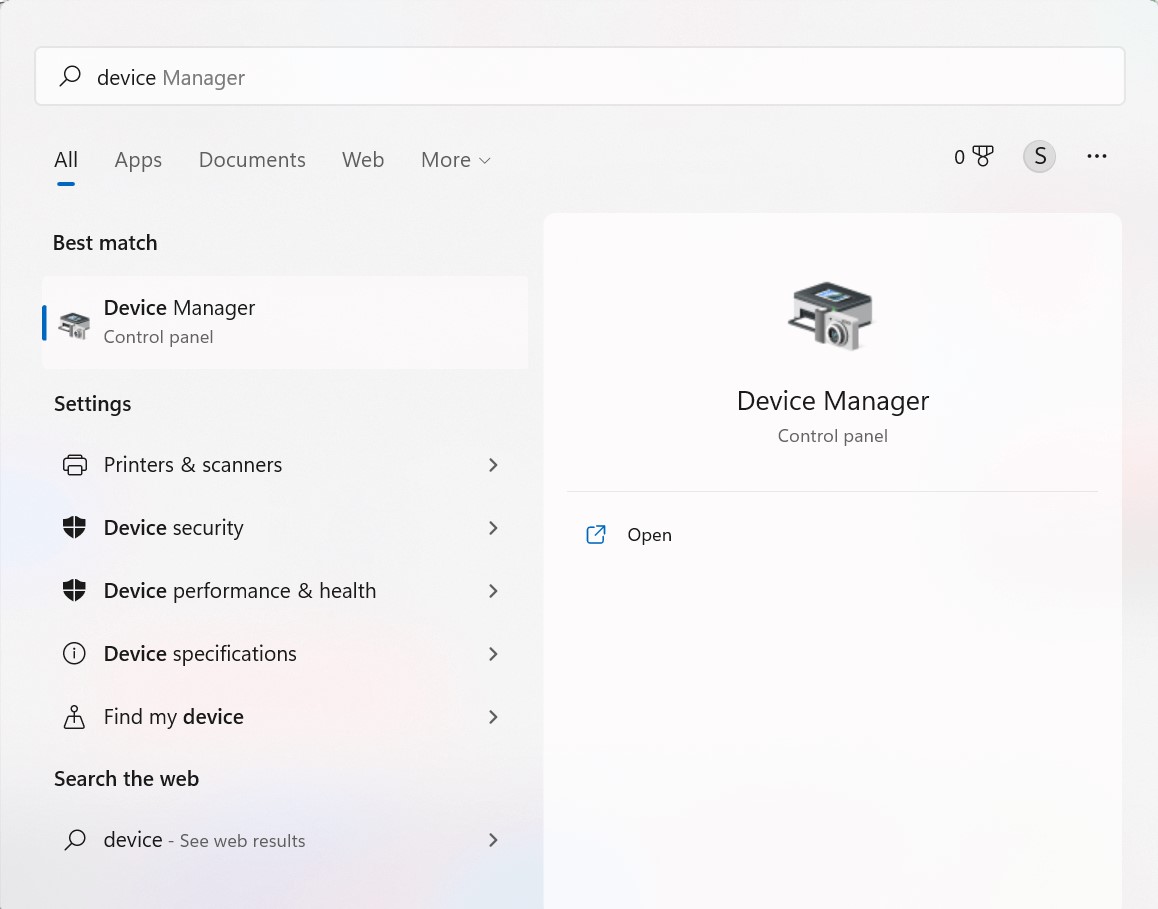
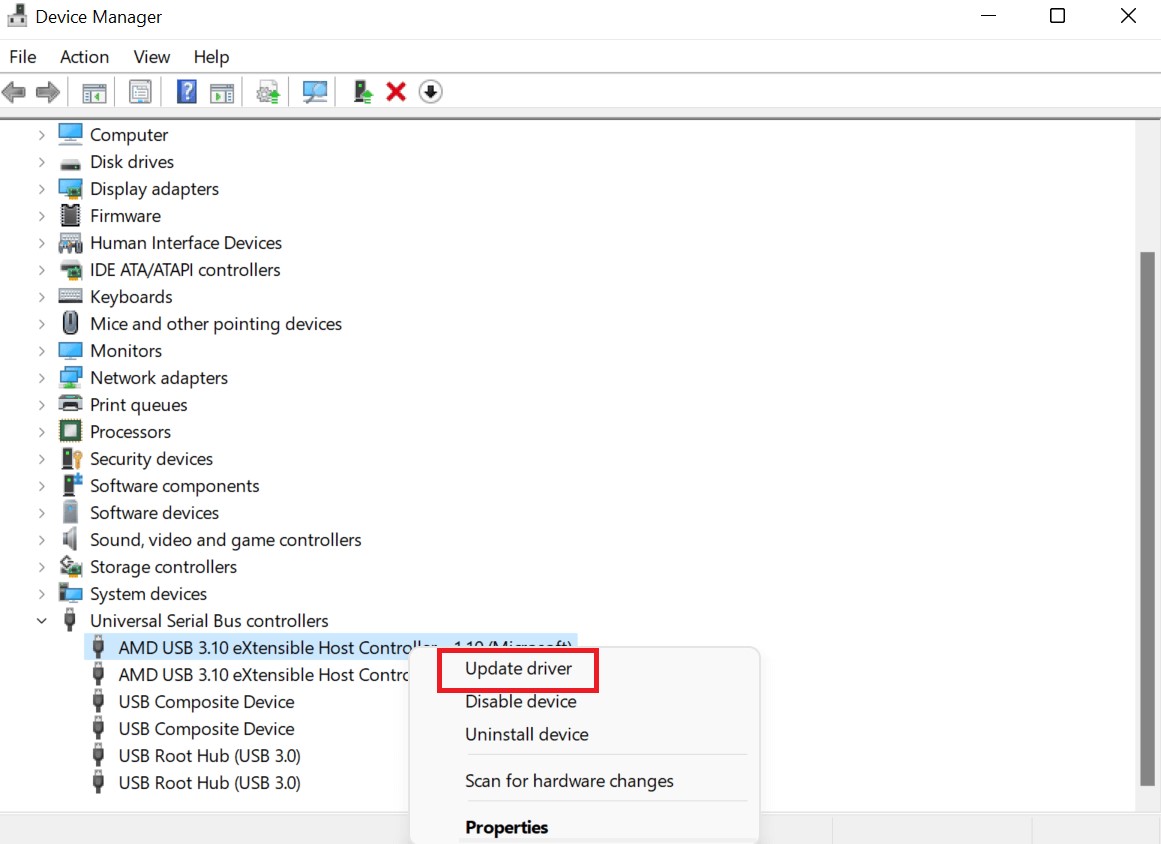
- Press the “Windows” key and type “Device Manager” in the search bar.
- Open Device manager.
- At the bottom of the page, you will find the “Universal Serial Bus controllers” option. Open it by double-clicking on it.
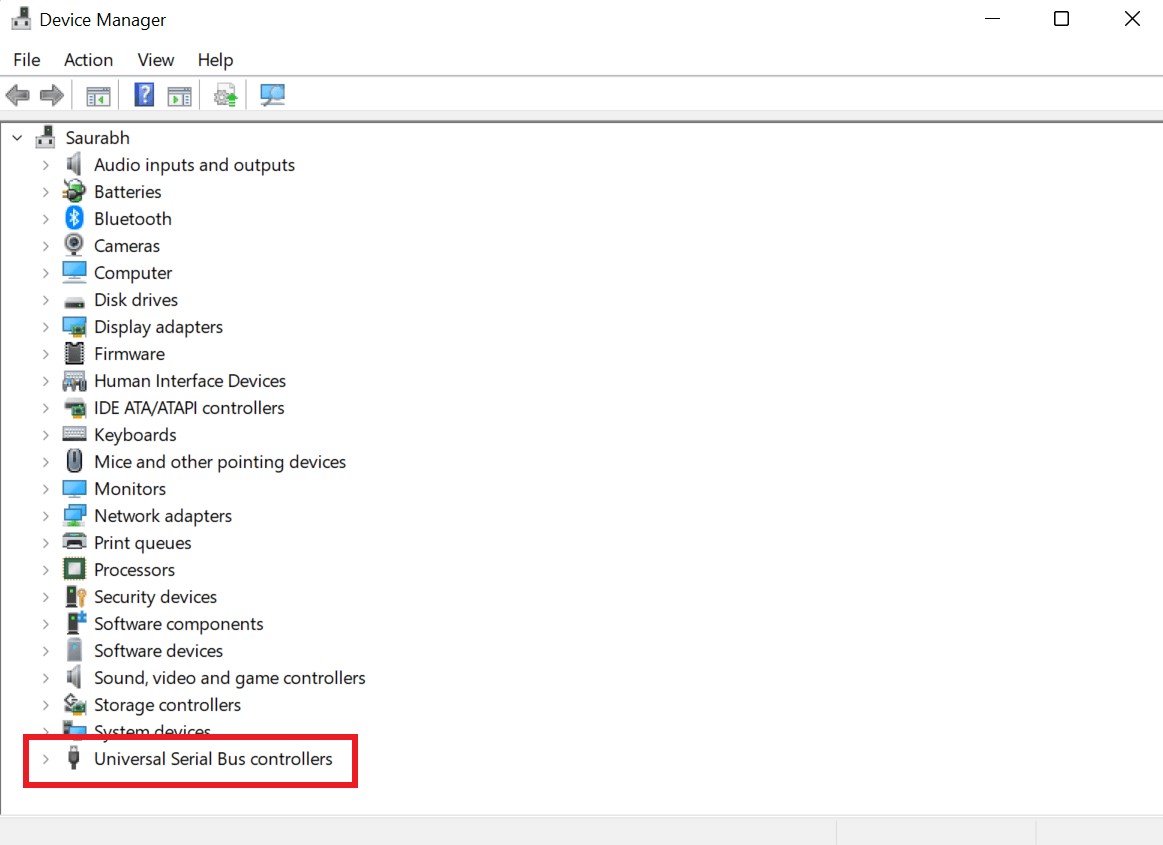
- Now right-click on the “USB Host Controller/USB host Device” and choose the “Update driver” option from the drop-down menu.
- Then you’ll see a pop-up window. Click on the “Search automatically for updated driver software” option.
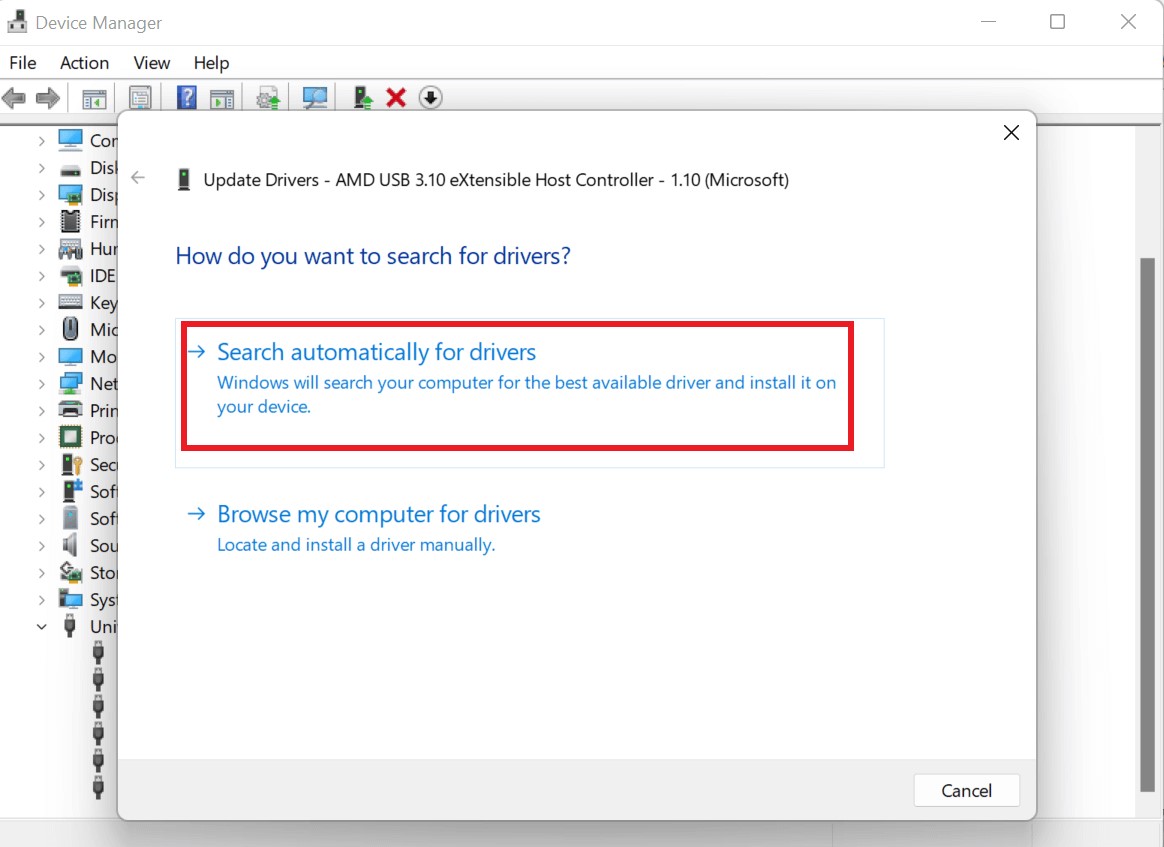
- Follow the same procedure for each USB driver listed in the section “Universal serial bus controllers.”
B. Use a Third-party Software
This method is easier and my favorite one. If you want to avoid all these hassles and all this manual process and want a simple way for all your driver-related problems, then you must use a driver utility tool such as Advanced Driver Updater.
Download Advanced Driver Updater

If you don’t have the time, patience, or technical expertise to update the drivers yourself, Advanced Driver Updater designed and developed by Systweak Software, can do it for you automatically. Advanced Driver Updater can resolve your driver-related issues with only a few clicks. This tool checks online for the most recent drivers for all the hardware on your computer. Then it scans the currently installed drivers and provides updates for any that are outdated, corrupted, or missing.

And it is fairly simple to use as well. Just click on this link to download the Advanced driver updater and install it on your computer. Then, open the tool and click on the “Driver Scan” tab. A list of out-of-date drivers will appear on the screen once the scan is finished. To update the driver, look for the USB driver option and hit the “Update driver” button right next. Once the procedure is finished, restart your PC.
Read Also: How To Fix Google Apps Keep Crashing On Android Phone
3. Enable USB Debugging
With the help of a USB connection, USB Debugging enables computer control of an Android device, as well as application installation from a PC and a few other features. Follow the steps below to enable USB debugging on your Android device to bypass ADB device unauthorized message.
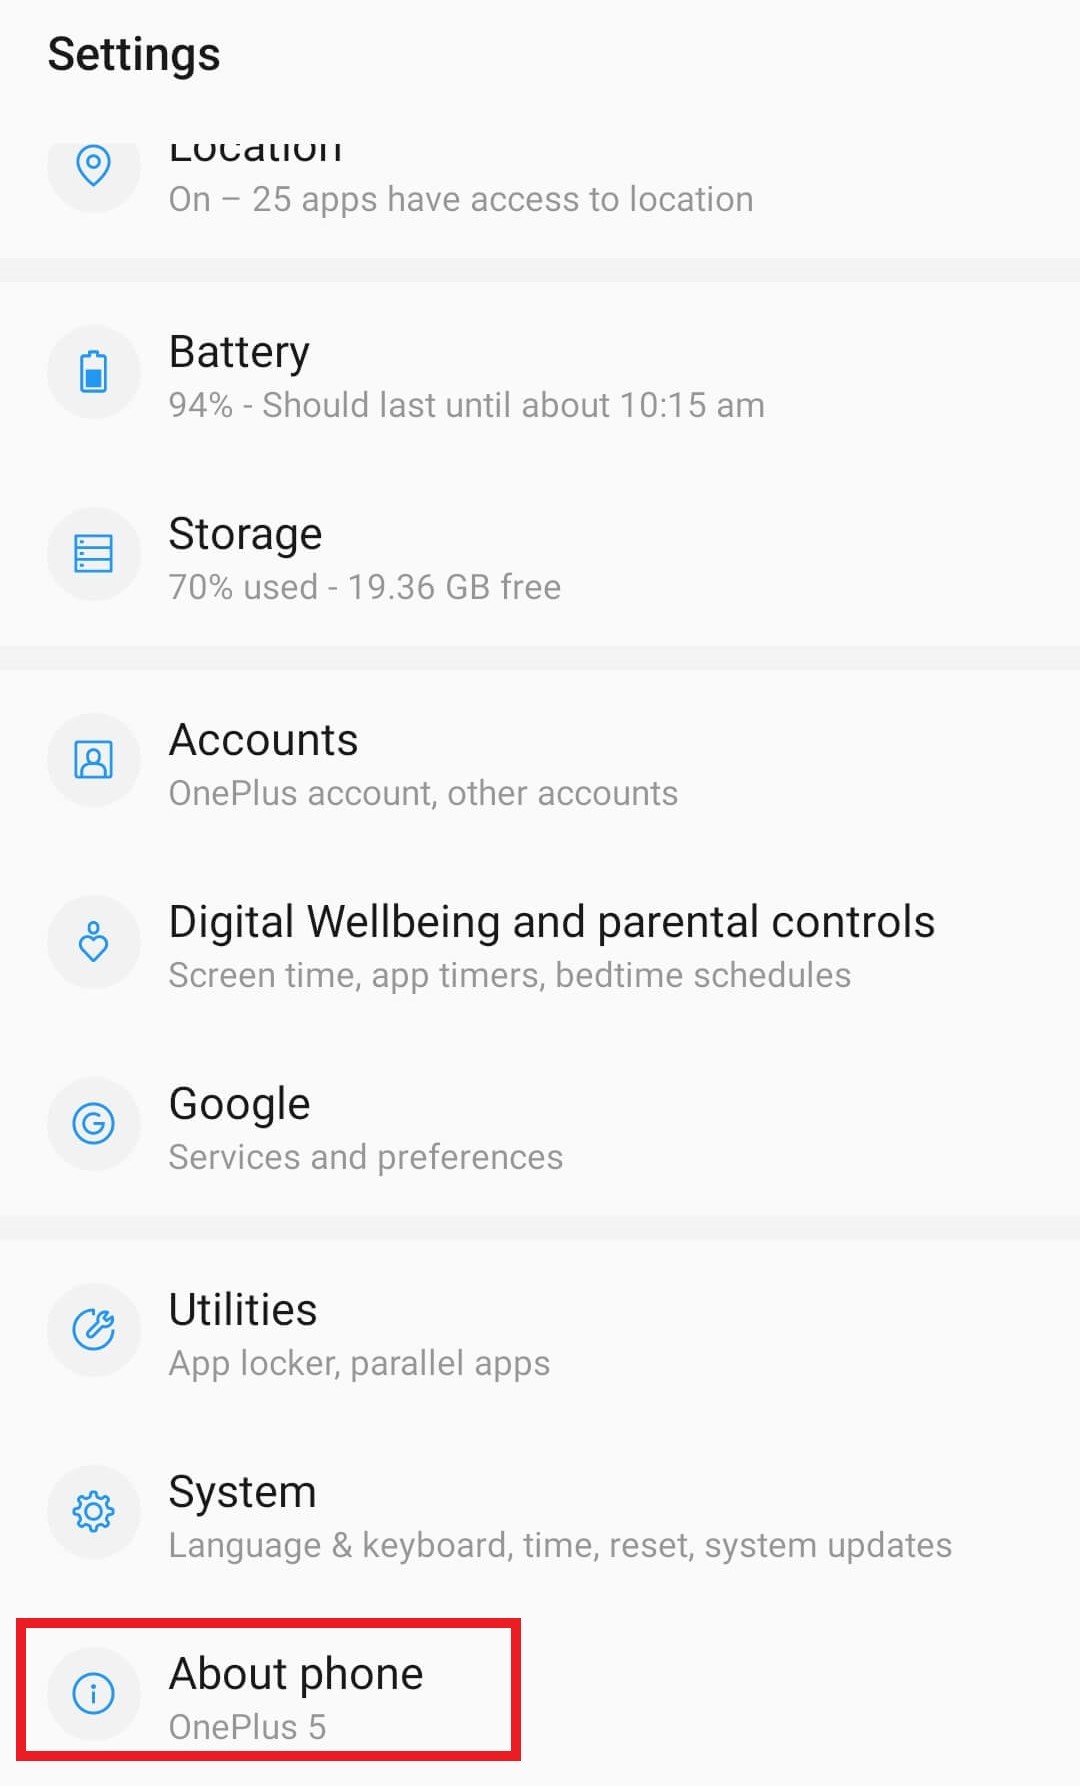
- Open the “Settings” application of your Android phone.
- Now head to the “About phone” option from the bottom of the settings app.
- Then scroll down and look for the “Build Number” option. Now tap 7 times on the Build number, and you will receive a message saying, “You’re now a Developer.”

- Now head back to the Settings app and tap on the “System” option.
- Depending upon your device, you will now have “Developer options,” or you’ll need to discover this “Developer option” under the “Advanced” option, which is under the “System” option.
- Click on developer options and switch on the toggle button to enable it.
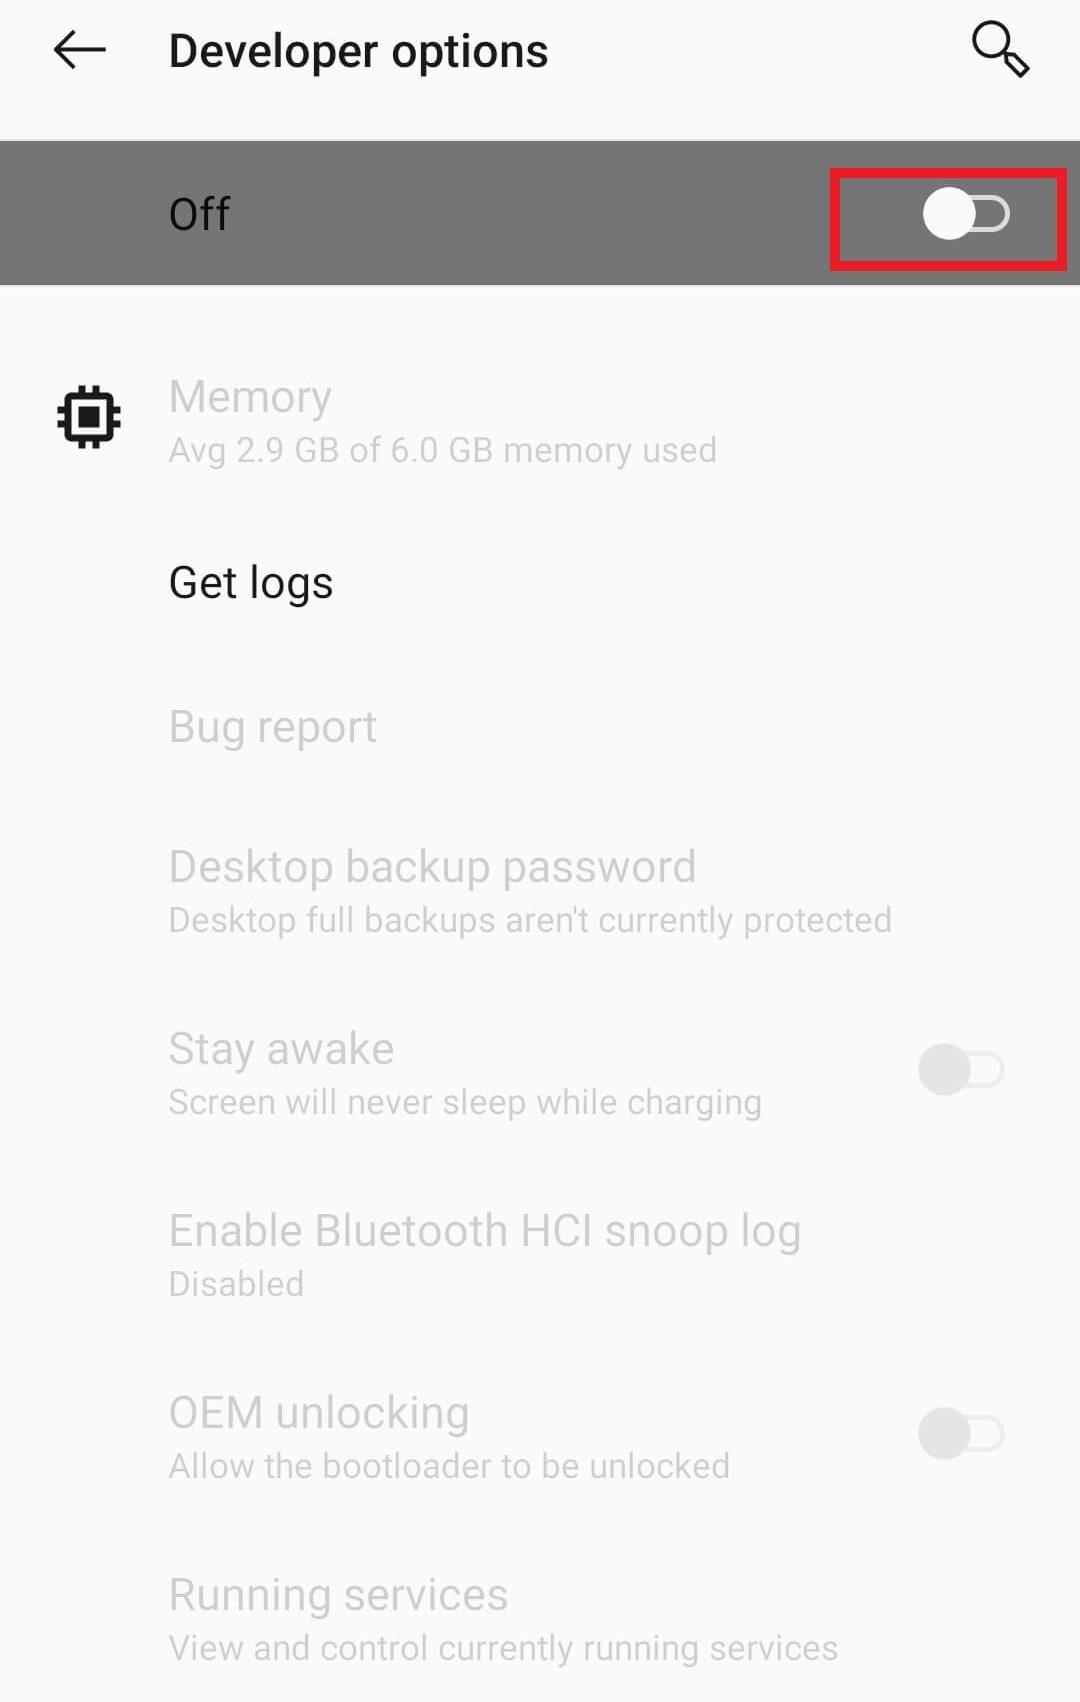
- A prompt window will appear in front of you asking permission to “Allow Development settings” click on “OK” to confirm. Under the Developer option, go to the “Debugging” section and toggle the switch to on position, right in front of “USB debugging.”

4. Download SDK Platform Tools
To bypass ADB device unauthorized message, ensure you’ve installed the Android SDK tools on your computer. To do so, follow the steps below:
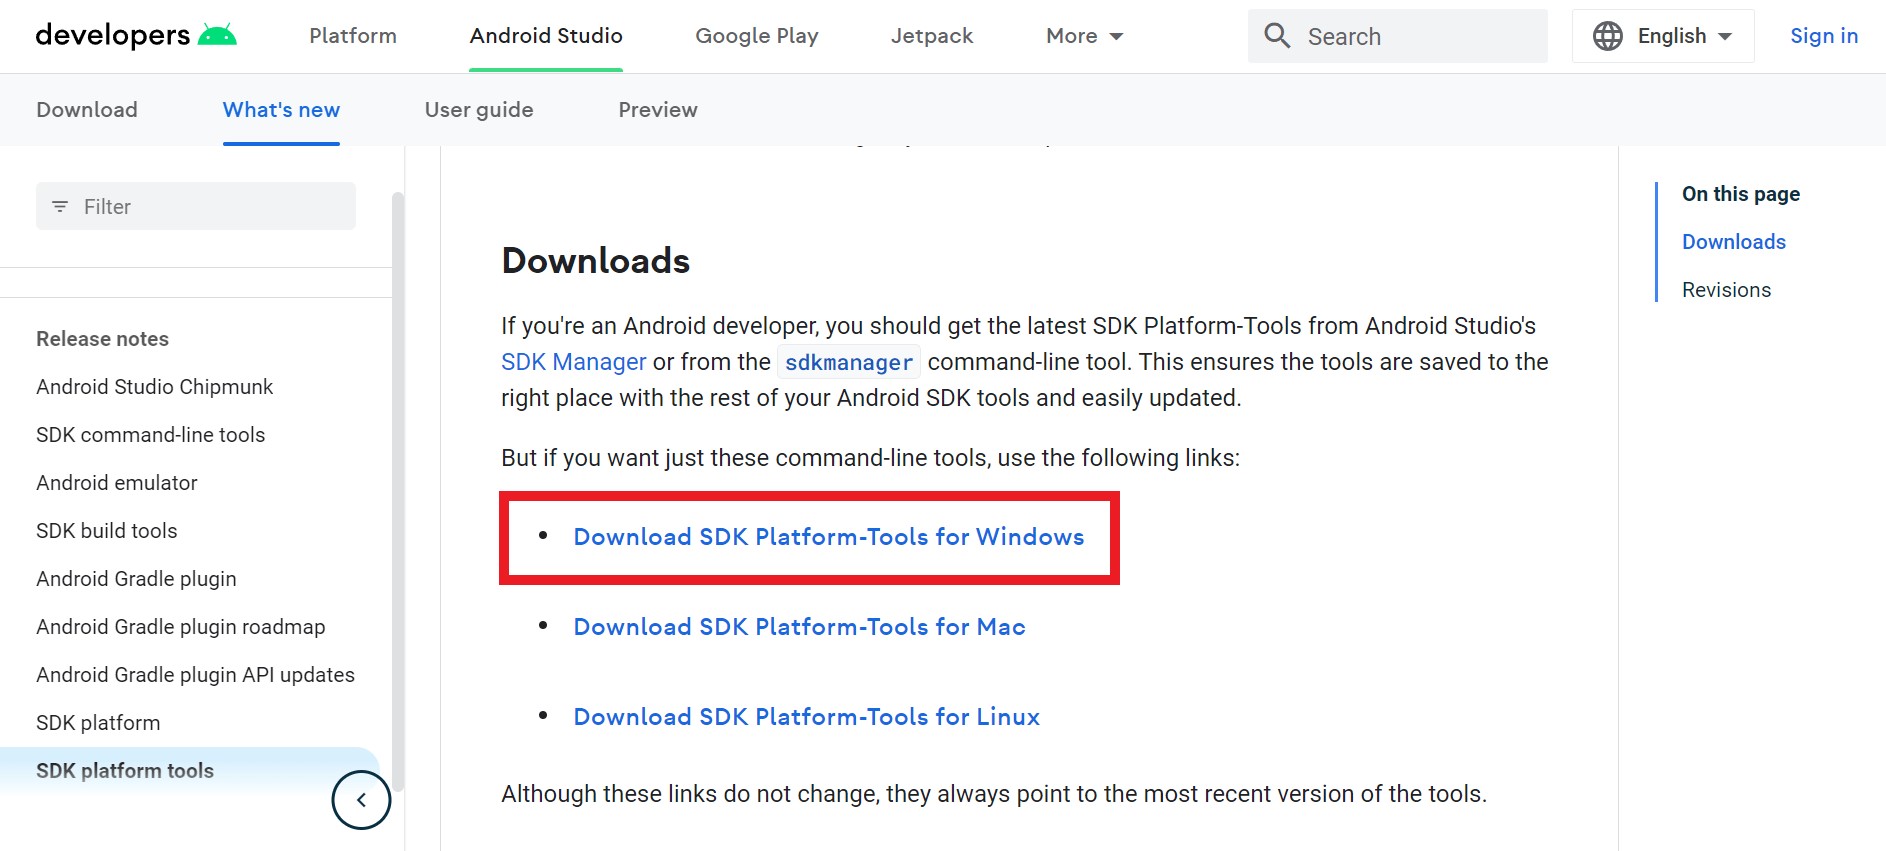
- Click on this
- Now click on the “Download SDK Platform-Tools for Windows.”
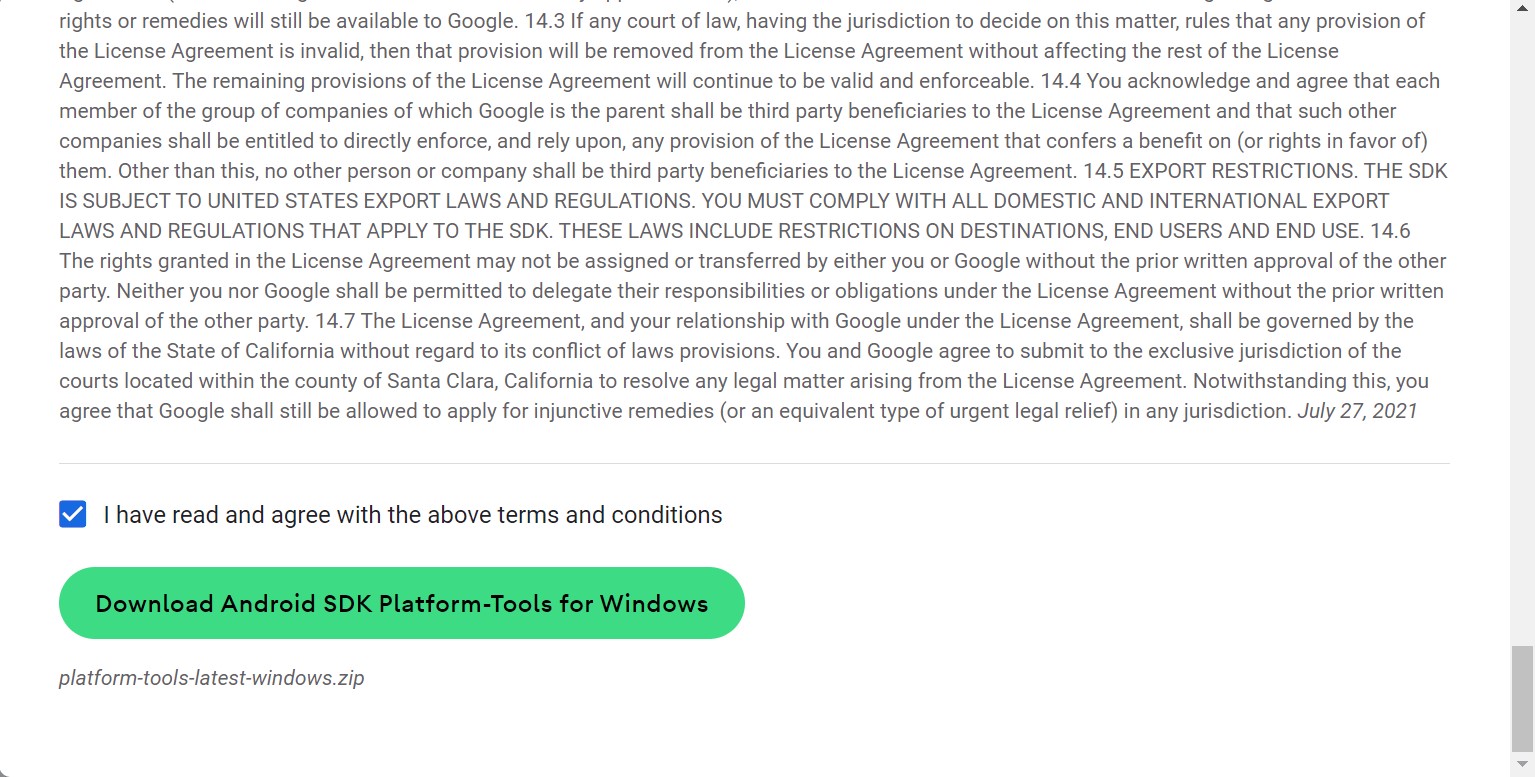
- A Term & Conditions page will appear in front of you; scroll down the page, tick mark the box, and then click on the green clickable link of “Download SDK Platform-Tools for Windows.”
- Extract the files for the Android SDK by going to the download folder.
To Warp This Up
So, this was a brief guide on how to bypass ADB device unauthorized message. And I hope that this was helpful for you to resolve the issue. If yes, then share it with your friends and family. Also, tell us which method worked for you and if you have any other method to resolve this free to tell us in the comments below.


Leave a Reply