
When you connect a USB device to your computer, the USB hub may continue to detach and rejoin on its own. Other problems, such as an Android phone connecting and detaching from USB, USB C disconnecting, and an unknown USB device connecting and disconnecting, are all related to the same thing. It’s most likely a hardware or driver issue.
If, on the other hand, all of your computer’s USB ports continually disconnecting and reconnecting with Windows 10, the first thing you should do is check to see if it works on another computer. If it functions normally, there’s a good chance there’s nothing wrong with the USB device.
One can also test the USB connection by connecting another typical working USB drive to the computer. If the USB reconnects after a few seconds, hardware or driver issues on Windows 10/8/7 should be investigated further.
How To Fix USB Keeps Disconnecting In Windows 10
1. Short-Term Fixes
Let’s begin by looking at a couple of short tricks to resolve this problem:
- Restart your computer.
- Use a different USB port to connect your USB device. This will assist in determining whether or not the first port is broken.
- Use a separate computer to connect your USB device. This will assist you to figure out if the problem is with your computer or the USB device.
- Restart your computer after disabling the Windows fast startup setting. For that, Go to Start->Control Panel>Hardware & Sound> Power Options>Choose what the power buttons do(from the left-hand side of the pane). Now under Shutdown settings> remove the checkmark beside Turn on fast startup (recommended)
2. Drivers for USB Devices must be Reinstalled
Faulty USB drivers might be the blame for this problem. You may fix it by uninstalling and reinstalling your USB drivers.
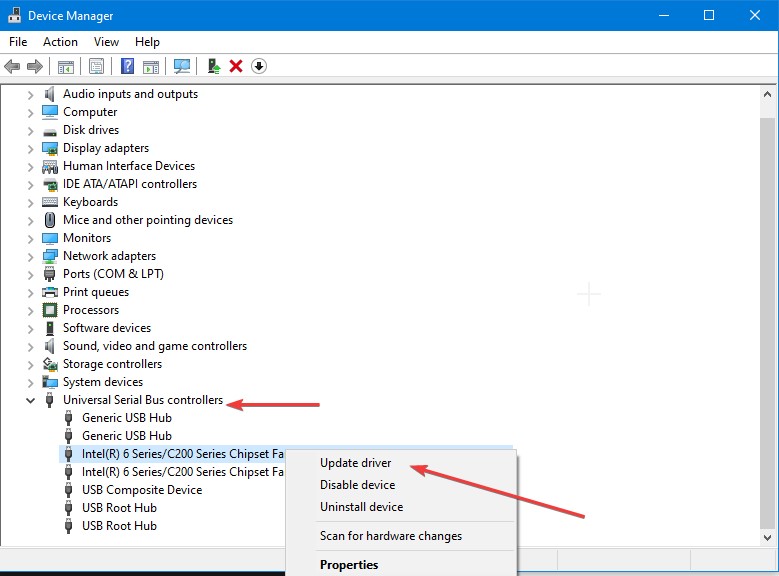
- To begin, press Windows Key + X and then choose Device Manager.
- Expand the section on Universal Serial Bus controllers.
- Uninstall the USB driver by right-clicking it and selecting Uninstall device.
When you’re done, reboot your computer. The USB drivers will be reinstalled automatically as a result of this.
To avoid unforeseen difficulties, it’s a good idea to check and update the drivers regularly. In this case, Advanced Driver Updater comes in handy. This program scans your computer for outdated drivers and shows the most current driver updates, ensuring that your drivers are always up to date. Advanced Driver Updater examines everything and presents the most recent driver updates without requiring you to enter any information. To get the most recent driver update, go here.
Advanced Driver Updater is a Recommended Method for Updating Drivers
Try Advanced Driver Updater if the previous way doesn’t work. This program may be used to update driver software. It finds and updates out-of-date drivers and shows the most current manufacturer driver updates. It also eliminates the need to manually update drivers using Device Manager or by visiting the manufacturer’s website.
Note that the FREE version only enables you to update one driver at a time, but the premium version allows you to update all outdated drivers in a matter of seconds. Most importantly, Advanced Driver Updater comes with a 60-day money-back guarantee.
To use Advanced Driver Updater, follow these steps:
- Download and Install Advanced Driver Updater from below.

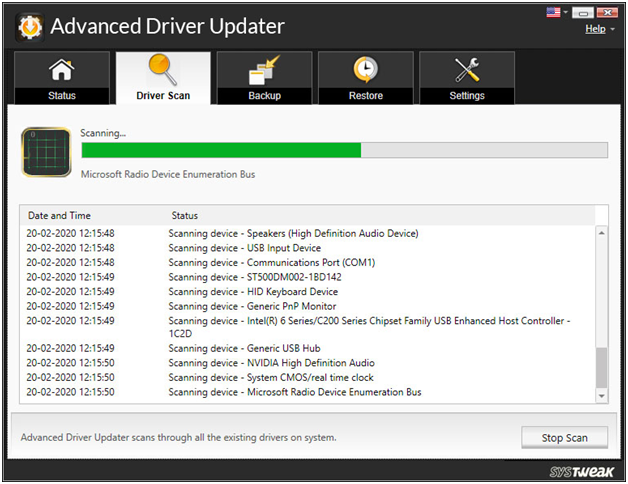
- Now is the time to run a scan to see if there are any outdated drivers.
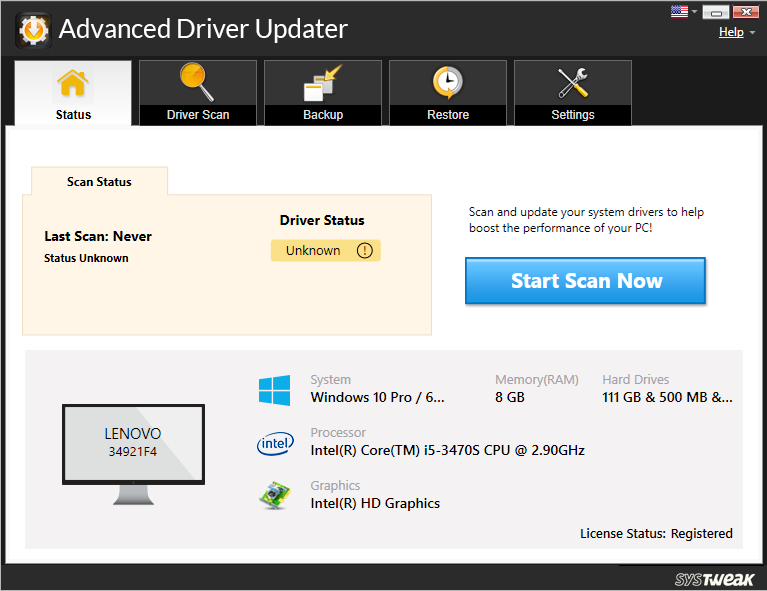
- After choosing Start Scan Now, wait for the Advanced Driver Updater driver to scan the computer and reveal outdated drivers.
- Examine the scan results and update any outdated drivers.
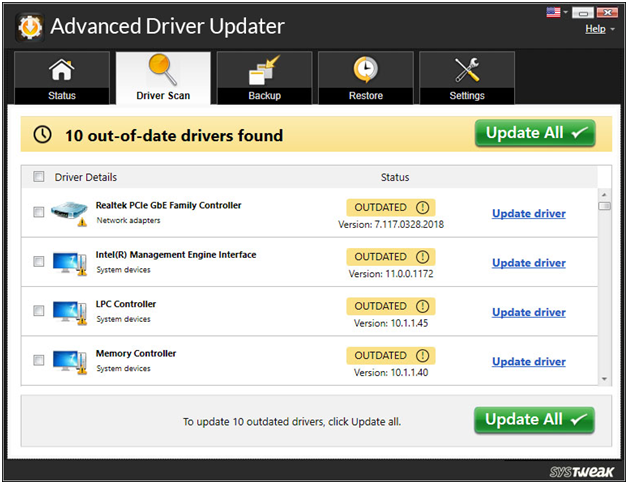
FREE users must update individual drivers. They must do so by clicking Update Driver next to each driver. On the other side, registered users can opt to Update All Outdated Drivers.
- Restart your computer once you’ve updated all of your drivers to see the changes take effect.
This is how Advanced Driver Updater may help you update your drivers.
3. Configure the Power Management Options on Your Computer
While customizing your PC’s power settings might be beneficial, it can also lead to several problems. For example, you might be having this problem as a result of how you’ve set up your PC’s Power Options.
Here’s what you need to do to fix the problem:
- Select Device Manager by pressing Windows Key + X.
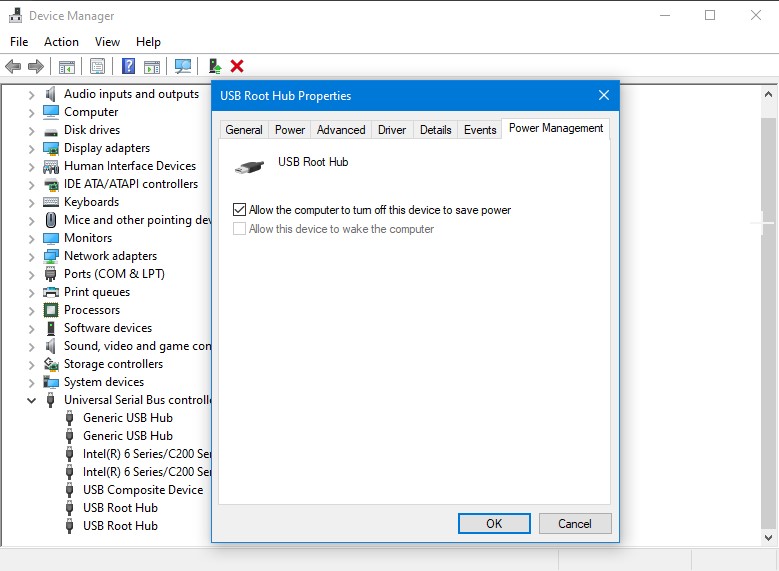
- Expand the Universal Serial Bus controllers section, then right-click and choose Properties on your USB driver.
- Go to the Power Management section.
- Uncheck the option that says Allow the computer to switch off this device to save power and then click OK.
- Restart your computer
4. Disable the USB Selective Suspend Setting
This problem might be caused by your computer’s USB Selective Suspend settings. Disable the USB Selective Suspend Setting by taking these steps to fix it:
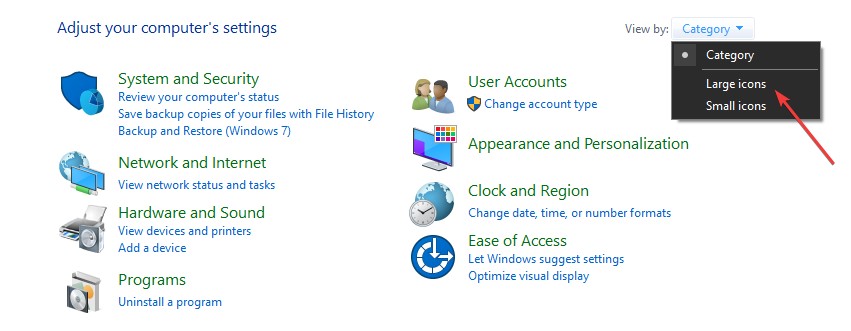
- In the Start menu search bar, type Control Panel and choose the best match.
- Select Large icons from the View by drop-down menu.
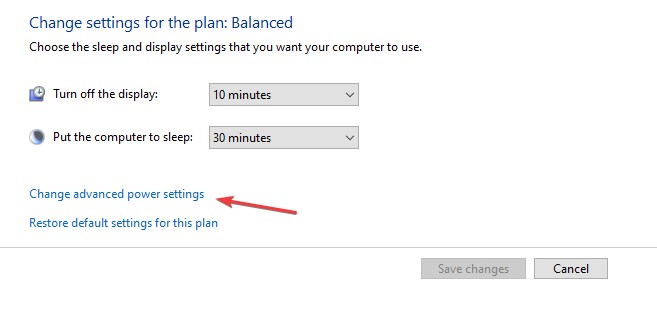
- Click on Power Options> plan settings
- Select the Change advanced power settings option in the following options.
- Locate & expand the USB settings on the Power Options panel.
- Disable both the On battery and Plugged in choices in the USB selective suspend configuration.
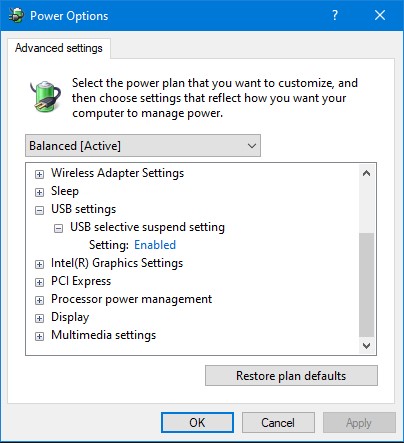
- Click on apply> OK> Restart PC.
5. Run the Troubleshooter for Hardware and Devices
This problem can be resolved with the Hardware and Devices troubleshooter. Here are the steps you can take to get started:
- In the Start menu search bar, type Troubleshoot and choose the Best Match option.
- Press the Run the troubleshooter button after selecting Hardware and Devices.
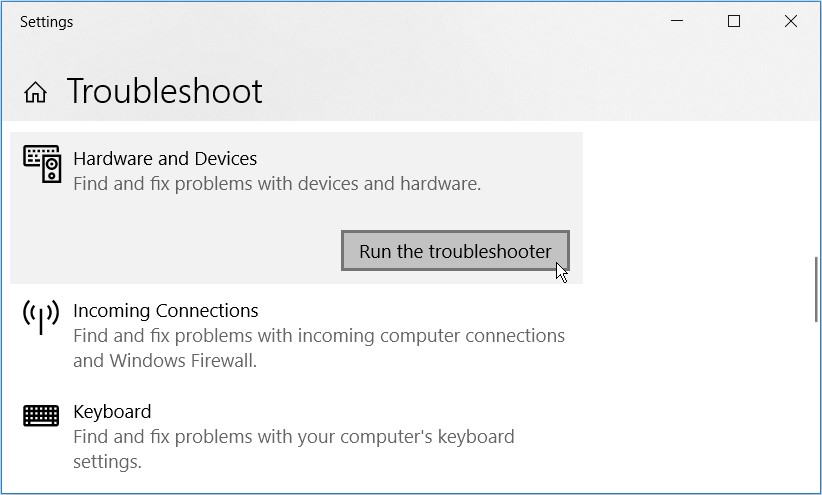
- Close the troubleshooter and restart your computer after the procedure is finished.
6. Make use of the DISM & SFC Programs
This problem might be caused by corrupted system files. In this situation, you can use the DISM & SFC tools to fix it.
To begin, run the DISM tool by following these instructions:
- Type CMD in the Windows key + R combo box.
- To launch an elevated Command Prompt, press Ctrl + Shift + Enter.
- Press Enter after typing the following command:
DISM /Online /Cleanup-Image /ScanHealth
- When the scan is finished, type and hit Enter the following command:
DISM /Online /Cleanup-Image /RestoreHealth
- When the scan is finished, restart your computer.
- Then, like in the previous stages, open the Command Prompt. Run an SFC scan by entering and hitting Enter the following command:
sfc /scannow
- Close the Command Prompt & restart your computer after the scan is finished.
Conclusion:-
In this post, we have gone through 6 different approaches to deal with the USB constantly disconnecting problem. However, if you still can’t access your USB drive after fixing the USB keeps disconnecting problem, you should use Advanced Driver Updater to update all the outdated drivers on your computer so that you enjoy the optimized performance and also the issue like USB Keeps Disconnecting are resolved.


Leave a Reply