Have you ever felt the need to block certain websites on your iPhone or iPad? Maybe you want to protect your kids from inappropriate content, or maybe you want to avoid distractions and stay focused on your work. Whatever the reason, blocking websites on iOS devices is not as hard as you might think. In fact, there are several ways to do it, depending on your preferences and needs.
In this blog post, we will show you how to block websites on iPhone and iPad using different methods. Let’s get started!
Why Block Websites on iPhone and iPad?
There are many reasons why you might want to block websites on iOS 16 and other popular versions. Here are some of the most common ones:
- Parental control: If you have children who use your device, you might want to limit their access to certain websites that are not suitable for their age or interest.
- Productivity: If you use your device for work or study, you might want to block websites that are distracting or time-wasting like entertainment sites, shopping sites, etc. to enhance focus.
- Privacy: If you share your device with others, you might want to block websites that contain sensitive or personal information. For example, you might want to block banking sites, email sites, social media sites, etc.
Also Read: Best Parental Control Apps
| Quickly block websites on your iPhone with this short video tutorial. No need to read the whole blog, just watch and learn!
|
3 Ways to Block Websites on iPhone and iPad
1. How to Block Websites on iPhone and iPad Using Screen Time?
One of the easiest ways to block websites on iPhone and iPad is to use the Screen Time feature in the Settings app. Screen Time is a tool that lets you monitor and manage your device usage, including the websites that you visit. You can use Screen Time to block all adult websites, limit access to a list of pre-approved websites, or block specific websites by adding them to the NEVER ALLOW list. You can also block websites with explicit language and protect the settings with a passcode.
Here’s how to block website on iPad and iPhone:
STEP 1 = Launch the Settings app on your iPhone or iPad and tap Screen Time.
STEP 2 = If it’s not already activated, flick the Content & Privacy Restrictions toggle on and then tap Content Restrictions.
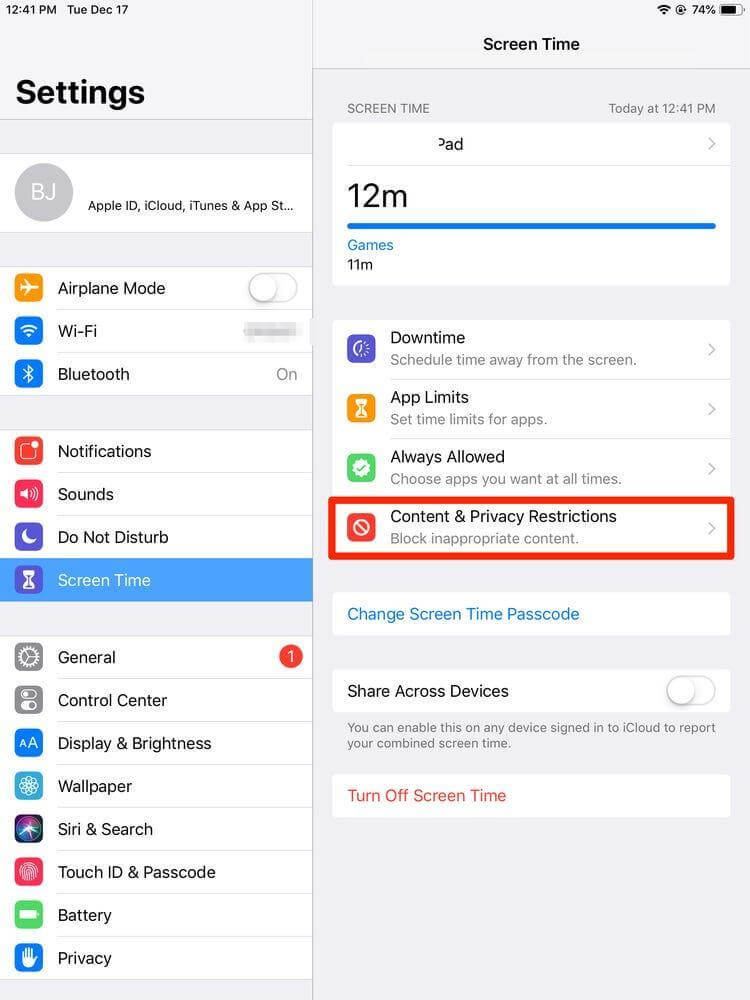
STEP 3 = Tap the Web Content option.
STEP 4 = You will see three options: Unrestricted Access, Limit Adult Websites, and Allowed Websites Only. Choose the one that suits your needs.
Unrestricted Access: This option allows access to all websites without any restrictions.
Limit Adult Websites: This option blocks access to adult websites automatically based on Apple’s list. You can also add or remove specific websites from the ALWAYS ALLOW or NEVER ALLOW lists manually.
Allowed Websites Only: This option blocks access to all websites except those that are on the list of allowed websites. You can add or remove websites from the list manually.
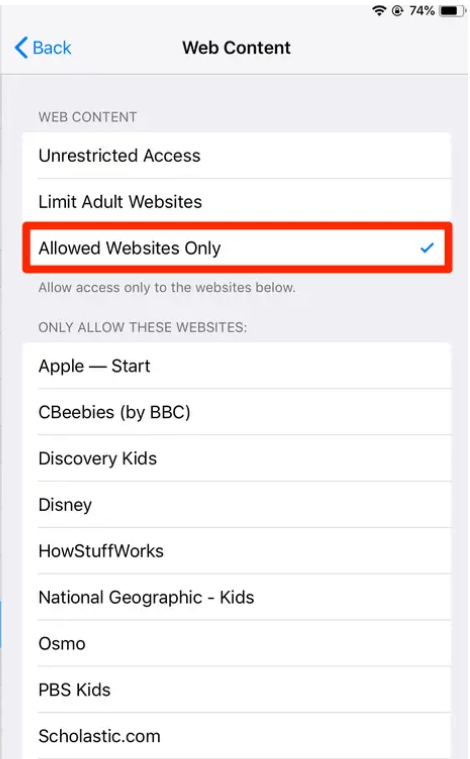
STEP 5 = To add or remove a website from the ALWAYS ALLOW or NEVER ALLOW lists, tap Add Website under the respective section and enter the URL of the website. Tap Done when finished!
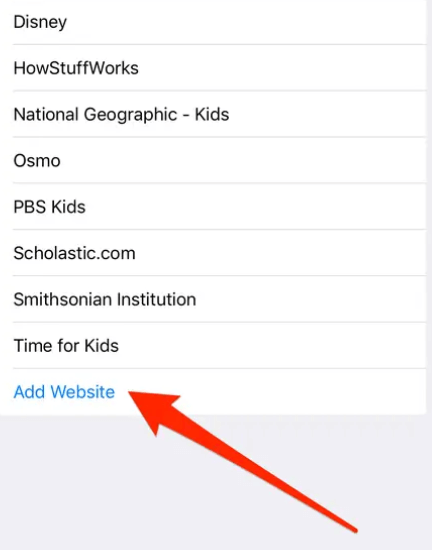
STEP 6 = To add or remove a website from the list of allowed websites, tap Add Website under ALLOWED WEBSITES and enter the URL of the website. Tap Done when finished!
STEP 7 = If you want to block explicit language in web searches, tap Siri & Search under Content Restrictions and toggle off Explicit Language.
Additionally, to protect your settings with a passcode, tap Use Screen Time Passcode under Screen Time and enter a four-digit code.
That’s it! You have successfully blocked websites on iPhone and iPad using the Screen Time feature.
2. How to Block Websites on iPad & iPhone Using Safari?
Another way to restrict websites on iPhone and iPad is via Safari browser settings. Safari has a built-in feature that lets you block pop-ups, cookies, cross-site tracking, fraudulent websites, camera access, microphone access, location access, and notifications from certain websites.
Here’s how to block access to specific websites on iPad and iPhone using your favorite browser:
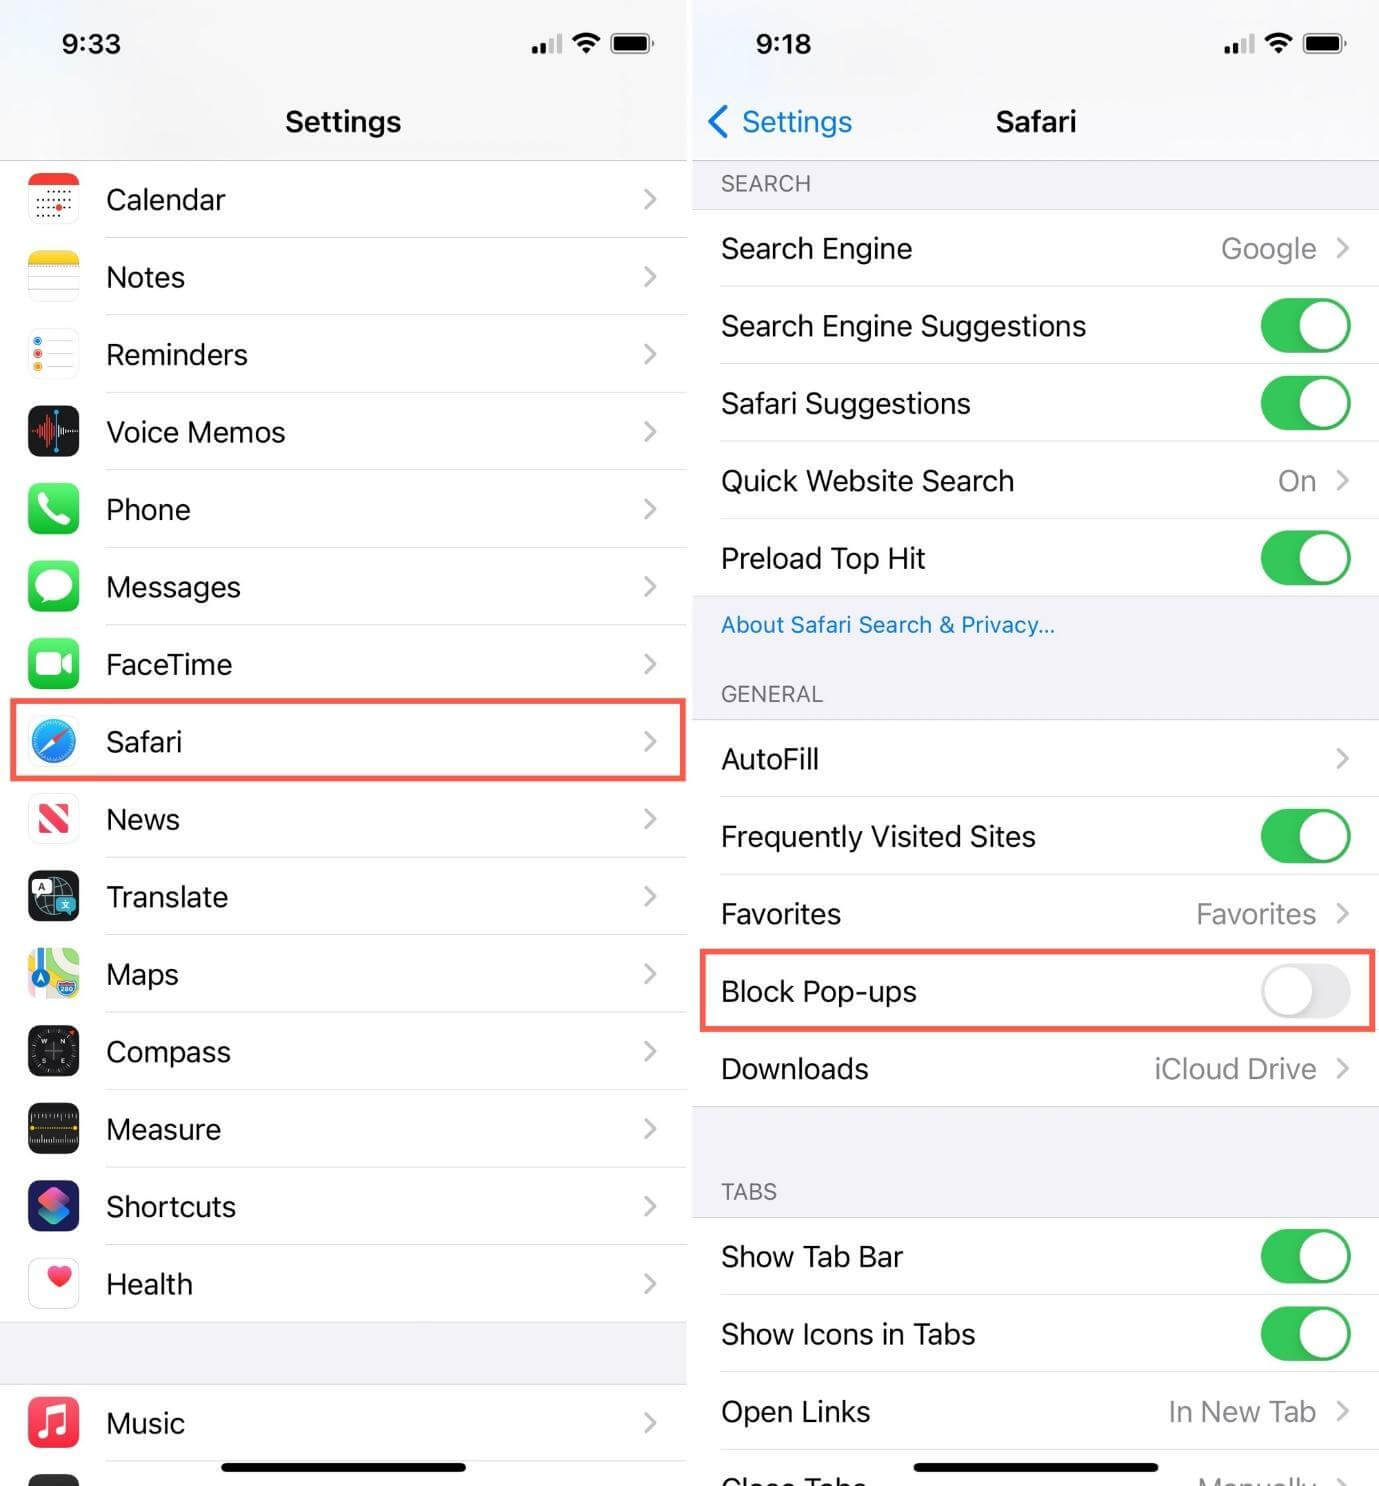
STEP 1 = Launch the Settings app on your iPhone or iPad and scroll down until you see Safari.
STEP 2 = Scroll down until you see General.
STEP 3 = Under the General tab, you will see several options that let you control how Safari behaves with different websites. Toggle on or off the options that suit your needs.
- Block Pop-ups: This option blocks pop-up windows from appearing when you visit certain websites.
- Prevent Cross-Site Tracking: This option prevents third-party trackers from collecting data about your browsing activity across different websites.
- Block All Cookies: This option blocks all cookies from being stored on your device by any website.
Moreover, you can scroll down until you see Privacy & Security which lets you protect your privacy and security when browsing the web. Toggle on or off the options that suit your needs.
- Fraudulent Website Warning: This option warns you when you visit a website that is suspected of phishing or malware.
- Camera & Microphone Access: This option controls whether websites can access your device’s camera and microphone.
- Location Services: This option controls whether websites can access your device’s location.
- Notifications: This option controls whether websites can send you notifications.
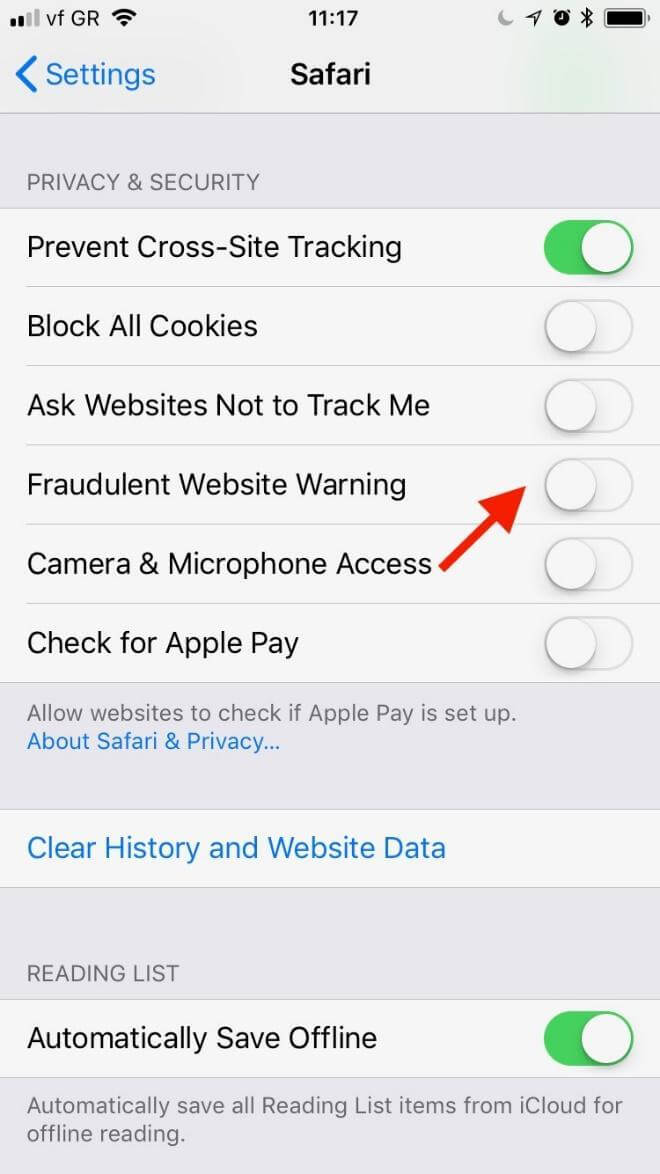
That’s it! You have successfully blocked websites on iPhone and iPad using Safari.
3. How to Block Websites on iPhone and iPad Using Third-Party Apps?
The third way to block websites on iPhone and iPad is to use third-party apps that are designed for this purpose. There are many apps available on the App Store that let you block websites on your device, such as FamiSafe, Freedom, 1Blocker, etc.
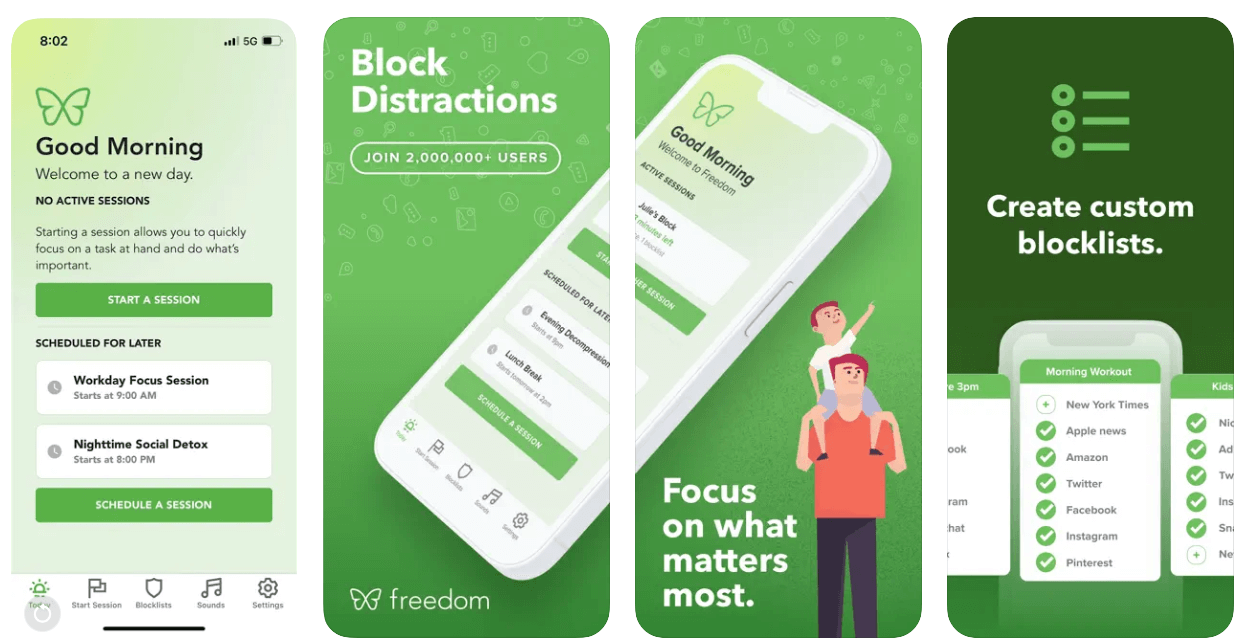
These apps have different features and functions, such as blocking websites by category, blocking websites by time, blocking websites by keywords, blocking websites by device, etc. You can choose any of the website blocking app that best suits your needs and preferences.
Enjoy browsing the web without any unwanted or harmful websites!
| Writer’s Tip: Bonus Tip to Safeguard Your iPhone and iPad Using Lockdown Mode
If you want to take your online security to the next level, you can use Lockdown Mode, which is a new feature introduced in iOS 16. Lockdown Mode is a mode that helps users protect themselves against targeted cyber-attacks by disabling multiple device and web features that could be used for spying or tracking. Lockdown Mode is intended for users who may be targeted by sophisticated espionage threats, so it may not be suitable for everyone. Here’s how to do it: STEP 1 = Launch the Settings app on your iPhone or iPad and tap Privacy. STEP 2 = Tap Lockdown Mode. STEP 3 = Toggle on Lockdown Mode to activate it. You will see a list of features that will be disabled when Lockdown Mode is on. Disabled Features Include: ● Just-in-time JavaScript compilation ● WebAssembly ● MP3 playback ● Gamepad API ● File previewing ● WebGL ● Speech Recognition API ● Web Audio API STEP 4 = To exit Lockdown Mode, toggle it off or restart your device. Please note that Lockdown Mode is not a regular method of blocking websites on iPhone and iPad, but rather a special mode for users who face serious cyber threats. Lockdown Mode may affect the performance and functionality of some websites and apps, so use it with caution and only when necessary. |
Blocking Websites on iPhone/iPad: A Smart Way to Protect Yourself and Your Loved Ones
Blocking websites is an effective way to prevent yourself from online threats and distractions. You can use any of the methods mentioned above to block websites on your iOS device, depending on your needs and preferences. Whether you want to block adult websites, limit access to certain websites, or block specific websites, you can do it with just a few taps.
If you have any questions or feedback, please feel free to leave a comment below. Happy browsing!
NEXT READ:
- Want to access blocked websites instead? Here are the ways to do that!
- 10 Best iPad & iPhone Antivirus Apps In 2023
- How to Stop Spam Calls on iPhone and Android


Leave a Reply