
“Write protected” Are you getting this message or error while saving or transferring any data or files from PC to USB drive? Have you tried to format write protected USB Pen Drive but it says, ‘write protected’? This is possible as some pen drives, and USB flash storages are designed to prevent unexpected data loss. When this error pops up, it refers to refusing to delete or format data into that drive. Don’t worry, if you are seeing an error or message “The Disk is write-protected” while transferring data from PC to Pen drive, below are the simple ways to remove and format write-protected USB pen drive in an easier way.
How To Check If The Disk Is Write-Protected Or Corrupted?

Before we go ahead, make sure that your USB pen drive is not corrupted and should be genuinely write-protected. Below are some points to check your USB pen drive is corrupted:
- If your pen drive is not detected in your PC or laptop, it might be defective and can’t be fixed.
- If you are using a USB drive or SD card in your PC or laptop and a message pops up “Drive is Corrupted”.
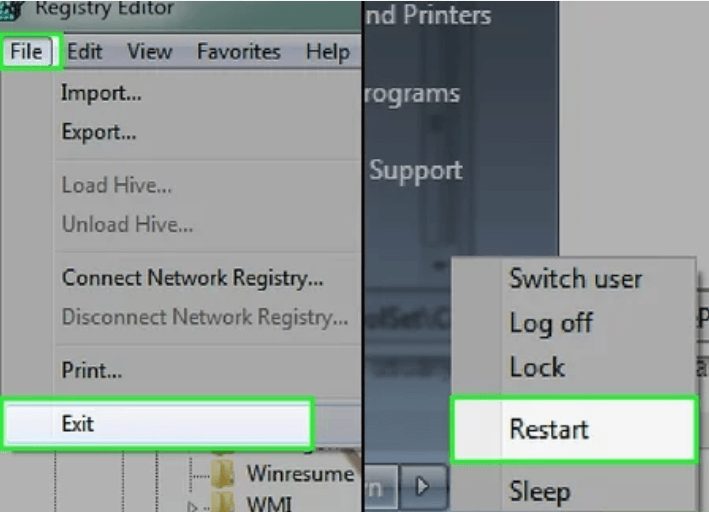
Remove Write-Protected On Pen Drive Using Regedit.exe
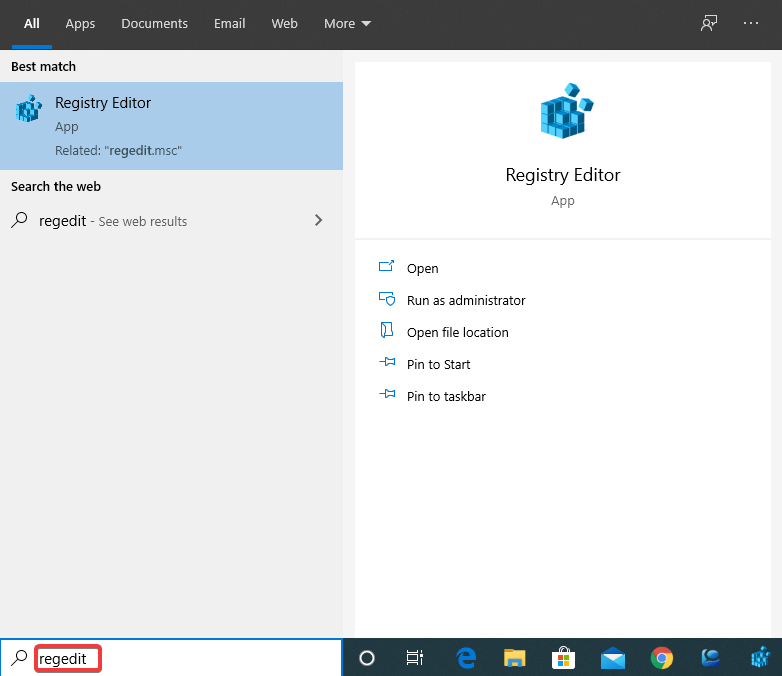
- On your PC or laptop, click on “Start” and in the search bar, type “Regedit”, select it and open it.
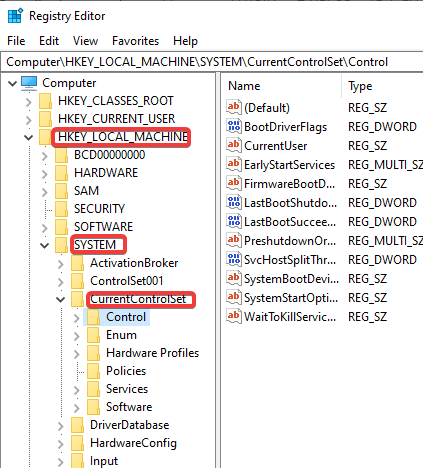
- Once the Regedit app opens, locate “HKEY_LOCAL_MACHINE” from the left corner then select “SYSTEM” > “CurrentControl Set” > “Control”.

- Select “StorageDevicePolicies” and do the double click to open it to display all the contents. If you are unable to see any folder, create a new project. Perform a right-click on the blank area of the right panel to open the context menu. Select New from the key menu, then type StorageDevicePolicies and again click on the blank area to save a new key. Now, perform a right-click on the blank area again and select New > DWORD. Write WriteProtect and click anywhere to save DWORD.
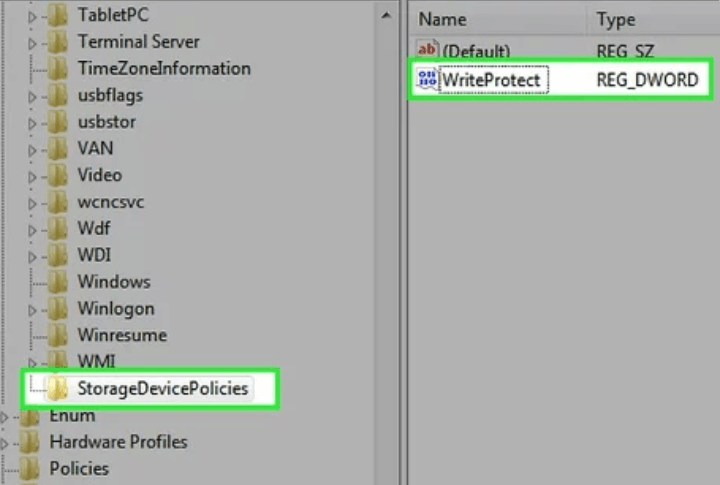
- Do a double click on “Write Protect” from the right column and a dialogue box will appear.
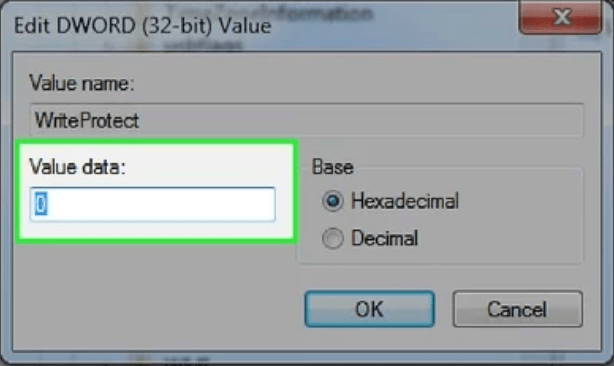
- Enter the value data as “0” and select OK.
- Close the Registry Editor and restart your PC or laptop.
- Now, connect your pen drive in your PC or laptop and open File Explorer. Do a right-click on your pen drive > Format > Quick Format > Start. This will format write-protect USB drive and erase all its contents.
Also Read: How to Fix USB Not Working in Windows 10
Remove Write-Protected On Pen Drive Using Diskpart
- Insert your Pen drive in your PC or laptop and do a right-click on the Start menu, select Run and type “diskpart” and press enter.
- Diskpart command prompt windows will open and type list disk and press enter. All the drives including your pen drive will appear in the window.
- Now, every drive is labelled with a disk number, identify your USB drive and type select disk #, press enter. Replace # with your pen drive number.
- Now, type attributes disk clear read only and press enter. From this method, it will remove write-protected status from your pen drive.
- To format USB stick, type clean and press enter, and it will remove all the data from your pen drive.
- Now, type create partition primary and press enter. To create a partition on your USB drive.
- And then, type format fs=fat32 or format fs=ntfs and press enter. That command will remove everything and make it read-only for your PC or laptop.
- At last, type exit and press enter to return in standard command prompt. And you will be able to use your pen drive normally.
Remove Write-Protected On Pen Drive Using Disk Utility(Mac Only)
- Insert your pen drive in your Mac and open Finder.
- Select the Applications > Utilities > Disk Utility.
- Now, select your pen drive from the left panel of Disk Utility and select Erase (on the top of Disk Utility window).
- You can enter the drive name (optional) and select the file system type from the “Format”
- Now, click on the Erase button and your Mac will reformat write-protected pen drive and allow the user to share and permissions status to “read and write”.
We have mentioned above all the steps to format flash drive (write-protected) and if any of the steps are not working, we suggest you contact your pen drive manufacturer websites or support pages and forums to find the links of that tools that have confirmed to work with the USB device.
We suggest users to try all the above steps to format write-protected pen drives and if you have any questions or suggestions, feel free to mention in the comments section below.


Leave a Reply