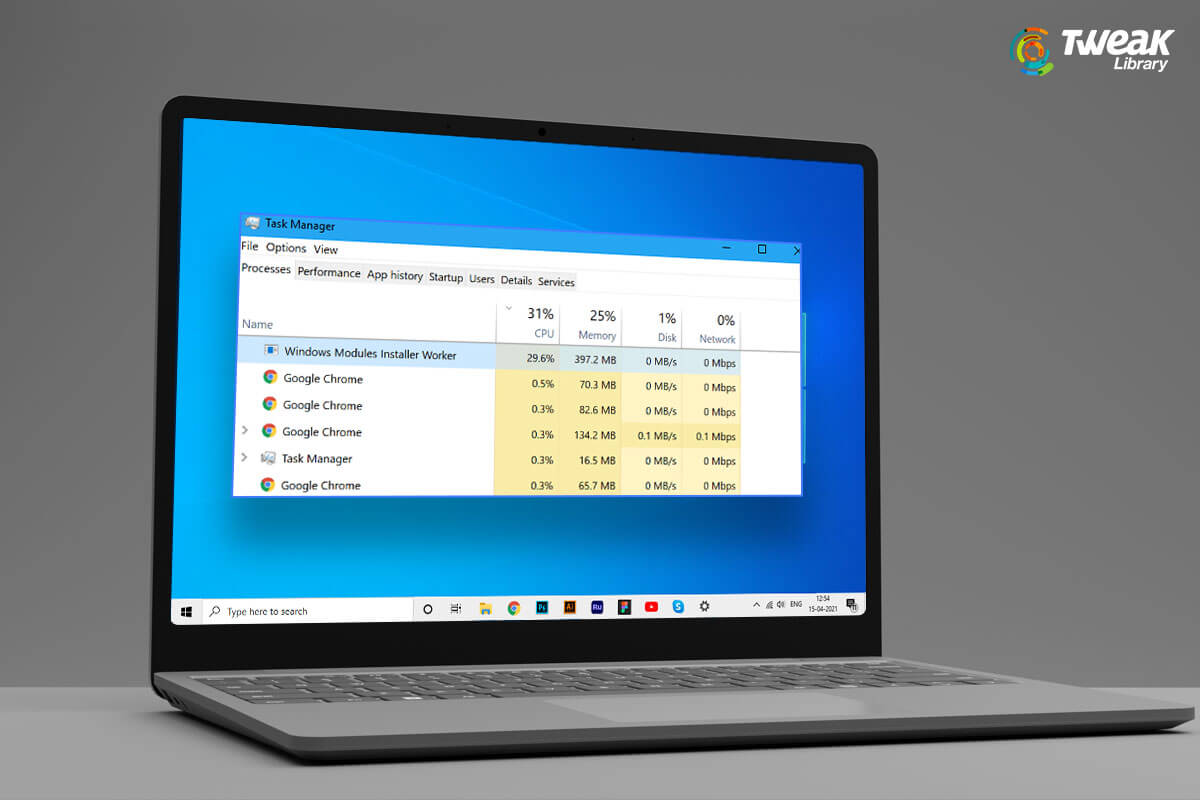
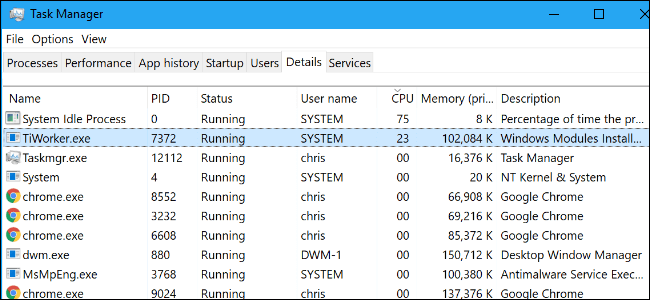
Being a Windows user, you must be aware of the fact that Windows updates automatically, but only a few know how this happens. Well, a process known as Windows modules installer (TiWorker.exe) is responsible for it. It is a system process that enables automatic installation and modification of Windows updates.
This means to get Windows updated automatically this process is essential, if that is the case why does it consume high CPU resources? To answer this question we bring this troubleshooting guide that will help understand all about Windows Modules Installer and how to fix 100% of CPU usage caused by this file.
What is Windows Modules Installer Worker or Tiworker.exe?
As discussed, it is a tool that checks for Windows updates automatically. But sometimes, it messes up with the PC’s performance and slows down everything, taking up enough CPU and memory space. Due to this behavior, most users think it is malware and try to remove it. But this is not how things work. To understand how to fix 100% disk usage caused by Windows modules installer, read further.
Why Windows Modules Installer Worker Causes High CPU Usage?
Windows Modules Installer causes 100% Disk Usage or High CPU due to the constant search of updates. Generally, we set the updates to be installed at night but since the system is turned off that cannot happen. Due to this, Windows Modules Installer sometimes runs in loop finding updates thereby consuming enough CPU resources.
Is Windows Installer Worker a virus?
The clear answer is No. It is just a part of Windows used for updates. So, don’t confuse it with a virus. In case you don’t trust what we are saying you can try running an antivirus program to scan the system for malware. For this, you can give Systweak Antivirus a try.
This best security tool for Windows offers real-time protection, malware protection, exploit protection, and web protection. Moreover, it also scans startup items for infections and its database definitions are updated regularly.
To use Systweak Antivirus, follow the steps below:
1. Download and install Systweak Antivirus

2. Launch the protection tool and click Scan Types from the left pane.
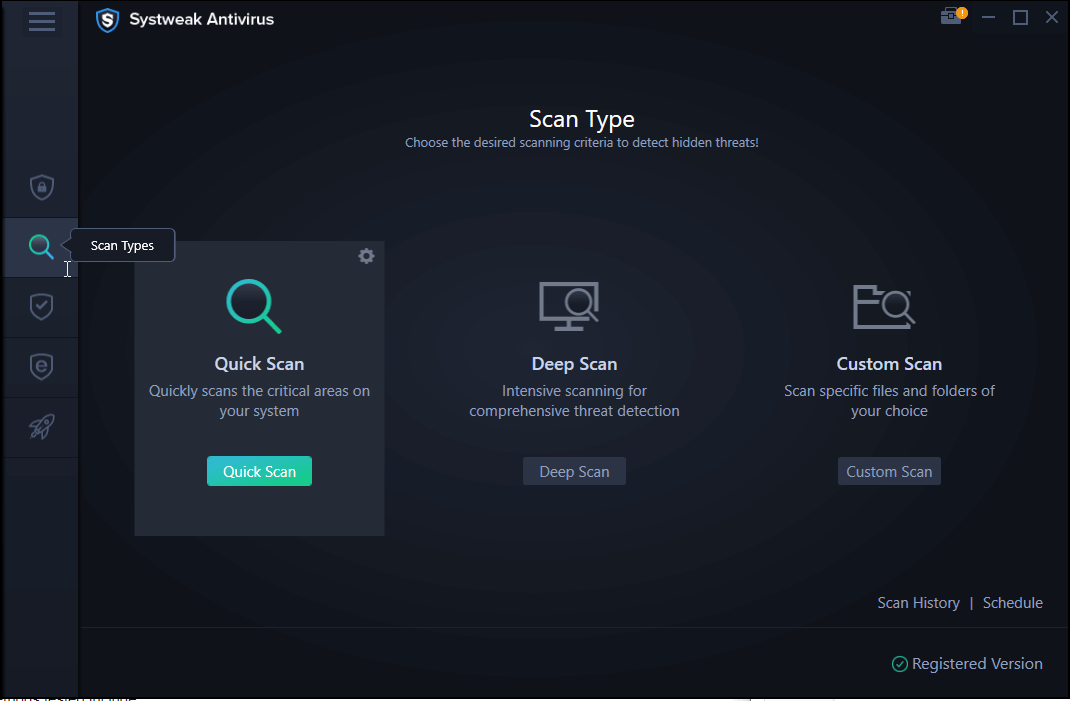
3. Here you will see three scan types – Quick, Deep and Custom. You can pick any as per your choice. However, if this is the first time you are scanning the system for infection we suggest running Deep Scan.
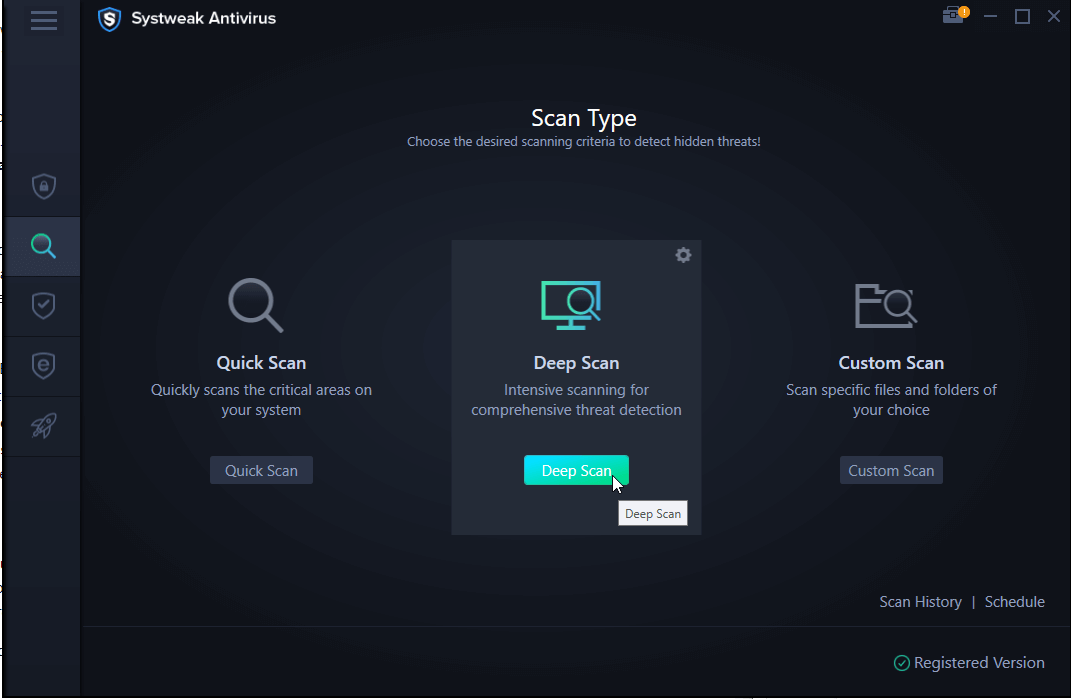
4. Hit the Deep Scan button and wait for the scan to finish.
Note: Since Deep Scan is in-depth and thorough, it is time-consuming. So, use it when the system is in an ideal state. Meanwhile, you can run Custom Scan on the C drive (on which your Windows is installed.)

5. Once the infections are detected, click Protect Now to Quarantine threats.
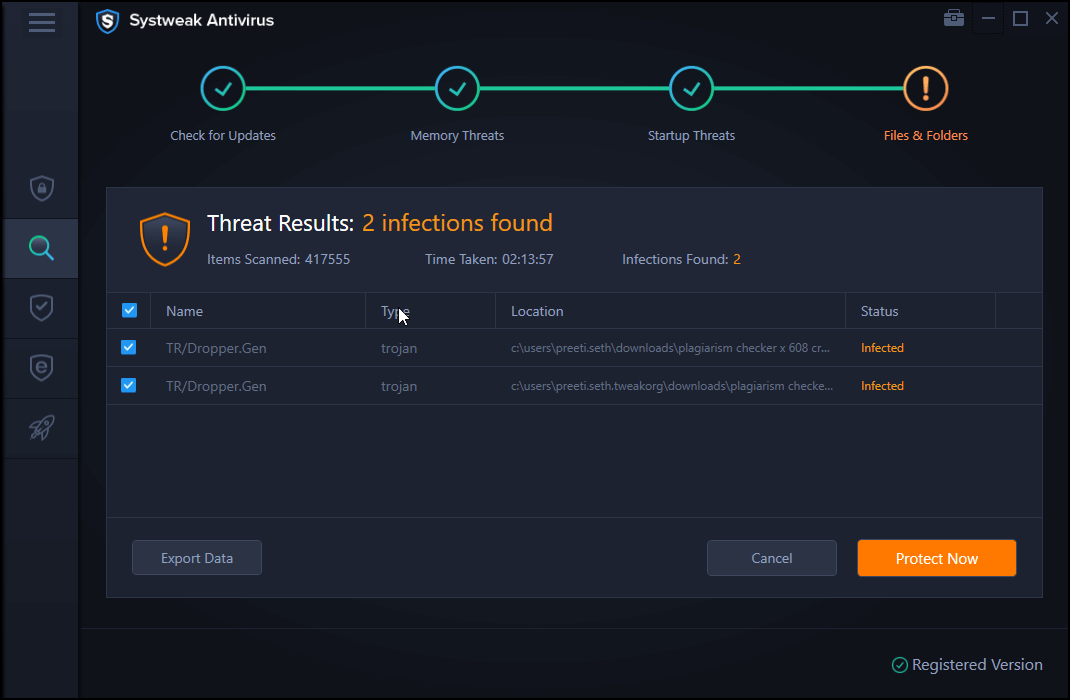
6. Restart the system, to apply changes
Check if this helps.
Fixes to solve High CPU Usage Windows Modules Installer Worker
1. Stop Windows automatic updates
To fix Windows modules installer worker high disk usage the first thing you should do is, disable automatic updates. To do so, follow these steps:
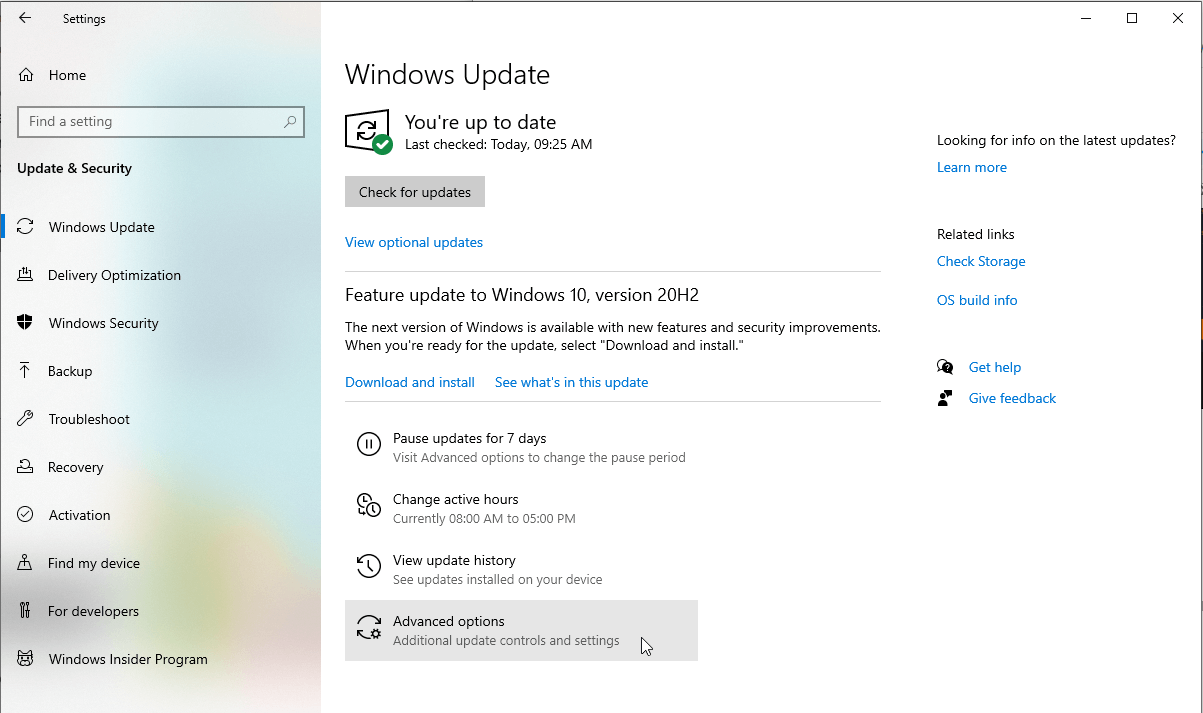
1. Press Windows + I to open Windows settings
2. Click Update & Security > Windows Update > Advanced Options
3. In the consecutive window look for the Pause Update option > click the down arrow next to it and select the date till you want to disable updates.
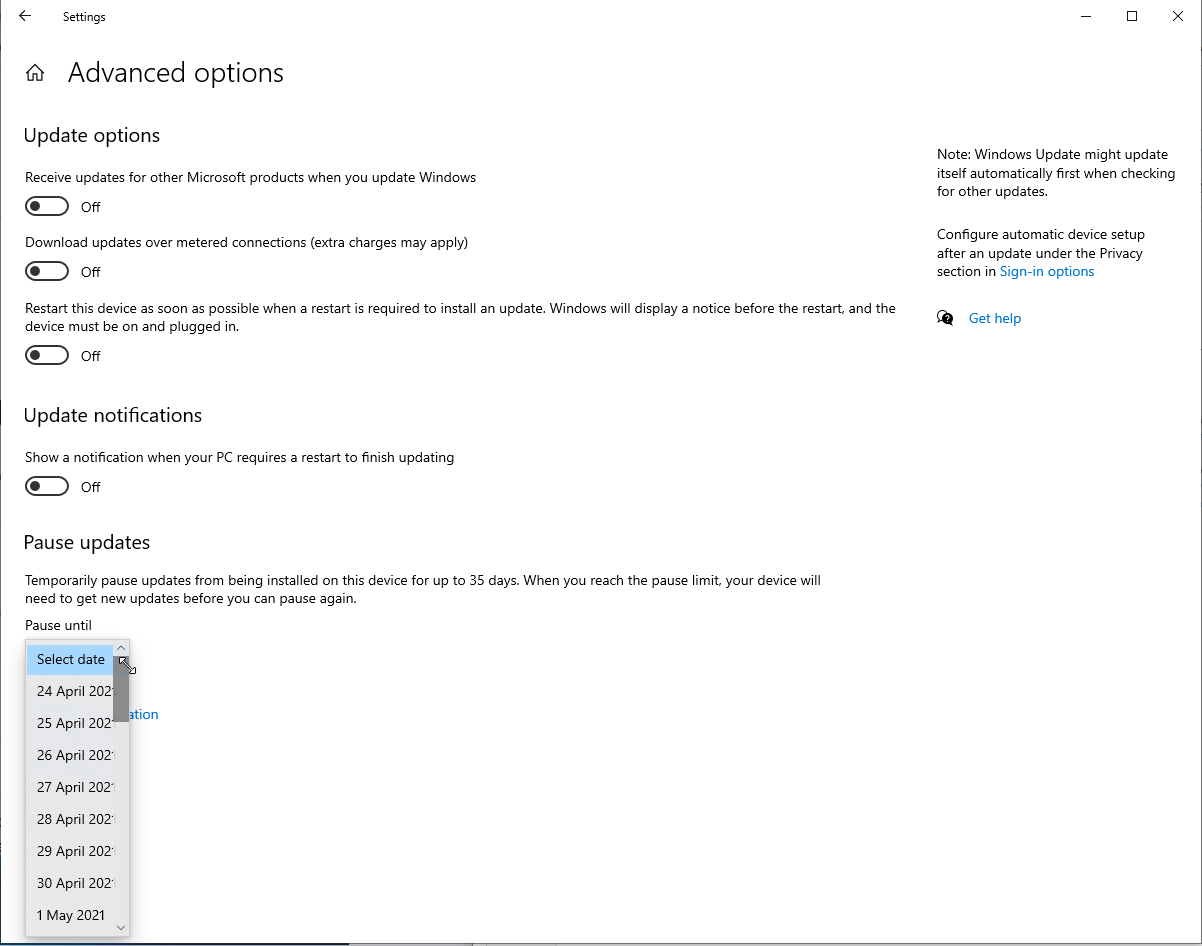
4. Doing so will pause Windows updates from downloading automatically till the date specified.
2. Run Windows troubleshooter
Sometimes, when system files or downloaded Windows update files get corrupted, High CPU usage occurs. To fix such issues Windows offers an in-built troubleshooter. To use it and fix such files, follow the steps below:
1. Press Windows + I to open Windows Settings
2. Click Update and Security > Troubleshoot from the left pane
3. Additional troubleshooter > Windows Update > Run the troubleshooter
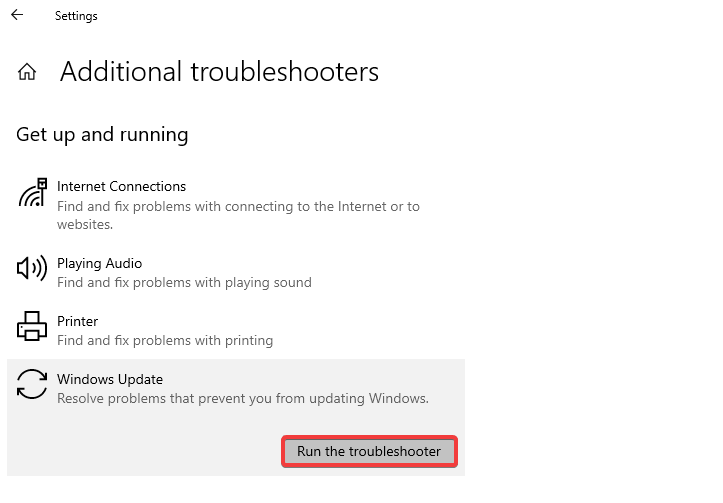
4. Windows will now scan the file, if any issues are detected follow the on-screen instruction to apply fixes.
5. Thereafter, restart the system and check the High CPU usage problem should now be fixed.
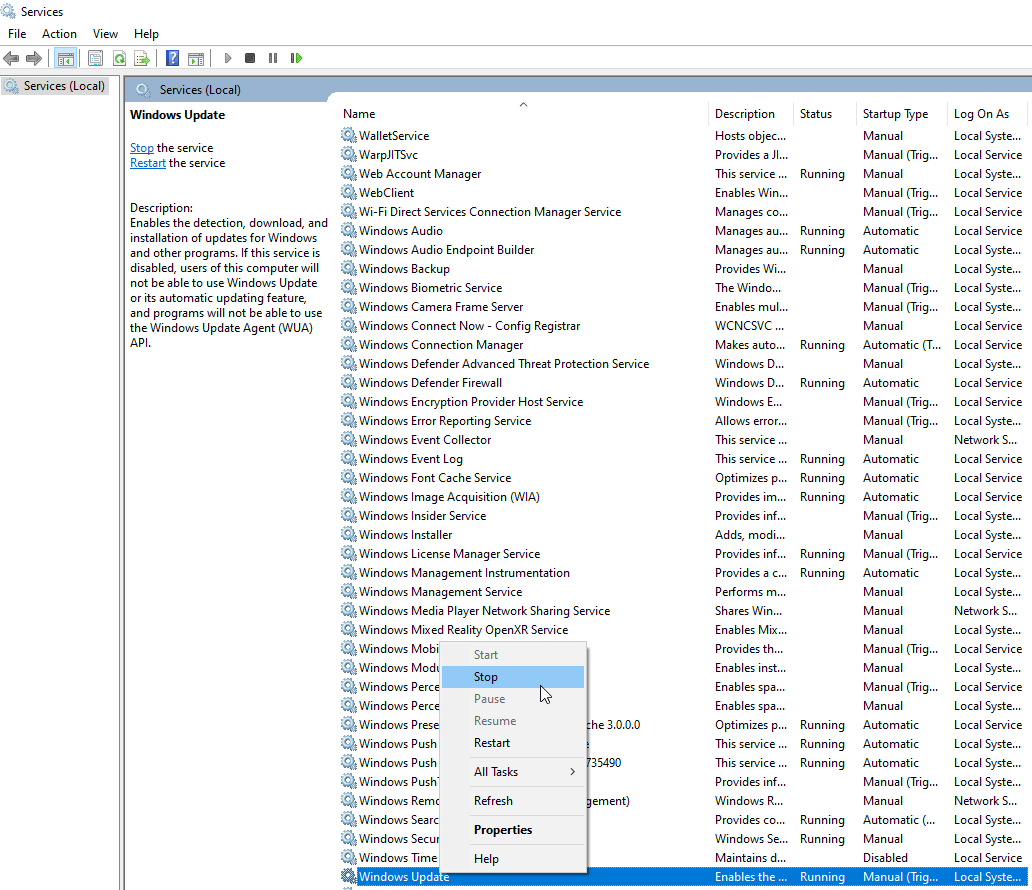
3. Delete the SoftwareDistribution folder
To do so, you will need to stop the Windows Update service for this, follow the steps below:
- Press Windows + R to open Run window
- Type services.msc > Ok
- Look for Windows Update > right-click Stop
Now that the Windows Update is stopped, exit the Services window and move ahead to delete the SoftwareDistribution folder.
- Launch File Explorer and head to – Local Disk (C:) > Windows
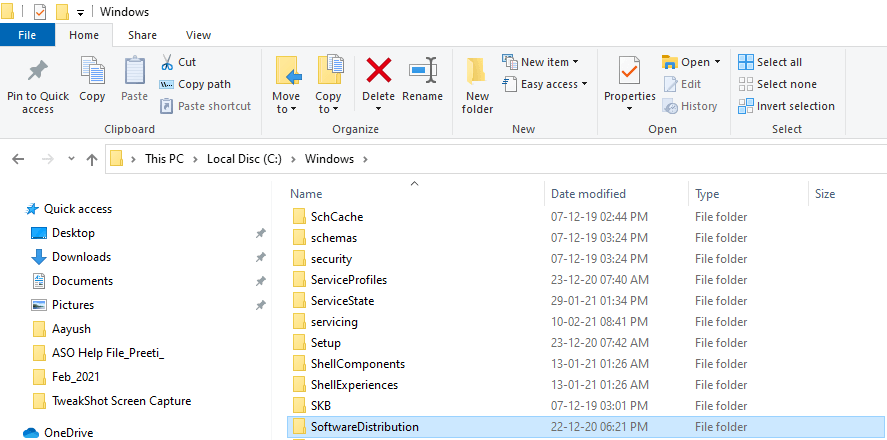
2. Search for SoftwareDistribution folder > right-click > Delete
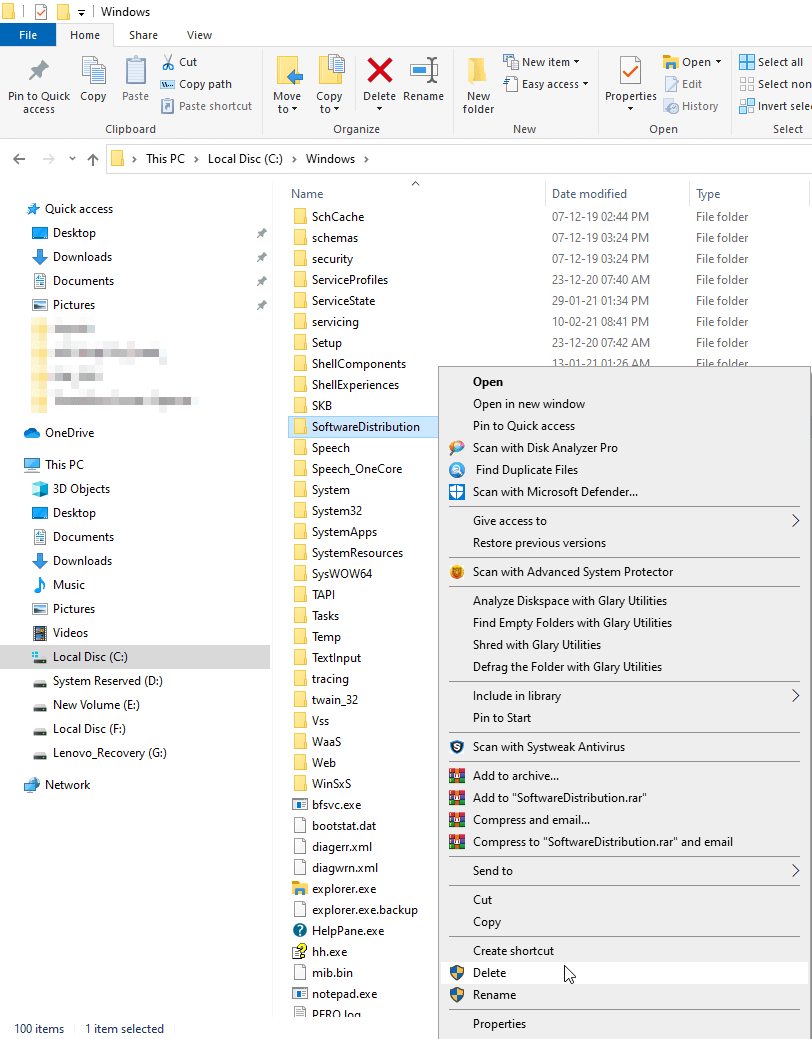
3. Restart the system and check for the update by heading to Windows Settings by pressing Windows key + I. > Update and Security > Windows Update > Check for Update.
Additional Tip:
Sometimes when the Windows update service isn’t running properly, then a Windows installer worker might consume enough resources. To fix this problem, restarting the Windows Update service is recommended. To do so press Windows + R > type services.msc in the Run window > Look for Windows Update > right-click Stop > wait for about 30 seconds > right-click Start.
Now, check the High CPU Usage problem should be resolved.
We hope this article answered your question, “what is Windows modules installer worker and how to fix High Disk Usage on Windows 10. By applying the fixes listed above you can fix the Windows modules installer worker high CPU problem. Do let us know which solution works best for you. Also, share your feedback in the comments section below.


Leave a Reply