You must have landed on this post as you have been looking for a way to fix the IDT High Definition Audio Codec error on Windows 10. If yes then you have come to the right place.
Here we will discuss how to resolve the common IDT High Definition Audio Codec – “Windows encountered a problem installing the driver software for your device.”
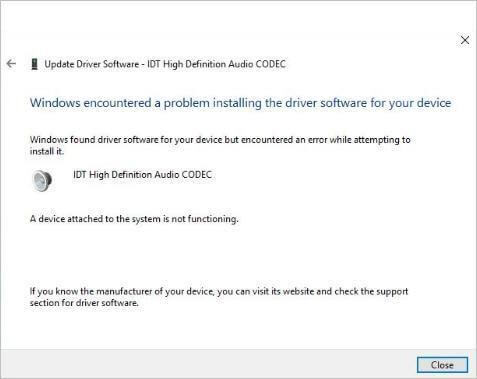
After upgrading to Windows 10 or installing updates, most users complain that they have started encountering the IDT High Definition Audio CODEC problem. This error results in no sound.
Luckily, there are ways to Fix the IDT High Definition Audio Codec issue and get back the audio. To learn what are the ways to read the post till the end.
Also Read: Best Ways to Fix OBS Desktop Audio Not Working
How to Fix IDT HD Audio Error – Windows 10
To fix the outdated IDT High Definition Audio Codec driver, you don’t need to do much. Simply follow the steps and resolve the IDT audio driver issue.
Best Way to Fix IDT High Definition Audio Codec On Windows 10
If you are short on time and looking for a quick fix, you can use a third-party driver updating tool – Smart Driver Care & update IDT High Definition Audio Codec driver. In no time, this will help fix the problem, and you will be able to get the sound back on your Windows 10.
To learn how to use it, follow the steps below:
Click Here to Download Smart Driver Care
- Download and install Smart Driver Care.
- Run the driver updating utility for Windows.
- Click Scan Now to scan the system for outdated drivers.
- Wait for the scan to finish.
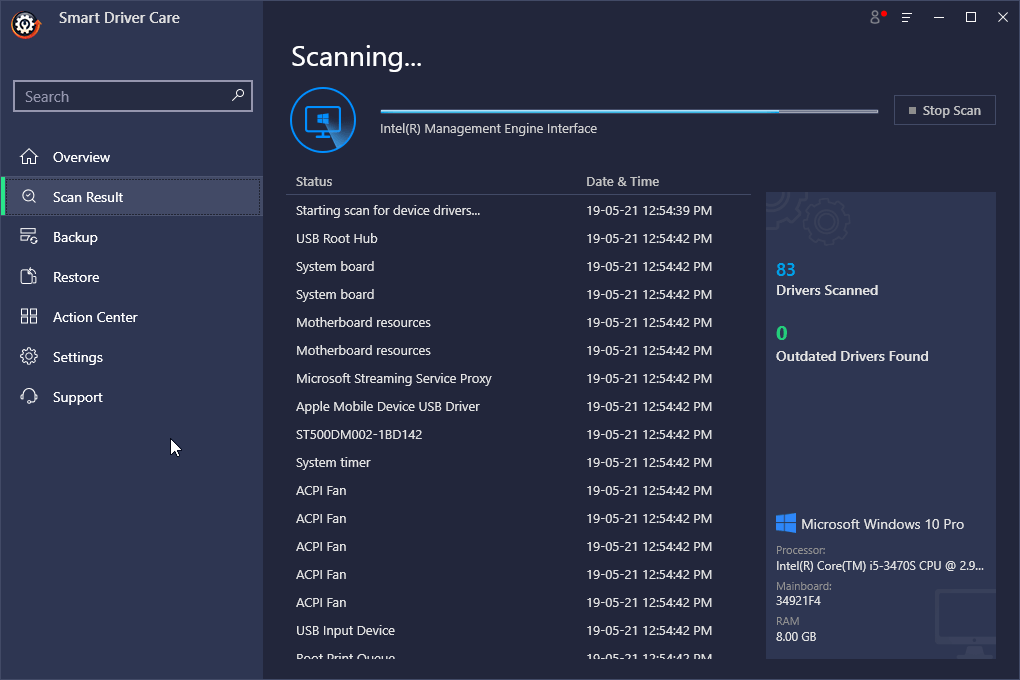
Once done, you will get a list of outdated drivers. Look for the audio driver and click the Update driver next to it.
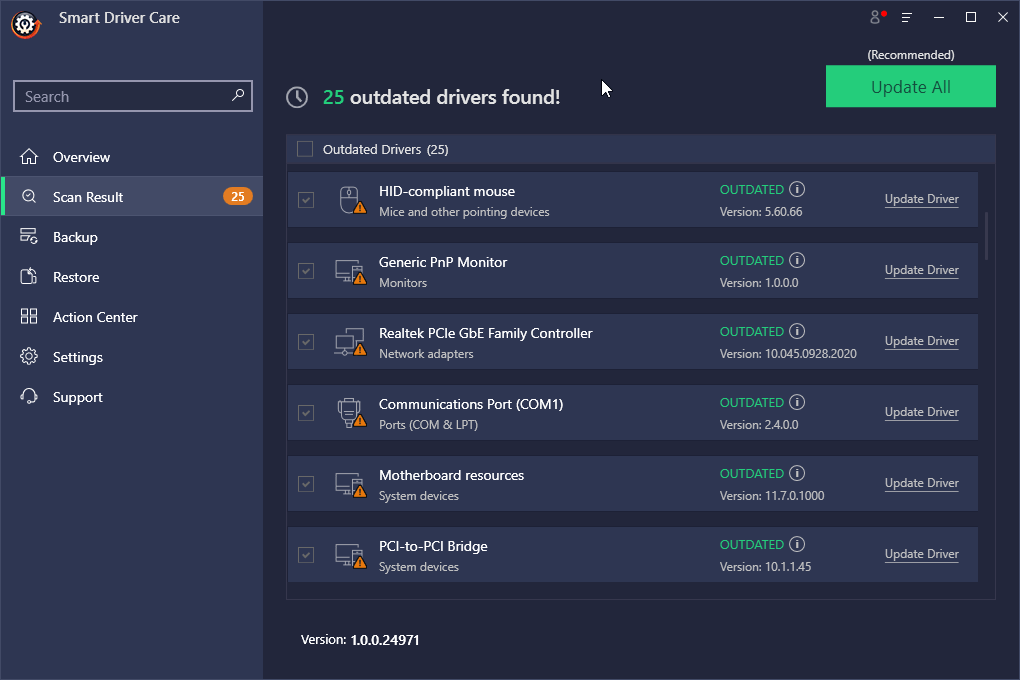
Note:- Using the trial version of Smart Driver Care, you can update only one driver at a time. However, if you upgrade to the registered version of this best driver updater, you can update all outdated drivers at once. Moreover, it comes with a 60-days money-back guarantee, giving you enough room to use the product and see how it works on your machine.
- Restart the system and see if the IDT Audio Codec driver will be solved.
Also Read: How to Fix Realtek HD Audio Manager Missing from Windows 10
Fix – IDT High Definition Audio Codec Issue
Option 1 – Reinstall IDT HD Audio CODEC Driver
To learn how to reinstall IDT HD Audio CODEC Driver on Windows 10, follow the steps below:
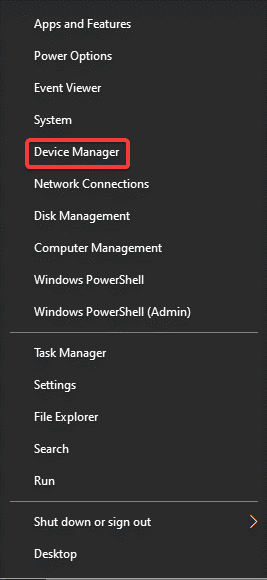
- Press Windows + X > select Device Manager

- You will now have the Device Manager window opened.
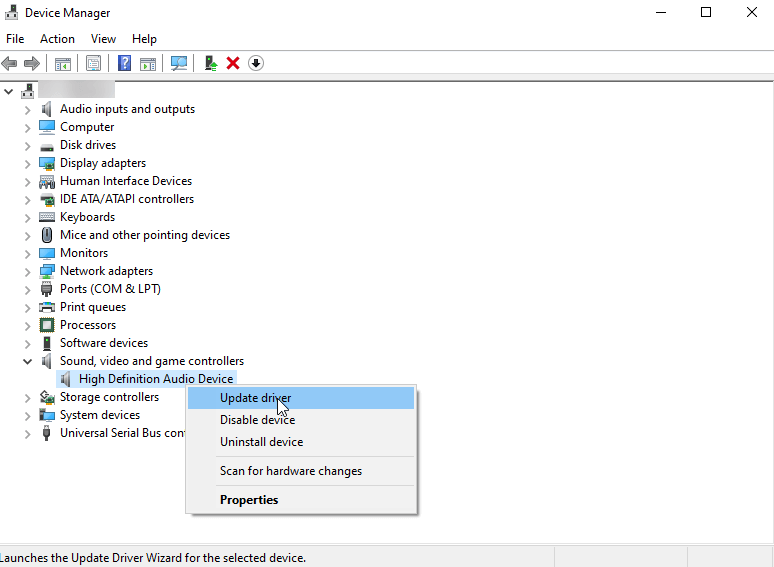
- Go to Sound, video, and game controller. Double click to expand the category.
- Right-click the High Definition Audio Device > Update driver.

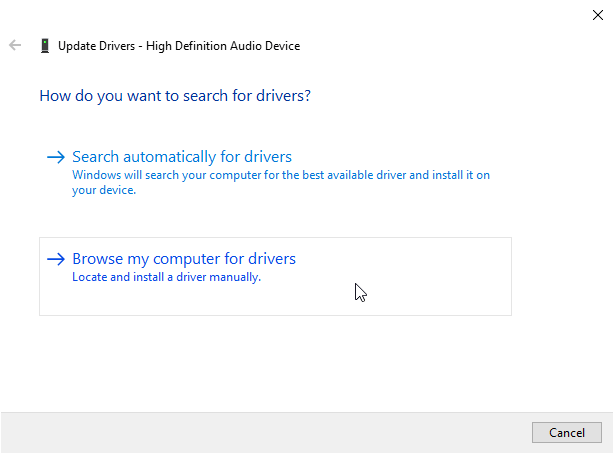
- In the new window that opens, select, “Browse my computer for driver software.”

6 Next select, “Let me pick from a list of available drivers on my computer.”
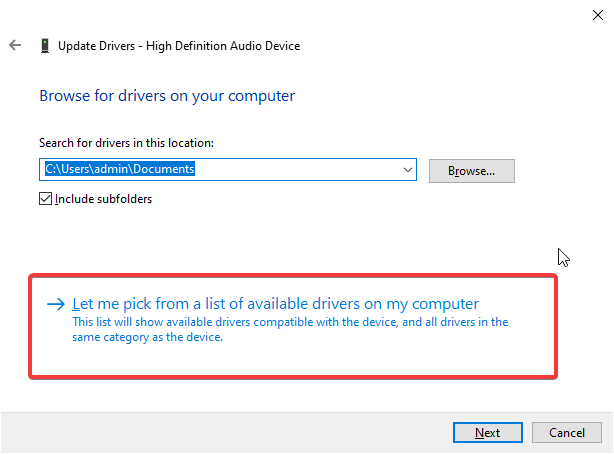
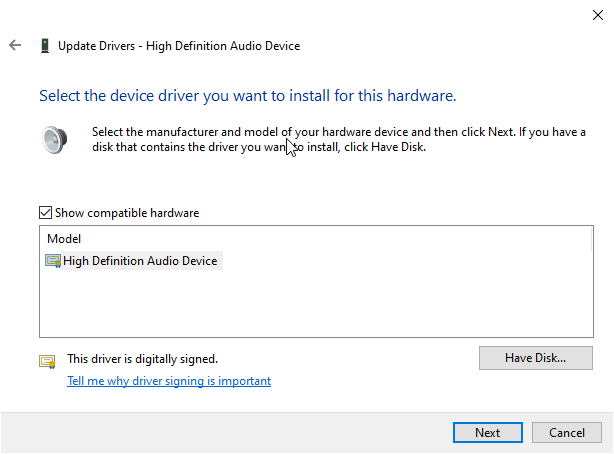
- Select High Definition Audio Device > Next

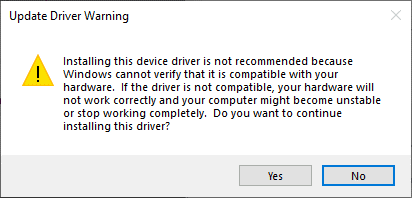
- This will show a warning message > click Yes to proceed and follow on-screen instructions.

- Doing so will reinstall the IDT HD Audio CODEC driver. Reboot the system, to check the problem with IDT High-Definition Audio Codec, which should now be fixed.
Option 2 – Install IDT High Definition Audio Codec in compatibility mode
Some drivers released for an older version of Windows are compatible with Windows 10. With that said, to resolve IDT High Definition Audio Codec on Windows 10, you can try installing the driver in compatibility mode. For this, you will first need to visit the manufacturer’s website and download the right driver for your operating system and the processor.
Once you have, follow the steps below to install IDT High Definition Audio Codec in compatibility mode.
- Go to the location where you have saved the downloaded driver.
- Instead of double-clicking the installer, right-click the setup file > Properties
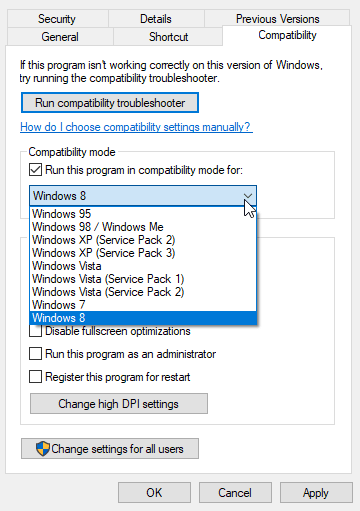
- Click the Compatibility tab > select Run this program in compatibility mode for
- Pick the older version of Windows from the drop-down list > Ok

- Now double-click the setup and follow on-screen instructions to install the driver.
Restart the system to complete the process. This should help fix the IDT High Definition Audio Codec driver issue.
Option 3 – Set Audio Service to Automatic
If none of the steps have worked so far, try updating the driver using Smart Driver Care, as explained at the beginning of the post. Doing so will help fix the IDT High Definition Audio Codec issue. However, if you are still not okay with it, try this last fix.
- Press Windows + R to open the Run window.
- Type services.msc > ok
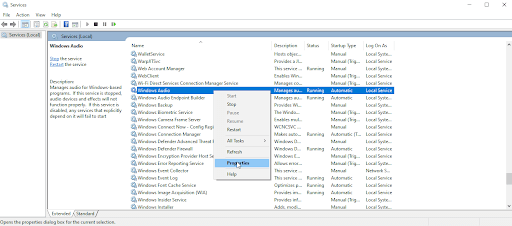
- Scroll down and look for Windows Audio > right-click > Properties

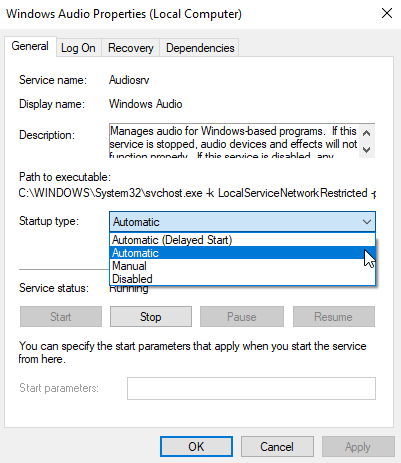
- In the subsequent window, click General tab > click the down arrow next to Startup, type select Automatic > or Automatic (Delayed Start).

- Click Start > Apply > Ok
- Repeat the above steps for Multimedia Class Scheduler and Windows Audio Endpoint Builder.
- Exit the Windows Service window > restart the PC.
Now try to play audio. The problem with IDT High Definition Audio Codec should be fixed.
Resolve IDT High Definition Audio CODEC driver problem
We hope using the steps explained above you are able to fix the problem with IDT High Definition Audio CODEC. For Windows 10 users this is a very common and frustrating problem as there’s no sound when this issue occurs. Using either manual solutions or using a powerful tool like Smart Driver Care, you can take care of the issue. If you are short on time and want to avoid the risk of downloading an incorrect driver, manually consider using the best driver updating utility offered by Systweak.
Do let us know which of the solutions worked for you to resolve the IDT High Definition Audio CODEC driver problem.
Next Read:
How To Merge Multiple Audio Files In Windows 10
Fix Device Driver Issues In Windows 10
How to Fix ” One or more Audio Service Isn’t Running” Error




Leave a Reply