Many of us use laptops for hours at a stretch, every single day. With constant wear and tear, your laptop battery is bound to weaken over a period. And, one of the evident signs that your laptop’s battery has become weak is when you start to see differences in the percentage of battery your laptop is showing and the actual amount of time it lasts.
For example, your laptop’s battery might show a good 75% (which means your laptop could last for at least 2 hours) but, surprisingly, it quickly drops down to 10%, and soon your laptop shuts off. The same happens, not just once, but every single time.
This is where you need to take matters into your own hands and calibrate your laptop’s battery. So, in this blog, we are going to look at ways you can calibrate Windows 10 laptop’s battery and finally, look at accurate battery readings on your laptop.
How To Execute Battery Calibration in Windows 10 Laptop?
Here we’ll discuss three ways, you can calibrate laptop battery in Windows 10 –
- Manually Calibrating Laptop Battery in Windows 10
- Using the BIOS to Perform Windows 10 Battery Calibration
- Use a Third-Party Tool To Calibrate Battery in Windows 10
1. Manually Calibrating Laptop Battery in Windows 10
- Change Your Laptop’s Power Plan
Before charging and discharging your laptop, you must make certain changes to your laptop’s power plan so that it doesn’t hibernate or sleep early.
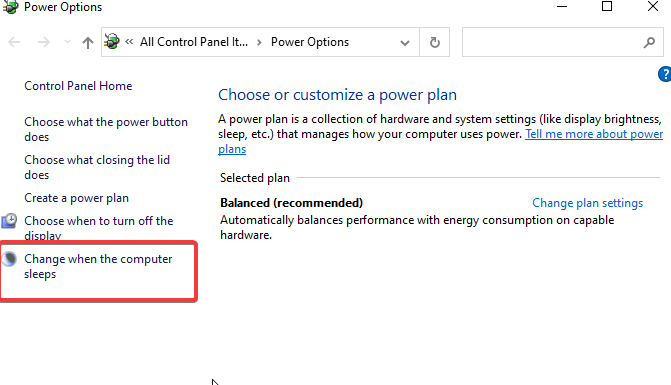
1. Right-click on the battery icon that you can find on your Taskbar
2. Click on Power Options
3. Next, click on Change when the computer sleeps
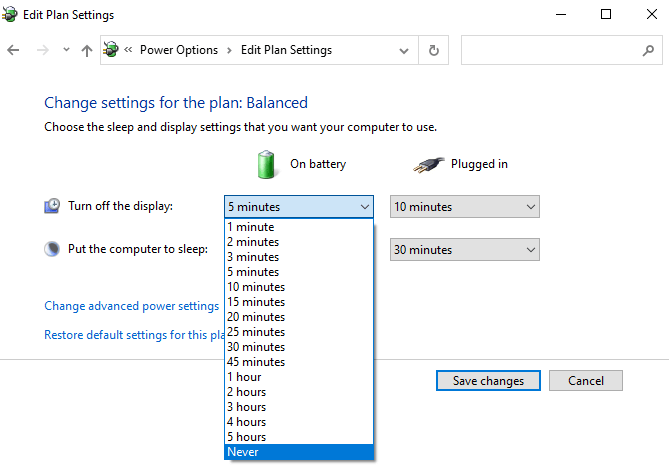
4. Locate the Turn off the display and select Never
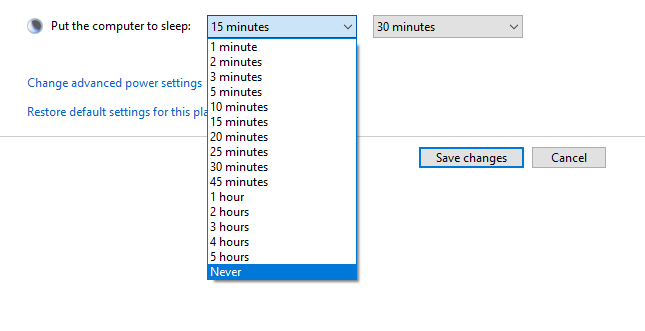
5. Click on the dropdown button next to Put the computer to sleep and then again choose Never
6. Select Change advanced power settings and then next to the Battery click on the expand (+) button
7. Similarly, click on the Expand (+)button next to the Critical battery action
8. Make sure that you have selected Hibernate in the section next to On battery
9. Click on the Expand button next to Critical battery level
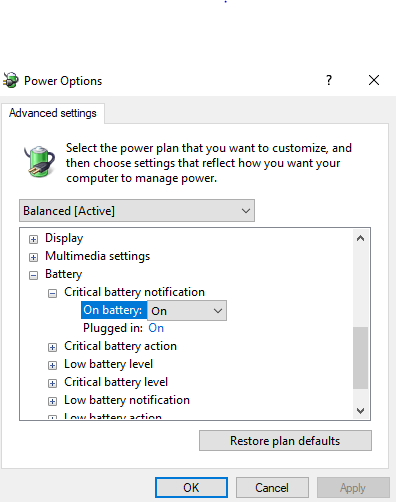
10. Click on the percentage against the On battery option and set it to as low as possible
11. Click on Apply and then OK
12. Click on Save Changes
- Charge Your Battery To The Fullest
After making changes in the Power Plan, charge your laptop’s battery to the fullest (i.e. 100%). Once your laptop’s battery is completely charged, leave the charger plugged in and leave it for a few minutes or few hours till the battery cools down.
- Disconnect Your Charger
Unplug the charger from your laptop and completely discharge its battery. Meanwhile, you can use your laptop, just make sure to not let your laptop go into a sleeping or hibernate mode and let the battery discharge completely.
- Recharge Your Battery To 100%
Again replug your charger and charge your laptop to 100%. At this point, you can use your laptop. You would now see that your laptop is giving you a much more accurate reading.
If you were able to calibrate your Windows 10 laptop battery satisfactorily, you can reset your power settings like they were before, else you can move on to the next step.
2. Using The Laptop’s BIOS For Windows 10 Battery Calibration
Several laptop models allow users to use the battery calibration tool which is present in the BIOS (you can use it if you are comfortable using the BIOS). Some manufacturers let users calibrate laptop batteries in Windows 10 using the laptop itself, which means you needn’t get into the BIOS settings.
Let’s see how you can use the laptop’s BIOS to calibrate the laptop battery in Windows 10 –
1. Power off your laptop
2. Power it on again
3. Press the F2 key when your laptop boots
4. Once in BIOS settings, using the arrow keys select the Power tab
5. Navigate to the Start Battery Calibration and hit the Enter key
6. Follow the commands that appear on-screen
7. Now, plug in your laptop’s charger and let it charge to 100%
8. Once your laptop’s battery reaches 100% unplug the charger
9. Completely drain your battery from 100% to 0% and let it power off now
10. Replug your charger but remember not to boot it
11. Let it charge to 100%. Once that’s done, you have successfully calibrated your Windows 10 laptop’s battery
12. Unplug your charger and then reboot your laptop
3. Use A Third-Party Tool To Calibrate Windows 10 Laptop’s Battery
In case you want to save yourself from the hassle of making manual changes in settings and calibrating your laptop’s battery, you can take the help of dedicated third-party software instead. These tools can also save you from making any wrong modifications in your settings that you might regret later.
iolo System Mechanic is one such utility. Although it is a powerful Windows optimization tool, it has some effective power/ energy management features that can help you increase both the lifespan and performance of your laptop’s battery.
To be more precise, iolo System Mechanic’s PowerSense Mode detects when you have switched your laptop to battery power. It then engages the battery saver mode automatically after your laptop stays idle as per your desired timeframe. The power settings present in Endurance mode stay in effect till you either plug in your charger or choose a different power sense mode.
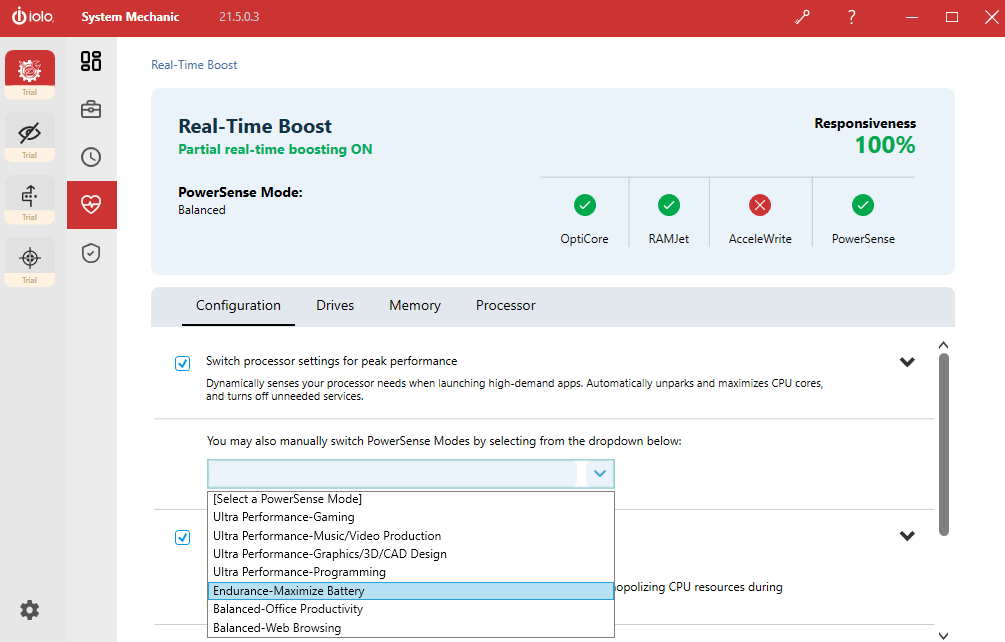
What Does Endurance Mode Within PowerSense Mode Does To Extend Battery?
- It decreases screen brightness by 40%
- Most processor cores are parked
- Calibrates processor speed to 25 % of maximum
- Decreases total hard drive spins
Download iolo System Mechanic

Read Complete Review on iolo System Mechanic
Wrapping Up
We hope that the above methods have helped you calibrate your Windows 10 laptop and you are now able to see correct battery readings on your laptop. For more such content, keep reading Tweak Library. You can also find us on Twitter, Instagram, Facebook, Pinterest, Flipboard, and Tumblr. More into videos on how-to’s, troubleshooting guides, and other tech stuff? You can like, share and subscribe to our YouTube channel.


Leave a Reply