
When working on a Windows 10 PC we work on multiple software and applications. Even after you close some of them, they would still run in the background and consume a lot of power. More specifically, these applications take up a significant amount of CPU resources. In this blog we’ll see how we can keep tabs on such processes and close them when required.
How To Monitor Power Throttling in Windows 10
Here we will look at all the background processes which are consuming the most power. For this we will need to access the task manager.
1. Press the Windows key and open the Start button
2. Open the Task Manager. You can do this by either typing Task Manager in the search bar or simply pressing Ctrl+Shift+Esc buttons
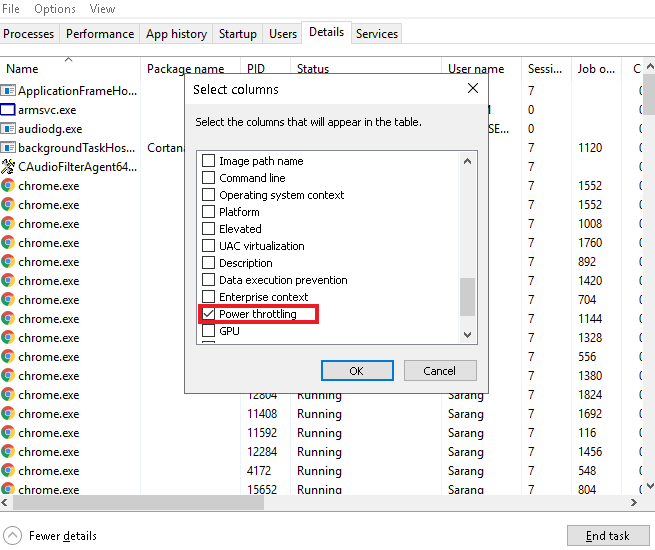
3. When the Task manager opens click on Details tab
4. Right-click on any of the column’s header and then click on Select columns
5. From the given options, only check Power Throttling
6. Click on OK
7. You will see list of apps where the power throttling is enabled or disabled.
Also Read: How To Read Maximum CPU Power in Windows 10
How To Enable Power Throttling In Windows 10 For Apps Running In The Background
The best part of apps and software in Windows 10 is that you can conveniently decide which apps you want to throttle and which you don’t. In this way you will be directing Windows 10 not to manage CPU resources for the aforementioned apps. Here are the steps to enable Power Throttling in Windows 10 for selected background apps –
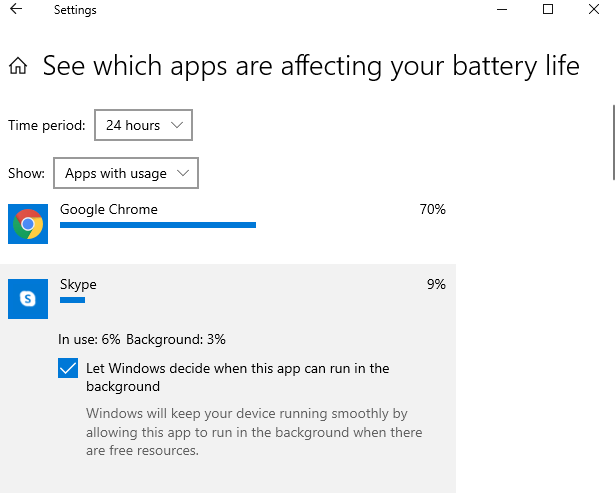
1. Open Settings
2. Go to System and select Battery
3. Choose Battery Usage by App which you can see on the left panel
4. From the list of apps choose an app that you want to exclude from power throttling. Now, click on it and select the checkbox that says Allow the app to run background tasks
How To Disable Power Throttling in Windows 10
Here are some of the ways Of Disabling Power Throttle In Windows 10. The methods include disabling Power Throttling in Windows 10 via –
- Using Group Policy
- Using The Power Settings
- Using Registry For Power Throttling in Windows 10
Method 1: Using Group Policy
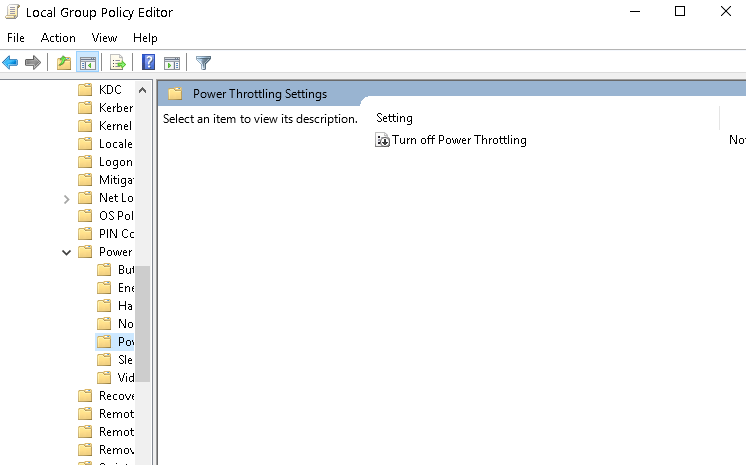
1. Press Windows key + R and type gpedit.msc. This will open the Local Group Editor Policy
2. Follow the path –
Computer Configuration > Administrative Templates > System > Power Management > Power Throttling Settings
3. Double click on the Turn off Power Throttling
4. Click on the Enabled radio button
5. Click On Apply and then click on OK
Method 2: Using The Power Settings
The feature automatically gets activated when you haven’t connected your laptop to a power source. This means if you plug it again into a power source, the feature will be disabled. Here is an alternative method – you can set your laptop’s power mode to “best performance” and disable power throttling.
1. Click on the battery icon. If you are unable to see the battery icon, follow the path mentioned below –
Right click on This PC > Click on Properties > On the left-hand side click on device manager > Click on the Batteries dropdown and right click > Click on Disable device for both the options > Now, click on Enable device both the options once again.
2. You will now be able to see the Power mode battery slider which you can use to select the Best performance option. Here is what each power mode signifies on Windows 10 –
- Better battery and Battery saver options enable Power Throttling
- Better Performance enabled Power Throttling but in a more relaxed manner and
- Best performance disables the Power Throttling option
Method 3: Using Registry For Power Throttling in Windows 10
1. Press Windows key + R
2. Type regedit which will open the registry
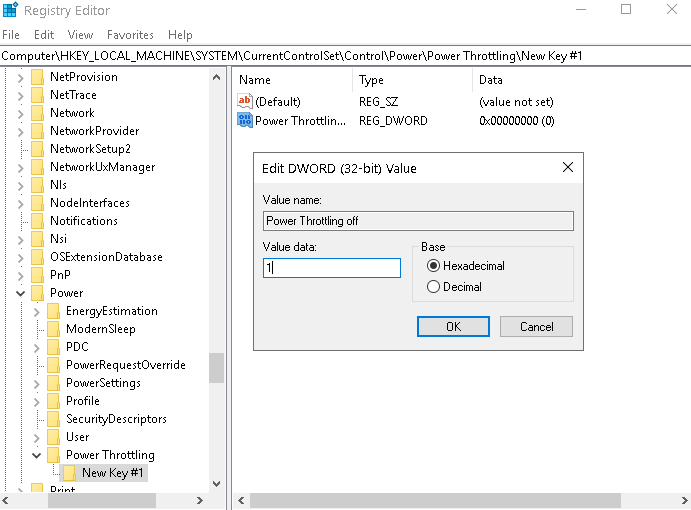
3. Browse the following path –
HKEY_LOCAL_MACHINE\SYSTEM\CurrentControlSet\Control\Power
4. Right-click on the Power folder > select New and click on Key
5. Name this key as Power Throttling and press Enter
6. Again right click on this newly created key, click on New and then click on DWORD (32-bit) Value
7. Name this key as Power Throttling off and press enter
8. Double click on this newly created DWORD and set value from o to 1
9. Hit the OK button
In The End
We would like to reinstate that Power Throttling is a feature in Windows 10 which if used correctly can help you preserve battery by giving you control on background apps. Hope this blog was of some help and you were able to have better control on background apps and software. For more such troubleshooting content keep reading Tweak Library.
Read Next:
Tips to Keep Your Laptop Battery in Optimum Condition
How to Increase Virtual Memory on Windows 10


Rashmi Kandhil
I was looking for a solution on this and then I landed on this blog. Found it really helpful so a big thank to you.
Sarang Bhargava
Hi Rashmi Thanks for the comment. Glad you found the blog helpful.