Photoshop is one of the best graphic editors you can find on the internet for editing. This photo editing tool contains different types of effects and text outlining is one of the great features of this tool. This feature can be learned easily and can be implemented to any text.
When using the effects, we need to make sure that we make the changes more subtle. Because if the changes are not right then your work will look overdone.
In which simple article we will show you how you can use the Outline feature in Photoshop correctly.
How to Outline Text in Photoshop
This first method will use Layer Styles for creating a Stroke. This feature will allow the type layer to be editable. This method can be used to add Stroke on different objects on your canvas.
1. To be able to outline a text you have to first select the type tool and make your text.
2. Now right click on the Type Layer and then choose “Blending Options”, you can also go to “Layer > Layer Style > Stroke”.
3. Now from the Styles check mark “Stroke” from the left side panel.

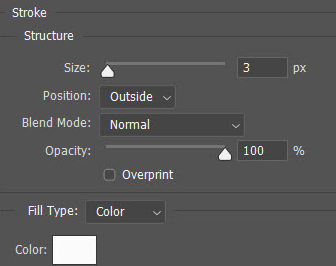
4. Under the Stroke you will see different options that give you control over the outline and its appearances. You can set the size and width to your desired requirement by using the slider or you can enter the value according to your need.
5. Now choose the Position of the stroke. You will see three different positions that will help you to change the appearance of the Stroke when text is combined with another layer of elements.
Three different positions of the Stroke are:
- This setting will make the stroke inside the edges of the selection.
- This will place the stroke 10 pixels inside and out of the selection.
- This will place the stroke placed outside of the edge of the selection.
6. From the Stroke settings you can use the Blend Mode which will help you to control how the coloured stroke will match with the colors/layers under the stroke. For example, if you have placed the text over a colourful image.
7. You can also set the transparency by sliding the Opacity slider.
8. When using the Strokes we can also fill it with the colorful gradients, solid-color lines, and as a patterned borders. To fill the Strokes you have to click on the drop down menu of Fill Type now click on the color tile and choose the color from the color picker and then click on OK.
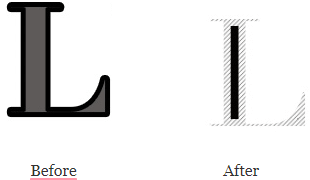
Here is an example of Stroke being used however, if this looks bland then you can experiment with other Stroke settings to make your text more attractive.
Also Read: Fix Blurry Pictures In A Heartbeat With These Incredible Apps
How to Outline a Font in Photoshop
The text we have mentioned is a normal serif font on which we have used Outline. Now we can also take other fancier fonts and by using them you can create some other beautiful outlined fonts you can also add effects that make fonts hollow inside. Fonts that are outlined are used in logs, banners and on other places. If you wish to create beautiful fonts you can use Google to download some fonts and then match it with your designs. Also, if you do not wish to download the fonts you can create your own.
There is another feature using which you can remove inside of the font so that its boundary only remains. You can use the font without the fill on top of any image you want.
You can see the outlined fonts from the image below:
1. You have to first take a blank canvas so let’s take a block one.
2. Now type the text and then right click on the text layer and then click on Blending Option.
3. Now I got to Layer Style and then Stroke.
4. Now select the position “Outside”.
5. Once the position is selected you can set the size and Opacity.
6. Once done click on OK.
7. Now lower the Opacity to 0 in the layers Tab.
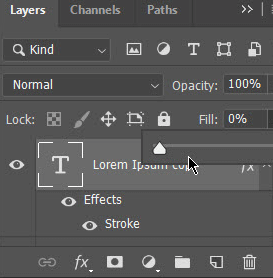
The simple process mentioned here is for the simple illustrations. However, you can use your own imagination and create a beautiful art.
You Might Want To Read This: How To Change Fonts In Android?
How to Outline Half a Text in on a Photo in Photoshop
Now we learn how we can outline some letters of text instead of full text to create subtle effects.
In this example we will take an image that has half the picture and half colored background. When using this type of image our half text will fall on the colored image and half our text will fall on the image. This will give us great opportunity to create images with great effects.
1. Take the image on which you want your text on and then type the text. Now make your text a little larger.
2. Now create a copy of the text and then name it.
3. Now change one layer of the text to outline and let the other one as it is.
4. In this example we named one our layer transparent and gave it the effects we have given previously.
5. Now we rasterize the normal filled layer, this will turn the text into a bitmap image made up of pixels.
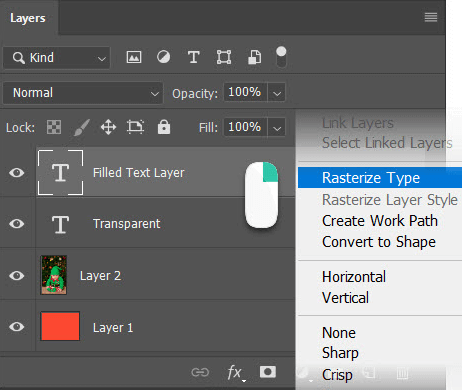
6. Now select the part of the text you want to see the outline effect with the rectangular marquee tool. Now delete the selected text so that only outlined text will remain.
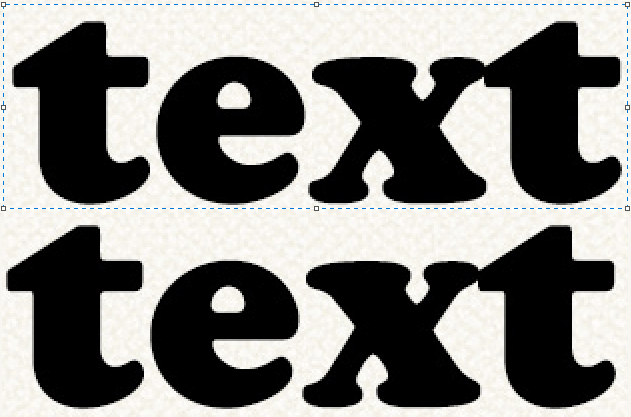
7. Now you have to Merge all visible layers or you can flatten the image using the options in the Layermenu.

This simple effect will only take a couple of minutes and it will make your image more presentable. You can see these types of images all over the internet.
Must-Read: How To Add Text To Photos On iOS, Android, Windows & Mac?
Verdict:
Outlining a text can be done using many ways but using Stroke is one of the simplest methods you can find. You can add effects by combining text with the Layer Styles for adding effects. Using this method, you can copy paste any text and replace the text previously you were using.
Photoshop is one of the best graphic editors you can find. This graphic editor can be used to create some beautiful artwork. You can add images, shapes and different text to your images.
Next Read
- Free Stock Photo Sites For 2020
- Best GIF Cutters to To Edit GIF Images
- Top 10 iPhone Photo Editor Apps – 2021
- 5 Best Photo Editing Apps For Android In 2021
- What Makes Pixlr The Best Online Photo Editor For Creative Graphic Designs?



Leave a Reply