
Switching from one hard drive to another, especially when it is the drive on which your important documents and operating system is installed, involves risk. Luckily, there’s a way to clone a hard disk and this involves using a third-party tool that helps create a Windows 10 system image. This means without jeopardizing data, we have all our data and important files on another disk.
In this post, we will discuss cloning disk Windows 10 using AOMEI Backuppper.
What Is Disk Cloning?
Disk Cloning often referred to as Disk Copy means exactly replicating one hard drive to another. This means without losing any file we can have everything from system files, documents, files/folders, pictures, videos, and more onto the destination disk.
The functionality comes into play when the following situations are faced:
- You are upgrading your hard drive to a new one.
- When the system disk is running out of space
- Fear of ransomware or another malware attack
- Migrating from HDD to SSD
- Creating a backup of HDD or SSD for safety.
How to Clone a Disk in Windows 10/8/7 via AOMEI Backupper?
Now that we know the situations in which a disk cloning software is required, let us learn how to clone a disk.
For this purpose, we will use AOMEI Backupper, a third-party disk cloning software that not only allows taking backup but also lets you restore data. What’s more, it offers cloning functionality.
Using this amazing cloning software for Windows, you can backup and restore partition/volume, system, disk, file/folder, and other data.
Note: AOMEI Backupper offers both free disk cloning software for Windows 10 and paid version too.
If you want to use the free version of the disk cloning tool, you can use the free version of the AOMEI Backupper Standard Edition.
In this post as an example, we will use AOMEI Backupper Standard Edition and will show how to clone Windows step by step.
Before we begin, please download, install and launch AOMEI Backupper.
Click Here to Download AOMEI BackUpper

Step to Clone Hard Drive Using Free Disk Cloning Software – AOMEI Backupper
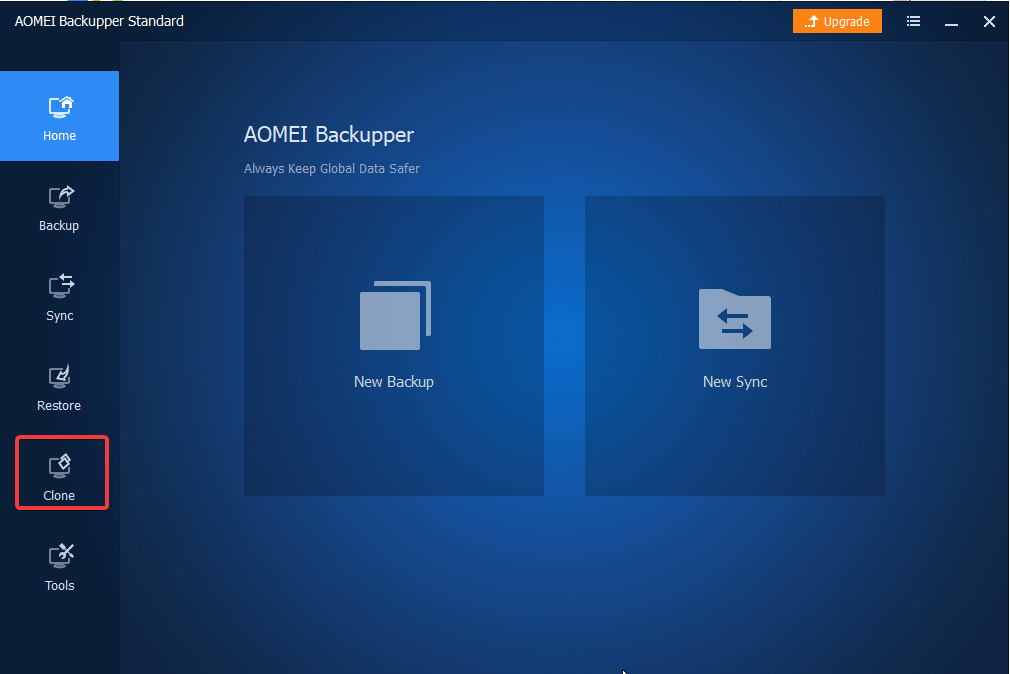
1. As the tool is already open, select ‘Clone’ from the left-pane.
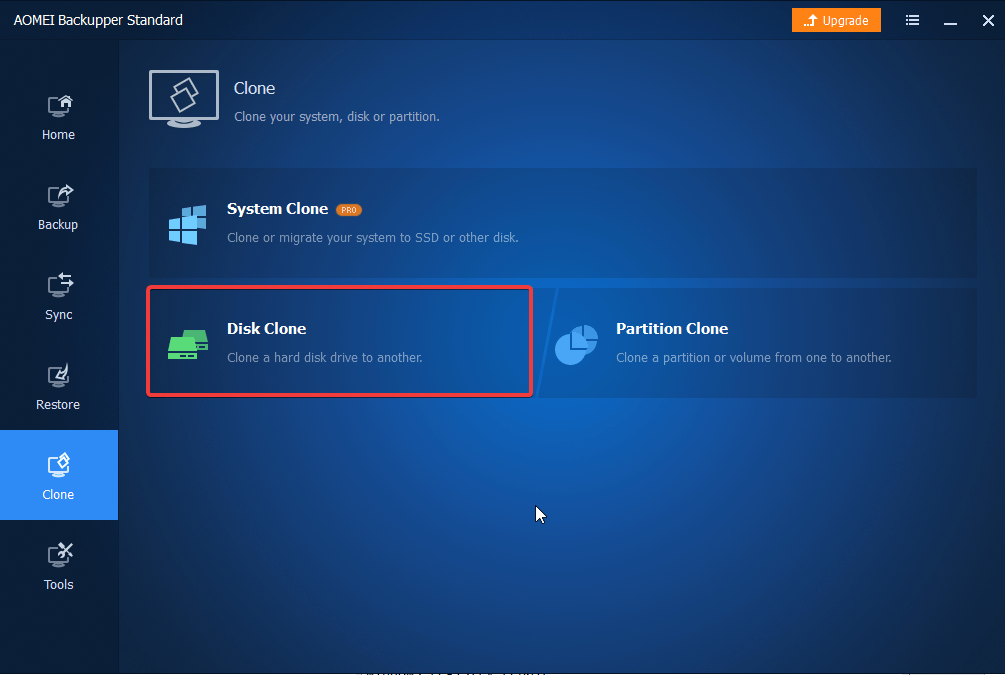
2. Select ‘Disk Clone’.
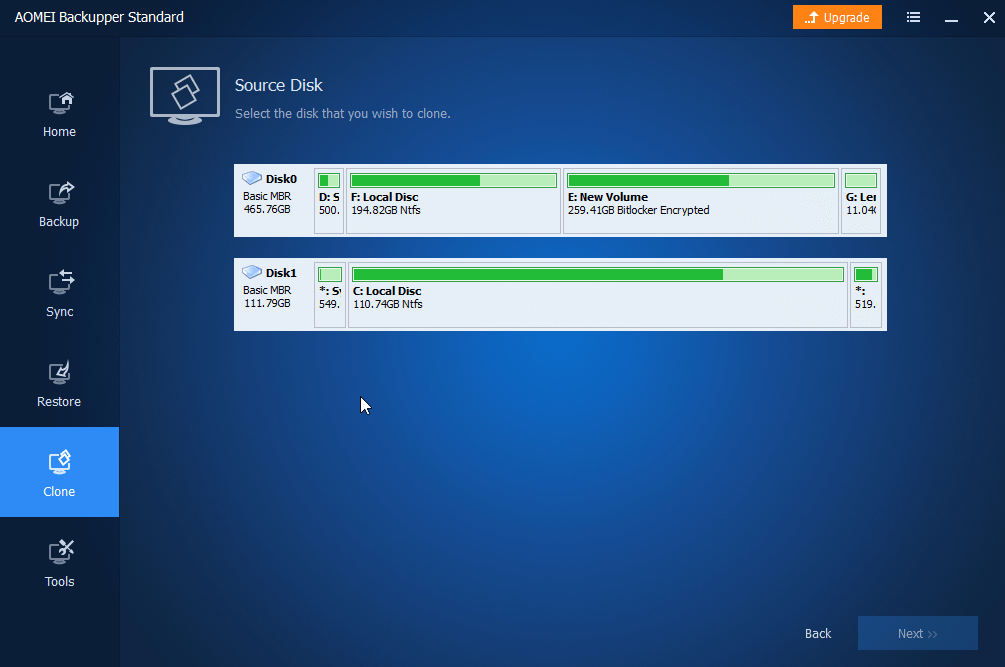
3. Next, choose the source disk that you want to clone > ‘Next’.
4. Thereafter, select the destination disk onto which you store the data of the source disk, and click Next.
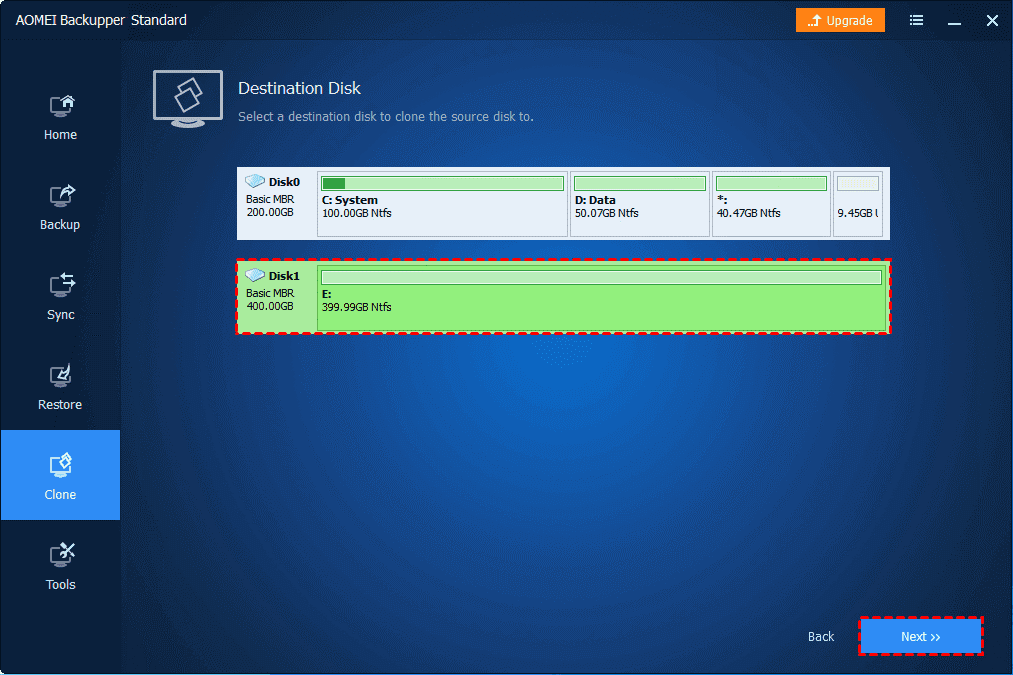
Caution: Make sure the destination disk is empty or it does not have any important data because it will be formatted. This means all the data it has on it will be wiped. Backup all the data using the best backup solutions. For this, you can read our post on the best backup tools.
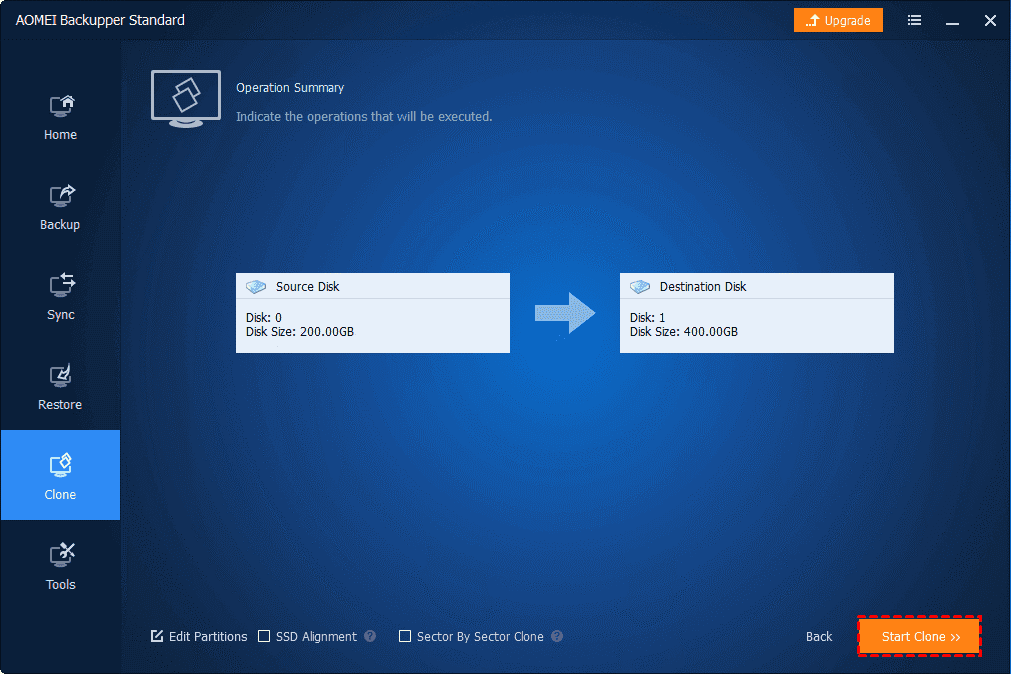
5. Review the information and make sure the correct source and destination disk are selected.
6. At the bottom of the screen, you will get some advanced settings. Use them to manage the size of the partition and other things.
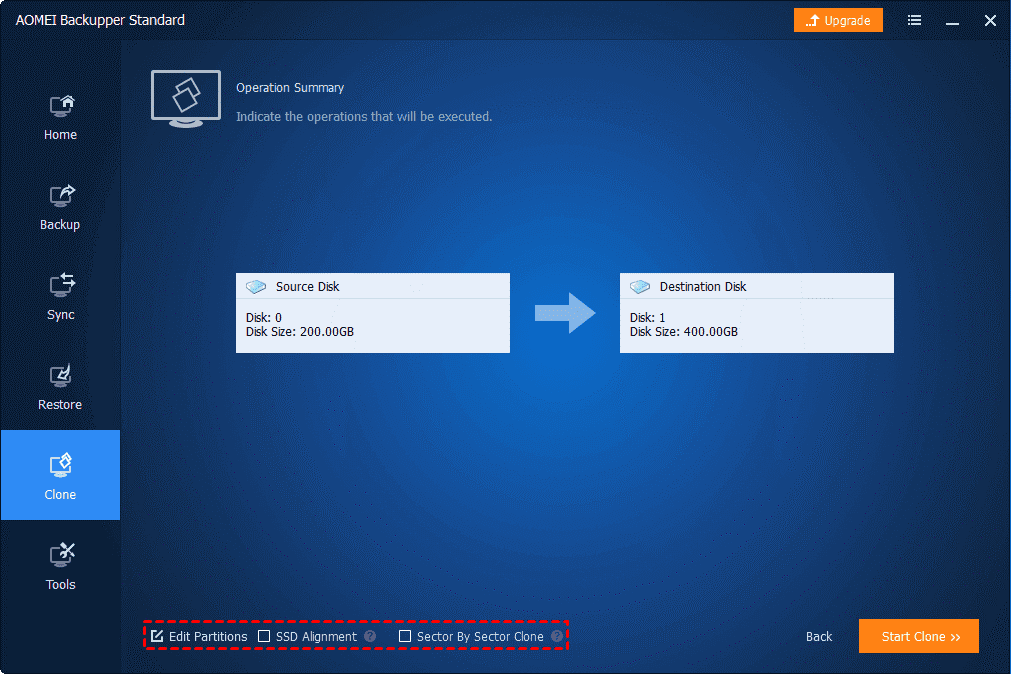
a) To change partition size on the destination disk, select the ‘Edit Partitions’ You will now get the following three options:
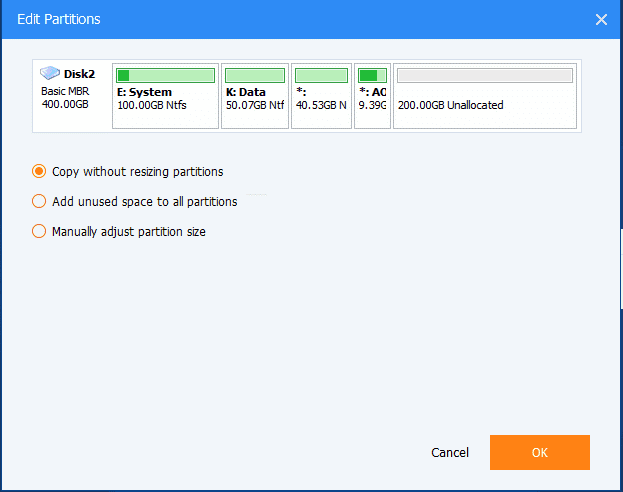
- Copy without resizing partitions: Selecting this option means you don’t want to modify the partition sizes. Using this option will leave some unallocated space on the destination disk after disk cloning.
Note: In such scenarios to assign a drive letter to unallocated space, or to resize the partition, you can use AOMEI Partition Assistant.
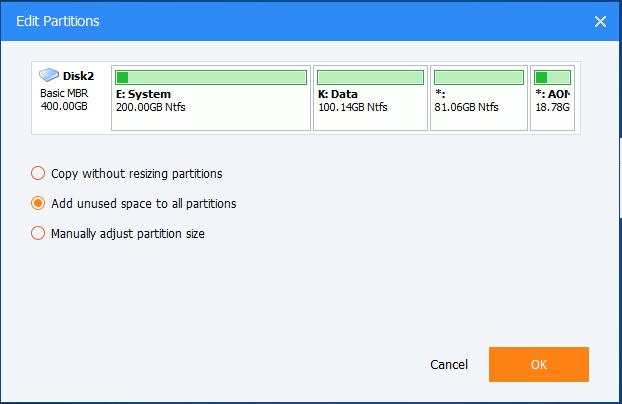
- Add unused space to all partitions (for paid version only) This option automatically resizes the destination disk partitions to fit with the disk size. This feature comes in handy when you have to clone the disk from a smaller drive to a larger one.
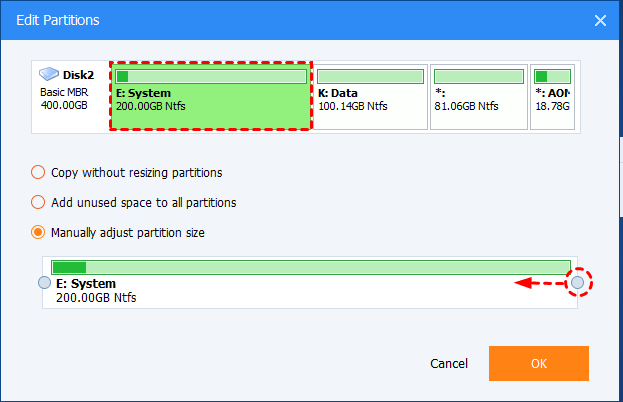
- Manually adjust partition size (available in AOMEI Backupper Professional or higher editions): This allows manually adjusting the partition size. Using this feature, you can select and modify the size of every partition.
b) Sector by sector clone: Whether in use or not, copy all sectors of the source disk to the destination disk.
Note: For this option, you need the destination disk size to be equal to or more than the source disk. Remember, deselecting “Sector by sector clone” will only clone the used part of the source disk.
c) SSD Alignment: If your destination disk is an SSD (Solid-State Drive), checking this option is recommended as this will help optimize SSD performance.
7. When you are done with settings, click Finish followed by clicking ‘Start Clone’.
8. Wait for the process to end and click Finish.
This is it, using these simple steps and this free disk cloning tool offered by AOMEI you can have a backup of all your important data. We hope you find the information helpful and will use the tool to clone HDD to SSD. Do share your experience about cloning a hard disk on Windows 10 in the comments section.
Your feedback and suggestions are appreciated.
Recommended Readings:
- Best Disk Imaging Software in 2021
- The Significant Differences Between Disk Cloning And Disk Imaging
- How to Extend C: Drive Space in Windows 10


Leave a Reply