Every smartphone needs an Email account for the configuration and setup for the first time and we generally use our primary email address to configure. But most of the emails that we receive, are either promotional emails, spam emails or social updates that are annoying to us. Most of the time, we miss out on important emails due to this bombarding.
Here in this article, you will figure out how to block emails on iPhone or how to stop spam emails on iPhone. There is no big trick and even a new user can configure these settings and block unwanted emails on iPhone. Though Apple has not made it simple to block unwanted emails on iPhone, after reading this article, you will master the trick of filtering and blocking unwanted emails.
Apple has designed the email app keeping multiple email providers in mind, and hence you can’t block senders simply by tapping or by swiping in the app.
- How to Block Emails on iPhone Gmail App
- How to Block Emails on iPhone using iCloud Email
- How to Block Emails on iPhone Using Block Feature in iOS 13
How to Block Emails on iPhone Gmail App
To block spam emails on iPhone on your Gmail app, you need to follow these steps.
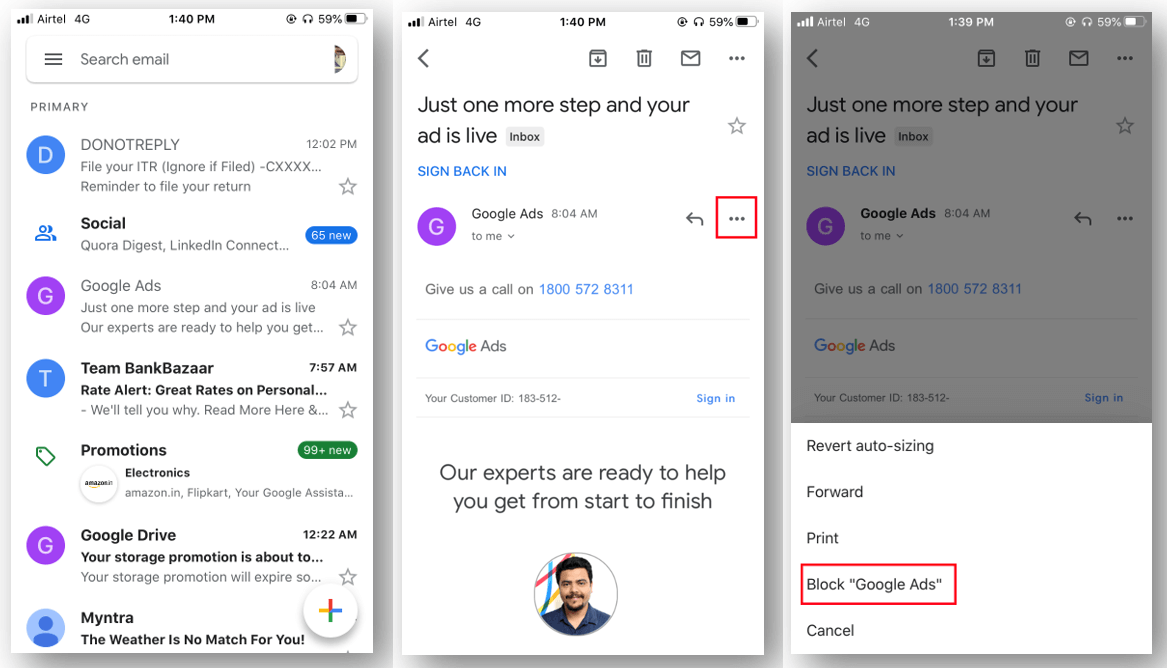
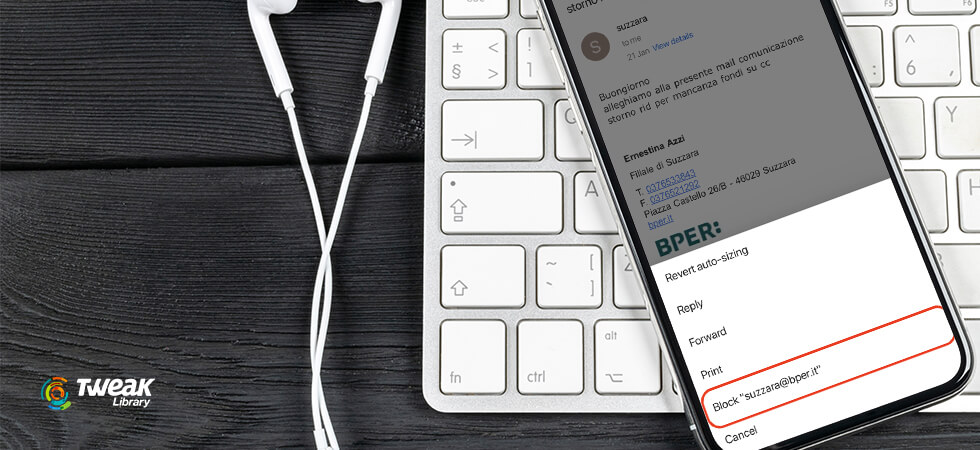
Step 1. Open the Gmail App on your iPhone or iPad. Tap on the ‘Gmail App’ icon that looks like an envelope with a red ‘M’ labeled on it. You will reach your primary inbox.
Step 2. Tap the email for which you want to block the sender. This will open the email message showing the email content and the sender details.
Step 3. Tap on the button with three dots on the right-hand side of the sender details to explore more options.
Step 4. You will find options like revert, forward, print and Block. Tap on Block “Sender” from the options. This step will add the sender to your blocked list, and you shall never receive any email from them. Any email received from the sender will directly go to the spam folder.
How to Block Emails on iPhone using iCloud Email
How to block unwanted emails on iPhone using iCloud email is a bit tedious task. If you have an Email box setup with iCloud login ID or your Gmail is set up on your mailbox, you can follow these steps to block spam emails on iPhone.
Step 1. Log in to your iCloud account on your iPad using the Safari browser that looks like a blue compass. You may find Safari in the Dock at the bottom of your screen.
Step 2. You may need to tap on the Share button that resembles a square with an arrow pointing upward. On iPhone or iPad, you may need to tap on the ‘Request Desktop Site’. It will appear in the list of options at the bottom of the share menu.
Step 3. When you ‘Request Desktop Site’ the page will appear as it opens on a desktop computer screen. It will ask you to log in to your Apple ID with a password to proceed further.
Step 4. Tap on the ‘Mail’ option and it will open your inbox if configured.
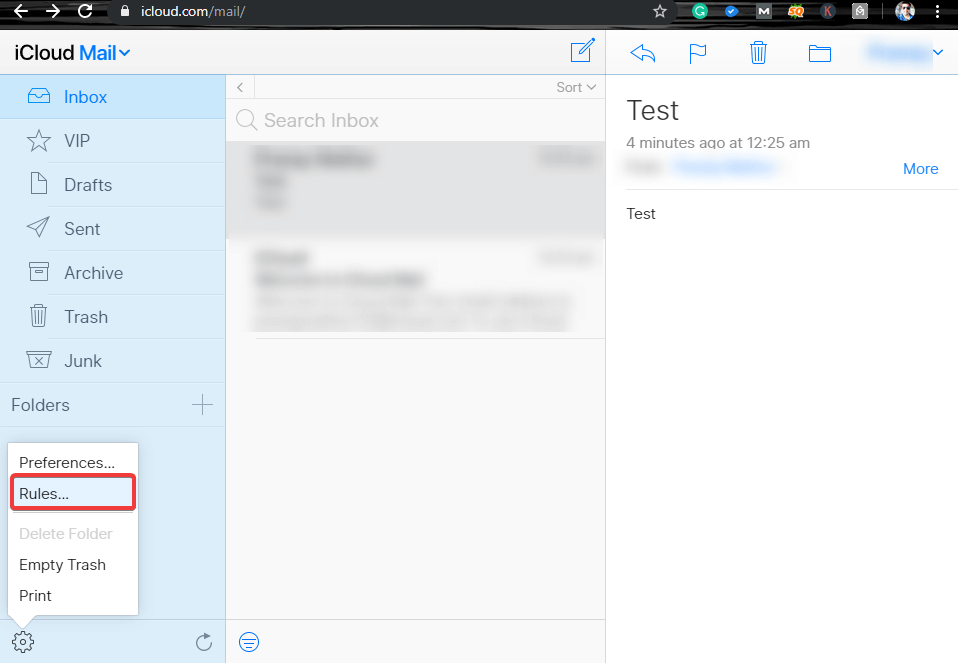
Step 5. Once you are in your inbox, tap on the gear-shaped icon at the lower-left corner of the page. This will populate a pop-up menu.
Step 6. Tap on ‘Rules…’ in the pop-up menu to open the Rules window.
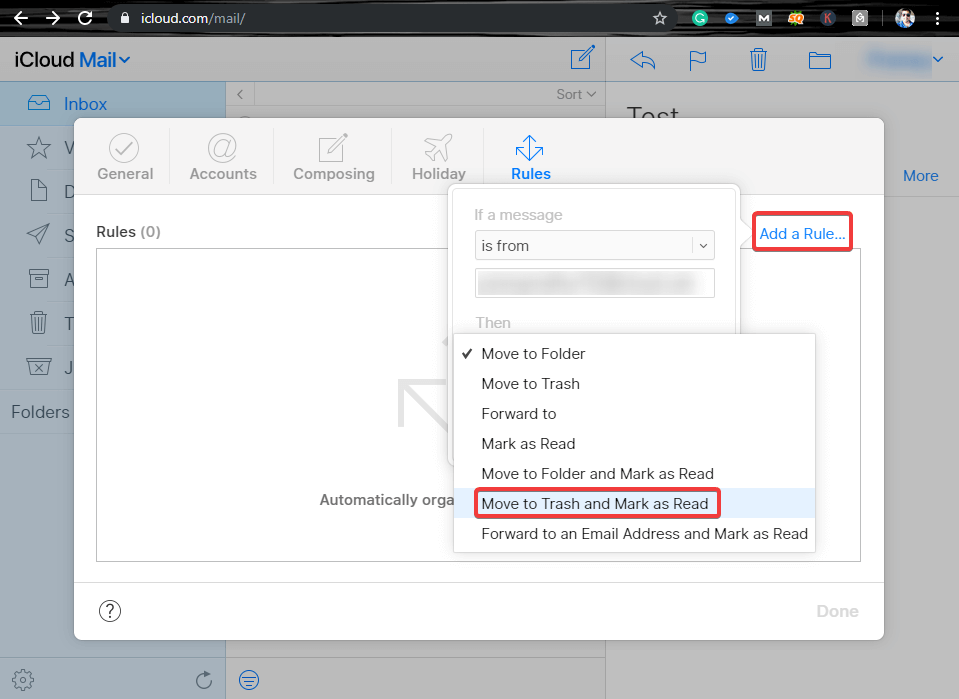
Step 7. Tap on ‘Add a Rule…’ on the new window that popups up on the screen. This will be a blue link in the upper-right section of the window.
Step 8. In the next popup, ‘If a message’ let it be ‘Is From’ in the first drop-down and select or enter the email address in the second box that you wish to block.
Step 9. In the next selection under ‘Then’ drop-down box, select ‘Move to Trash and Mark as Read’ option from the drop-down list and tap on ‘Done’. This will fix your how to block emails on iPhone concern and will ensure that the next email from that sender will directly go to the trash folder. The same settings will be applicable in your iPhone settings.
How to Block Emails on iPhone Using Block Feature in iOS 13
iOS 13 has come up with an upgraded feature to block contacts and senders directly in the Email App. These steps will help you to configure how to stop spam emails on iPhone.
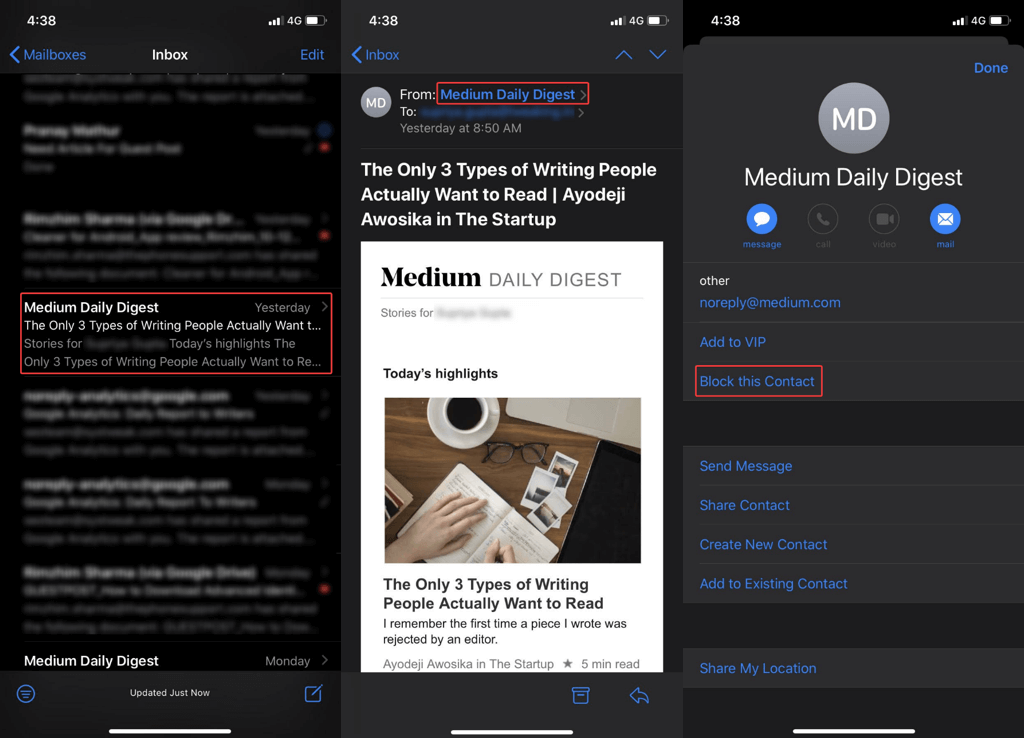
Step 1. Open up the Mail app and go to the spam Email that is bothering you.
Step 2. Tap to open the email and then tap on the sender on the top-left corner.
Step 3. It will populate the contact sheet for the sender.
Step 4. From the available options, tap on the ‘Block this Contact’ option. Tap to confirm your submission by tapping on ‘Block this Contact’ once again. Now onwards, all the emails from the blocked sender will directly go to your Bin folder.
Wrapping Up
Here we have covered a few of the best possible options to block spam emails on iPhone and have figured out how to unwanted emails on iPhone. If you like this article, please like and subscribe to the page for more such tech updates. If you know any better option to meet the task, please share it in the comment section.


Leave a Reply