
Sometimes, it becomes necessary to remove every ounce of data that resides on your Mac. The reasons for this can be one too many. Maybe you are planning to sell your old Macbook or it could be that you are giving your Mac for repairs. In such cases, it is advisable that you clean your Mac, and by that we mean, even the deepest recesses. So, what are the situations where you might want to deep clean these identity traces –
- You suspect that someone is spying on your Mac and may misuse your data
- When you are giving your Mac for repairs
- When you are planning to sell off your Mac
- You have seen a heavy dip in your Mac’s storage and now you want to remove stuff
- To save yourself from impending cyber threats
- You are planning to reinstall macOS with no prior apps and data
Why Consider Completely Removing Personal Data From Mac
There is a lot of personal information that can reveal loads about you. So, what kind of data (if exposed) can prove to be hazardous to you. Most of us use our Macs to store passwords, bank account details, personal or crucial professional notes, documents, social security numbers, bank account details, credit/ debit card details, so on and so forth. The thing is these details are spread across the various locations in your Mac.
Over some time, you store such information at places like your emails, files, notes, browser history. Now, when the time comes to erase such data for reasons like the ones mentioned above, it is almost next to impossible to perform a thorough search.
That’s where you need to act smart. And, in this blog, we are going to arm you with a few such simple yet effective ways using which you will be able to erase personal data on Mac
How To Erase Personal Data from Mac
1. Backup Your Mac
Erasing personal data from Mac doesn’t just start from hitting the “erase” button, you should also be wary of the fact that once the data is gone, you might not be able to retrieve it. That’s where the concept of data backup comes to being. It is advisable that you backup your data using a backup utility for Mac or using Mac’s Time Mchine .
EaseUS Todo Backup, for instance, is one of the backup utilities for Mac. It lets you back up all kinds of files. Here are some of its features:
1. Choose from a full, incremental, or differential backup
2. Compress backup to preserve storage space
3. You can set up automated backup as well
4. Encrypt backup to strengthen privacy
5. Restore archives on any other Mac without compromising original data
6. Sync files and folders between two Macs
Download EaseUS Todo Backup

2. One-Stop Solution To Protect Yourself From Identity Theft
You can take the help of a tool like Advanced Identity Protector. This utility is capable of automatically identifying all the traces of sensitive information on your Mac. It gives you complete control of what you want to do with personal information. This means, if you don’t want to delete the personal information and yet want to protect it, you can move it to a secure vault and password protect it. Thereby, no prying eyes will be able to access this information. What’s even better is the fact that the scanned results or traces are neatly organized into categories which further makes it simple for you to decide what you want to do with the information. And, if you move the results to the Secure Vault, they’ll all become encrypted and until someone furnishes the correct password, the information will be inaccessible.
What Kind of Mac Identity Traces Does Advanced Identity Protector Scan?
- Bank account details
- Saved passwords
- Credit/debit card information
- Personal notes
- Social security numbers
How To Use Advanced Identity Protector On Mac?
Here are the steps that will help you erase personal data on Mac or protect it. This is just a glimpse of how Advanced Identity Protector works to secure your Mac. For a more detailed overview, you can refer to this post.
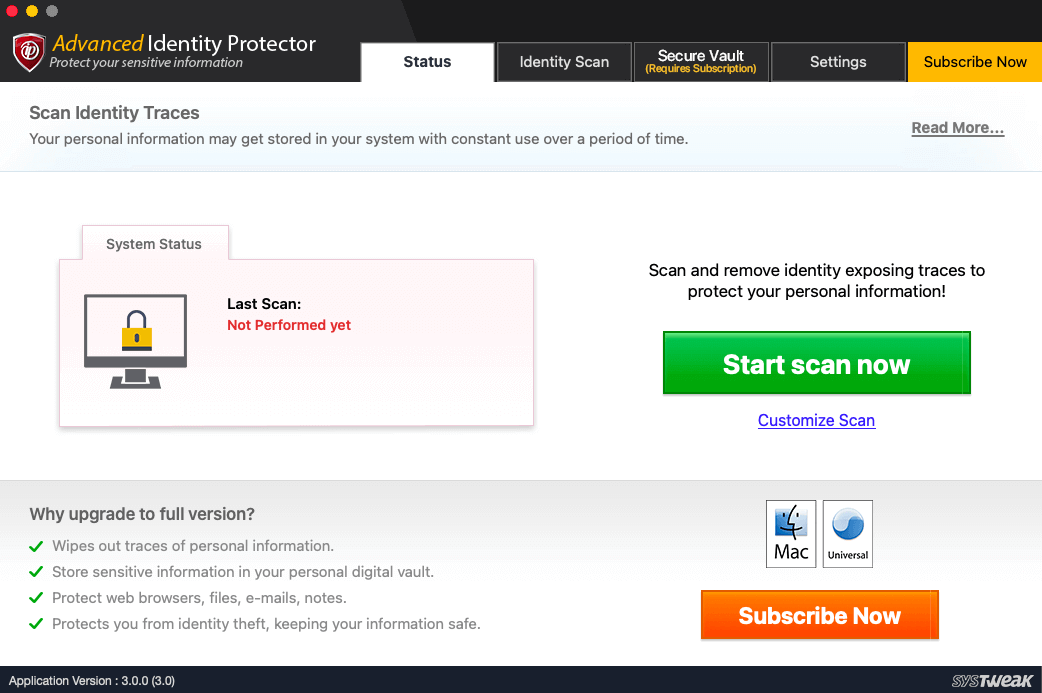
1. Download, install and run Advanced Identity Protector

2. Click on the Start Scan Now button after which Advanced Identity Protector will scan your Mac for identity traces at all possible locations.
3. Once the tool furnishes the identity traces, you can scan each of them thoroughly.
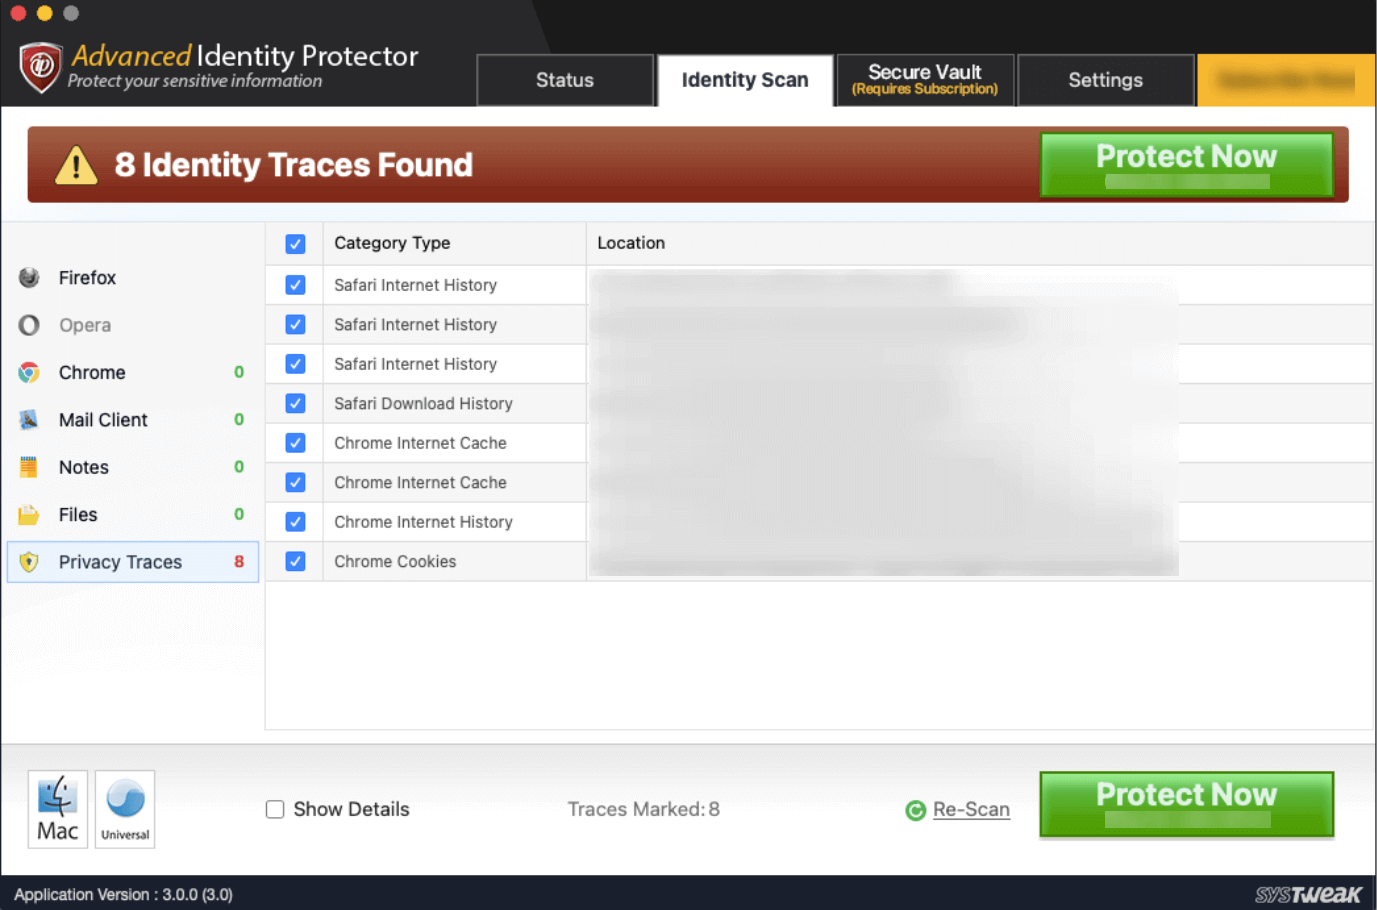
4. Once sure, you can click on the Protect Now button
5. You can now decide whether you want to delete these traces, move them to a vault or add to the exclusion.
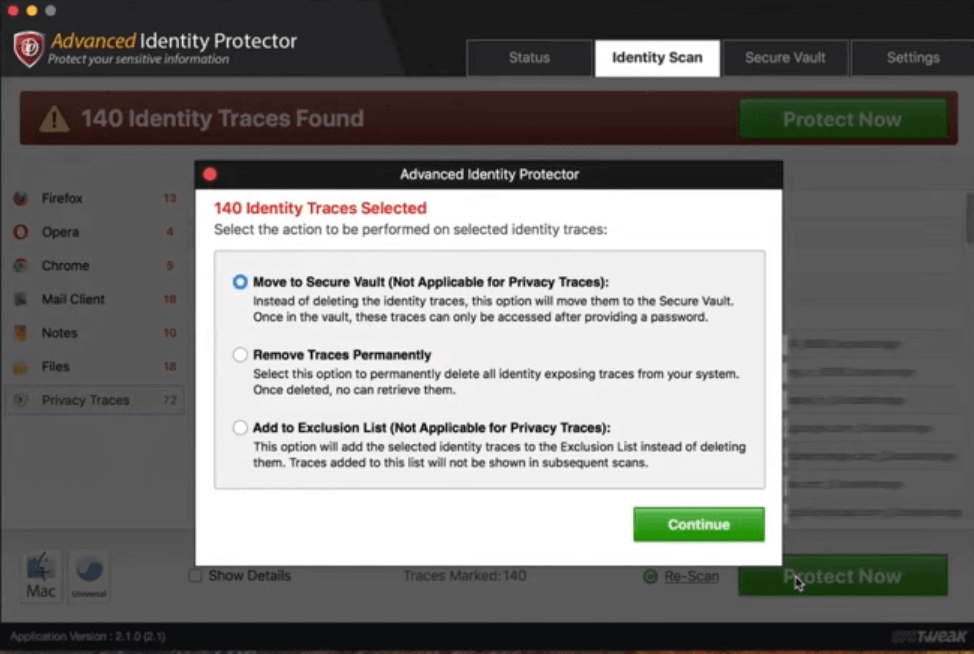
Once you add certain traces in the exclusion, those traces will not appear in future scans and you can save yourself from deleting such traces
3. Unlink Your Apps and De-authorise Services
This is a step where you will be bidding adieu to all the apps that reside on your Mac. You will need to be mindful of those apps which require licenses and work on limited computers. In case, you have purchased a license for such apps, better notify the vendor or check the procedure of transferring the license. Sign out of your iCloud account. This will ensure that there is nothing to which your Apple ID is linked. So, for signing-out –
1. Click on the Apple icon
2. Select System Preferences
3. Click on iCloud
4. Uncheck all the boxes next to apps so that copies of related data is removed
5. Click on Sign-out
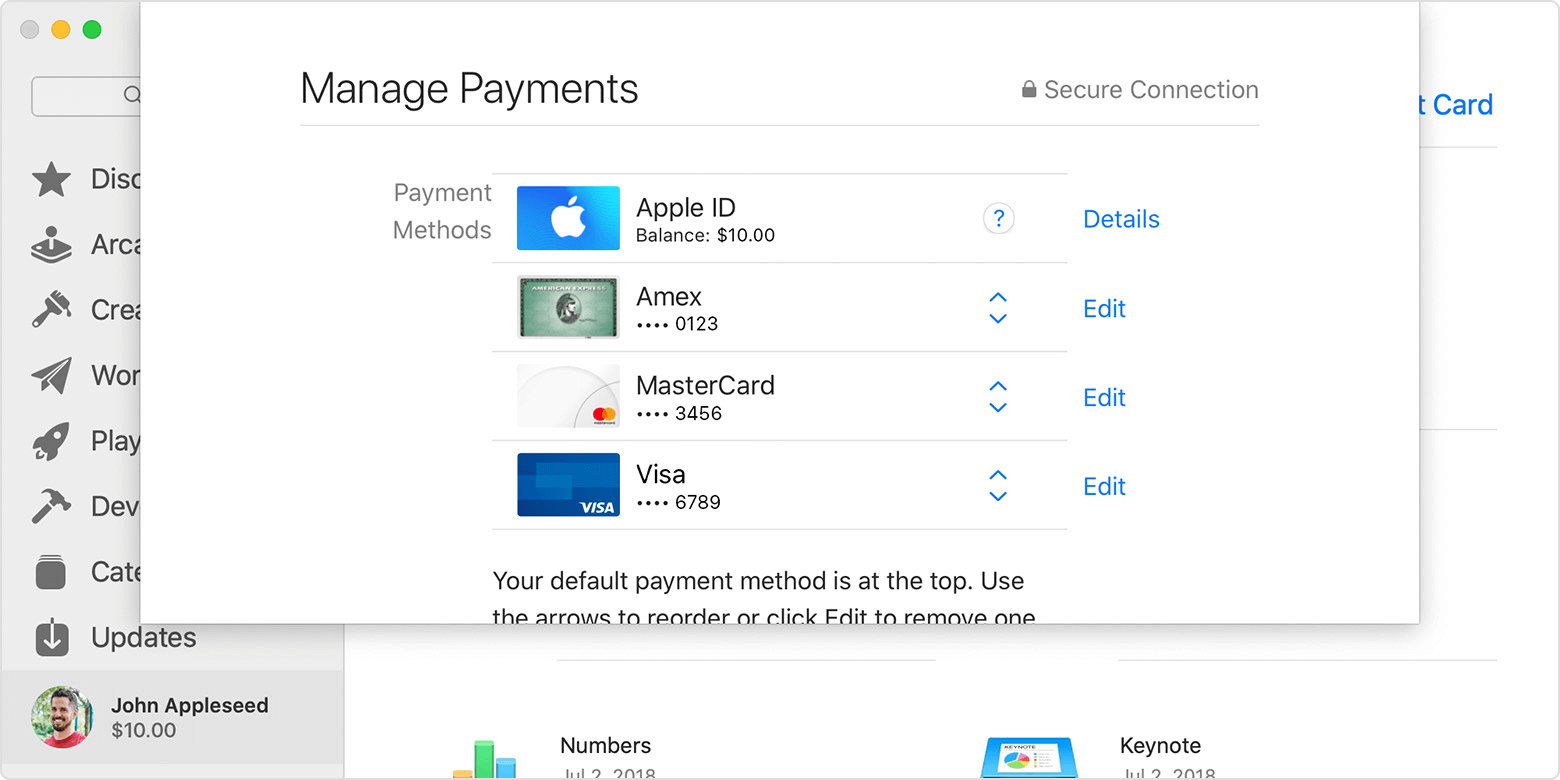
4. Remove Payment Methods
You may also want to remove any payment methods that you might have set up on App Store on your Mac –
1. Open App Store
2. Click on the sign-in button or your name present at the sidebar
3. Click on View Information
4. Click on ManagePayments next to Payment Information
5. Click on Edit next to a payment method and then click on Remove
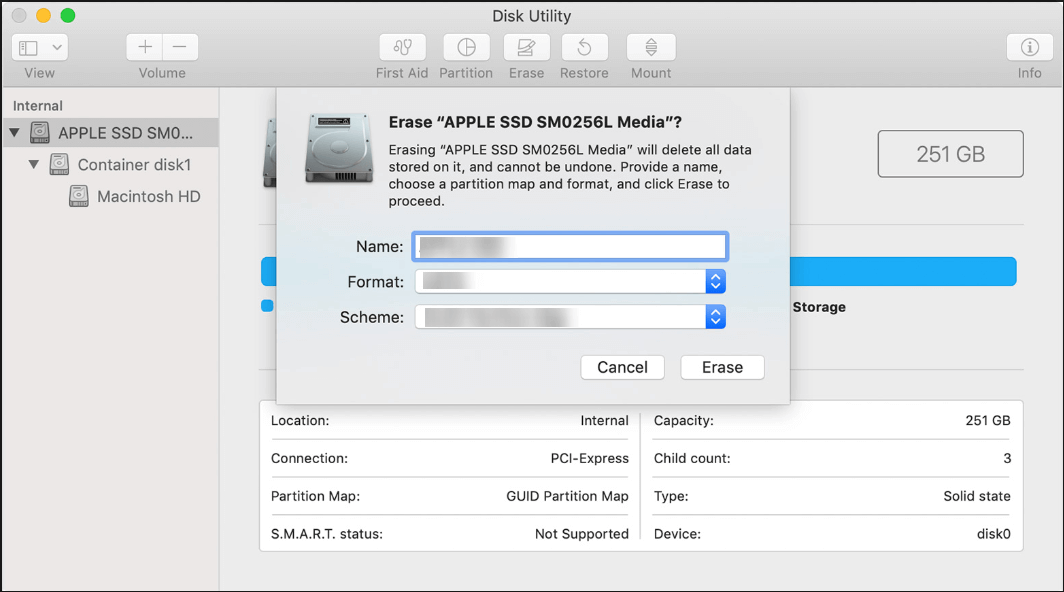
5. Erase and Reset Your Mac
So you have finally unlinked all your accounts and have gotten rid of payment methods, you can now erase your Mac’s drive and reset your Mac to its factory resetting. The steps for this are mentioned below –
1. Click on the Apple icon
2. Select Restart
3. Hold down Command + R as soon as you listen to the chiming tone which would mean that your Mac is rebooting
4. When the macOS Utilities screen appears, click on Disk Utility
5. Select your Mac drive and then click on Erase
6. Select the Format option
Wapping Up
Erasing personal data on Mac can help you safeguard your Mac’s privacy in circumstances when you don’t have your Mac. So, before pushing your Mac off for repairs or selling it off, make sure that you get rid of the privacy traces using the methods above and especially using a tool like Advanced Identity Protector. If the information in the blog has been helpful, do give us a shoutout in the comments section below. For more such content keep reading Tweak Library.
Leave a Reply