Having no internet when you need it the most can be very frustrating and many users have reported not being able to see the Wi-Fi option on their Windows 10 PC or having a Wi-Fi adapter not working. If you or someone you know are stuck in any similar situations, you can try the fixes mentioned below and hopefully be able to get your Wi-Fi back on track.
Here we are going to talk about fixes which should most likely work when you are not able to connect to a network.
Ways To Deal With Wi-Fi Adapter Not Working In Windows 10 In A Nutshell
1. Try Resetting Your Adapter If Your Windows Wi-Fi Is Not Showing Up
Sometimes even to solve critical issues such as network adapter not working on your Windows 10 PC, you can take simple steps. For instance, you can reset your network adapter. To do this, find a small button at the back of your adapter and long press it. Now, wait for the signal to get back. This may take a couple of minutes. Once you are through this process, try and connect to your Wifi once again and check if it is turning on or not.
2. Using The Troubleshooter
Windows 10 has an inbuilt troubleshooter that can help you resolve the “wireless adapter not working Windows 10” issue. It can be accessed using the steps mentioned below –
1. Open Settings by pressing Windows + I keys
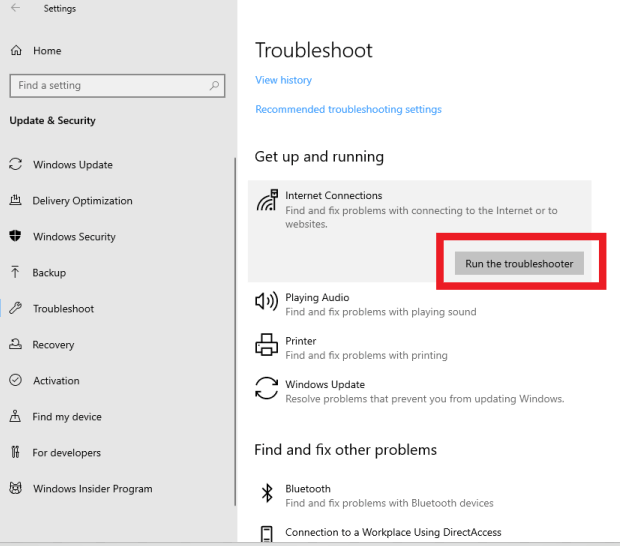
2. Under Update & Security click on Troubleshoot
3. On the right hand side under Internet Connections click on Run the troubleshooter
4. Wait till the process detects problems
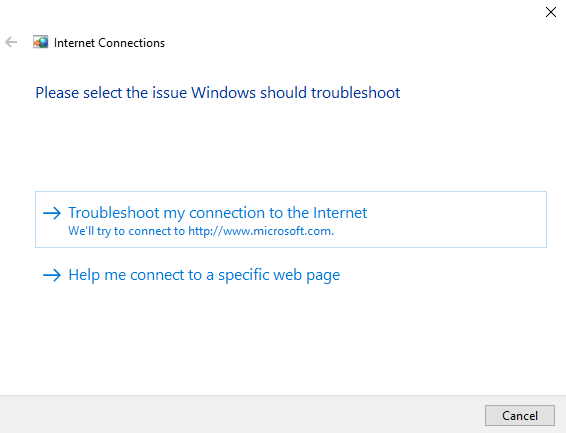
5. Select the issue and follow the steps as shown on the screen
6. Once the process is finished, restart your computer
Also Read: How To Troubleshoot Internet Not Working With A VPN Client
3. Resolving The Issue By The Way Of Command Prompt And Registry Editor
If your Wi-Fi adapter is not working Windows 10 you will be unable to see Wi-Fi options in the settings. To resolve the issue you can take help of the Command Prompt and if required, the registry editor as well –
1. Open command prompt as administrator by typing cmd in the Windows 10 search bar and then selecting Run as administrator from the right hand panel
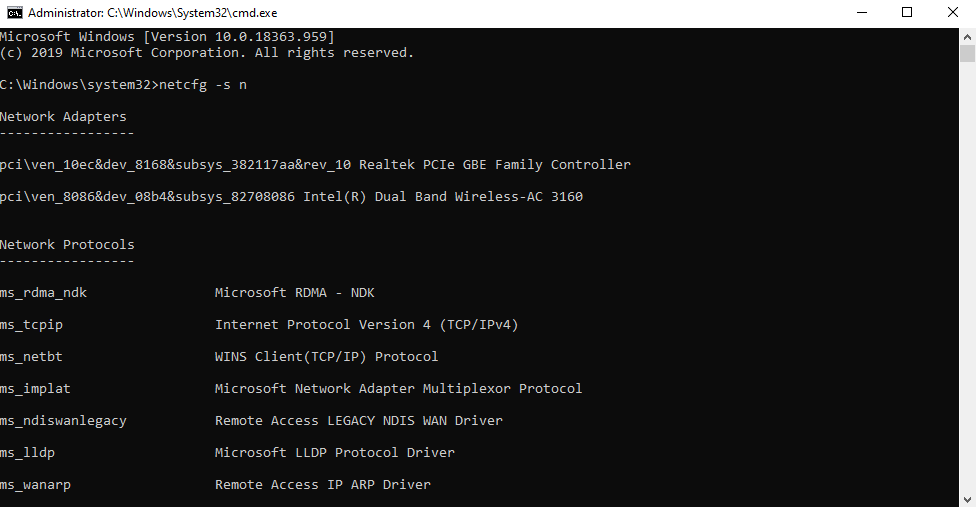
2. Copy-paste the following command and press Enter
netcfg –s n
3. After you have entered the above mentioned command, you will be presented with a list of network adapters, network protocols, network services and network clients. Check if DNI_DNE is present in this list. If yes, this means there’s a problem
4. To resolve the problem, type the following command in the same command prompt one after the other
reg delete HKCR\CLSID\{988248f3-a1ad-49bf-9170-676cbbc36ba3} /f
netcfg -v -u dni_dne
Note: It is quite possible that you might receive error 0x80004002. To resolve this error, head to the registry editor and follow the step as mentioned below –
1. Press Windows + R keys and in the Run dialog box type regedit to open the Registry Editor
2. Navigate to the registry whose path is mentioned below
HKEY_CLASSES_ROOT\CLSID\{988248f3-a1ad-49bf-9170-676cbbc36ba3}
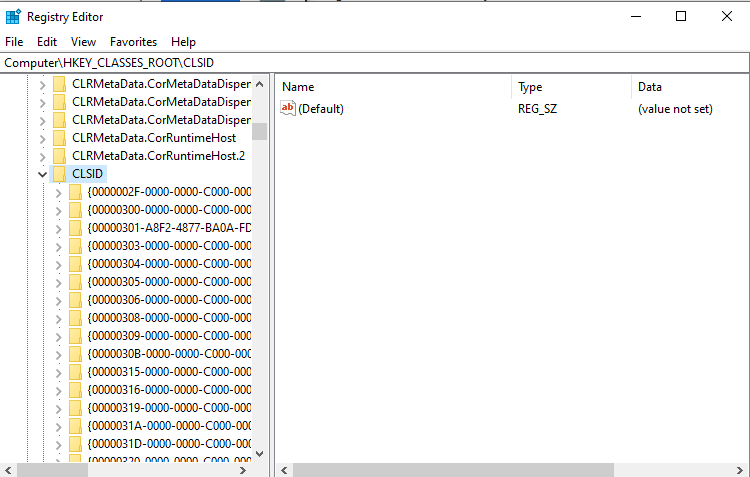
3. Check if DNI_DNE still exists or not. If yes, delete it
4. Restart your computer and check if your Wi-Fi is turning on or not on Windows 10
4. Change Network Mode Using Control Panel
To resolve the network adapter problem you can try changing the network mode using the Control Panel. This should hopefully help you in case your Windows 10 Wi-Fi is not turning on. To change the network mode, follow the steps mentioned below –
1. Type Control Panel in the search bar next to the Windows icon and click on Open from the right hand panel
2. Click on Network and Sharing Center
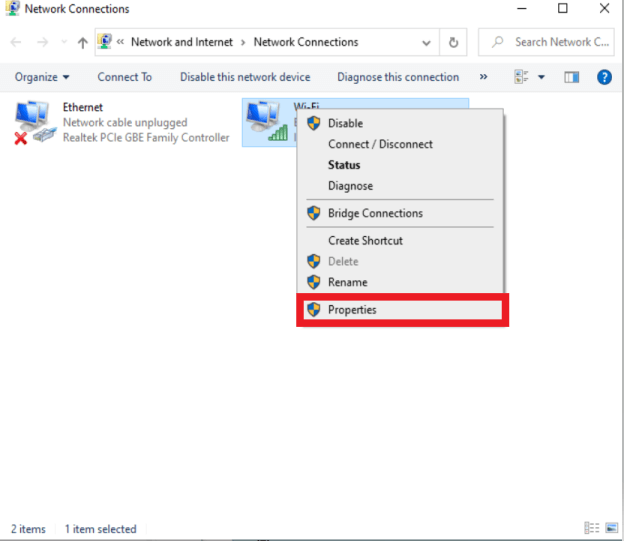
3. From the left hand side click on Change adapter settings
4. Locate your wireless network, right-click on it and then click on Properties
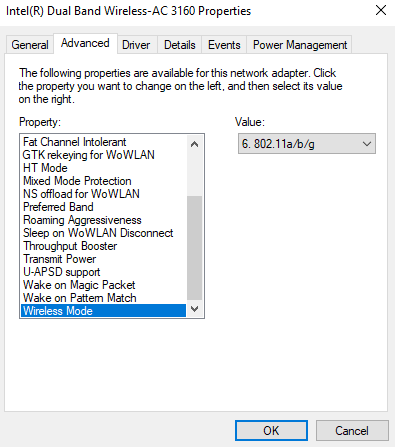
5. When the Properties window opens select the Configure button
6. Under Advanced tab choose the Wireless Mode
7. Change it to the same mode as that of your router by choosing a value from the Value dropdown and click on OK
5. Disable/ Re-Enable Network Adapter or Uninstall/ Reinstall Wireless Adapter
Whether it is a wireless adapter compatibility issue or any other reason for you your Wi-Fi not showing, you can try either disabling or reinstalling your wireless adapter. Here are the steps to do the same –
1. Press Windows + R keys to pen the Run dialog box
2. Type devmgmt.msc
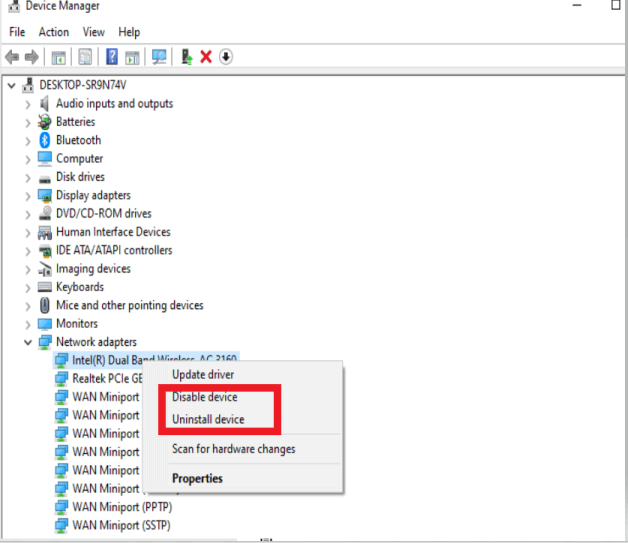
3. When the Device Manager window opens scroll down and click on Network adapters
4. Choose your network adapter, right-click on it and do one of the following –
- Disable device > follow further instructions as shown on the screen > Restart your computer and then again Enable device
- Uninstall device > follow further instructions as shown on the screen > Restart your computer and then again Install device
In The End
Immaterial of whether you are able to connect to the internet or not the above fixes should work fine and be able to resolve “Wi-Fi adapter not working” issue. If the blog has helped you, do share it with others who might be dealing with the same issue. You can also follow us on Facebook and YouTube and stay updated with our content.


Leave a Reply