All modern desktops or laptops have the capability to run multiple displays on Windows 10. All you need is a second monitor – it could be a second laptop monitor or a second desktop monitor. Wondering how to add a second monitor on Windows 10, worry not we have it all figured out for you. But, before that let’s have a look at the situations when you might need dual monitor setup in Windows 10.
Situations When You Might Need To Add A Second monitor on Windows 10
- There are several Windows and even a gigantic 24-inch monitor would feel all packed
- Maybe you are a gamer and you need to make edits to your graphics while test on the other
- You are a tech blogger who needs to have one screen for reference blogs and one screen for text editor on which you can write
Situations could be many and here are the steps you can take to add a second monitor to your existing monitor.
Steps To Add Multiple Displays In Windows 10
First thing first, have a second monitor ready. Once you have that follow the steps mentioned here –
Step 1: Attaching One Monitor To The Another
Attach your second monitor to an outlet, a port available on your first PC. The ports can be seen on the sides of most laptops though there are times when these ports can be seen at the back. You can see them at the back of the desktops.
A laptop for instance has a VGA port, like the one mentioned in the screenshot.

Similarly, there are other kinds of ports too. So, figure out the display port you have. Next, up you will have to select the right cable with the help of which you will be able to setup dual monitors in Windows 10.
Also Read: Monitor Not Displaying Full-Screen On Windows 10?Here’s The Fixes!!
Step 2: Detecting The Second Monitor
In most cases, you might be running Windows 10. Now, since both monitors are connected, next in the step to add a second monitor on Windows 10 is making one monitor detect the second monitor. This should be a straightforward and simple step. Follow the steps mentioned below –
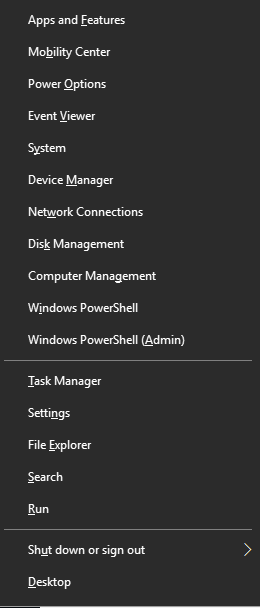
1. Open the power user menu by pressing Window + X key

2. Select Settings
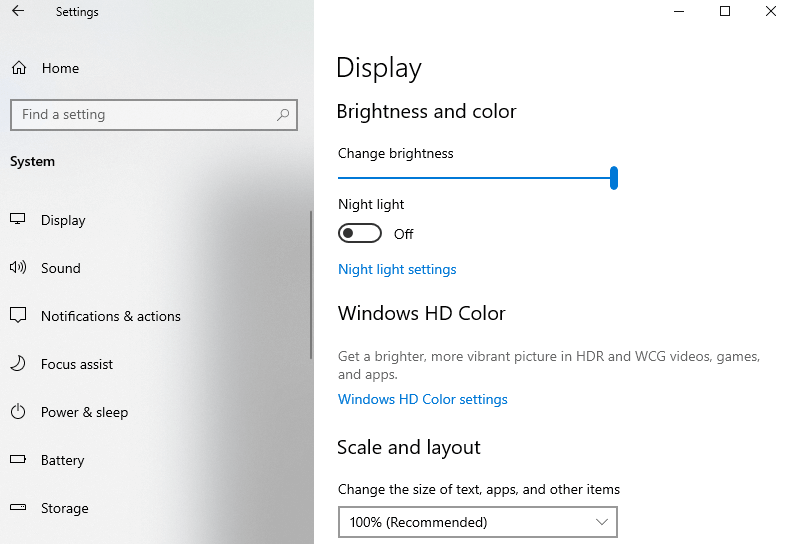
3. Click on System
4. Locate the Display option on the right and click on it.

5. Scroll down till you see Multiple displays option and click on the Detect button
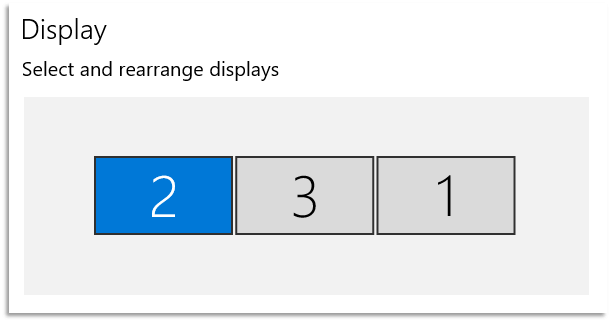
6. Now, if you have rightly connected the monitor you will see two numbers on your screen 1 and the 2
7. You can take help of the Identify option to see which number belongs to which monitor. You can even drag the position and choose which monitor to make number 1 and which to make number 2

Also Read: Best PC Cleaner Software
Step 3: Now, You Have To Choose How Your First Computer Uses The Second Monitor
In this step, you can choose how your first monitor handles the second monitor. For instance, you can mirror what is happening on one monitor onto the other, choose one and not the other or do other stuff.
1. Now, under the Display you will see Multiple displays
2. Click on the drop-down below Multiple Displays and choose your desired option from the menu. The options are explained in detailed below –
Show only on 1: only monitor number 1 will be used
Show only on 2: only monitor number 2 will be used
Extend these displays: This will increase your screen size. You will be able to see whatever it is that you are not able to see on screen 1
Duplicate these displays:
You will see the same desktop on both the monitors
Must Read: Is Someone Snooping on Your Windows PC? Find Out Here!
In The End:
What is your reason to use multiple screens on Windows 10. And, did the steps above help you in connecting monitors, do let us know in the comment section below. For more such tech related content, keep reading Tweak Library. Also, follow us around on all social media platforms, the links of which are mentioned below.


Leave a Reply