
Everyone has encountered a situation when we complain about high CPU usage. I know this is not a new term in the Windows 10 ecosystem. But have you ever wondered why there is high CPU usage? Honestly, there could be many but if what matters is how magnificently we can solve such glitches.
Also, read- How to Use Maximum CPU Power in Windows 10
The high CPU usage can be caused because of antimalware services, Runtime Broker, or Wsappx. But in this blog, we will be talking about antimalware service executable for high CPU usage.
Best Methods To Halt Antimalware Service Executable On Windows 10
Method 1- Windows Defender from scanning its own folder
- Enter “Virus & threat protection” in the Cortana Search.
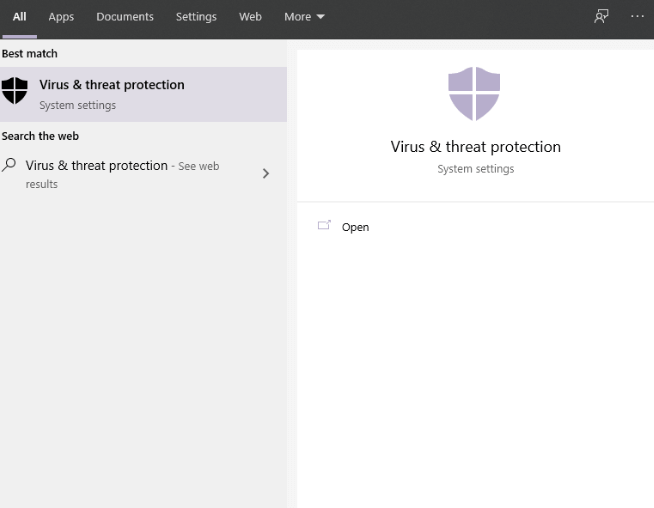
- Under “Virus & threat protection settings” tap on manage settings.

- Scroll down to “Exclusions” step, tap on “Add or remove exclusions”

- Here tap to add exclusion and select folder.
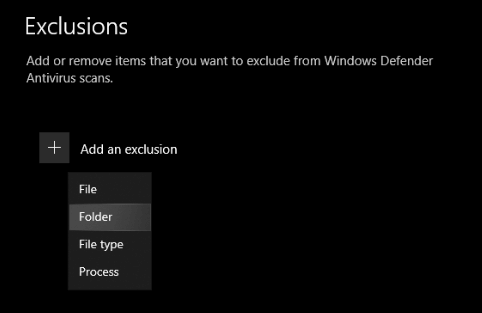
- Once you select to add Folder, paste the following path: file:///C:/Program%20Files/Windows%20Defender/

See whether this method helps in solving an issue with antimalware service executable on Windows 10.
Method 2- Disable Real-Time Protection and reschedule your Windows Defender
- Launch the run box by pressing Win key and R together.
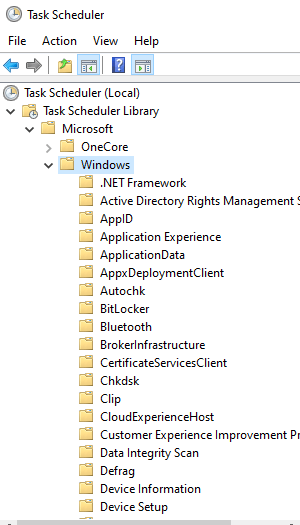
- Enter “taskschd.msc” and press ok.

- Now, follow this method precisely, on the right side of the window tap on Task Scheduler Library > Windows > Windows Defender.
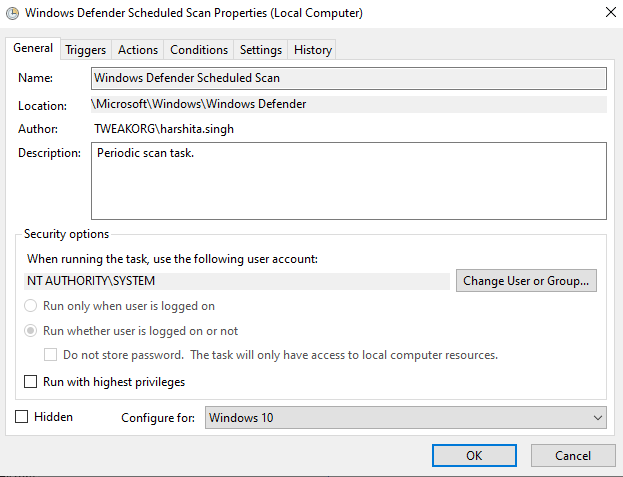
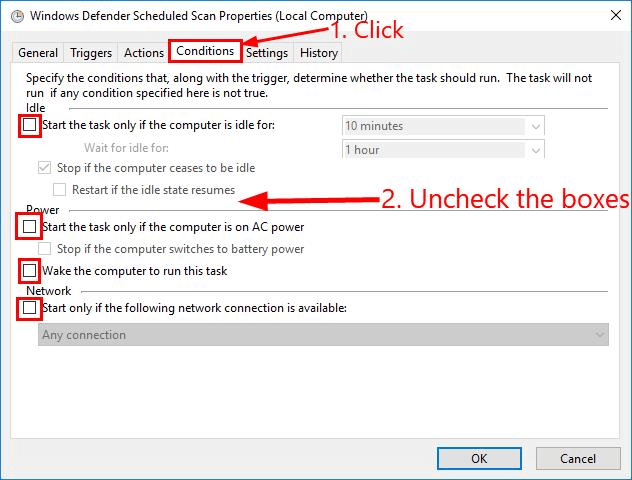
- Now on the middle pane, right-click on “Windows Defender Scheduled Scan” and select properties.
- In the next pop-up, go on General tab and uncheck “Run with highest privileges”
- Now, shift to connection tab and uncheck the following features shown in the image
- Now, tap on the Triggers tab and here select New.
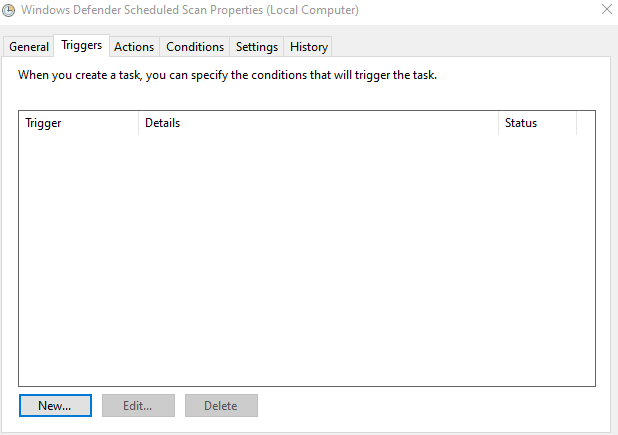
- Schedule Windows Defender scans according to your preference and select Ok.

Hope with this method you can deal with antimalware service that is executable on CPU usage.
Method 3- Disable Executable Antimalware Service
- Launch the run box by pressing the win key and r together.
- Enter “regedit” and press ok.
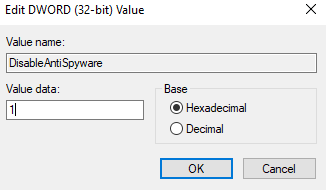
- Follow the navigation path “HKEY_LOCAL_MACHINE\SOFTWARE\Policies\Microsoft\Windows Defender”
- On the right side of the Registry Editor, if there is registry named as “DisableAntiSpyware” double click on it to set Value 1.
- If there is no registry mention there, right-click on the right-side pane and follow the below image:
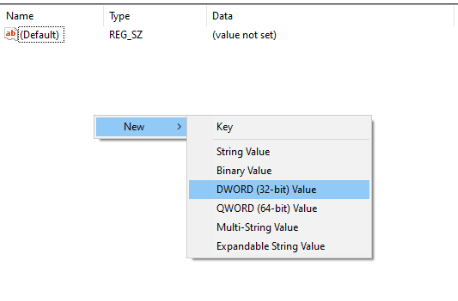
- Rename the latest created entry as a “DisableAntiSpyware” and set the value data as 1.
Check with this method antimalware service executable on high CPU usage is resolved.
Method 4- Delete Faulty Windows Updates
As said above, antimalware service executable on Windows 10 happens because of update bugs, so in this method, we will eliminate faulty Windows Update from your system.
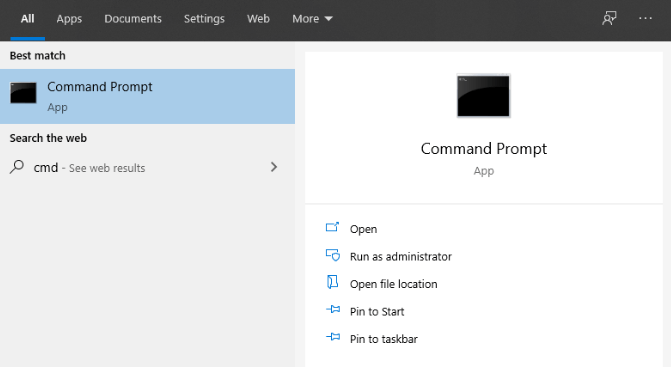
- Launch the Windows run box by pressing Win key and I together. Here enter “CMD” command to open Command Prompt.
- If the run box is not allowing “CMD” to run as an administrator. You can launch it directly from the Cortana search and tap “Run as Administrator” refer to the below image.
- Now enter “%PROGRAMFILES%\Windows Defender\MPCMDRUN.exe” -RemoveDefinitions -All” and hit enter.
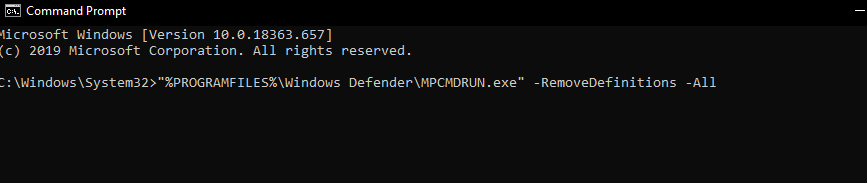
- The next command to enter is “%PROGRAMFILES%\Windows Defender\MPCMDRUN.exe” -SignatureUpdate”
Let the process complete and check antimalware service executable is now disabled by removing faulty Windows update.
Method 5- Disable Windows Defender from Local Group Policy Editor
- Launch the Windows Run Box and enter “gpedit.msc” [Same As Method 2]
- Now follow the below method carefully: Computer Configuration > Administrative Templates > Windows Components > Windows Defender.
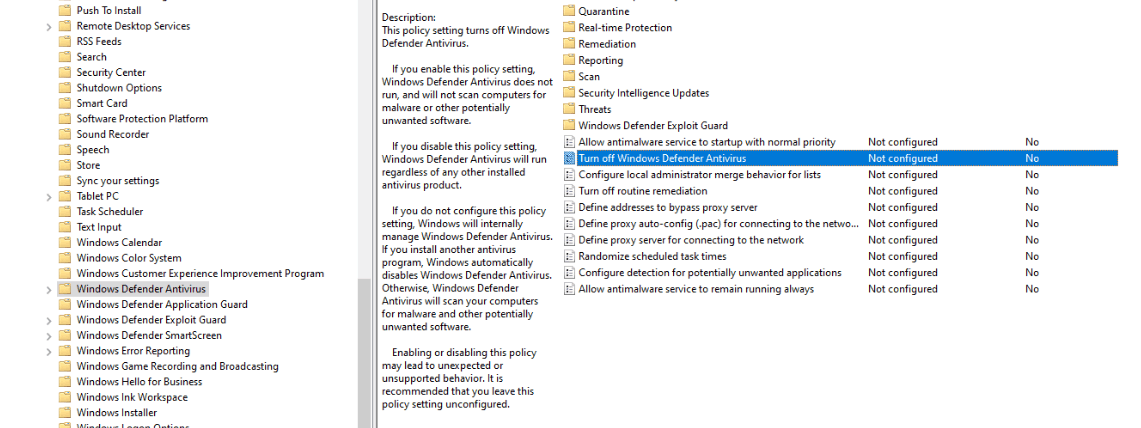
- On the left side pane, double -click on “Turn off Windows Defender Antivirus”
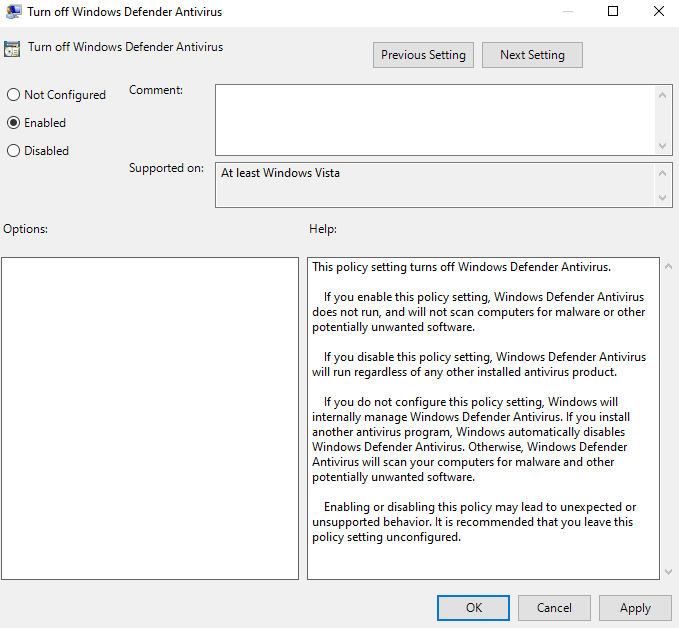
- On the next settings page, tap Enabled followed by Apply and Ok.
This is how we can disable windows defenders from the local group policy editor.
Folks if you are thinking about what antimalware service executable on Windows 10 is. Let me tell you antimalware service executable on Windows 10 is a Windows Defender’s background process that scans malicious files and software. It also helps in installing antivirus updates and taking care of other security purposes on your system.
But there is a drawback that’s why we have disabled antimalware service executable. The foremost reason for disabling this is because it consumes a lot of CPU usage and other is its full scan feature that slows your system.
That’s All Folks!
Hope you like this article and now understand how to deal with antimalware service executable when it consumes high CPU usage. If I missed out at any point, or there is any other better way to deal with this glitch share it with us in the comment section below.
Don’t forget to share and subscribe to our newsletter for amazing tech-related tips and tricks.


Leave a Reply