Tweak Windows settings easily to make the most out of it!
Windows Narrator also known as Screen Reader reads the text on the screen aloud. Not only this, Narrator on Windows describes events such as error messages so that a user can use the PC even without display.
| A Note To Consider:
Narrator is available in following languages and locations: English (United States, United Kingdom, and India), French, Italian, German, Japanese, Korean, Mandarin (Chinese Simplified and Chinese Traditional), Cantonese (Chinese Traditional), Spanish (Spain and Mexico), Polish, Russian, and Portuguese (Brazil). |
The use of Windows Narrator is not a compulsion and it entirely depends on your choice. You can anytime turn on or turn off Windows Narrator on your PC using a few ways.
How To Turn On/Off Windows Narrator?
Way 1: Use Keyboard Shortcut To Turn Off Narrator
The quickest and the simplest way to use keyboard shortcut to turn off a narrator on windows. Usually the Narrator is turned on by default. You can anytime turn the narrator off by holding down Ctrl + Win while pressing Enter.
With this you can exit the narrator, and you’ll hear a voice saying Exiting Narrator. If this method doesn’t work for your PC, try next.
Way 2: Exit Narrator Window
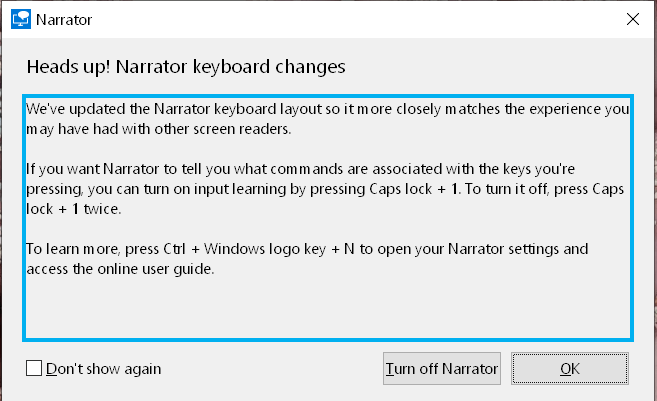
While Narrator is enabled on your Windows PC you can turn off Windows narrator by exiting the narrator window directly. Go to the Narrator window and click Exit at the bottom or click on the X mark at the top right of the narrator window. It will turn off the Windows narrator.
Way 3: Force Quit To Turn Off Windows Narrator
Force quitting the narrator helps when you are unable to work and the narrator is reading on-screen text aloud for long. Here’s how to force quit Windows narrator.
- Open Task Manager by pressing Ctrl+Shift+Esc keys together.
- Find Screen Recorder in the list of apps under Processes Click on it for more options.
- Now, double click on the End Task in the bottom right of the screen.
If you are still unable to turn off Windows narrator, follow the method discussed below.
Way 4: Disable Narrator From Device Settings.
Last but not the least, to disable Windows narrator. Follow the steps below to turn off the narrator on Windows:
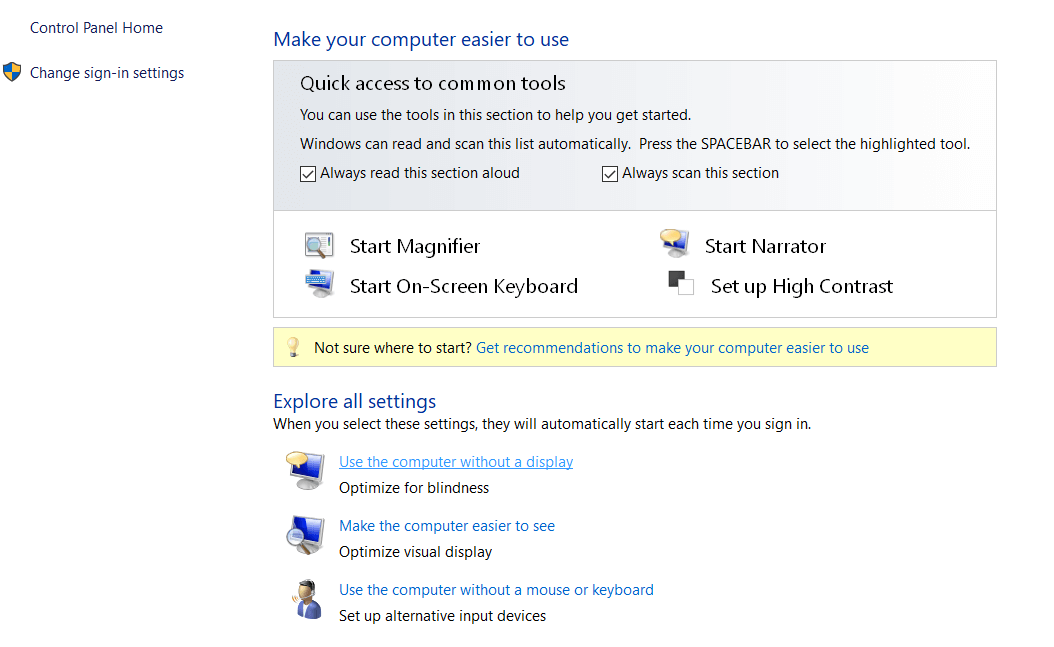
- Go to Start > Control Panel > Ease Of Access Center.
- From the results that appear, click on Ease Of Access Center to proceed.
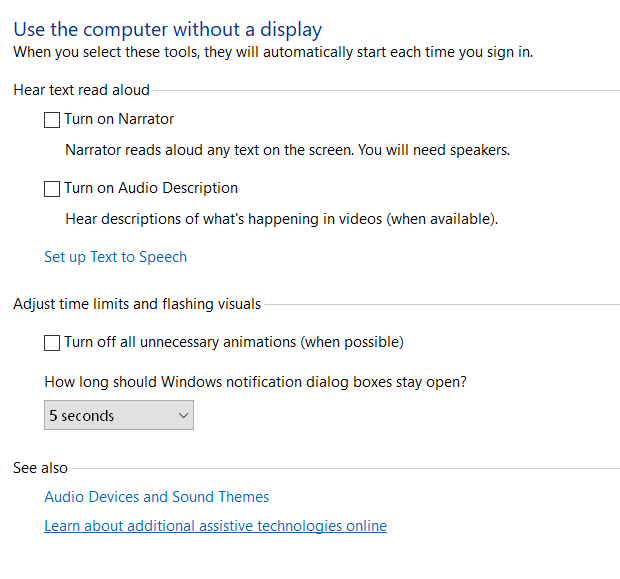
- On the next screen, under Explore all Settings, find Use a computer without a display and click on it for further process.

- The screen next to this will display multiple options wherein the first one is Turn On Narrator. Uncheck the checkbox to turn it off.

- Click on Apply at the bottom of the screen and press OK. That’s it and it’s done.
After you press OK you’ll exit the narrator window and this step indicates that you are no longer be signed into the narrator unless you turn it on again.
How to Turn On Windows Narrator?
I’m general, there are three ways to turn on Windows Narrator. All of them are listed below:
- Press Ctrl + Win + Enter in Windows 10 to turn on the Narrator.

- Turn on the narrator directly from the sign in screen by clicking on the Ease of access icon located in the bottom right corner. Turn the toggle on under Narrator.
- If you are logged into your PC, go to Settings > Ease of Access > Narrator. Turn the toggle on under Use Narrator.
Wrapping Up:
That’s all folks! Isn’t it quite easy to enable or turn off Windows narrator? These were some of the quick ways to disable screen recorder on your Windows 10 check them out and let us know in the comments if it works.
Drop us a note if you have any suggestions or queries.
Keep reading Tweak Library for more such content.
Recommended Readings:
How to Use on Screen Keyboard on Windows 10
Facing Keyboard Lag in Windows 10? Here’s the Fixes!
Keyboard Keys not Working on Windows 10? Here’s how to fix!


Leave a Reply