
Gmail is undoubtedly the best email client to manage your emails and connect with uncountable email users. Gmail itself has over 1 Billion active users around the world. Sending an email to a single recipient is okay but what if we want to send emails to multiple recipients? You can send individual emails to all of them or you can use mail merge in Gmail and send emails to multiple recipients.
Though it’s a pretty easy function yet many of us are unaware of mail merge steps. Using mail merge, we can use the same content with a customized message like different names, addresses, personalized subject line or hyperlinks. Here’s how you can do it.
Step 1. Open Google Chrome on your PC or Mac and sign in to your Google account.
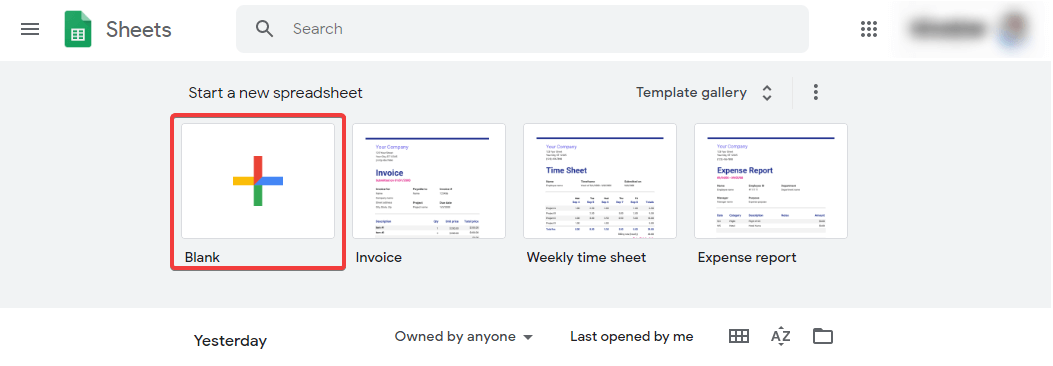
Step 2. Open Google Sheets and click on + link to open a new Sheet.
Step 3. Create a list of recipients for your mass email in the below format. This mail merge step will be useful for future use whenever you wish to send an email to the same recipients.
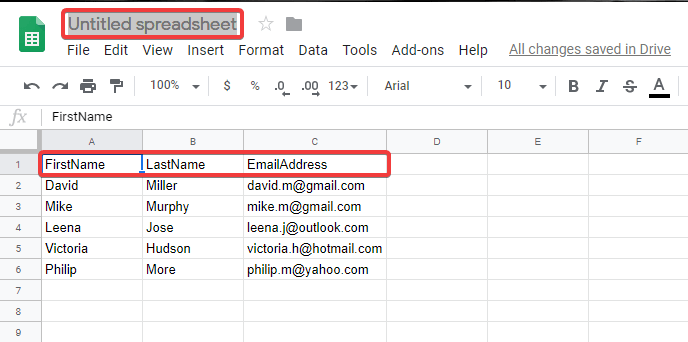
Step 4. Once you have created the list of email recipients, rename and save the file.
“Please Note: Row 1 will be the column header which shouldn’t have space or special characters. Ensure that the email addresses are correctly entered. Double click on ‘Untitled Spreadsheet’ at the top left and rename the spreadsheet. Click on any blank cell and the changes will be autosaved.”
Also Read: Configure Gmail and Windows Live Hotmail with Microsoft Outlook
Step 5. The next mail merge step is to get a plugin that will enable you to do the trick. Open another tab on Google Chrome and browse GMass to get a plugin.
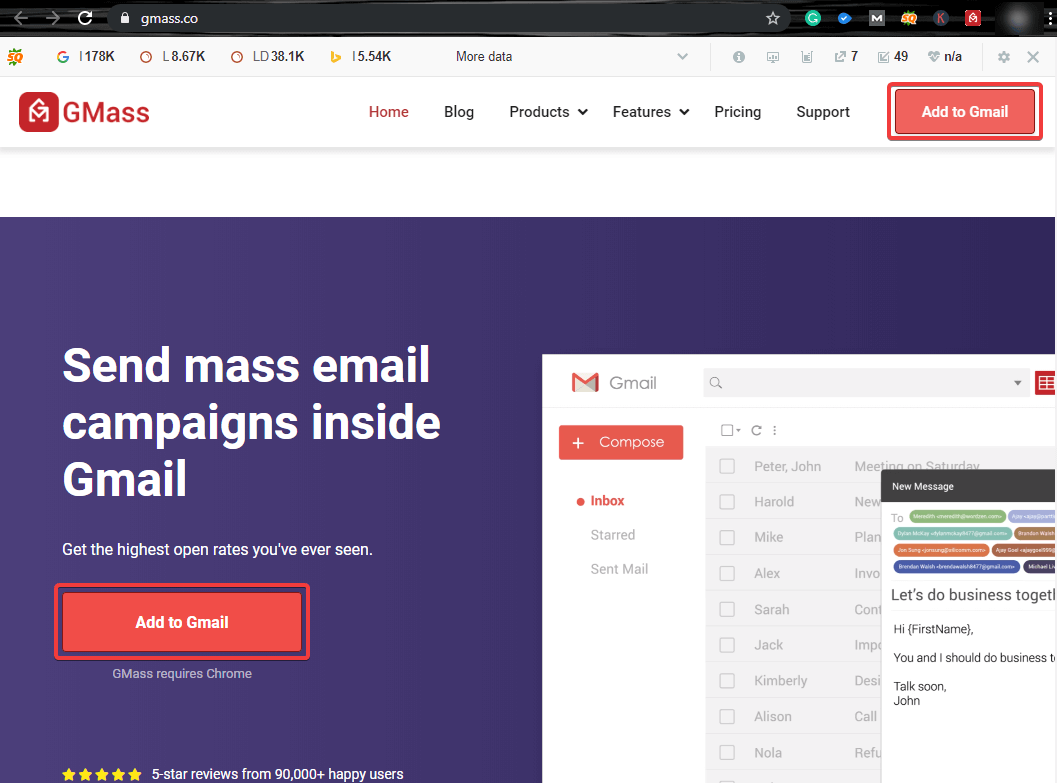
Step 6. Click on ‘Add to Gmail’ to get the GMass extension for your Gmail. If prompted, click on the ‘Add Extension’ button. This extension allows you to send FREE mass emails to 50 recipients on a daily basis using mail merge in Gmail. If you have more recipients, you can upgrade the plugin and purchase a plan for unlimited usage.
Step 7. The plugin will be installed and will redirect the page to the Gmail inbox. If you have multiple Gmail accounts, it will ask you to select a Gmail account to use and ask for permission to allow using GMass.
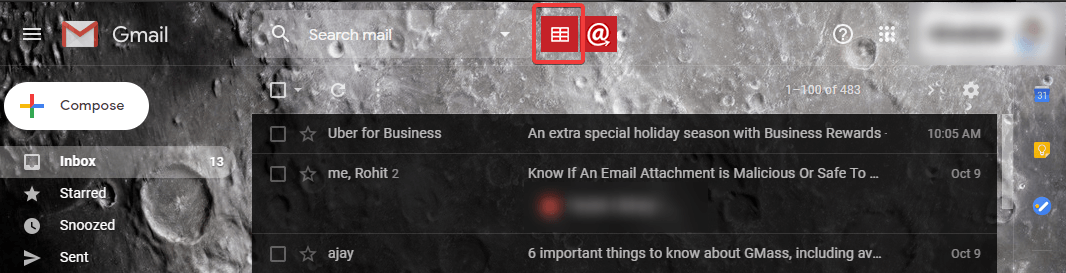
Step 8. Go to your inbox and click on the RED Spreadsheet Icon on the top of the inbox list.
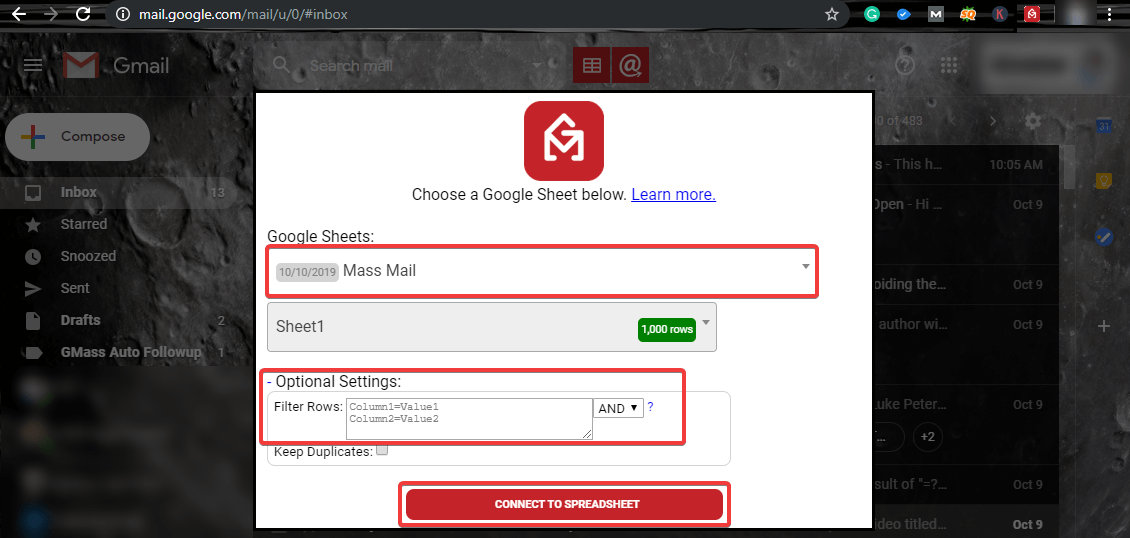
Step 9. Select the Google Sheet you prepared with the contact list, maximize ‘Optional Settings’ and in front of ‘Filter Rows’ enter “Column1=Value1” and “Column2=Value2” and click on ‘Connect to Spreadsheet’ button.
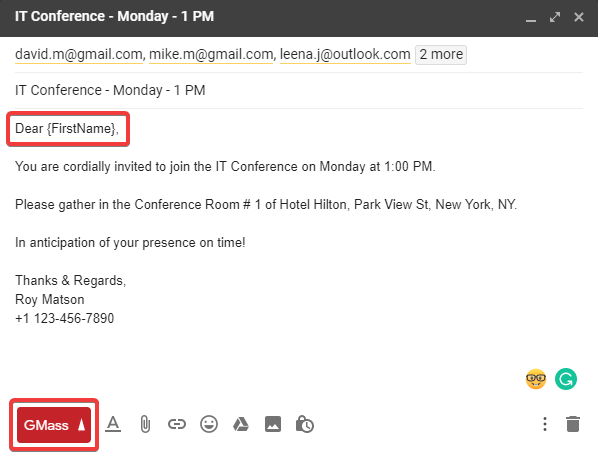
Step 10. Draft your Email and customize the greetings or subject line as shown. Once you are done, click on the ‘GMass’ button (Red button at the bottom of the screen) to send individual emails. ‘GMass’ button won’t show other recipients to anyone.
While drafting your email, you can use all Gmail edit and formatting options to customize your email. You may also attach Documents and Pictures, a Google Drive File, Hyperlinks or Links to other websites.
“Please Note: If you click on the ‘Send’ button, it will send the mass message to the recipients showing everyone in the recipient’s box.”
There are other extensions available in Google Chrome store however we have selected the one which has worked for everyone and has shown wonderful results.
Summing Up
We have covered how to send emails to multiple recipients using mail merge in Gmail. For emails up to 50 recipients, this is a free tool however if you need to send it to more than 50 recipients, you can upgrade and buy a premium plugin and explore another pool of services that includes various tracking and scheduling options. We hope you make use of mail merge in Gmail option and increase your productivity.
If this article turned out to be helpful to you, please like and share this with your colleagues. For more such tips, tricks and tech-related updates, click on the bell icon to get regular updates from Tweak Library. Do share your thoughts about this article in the comment section.
Next Read: Ways To Change Gmail Password & Gmail Password Recovery
Follow Us:


Leave a Reply