Be it a college student or professional, all have to deal with PDF files. In our earlier articles, we’ve discussed ways to convert PDF files on Mac, Windows, Android. But if you want to print PDF then?
Worry not, we have your back.
In this article, we will discuss how to use Windows 10 built-in way to print a PDF file. Although, Microsoft Print to PDF is a little late to the party it is now there in Windows 10. Using this feature, you can print PDF file using. This means, no longer you need to use third-party software to print PDF like Bullzip, etc.
Printing PDF using Microsoft Print to PDF is very easy shortly we will explain how to use Microsoft Print to PDF feature. Also, we will explain if you are unable to see Print to PDF option then what should be done.
Here’s how to use Microsoft Print to PDF
Microsoft’s popular application Word, Excel allows printing PDF. Let’s look at how it is done individually.
How to use Print to PDF in Word.
To print a Word file to PDF you will first need to open the file and then follow these simple steps:
Steps to use Print to PDF in Windows 10
1. Click File > Print or you press Ctrl +P keys.
2. This will open a new window here, under Printer select Microsoft Print as PDF > Print
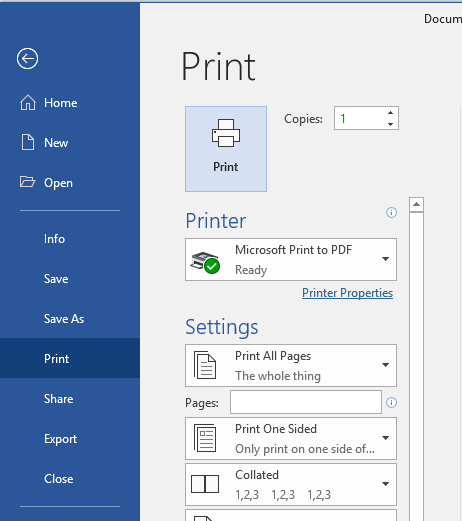
Note: You can select other settings like pages to print, Print One Sided, etc.
3. Once all the settings are selected to give a name to the newly created PDF file and save it. This will create another file in PDF format.
4. Now you can print this saved PDF file.
Note: Print to PDF is different than Save as PDF because it does not change any information.
How to use Excel Print to PDF
To print Excel to PDF you need to follow the similar steps as we did for Word document.
Using these simple steps, you can use Microsoft Print to PDF in Word and Excel.
However, if you are unable to see Microsoft Print to PDF on Windows 10 you will need to activate it.
Steps to enable Microsoft Print To PDF
1. Type Control Panel in the search bar.
2. Here, make sure under View by its Category is selected. Now click on Programs.
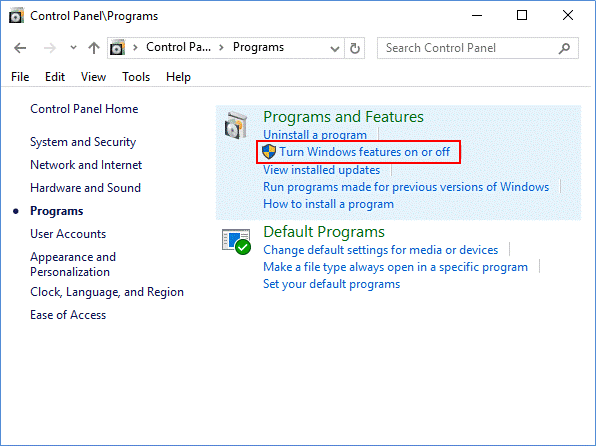
3. In the new window, the open click on Turn Windows features on or off.
4. Next under Windows Features box check the box next to Microsoft Print to PDF > Ok.
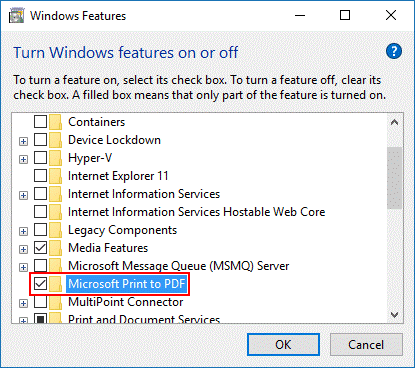
5. Now restart your Windows 10 to bring changes into effect.
Steps to add Microsoft Print to PDF on Devices and Printers
1. Type control panel in the search box
2. Here click on Hardware and Sound > Device and Printers.
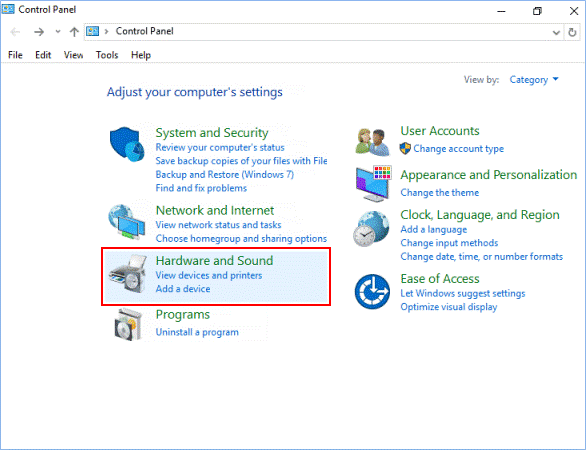
3. Click Add a Printer.
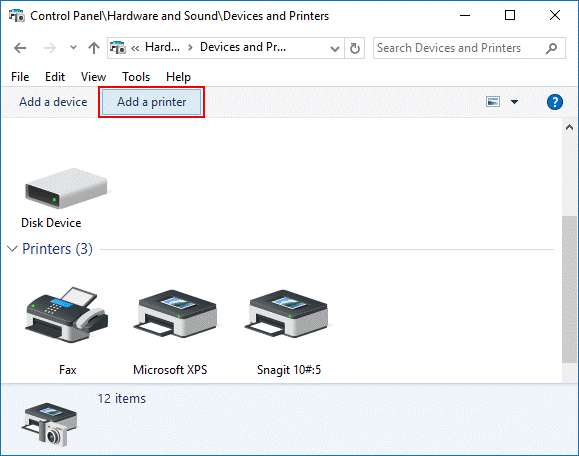
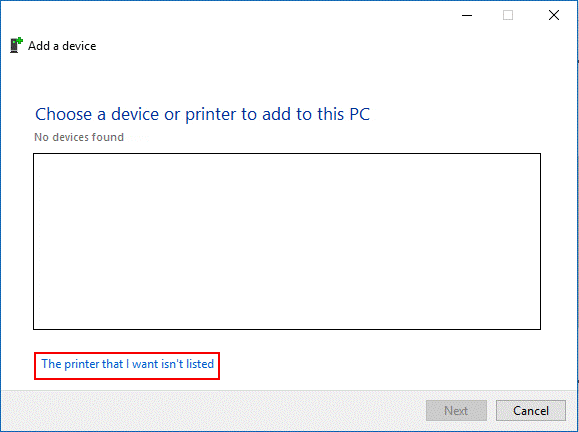
4. In the window that opens click on The printer that I want isn’t listed.
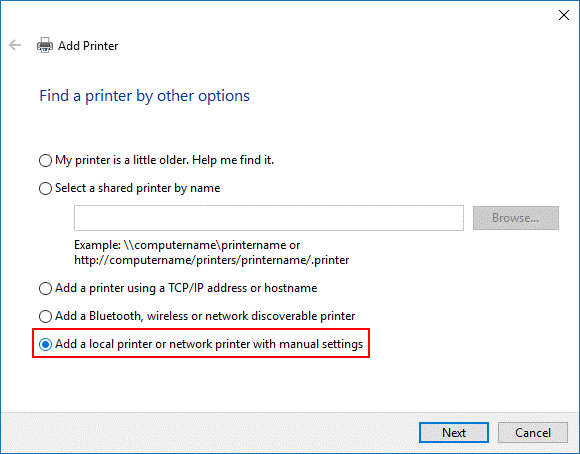
5. In the consecutive window, select Add a local printer or network printer with manual settings and click on Next.
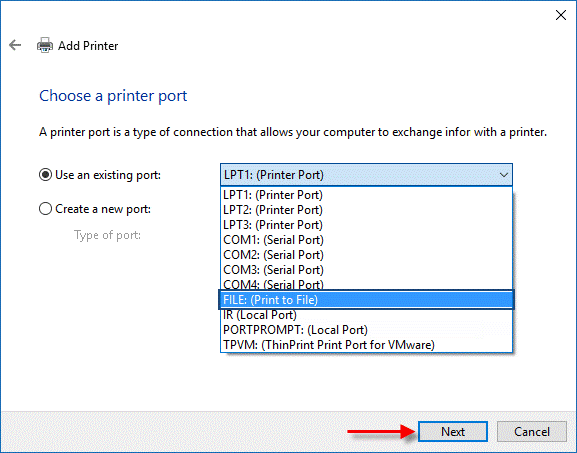
6. Select Use an existing port, select FILE (Print to File) from its drop-down menu, and click on Next.
7. Now choose Microsoft from the left pane > Microsoft Print to PDF > Next.
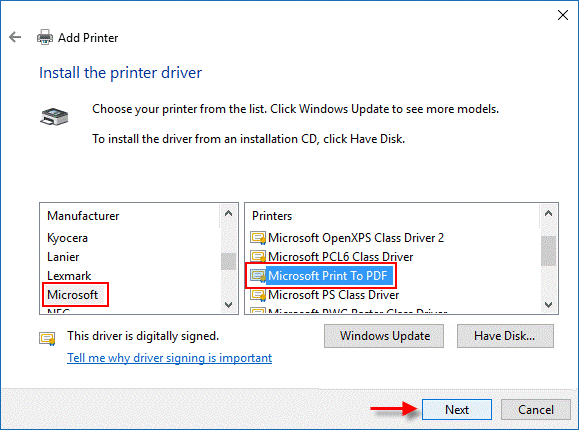
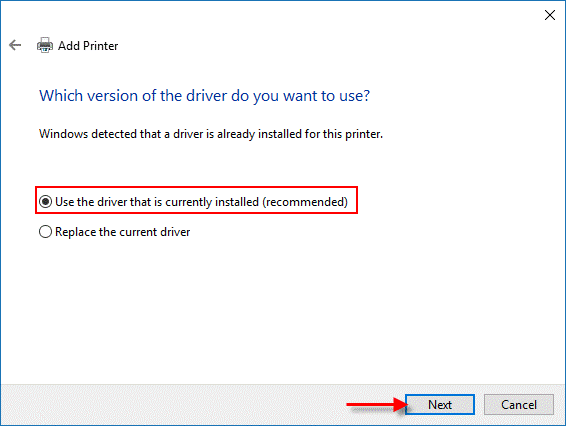
8. Choose Use the driver that is currently installed > Next.
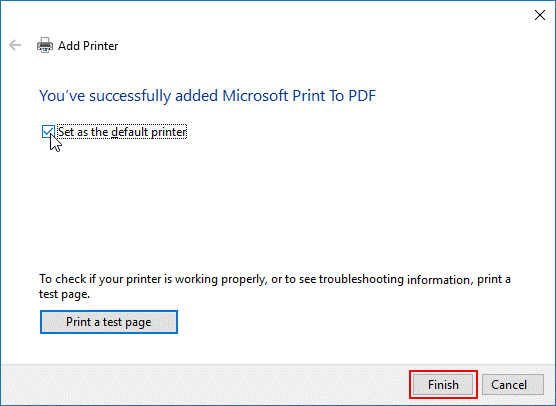
9. Select Set as the default printer > Next > Finish.
So, using these simple ways you can easily use Microsoft Print to PDF option. But there’s a catch Print to PDF method will only work if you are running Windows 10. Also, you cannot edit this PDF document to edit you will need to use a third-party tool like Bullzip.
Must-Have Free PDF Printer App – Bullzip PDF Printer
You can find tons of freemium PDF printer applications, but finding the best is really a pain. We understand this therefore, we’ve done all the work and suggest using Bullzip PDF printer.
This free PDF printer works as a Microsoft Windows printer and allows you to write a PDF document from virtually any Microsoft Windows application. To use it you need to simply download and install Bullzip PDF printer. Once installed, you are ready to print PDF from any application.
Hope these steps will help using Microsoft Print to PDF to print PDF document. Do let us know what you think Microsoft Print to PDF and how helpful is it for you.
Follow us on:


Leave a Reply