
Still thinking of upgrading to Windows 10? Well, it’s never too late though more than half of the world had switched to Windows 10. Microsoft announced that its much-hyped free Windows 10 upgrade offer will end in 2016. But that’s not exactly the case. It’s just the GWX tool which ended support on upgrades however all the other upgrade tools are still working. But how does it matter as the end result is a valid digital license which is what we are looking for. Well, before it actually ends, let’s upgrade your system to Windows 10 in just a few clicks.
Don’t know how to upgrade to Windows 10?
Well, you just need to follow a step-by-step guide to performing the upgrade and it’s as simple as installing a program.
What is Gwx?
GWX stands for ‘Get Windows X (10)’. ‘GWX.exe’ is one of the advertising software by Microsoft for Windows 10 and displays a white windows flag icon in the notification area of the Taskbar. It was used to prompt Windows 8.1/8/7 users to upgrade their OS to Windows 10. You should follow these steps to upgrade Windows 7 to Windows 10 or to upgrade Windows 8.1 to Windows 10.
Minimum Hardware Requirements for Windows 10
- Processor: 1GHz or faster processor or SoC
- RAM: 1GB for 32-bit or 2GB for 64-bit
- Hard Disk Space: 16 GB for 32-bit or 20GB for 64-bit OS
- Graphics Card: DirectX 9 or later with WDDM 1.0 driver
- Display: 800×600
Note: If you are upgrading from Windows 7, then you must have ‘Windows 7 Service Pack 1’ installed on your PC. For Windows 8, 8.1, it is not a mandate as these are earlier versions of Windows.
How to create a full backup of Windows 7
Although Microsoft has worked a lot on the Windows 10 upgrade process still there may be a possibility of an upgrade failure. To avoid such circumstances, it is recommended to have a Windows full backup so that you can use it to roll back if anything happens. Windows 7 and Windows 8.1 comes with the System Image Backup tool to create a backup of your entire computer.
Windows Process
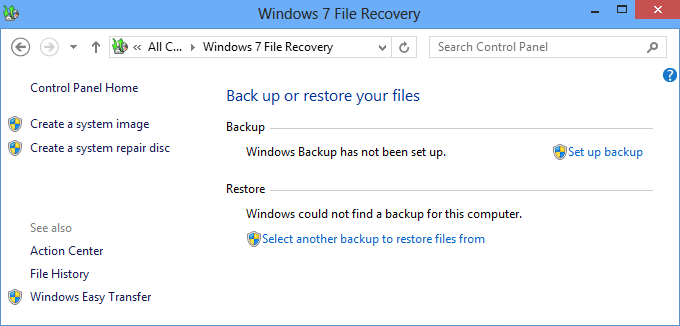
Step 1. Pres ‘Win + R’ -> type in ‘Control Panel’ and press enter to open Control Panel.
Step 2. On the top right side of Control Panel in the search box, type ‘Windows 7 File Recovery’ and click on ‘Backup & Restore Windows 7’
Step 3. From the left-hand side pane, click ‘Create a System Image’.
Step 4. It will ask you for a destination folder. You may select any other partition of hard drive except C: Drive. You can also save the backup on an external Hard Drive, a DVD or a Network Location. Select the destination folder and click on ‘Next’.
Step 5. Confirm your settings and click on ‘Start backup’. It may take time to create the backup according to your data and the location where you are trying to take a backup.
Step 6. Windows will save the backup image on the selected location and will prompt to create a ‘System image repair disc’, click ‘Yes’ to continue.
Right Backup Windows
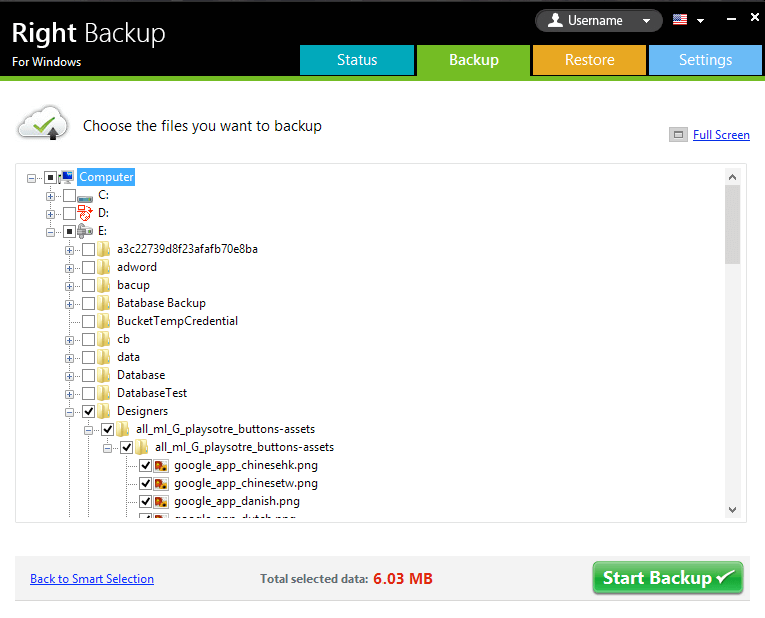


Click here to sign up for right backup and get free storage now!!
If you face challenges in following Windows process, you may also try Right Backup windows which is a third party tool to backup all your data on cloud storage.
- It’s an easy to use backup software and within a few clicks, you would be able to back up your entire data on cloud storage.
- It allows you unlimited space storage so that you never miss out on any single file.
- It allows you to access your data anywhere from any device.
- Your data is secured with Amazon trusted services using multiple layers of protection.
Also Read: Why Upgrade From Windows 7 to 10?
How to Upgrade to Windows 10
Before initiating the Windows 10 upgrade process, it’s always recommended to uninstall any antivirus, security software which may interrupt you from a successful upgrade to Windows 10.
It is also recommended to disconnect any hardware connected to your computer including printer, external hard drive, USB peripherals, phone or camera. These connections may result in system failure during the Windows 10 upgrade process.
Follow the steps to upgrade from Windows 7 to Windows 10
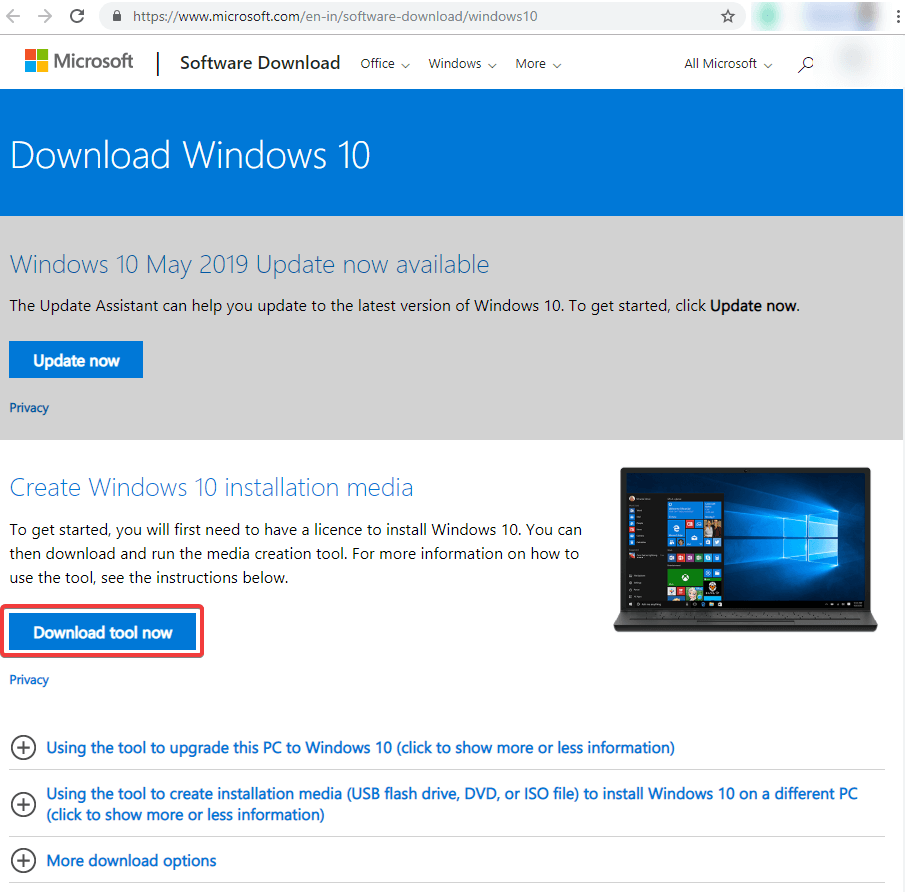
Step 1. Download the Windows 10 Media Creation Tool from the Microsoft website.
Step 2. Double-click the downloaded tool to launch Windows 10 upgrade assistant.
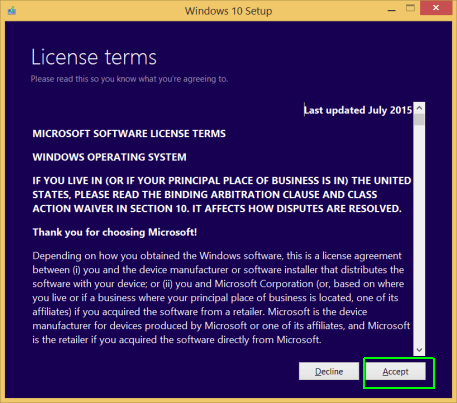
Step 3. Click to accept the licensing agreement.
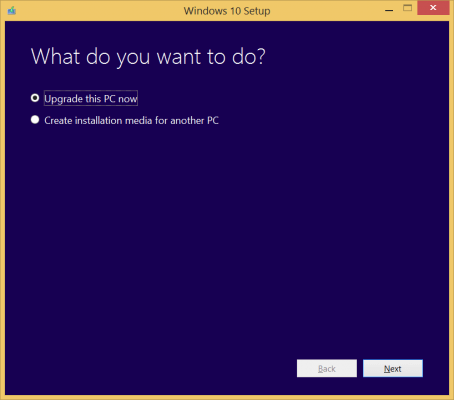
Step 4. Put a tick on ‘Upgrade This PC Now’ radio button to download the files and initiate the Windows 10 upgrade process.
Step 5. Click on the ‘Next’ button.
Step 6. Enter the Windows 7, 8, or 8.1 product key for the upgrade and click on ‘Next’ button.
Step 7. Click on the ‘Accept’ button to proceed further with the licensing agreement again.
Step 8. Change what to keep and what not. By default, it keeps Windows files, Personal files, and Apps during the upgrade process.
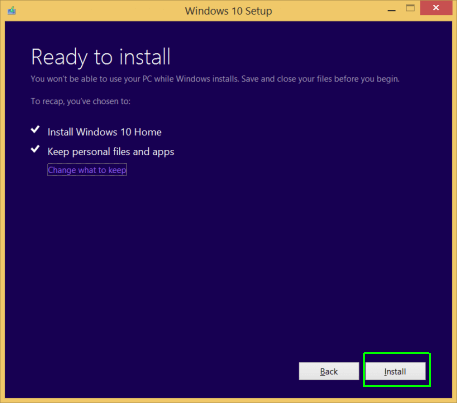
Step 9. Finally, we will click on the ‘Install’ button to finish the Windows 10 upgrade assistant.
Once we are done with these steps to upgrade Windows 7 to Windows 10 or to upgrade Windows 8.1 to Windows 10, the system will restart automatically. It will come back to the ‘out-of-box-experience’ (OOBE) to finish the set up of Windows 10. It will restart again and finally, you will come back to the desktop screen of Windows 10.
For more such tips, tricks and tech related updates subscribe to Tweak Library and if you are more into tech-related videos do watch and subscribe to our YouTube channel. You could also reach us on Facebook and Pinterest.


Leave a Reply