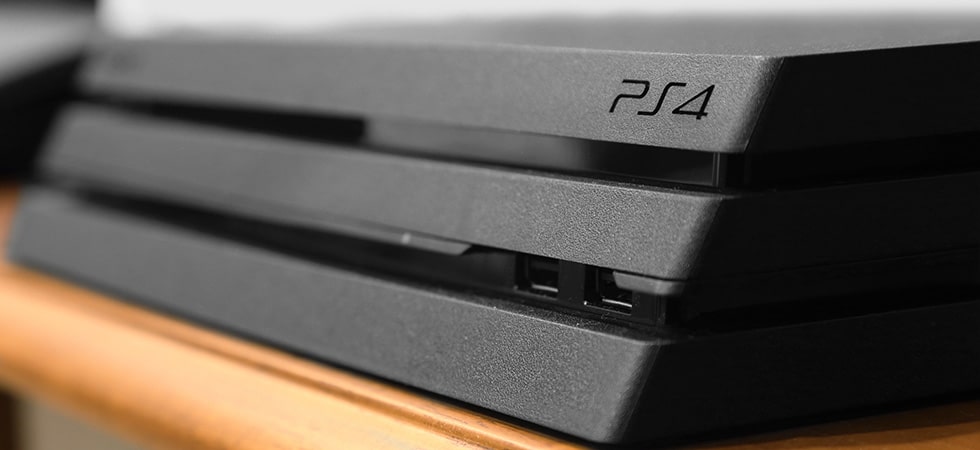
If you are a gaming fan and own a PS4, PS4 slim or PS4 Pro then you may have encountered hard drive failure error. This means you’ll either need to replace your hard drive or need to upgrade hard drive to a better one like Solid State Drive. Whatever the reason is for hard drive replacement you can easily replace the hard drive of your PS4, PS4 slim and PS4 Pro easily.
Before upgrading the PS4 hard drive make sure you have got everything ready.
1. Screwdriver: To unscrew hard drive casing and removal of the hard drive from PS4.
2. External Hard Drive: To take backup.
3. Pendrive (Thumb drive): To Update PS4.
4. External Drive: Upgraded HDD or SSD.
Once you have all these items ready you can change your PS4 HDD to a better one.
We are providing you with the steps to change hard disk for all the three versions of PS4. If you own any one of the consoles or all three of them you can change the hard drive.
Types of hard drive supported by PS4, PS4 Slim and PS4 Pro.
Before purchasing the hard drive for your PS4 devices make sure hard drive is not more than 9.5 mm think. The standard hard drive in the console is 2.5 inch SATA 500 GB. Due to size limitations currently, you can purchase 2 TB hard disk because above that size of the hard drive will be more and it won’t fit in the console.
Also Read: PS4 Accessories that will make you love your console more!
First of all Take backup of your PS4 system.
Taking back up of your PS4 console is necessary because if anything goes wrong you can easily restore all your data.
To take the backup of your PS4 console, follow the steps below:
1. Connect the External hard drive of the USB storage device to one of the PS4’s USB ports.
2. Now Go to Settings > System > Back Up and Restore.
3. Choose what data you’d like to back up. Note: If you do not take the backup of the applications, you have to reinstall them again.
4. Name the backup you are taking and then press the X button on the controller.
The backup process will start.
How to change PS4 Pro hard drive:
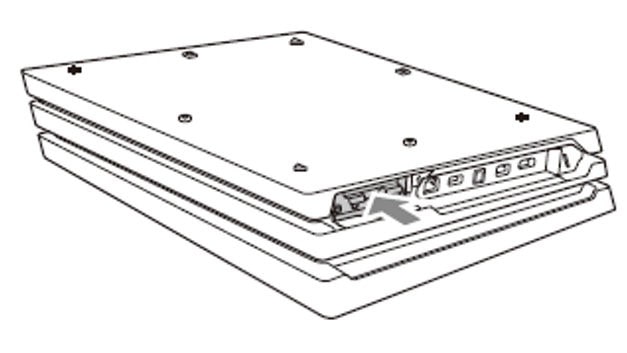
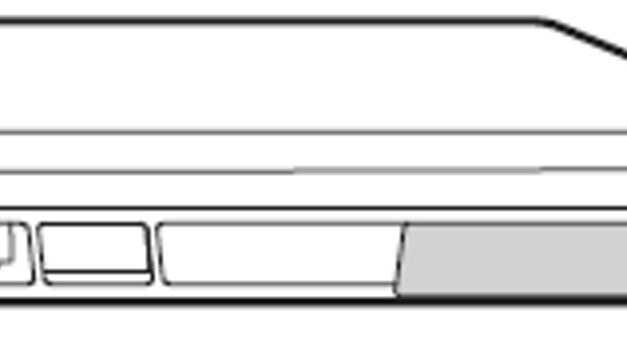
1. Remove the Hard Drive bay cover located at the rear of the system.
Note: Removing the sticker covering the Hard Drive bay will not affect the warranty.
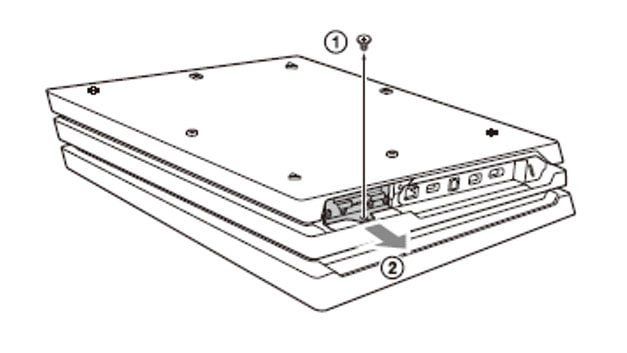
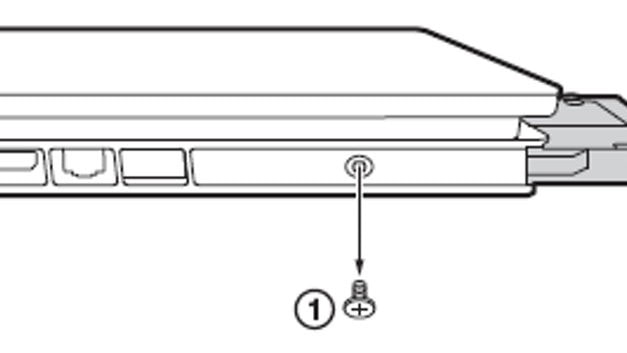
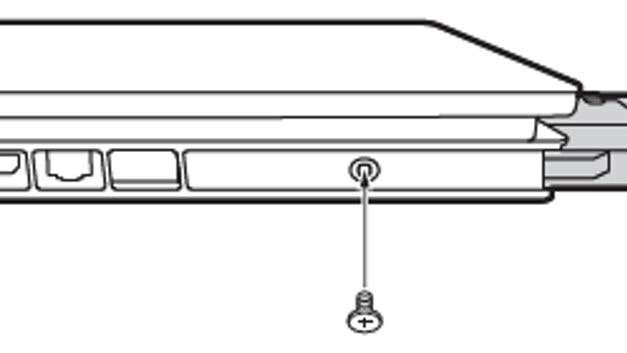
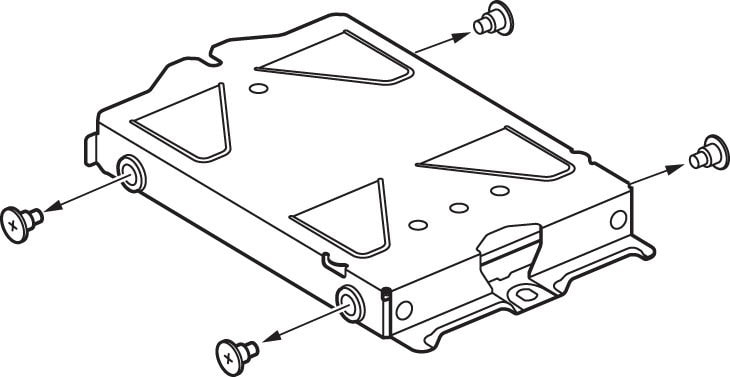
2. Remove the screw which holds the hard drive case in its place and pull out the hard drive.
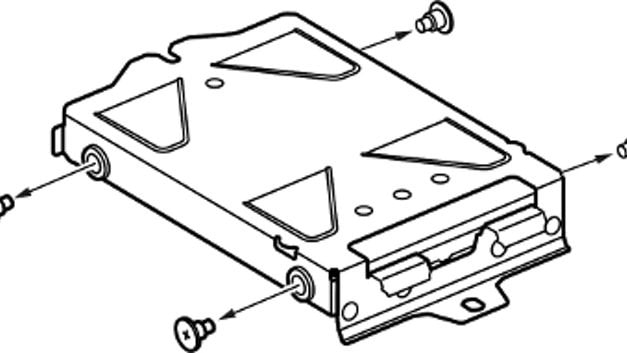
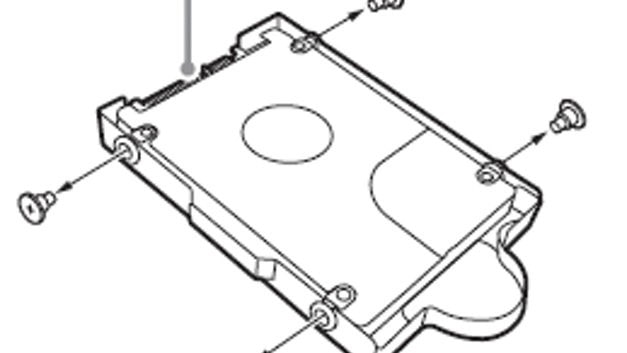
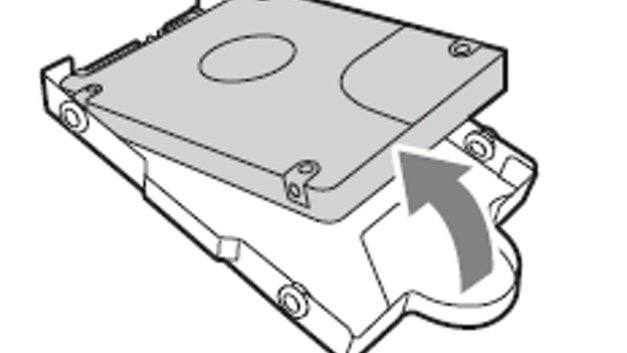
3. Remove the hard drive from its casing by removing the 4 screws on the side and replace it with the new one and screw it in the same place in the hard drive casing.
4. Put back the hard drive back in PS4 and put the screw back.
5. Re-attach the HDD cover.
How to change PS4 Slim hard drive:
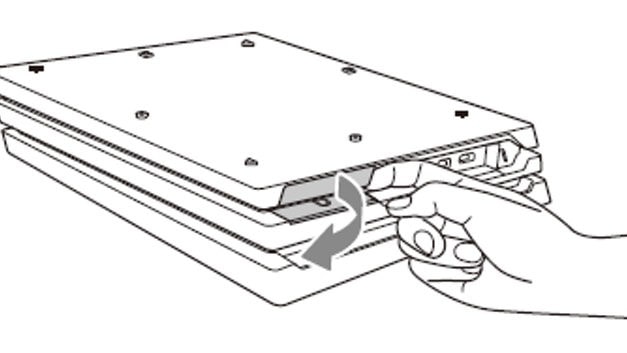
1. Slide the hard disk bay cover to the right or in the direction of the arrow to remove it.
2. Remove the screw that holds the hard drive case in its place.
3. Remove the hard drive simply by pulling it out.
4. Remove the hard drive from its casing by removing the 4 screws on the side and replace it with the new one and screw it in the same place in the hard drive casing.
5. Put back the hard drive back in PS4 and put the screw back.
How to change PS4 hard drive:
Replacing the hard drive is very simple. Follow the steps below to change the hard drive in your PS4:
1. Turn Off PS4 and disconnect all the cables.
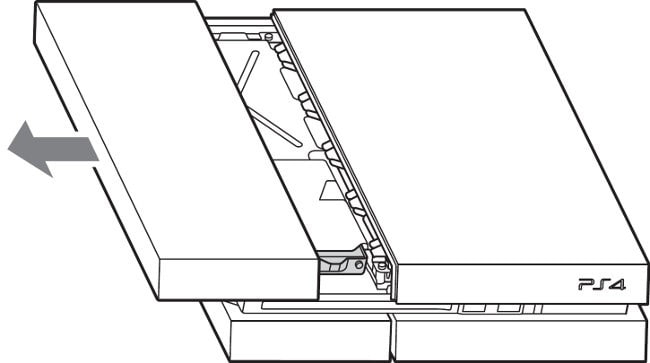
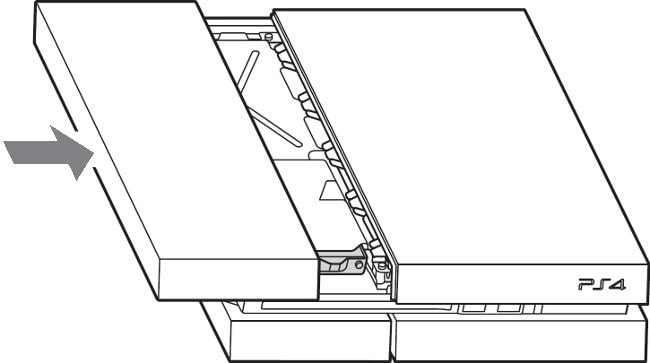
2. To open hard drive bay simply slide the left side cover to the left and lift it completely.
3. Remove the screw which holds the hard drive case in its place.
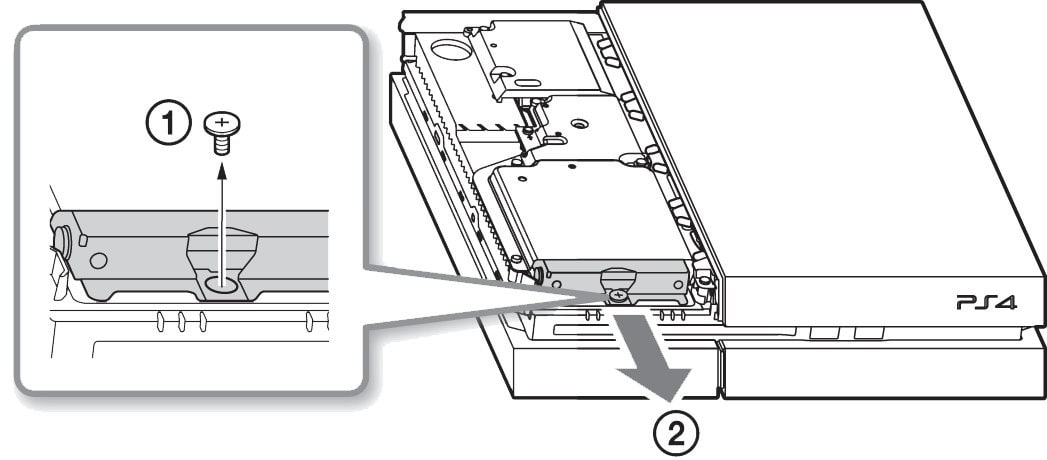
4. Remove the hard drive simply by pulling it out.
5. Remove the hard drive from its casing by removing the 4 screws on the side and replace it with the new one and screw it in the same place in the hard drive casing.
6. Put back the hard drive back in PS4 and put the screw back.
7. Put the cover back by sliding back on your PS4.
Now for the installation for the system software update.
1. Plug your Pendrive on your system and format it in FAT 32 format.
2. Download full PS4 software from the official SONY website: Click Here
Note: Make sure that download size of software files is around 995 MB. Anything less then this means it is only an update file.
3. Create the location of your Pendrive: PS4 > UPDATE.
4. Move the update file in the UPDATE folder.
5. Now plug all your PS4 cable that was disconnected before and plug the pen drive into the PS4.
6. Start your PS4 in the safe mode by pressing and holding the power button until you hear the second beep. Connect DualShock 4 controller to the PS4 and select Initialize PS4 (Reinstall System Software).
This will install new software to your PS4 system.
Restore back the PS4 data that you have backed up:
Connect the External Drive or USB Storage on which you have taken the backup to PS4.
Open Settings > System > Back Up and Restore.
Choose the Restore option.
Now select the files.
Click on yes to continue.
Changing the hard drive of your PS4 console is fairly an easy task. You just need to follow the steps provided in this article. By upgrading the hard drive you will get more storage and if you have upgraded to the SSD or SSHD then you will experience faster load time and installation time.


Shashank Rana
Hi, 1. What should be the size of the pen drive that would be needed to update the PS4 software? 2. What type of screw driver would be needed? 3. What hard drives can be used if I want to upgrade it to 1TB and 2TB, SSD and HDD (PS4 Slim)? Thank you in anticipation..
Kunal Sharma
Hello Shashank, Thanks for liking our articles. As the setup file size is around 995 MB you can use a pen drive having 1GB or more free space. You'd need to use Phillips head screwdriver, designed for X-slotted screw. Further, the choice of the hard disk depends upon certain criteria like budget, and load time speed. If you want faster load time and are ready to spend more consider upgrading to SSD. Hope this answers all your queries.