
Instagram has become a popular platform for sharing photos and videos with friends, family, and followers. One of the most widely used features on Instagram is the ability to apply filters to your photos, which can enhance the colors, contrast, and overall look of your images.

However, there may be times when you want to remove a filter from a photo after it has been applied. Whether it’s because you’ve changed your mind or because you want to showcase the original, unfiltered version of the image.
The process to remove filters from photos on Instagram can be a useful skill, especially for those who want to maintain a consistent aesthetic across their feed or for those who simply prefer a more natural look.
In this article, we’ll explore various methods to help you remove Instagram filters from your photos, ensuring that you have full control over your visual content.
Can I Remove Instagram Filter From Photos?
The short answer is yes, you can remove Instagram filters from photos. Instagram’s filters are essentially just adjustments made to the image’s color, contrast, and other visual properties. While these filters are not permanently baked into the image file, removing them might require some additional steps, depending on the method you choose.
One important thing to note is that once you’ve uploaded a photo to Instagram with a filter applied, the original, unfiltered version of the image is no longer available within the app. This means that you’ll need to remove the filter from a copy of the original photo file before re-uploading it to Instagram.
Also read: How to Put Music in Instagram Bio?
How to Remove Filters From Photos on Instagram?
Here are three effective methods to help you remove filters from your Instagram photos:
Method 1: Use the Built-in Option
Instagram offers a wide range of filters that allow you to enhance the aesthetics of your photos or photo collections before sharing them with your audience.
However, if you’re not satisfied with a particular filter and want to remove it from your Instagram camera, follow this step-by-step guide:
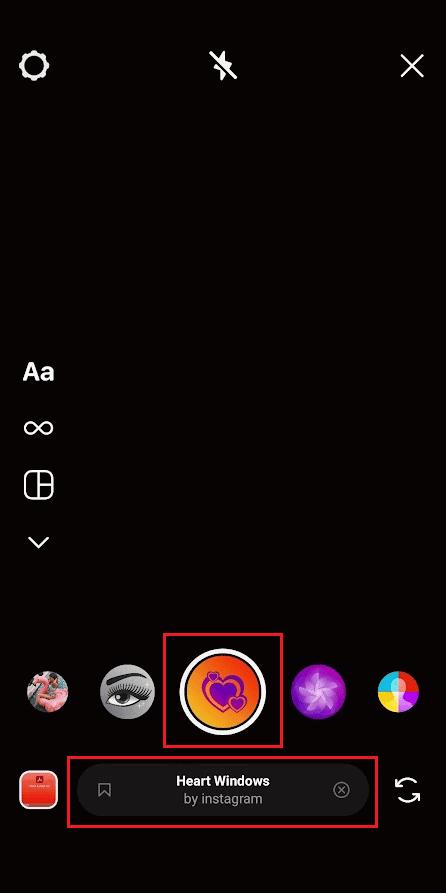
Step 1: Launch the Instagram app on your mobile device. Swipe left from your Instagram feed to access the Instagram Camera screen. Alternatively, you can tap the plus icon located in the top-right corner to navigate directly to the IG camera.
Step 2: Once you’ve selected or captured a photo, tap on the desired filter from the options displayed at the bottom of the screen.
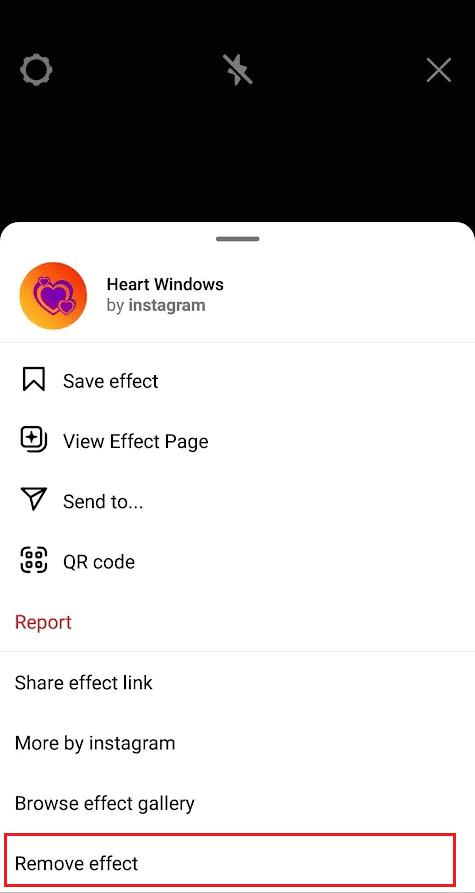
Step 3: After applying the filter, swipe down on the menu options, and you’ll find the Remove effect option. Tap on it.
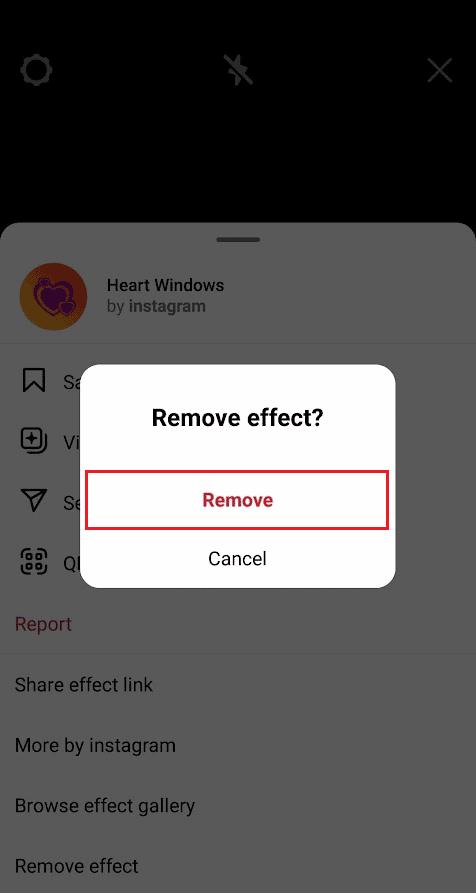
Step 4: A confirmation pop-up window will appear. Tap on Remove to successfully remove the filter from your Instagram camera.
And that’s it! By following these simple steps, you can easily remove Instagram filters before sharing your photos with your followers. This feature provides you with the flexibility to experiment with different filters and ultimately choose the one that best represents your desired aesthetic or remove all filters altogether, ensuring your photos maintain their original, unfiltered appearance. This method is straightforward and allows you to remove any filter before posting your photo.
NOTE: However, it’s important to note that this option is only available before you post the photo to your Instagram feed. If you’ve already posted a filtered photo and want to remove the filter, you’ll need to use one of the other methods described below.
Also read: How to Fix Instagram Keeps Crashing on Android?
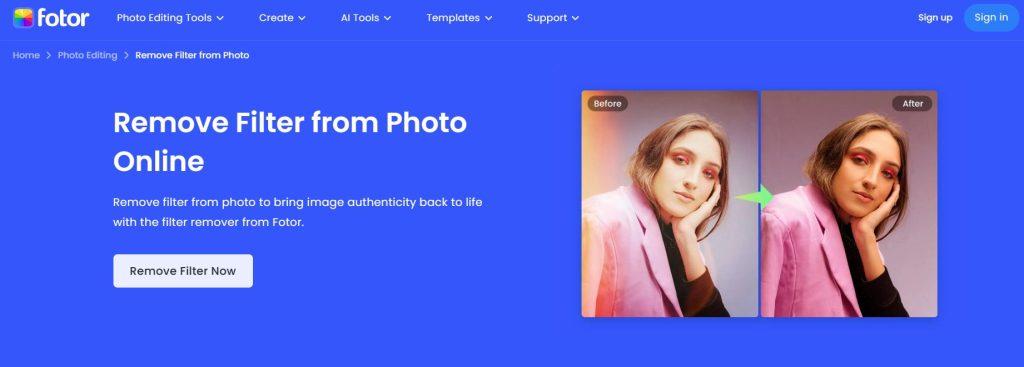
Method 2: Use the Fotor Photo Editing Tool to Remove Filters From Photos
Fotor is a popular, one of the best online Instagram editing apps that offers a wide range of features, including the ability to remove Instagram filters from photos.
Here’s how you can use Fotor to remove filters from your Instagram photos:
Step 1: Go to the Fotor website. click on the “Remove Filter Now” button.
Step 2: Upload the filtered photo you want to edit from your device or drag and drop the file into the Fotor editor. Once the photo is loaded, take advantage of the powerful filter removal tool offered by Fotor. This tool allows you to selectively brush over specific areas of your image, effectively erasing the applied filter.
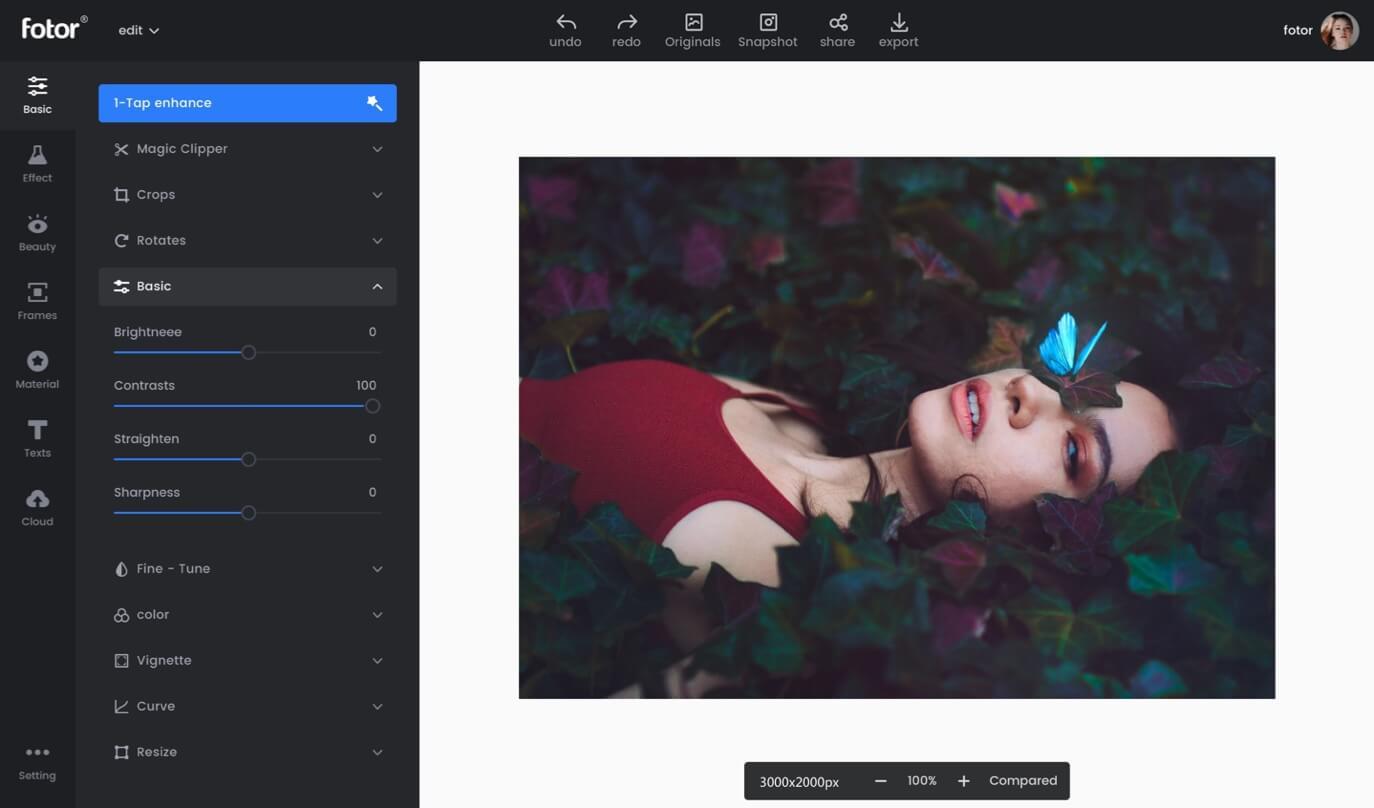
Step 3: Once you’ve utilized the filter eraser tool, carefully inspect the image. Use the preview option to ensure that the filter has been successfully and accurately removed from the desired regions of your image.
Step 4: After verifying the results, export your image by saving it to your desired location, preserving the original, unfiltered appearance.
Fotor offers a user-friendly interface and a wide range of editing tools, making it a great option for removing Instagram filters from photos. Additionally, Fotor is a web-based tool, so you don’t need to download or install any software to use it.
Also read: How To Post To Multiple Instagram Accounts At Once
Method 3: Using Adobe Photoshop Elements
If you have access to Adobe Photoshop Elements, you can use this powerful photo editing software to remove Instagram filters from your photos. Here’s how you can do it:
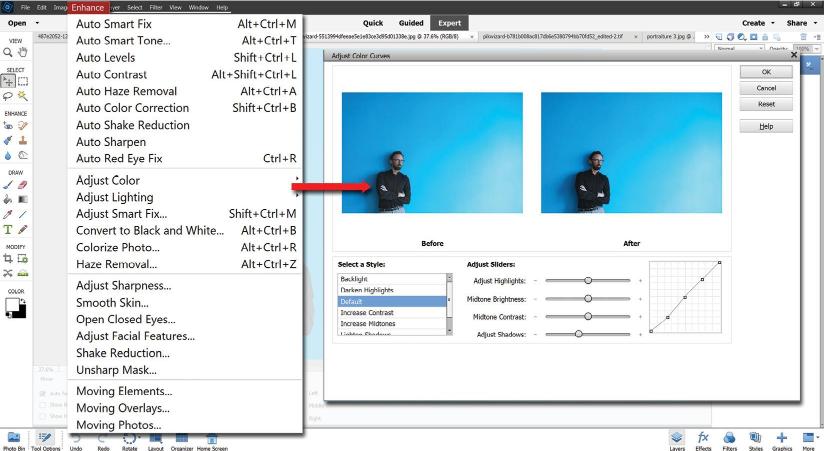
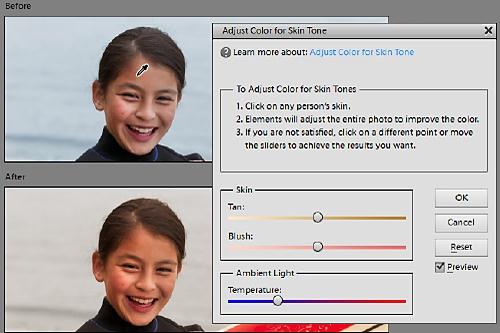
Step 1: Launch Adobe Photoshop Elements on your computer and import the image from which you want to remove the filters. To restore the image to its original state, navigate to the Enhance menu, then select Adjust Color, followed by Adjust Color to Skin Tone.
Step 2: Once you’ve selected this option, click directly on the photo to apply the skin tone adjustment changes. If the result is not satisfactory, proceed to the next step.
Step 3: Return to the Enhance menu, then select Adjust Color, and choose Remove Color Cast. With the cursor on the image, click to apply the color cast removal. Observe the changes to the image.
Step 4: After using the Remove Color Cast tool, go back to Enhance > Adjust Color > Adjust Hue/Saturation. Decrease the saturation levels for the image to achieve a more natural look.
Step 5: Once you’re satisfied with the results, save the unfiltered version of your photo by going to “File” > “Save As” and choosing the desired file format and location.
By following these steps in Adobe Photoshop Elements, you can effectively remove filters from your images. The Adjust Color to Skin Tone and Remove Color Cast tools help correct color casts and restore the image’s original tones. Additionally, adjusting the hue and saturation levels allows you to fine-tune the image’s appearance, giving it a more natural and unfiltered look.
Adobe Photoshop Elements is a powerful photo editing tool that offers a wide range of features and adjustments, making it an excellent choice for removing Instagram filters from photos. However, it’s important to note that Photoshop Elements is a paid software, so this method may not be suitable for everyone.
Also read: How to Lock Instagram Chats | Protect Your DMs From Prying Eyes
Conclusion
Removing Instagram filters from photos can be a useful skill, whether you want to maintain a consistent aesthetic across your feed or simply prefer a more natural look. While Instagram doesn’t provide a built-in option to remove filters from photos after they’ve been posted, there are several third-party tools and methods you can use to achieve this.
The built-in option in Instagram allows you to remove filters before posting, while tools like Fotor and Adobe Photoshop Elements offer more advanced editing capabilities for removing filters from existing photos.
Regardless of the method you choose, having the ability to remove Instagram filters from your photos gives you greater control over your visual content and allows you to showcase your images in their truest form.
FAQs:
Can you remove a filter from an already taken photo?
Yes, you can remove a filter from an already taken photo using third-party photo editing tools like Fotor or Adobe Photoshop Elements. These tools allow you to adjust the color, contrast, and other settings to remove the filter and restore the photo to its original, unfiltered state.
How do you delete an Instagram filter you made?
If you’ve created a custom filter on Instagram and want to delete it, follow these steps:
- Open the Instagram app and go to your profile.
- Tap on the three horizontal lines in the top-right corner to open the menu.
- Select “Settings” > “Filters & Lenses.”
- Under “Filters,” you’ll see a list of all the filters you’ve created.
- Tap on the filter you want to delete and select “Remove Filter.”
- Confirm your choice by tapping “Delete” again.
Can You Remove Filters from Other People’s Instagram Videos?
Unfortunately, you cannot remove filters from other people’s Instagram videos. The filters applied to videos are embedded in the video file itself, making it difficult to remove them without significantly altering the video quality or content. If you want to share or repost someone else’s video without the filter, your best option is to seek permission from the original creator and request the unfiltered version of the video.


Leave a Reply