Microsoft released Windows 10 with many interesting features that not only makes it more convenient but also more secure than its predecessors. One of the aspects where Apple has a significant edge over Windows is security. Therefore, Microsoft has worked a lot to provide its users complete peace of mind when it comes to safety and security.
Features like, smartscreen filter, Windows Defender, secure Edge browser, Find My Device, etc. make Windows 10 a safer platform to work on.
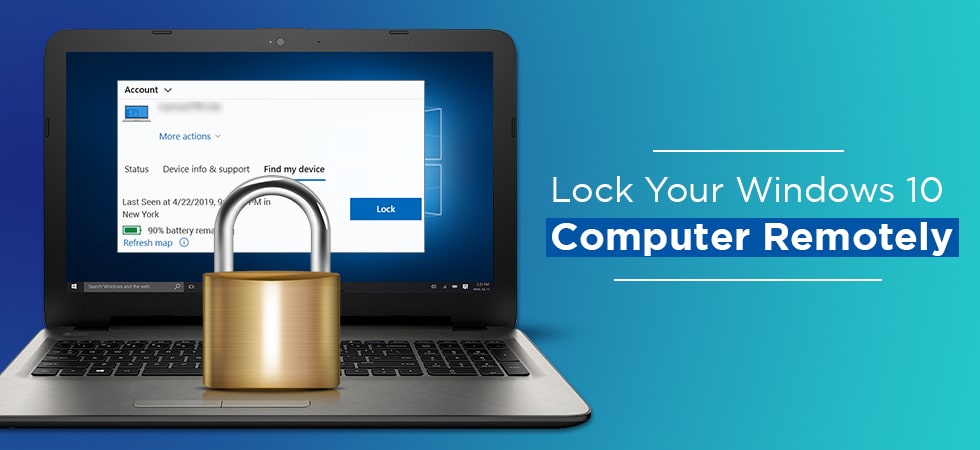
Amongst all these nifty features Find my Device is one of the most appreciated one. The feature helps know exact location of your computer/laptop. This feature works like find my device feature in Android and iPhone. Moreover, using this feature you can lock your Windows 10 computer even when you have walked away from it. Sounds interesting! And wish to learn how? Then just continue reading the article till the end.
Remotely Lock Windows 10 Computer
Though quite lately but lastly Windows introduce this highly needed security feature that allows its users to lock their Windows PC or laptops remotely. This comes handy when forget to lock our system. Best part of Find my Device is, you can lock your Windows 10 PC remotely even with your smartphone.
Windows already provided Remote Desktop Connection feature in the earlier versions. But accessing the PC remotely using Remote Desktop Connection raise security concern, therefore security experts advice to disable this feature when not in use. This is when, Microsoft’s Find My Device feature helps lock your PC remotely.
Prerequisite for Using this Feature:
Before getting started with this feature, you need to fulfil following pre-requirements:
- Your Windows 10 device should have an active Internet connection.
- Find My Device Feature should be enabled on the machine. If you do not know how to enable this feature, read How to Setup Find My Device in Windows 10
- You need to have an account with administrative privileges, signed with a Microsoft account. This feature cannot be used with a non-Microsoft account.
Once all the above prerequisites are followed you are good to go ahead.
How to Remotely Lock Windows 10 PC
- To get started, open your preferred web browser and browse to Microsoft account page
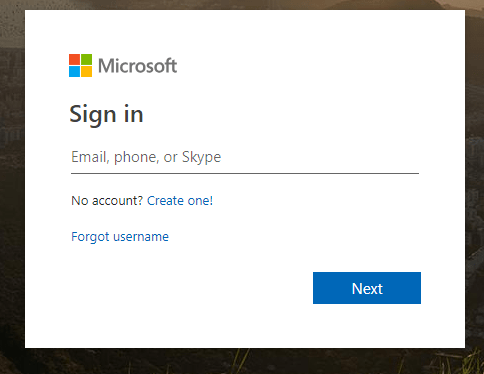
2. Now provide your username followed by the password in the Sign-in window to login into your Microsoft account.
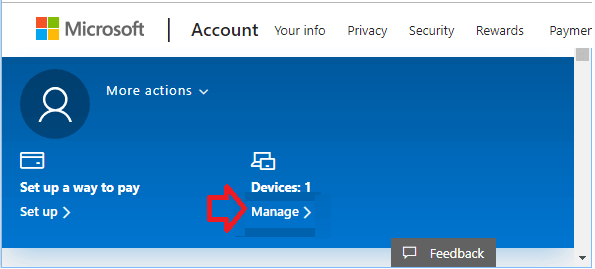
3. After signing in click on Manage option located under Devices section.
Alternatively, you can also click on Devices, and in the new window that open click on Show Details in the device section.
4. On the new page that open click on Find My Device option. This will display the current location of your PC along with the last seen status.
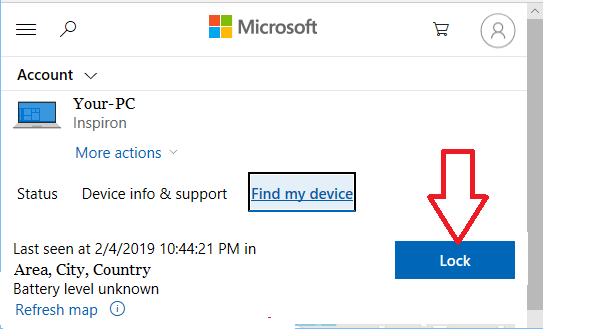
Here, click on the Lock button as you wish to remotely lock your PC. This will log you and other active user out and disable local accounts, blocking all unauthorized access. Click Next button to proceed.
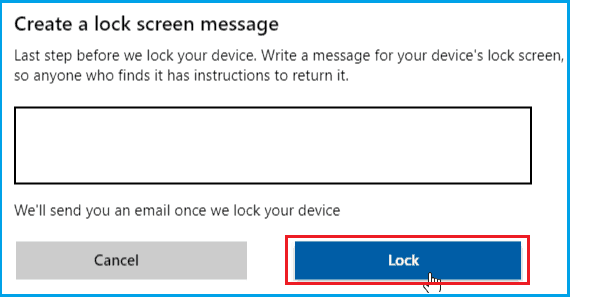
On the last screen, you can write a personalized message that will stay on the lock screen. However, since your primary objective is to lock the computer you can skip the message and click on the Lock to proceed.
This way you can lock your Windows 10 PC. Now, whenever you have access to your PC to login use admin account to sign in to your computer.
So guys, how did you find the article? Wasn’t it simple. Now using these steps you can lock your Windows machine from anywhere in the world. Moreover, you can also lock your PC remotely via your smartphone. Meta Description: Worried, because you have left the office without locking your PC. You need not be! As this article will describe you how to remotely lock your Windows 10 PC.


Leave a Reply