
Microsoft Excel is undoubtedly one of the most popular programs to view, edit, create and spreadsheets. Whether you need to do basic accounting task, perform data analysis or need to represent data in the graphical form there can’t be a better choice than Microsoft Excel.
But sometimes while using Excel if a cell data gets accidentally deleted graphs, charts, presentations, and other things get messed up. In such a situation locking certain cells in Excel helps.
So, here we are with a solution on how to lock cells in Excel.
How to Protect Cells in Excel:
There can be several reasons that make you want to lock cells in Excel:
Want to block anyone from editing contents of the Excel sheet.
- Want to protect cells in Excel to prevent accidental deletion of content stored in them.
- So, guys, irrespective of the reason, here are the simple steps on how to lock cells in Excel.
Lock All Cells in Excel:
If you wish to block others from making changes to the data value stored in the Excel worksheet, follow the steps below to lock all cells in your Excel worksheet.
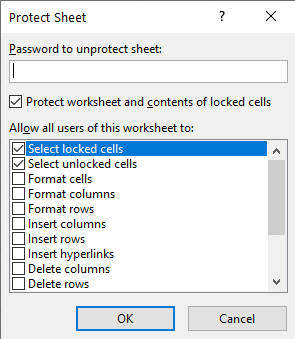
1. Once you have your Excel worksheet prepared click Review tab > select Protect Sheet option.

2. To lock the cells from accidental deletion click Ok to save the setting. However, to block someone from modifying data stored in the cells password protect the sheet.
3. This way all the cells in Excel are locked. If anyone tries to delete or modify the data stored in those cells a message will get a prompt, “The Cell or Chart you’re trying to open is on a protected sheet”.

How to Lock Certain Cells in Excel:
It may be possible that the Excel spreadsheet you are working on is shared. Therefore, locking all cells of Excel won’t solve the purpose. In such cases, you need to lock specific cells, leaving other cells unlocked so that they can be modified or edited as per requirements.
To do so follow the steps below:
1. Open your Excel sheet > select the cells you want keep unlocked. In the screenshot below you can see column A, B, and C are not selected as we are not locking them.
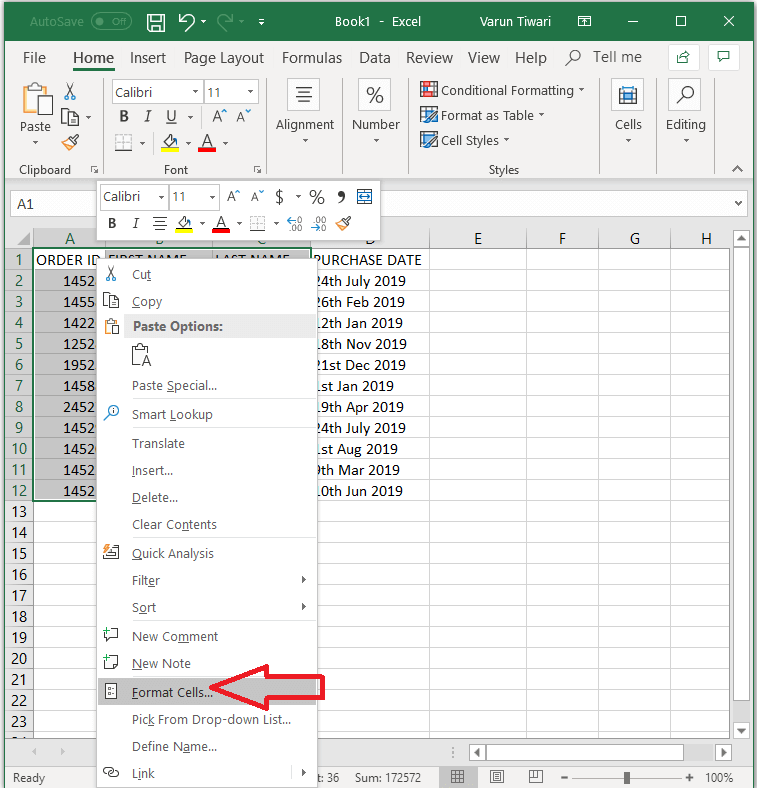
2. Now right-click selected cells > from the drop-down menu select option, Format Cells.
3. Next, click the Protection tab, that you will see in Format Cell window and uncheck the Locked option.
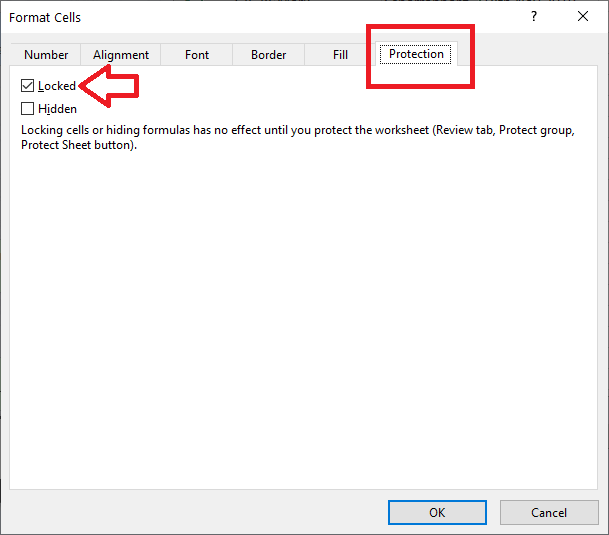
This option is checked by default. Click OK to proceed.
4. Next on the main Excel sheet window click Review tab > Protect Sheet.
5. Click OK to save settings.
So, guys, these were simple steps on how to lock certain cells in Excel.
How to Unlock Cells in Excel:
After learning how to lock cells in Excel it’s time to learn how to unlock cells in Excel so that you can edit the data stored in cells. To unlock the cells in Excel, click on Review tab on the Excel menu and select the option, Unprotect Sheet.

If the sheet is password protected, then you need to enter a password for unlocking the cells. Once you type in the correct password the cells will be unlocked and the data stored in them can be altered.
Wrap Up:
When you have sensitive data stored on your Excel sheet, it is always better to protect your worksheet by locking cells in Excel. So, folks, hope this article has not only helped you in learning on how to lock cells in Excel but also on how to unlock cells in Excel when required. If you have any other steps that we might have missed then do share them in the comment box below.
Follow us:


Leave a Reply