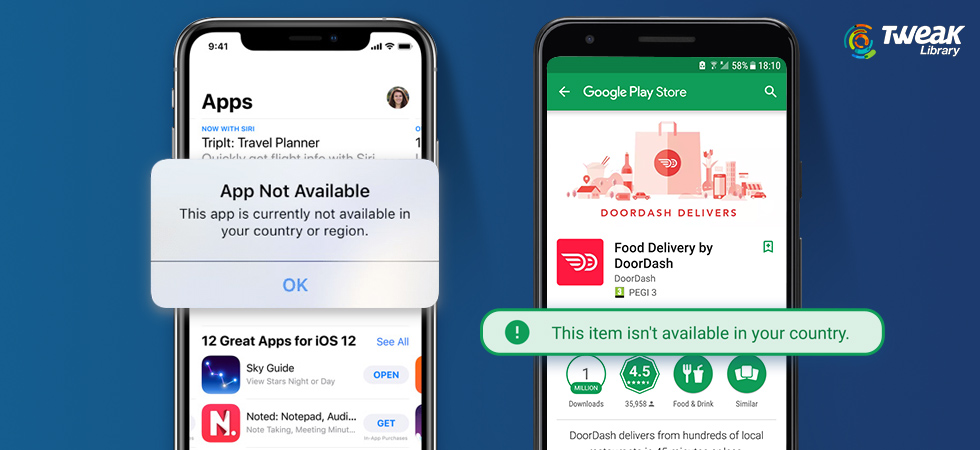
Have you ever been in a situation where you are trying to install a new trending app or a game with great graphics, just to find out that the app is not available in your country? Sometimes it feels very frustrating and annoying, coz the frequency increases to a level where we start thinking that all the amazing applications aren’t available in your country.
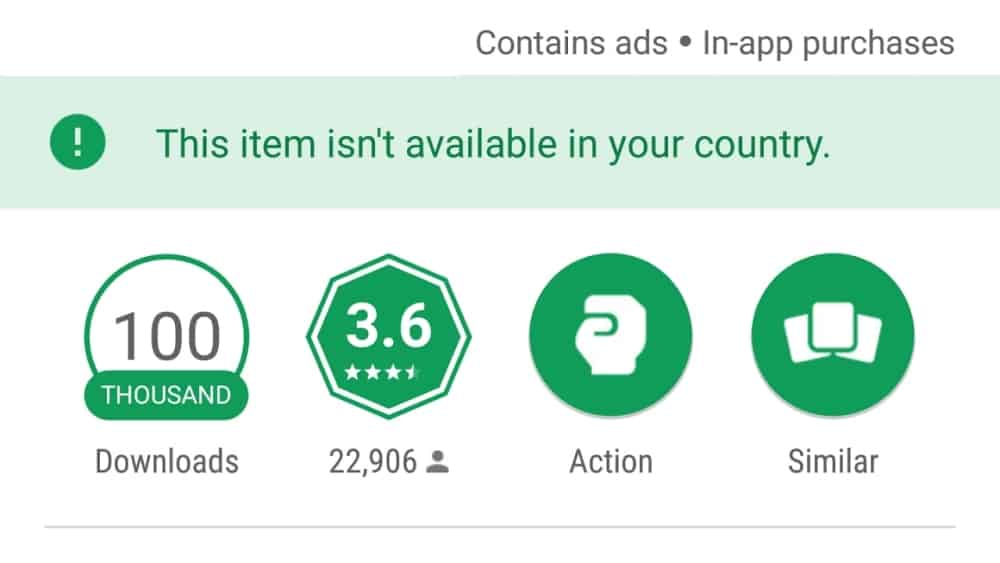
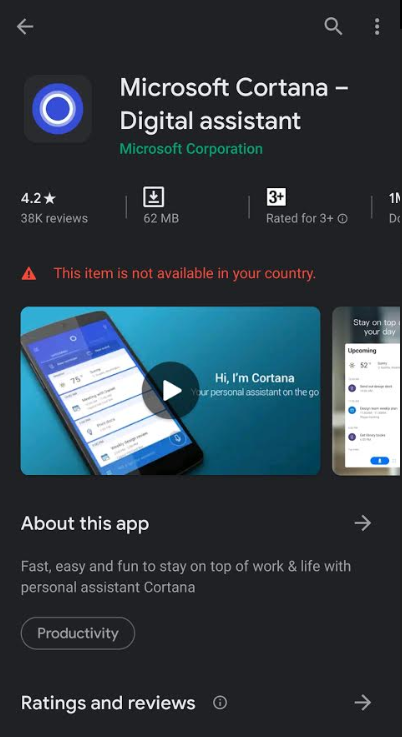
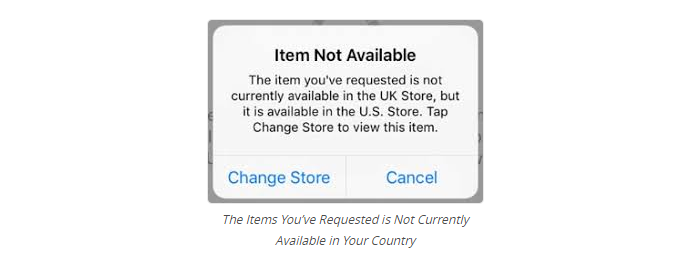
So while downloading any app from Google Play Store or App Store, if the platform says, “This item isn’t available in your country “or “The item you’ve requested is not currently available in the country store…” or “The item you’ve requested is not currently available in the country store.”, the publisher doesn’t want the application to be available in your country.
The reasons for this unavailability of the app can be many including the app services aren’t ready for your country, or the different payment system that is only available in your country or a specific list of regions.
To avoid these types of app unavailability situations, there are ways that can help you out. Be it an Android or iOS app, with this guide, you will be able to download any of them on your mobile devices. So in order to remove the Geo filter of the apps you want to download, let’s go through the below ways:
A. How to Install Android Apps that Aren’t Available in Your Country
1. The first thing you will require is a VPN app so that you can use a fake location for the Google Play Store. Check out the Best Android VPN Apps and install the one that lets you choose the location manually. This goes without saying but go with the location that either has most of the Android app’s availability or is itself a big app market.
2. Follow this process by opening the VPN app and choosing the country the app is available in. Let’s go with the United States because we all know that almost every app in the world is available in that country without a doubt. Once you select the location, tap on the “Connect” button and wait for it to get connected.
3. Now after the VPN gets connected, go to the below path and clear the cache as well as data from the Google Play Store App so that there is nothing running in the background.
Path to follow: “Settings > Apps (Manage Apps)/Application Manager > Google Play Store > Storage”.
Once you reach here, tap on clear data and clear cache to clean the storage. Now go one step back and click on “Force Stop” also.
4. The VPN is running in the background, what you need to do is, visit Google search and look for the app you want to install. In results, look only for the searches that have the Google Play Store link of the app.
Please note that If you go and search directly on the Google Play Store for the app, you won’t find it. Use the method mentioned in point number 4.
5. From the Google results, click on the Google Play Store app link and it will open the same. Now, go ahead and accept the pop-up permission asked by Play Store and you will see the “Install” button now. This was the option that was missing before and now you have it.
6. Tap on the “Install” button and once again another pop-up will ask you to set up your Google Play Store account. What you need to do is to tap on “skip” and the downloading will start. Yayyyyyyy!!!!!
Also Read: Best Secret/Hidden Codes For Android
B. Ways to Install iOS apps that aren’t available in your country
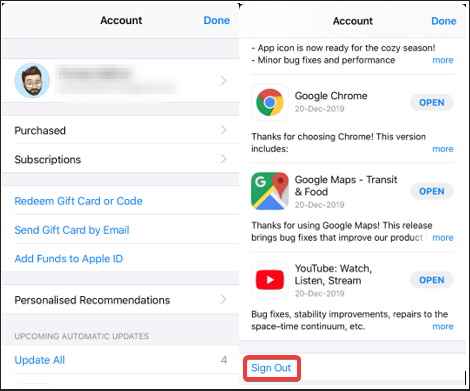
1. In order to get away from the situation where you cannot install an iPhone app due to geographic limitations, start the process by launching your App Store on your iPhone.
2. On the upper right corner, you will find an avatar. Click on it and then tap on “Sign Out” on the page.
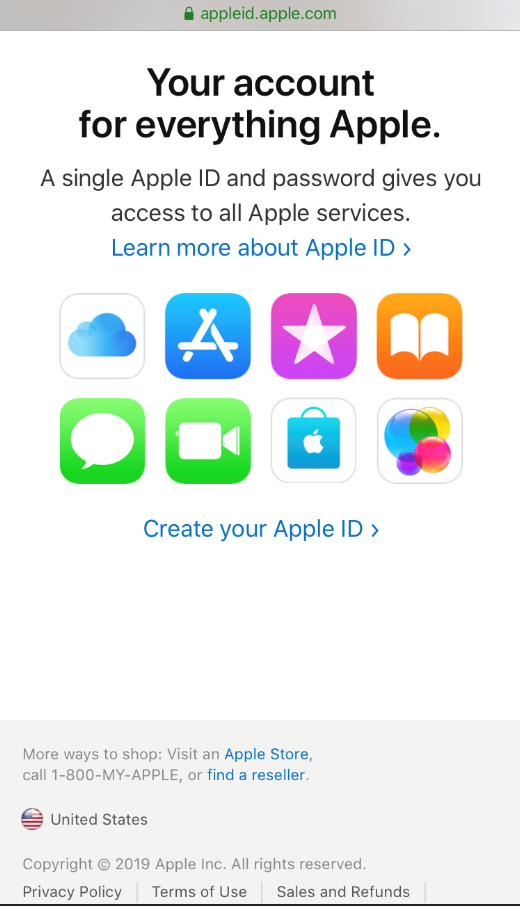
3. Now since you have signed out from your current existing Apple ID, so in order to install the app which isn’t in your country, you will need to create a new ID that has that particular country in the App Store. Visit the page and click on “Create your Apple ID” option.
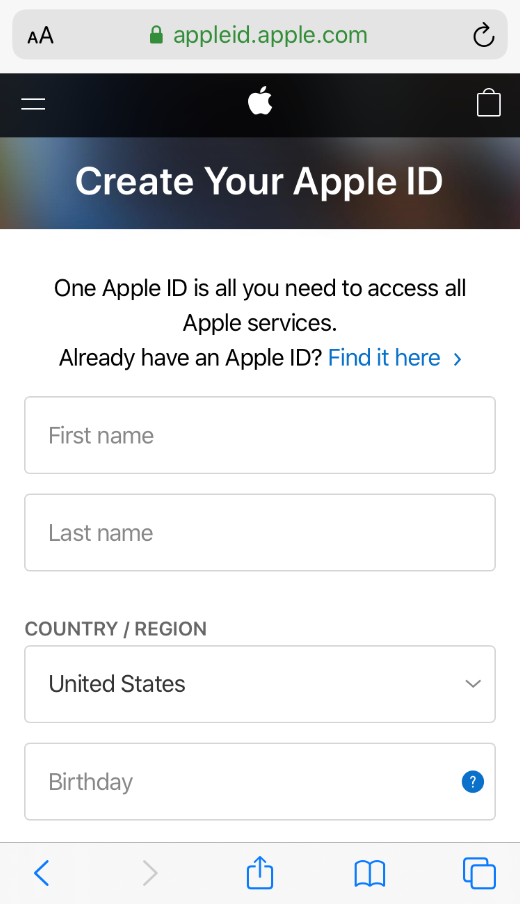
4. Once you click on “Create your Apple ID”, it will bring you to the page where you will need to fill in some details i.e. your name, country, birthdate, security questions, etc.
Please note that here you need to select the country which has the availability of the app you are looking forward to installing.
5. This ID creation process will end with a verification code that will be sent to your email. Once you verify the code on the device, your new Apple ID will be generated with the new country as your current country.
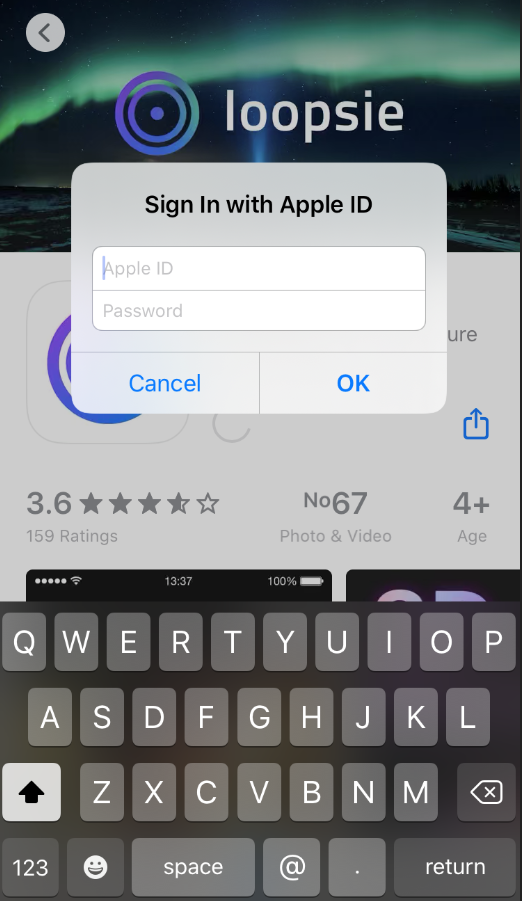
6. Now go back to the App Store and search for the app you want to install. Once you click on install, it will pop up the Sign-in windows where you need to fill in the credentials of the new Apple ID.
7. After putting the credentials, tap on “Review” that will take you to the page where you need to fill in the billing information. Complete the process by choosing the mode of payment (which should be “None”) and add the billing address and contact information.
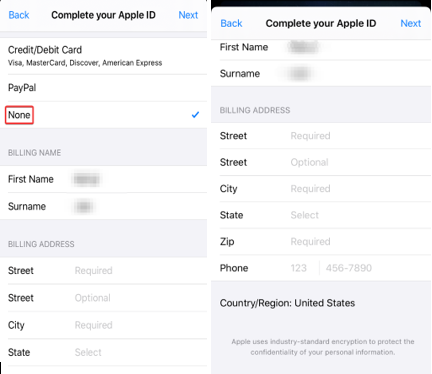
Please note that you will be entering a fake account number that doesn’t exist or isn’t related to you in any way. If you need some assistance, check out apps like text+ that helps you with free phone numbers and texting. Know that you have the green light to go ahead with fake phone numbers because Apple doesn’t verify the phone numbers related to the Apple ID.
The process has been completed and you are ready to download apps from the App Store which you weren’t able to before, due to geo limitations.
Also Read: Best Android Cleaner Apps
What Do You Think?
Did you find this article useful and informative? Do share your experiences in the below comments after using the methods given above. Thanks!!


Leave a Reply