
While using an application on Windows 10 it suddenly crashes and a message prompts “Windows is checking for a solution to the problem”. Ever wondered what the message is, why you see it and how to disable it?
Here we will give you an answer to all these questions.
What is Windows is checking for a solution to the problem, message?
Windows is checking for a solution to the problem message appears because of Windows service known as Window error reporting service. This service initiates itself when any application on your Windows 10 crashes or become unresponsive. Once initiated Window error reporting service flashes a message- Program has stopped working, Windows is checking for a solution to the problem. This service diagnoses the cause for the program crash and tries to fix it. In case it is unable to find any solution, it sends the error log to the Microsoft servers for further analysis. Although, there is no harm in keeping this service enabled. However, if you are bothered by this annoying message you can disable it.
Moreover, if you want to avoid sending private information about your computer to Microsoft, then also you can stop Windows error reporting service.
How to Disable Windows 10 Error Reporting Service?
If any of your apps crash due to memory or hardware issues you get to see Windows is checking for a solution to the problem. Hence here we will list various ways to disable this message permanently.
Disable Error Reporting Service in Windows using Registry Editor:
Registry Editor is one of the most powerful components of the Windows operating system. Any unknown changes in the Windows registry can lead to Windows malfunctioning. Therefore, before proceeding with this step we recommend you follow each step in exactly the same manner as described.
Also, we recommended taking complete registry backup before making any changes. For this, you can use RegClean Pro. One of the best registry cleaning and optimization tool that allows you to take a full and partial backup of Windows registry.

Now let’s learn how to disable error reporting service in Windows using Registry Editor:
1. Type regedit in the Windows search bar. From the results, right click on Registry Editor and select Run as administrator. In the UAC that prompts click on Yes to open Registry Editor window.

2. Now navigate to the following key:
HKEY_LOCAL_MACHINE\SOFTWARE\Microsoft\Windows\Windows Error Reporting
3. Now in the right pane create a new DWORD (32-bit) entry. To do right-click on the empty space and select New > DWORD (32-bit) Value.
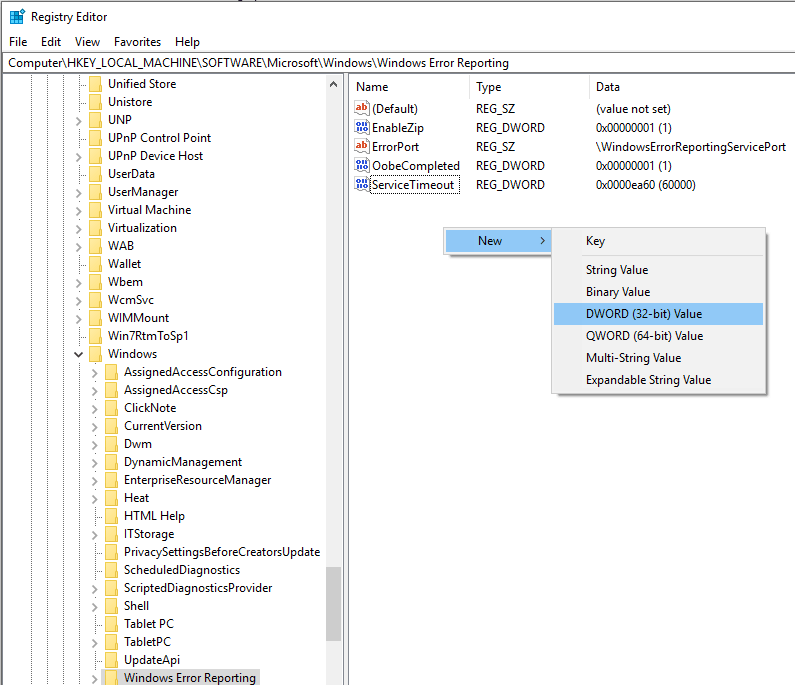
4. Rename this value as Disabled and double click to open it and change its value data field from 0 to 1.

5. Restart your PC to save the changes.
Also Read : How To Disable Windows Installer To Block The Software Installation
Disable Windows Error Reporting Service using Group Policy Editor:
Another way to stop the message- Windows is checking for a solution to the problem is via making changes in Local Group Policy Editor.
1. Click Windows + R to open run dialogue box. Now in run prompt type gpedit.msc to open Group Policy Editor.
2. In the window that opens navigate to Computer Configurations> Administrative Templates > Windows Components > Windows Error Reporting.
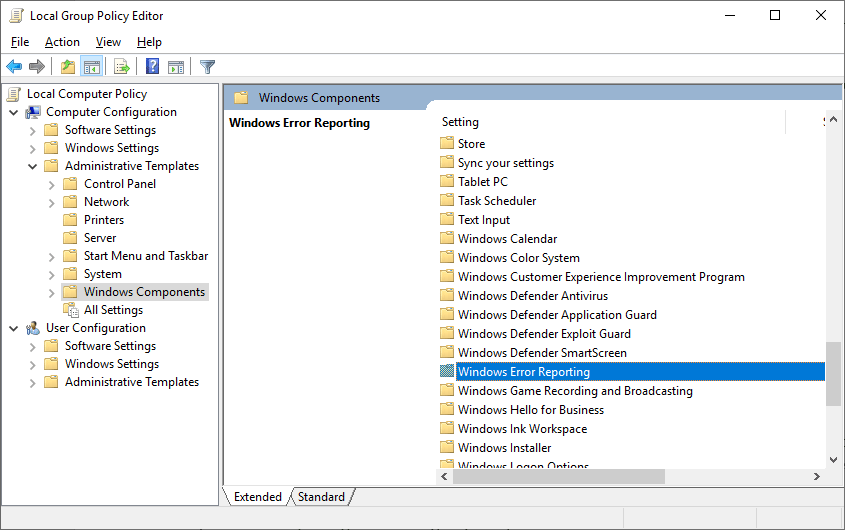
Out of the many options available in Windows Error Reporting entry you can use the below two options:
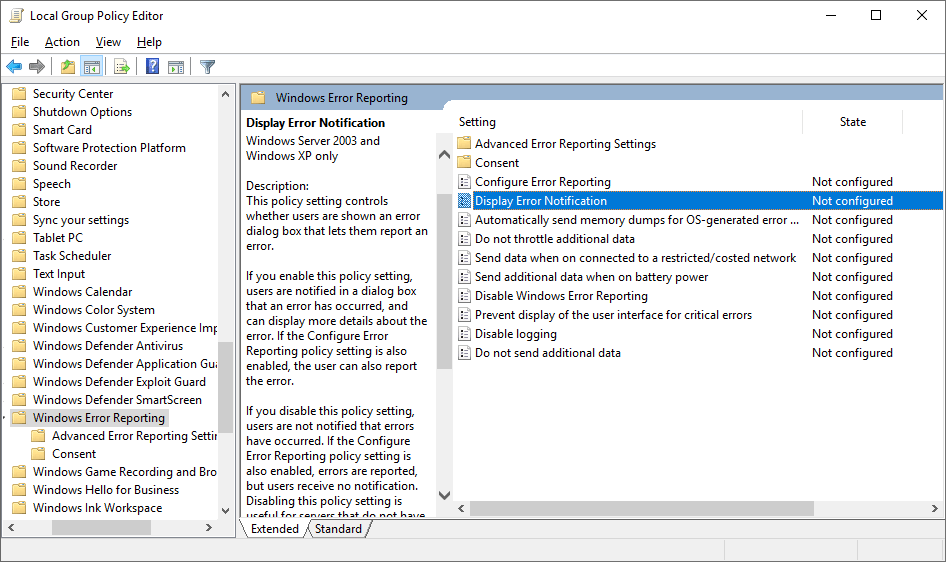
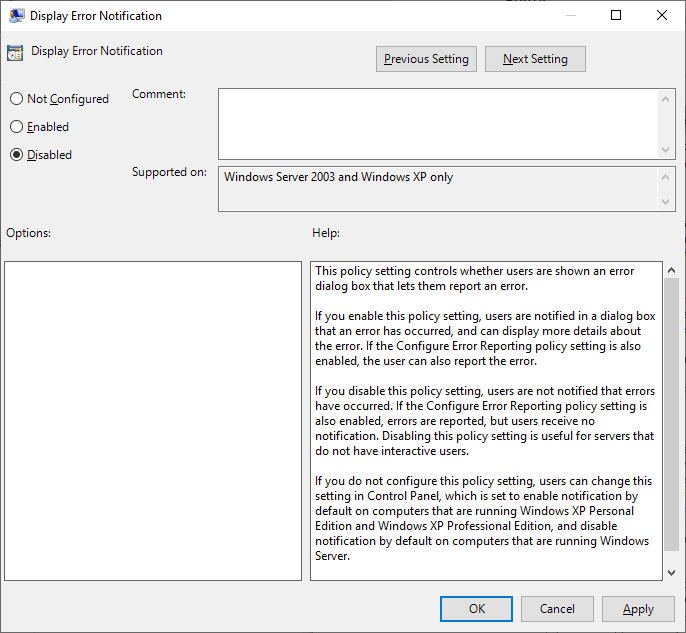
Display Error Notification: When this policy setting is enabled users are notified for the error message like Windows is checking for a solution to the problem anymore, on application crash. However, once you disable this policy you will no longer see the error message prompting on your screen. But it doesn’t mean that Windows has stopped collecting the crash report. Windows is still collecting that info and sending to the Microsoft without notifying you. For the non-interactive servers, it is recommended to disable this policy setting. To disable this policy, double-click on Display Error Notification setting and from the window that opens click on Disabled > press Ok to save the changes.
Disable Windows Error Reporting: If you completely wish to stop Windows Error Reporting service then this policy setting will completely disable it. Neither the prompts will be shown, nor the reports will be collected and sent to Microsoft servers. To disable this policy, double-click on Disable Windows Error Reporting setting and from the window that opens click on Disabled and press Ok to save the changes.

Disable Windows Error Reporting Service Via Windows Services:
It is one of the easiest methods to stop Windows Error Reporting Service and avoid that irritating prompt- Windows is checking for a solution to the problem. To disable please follow the below steps:
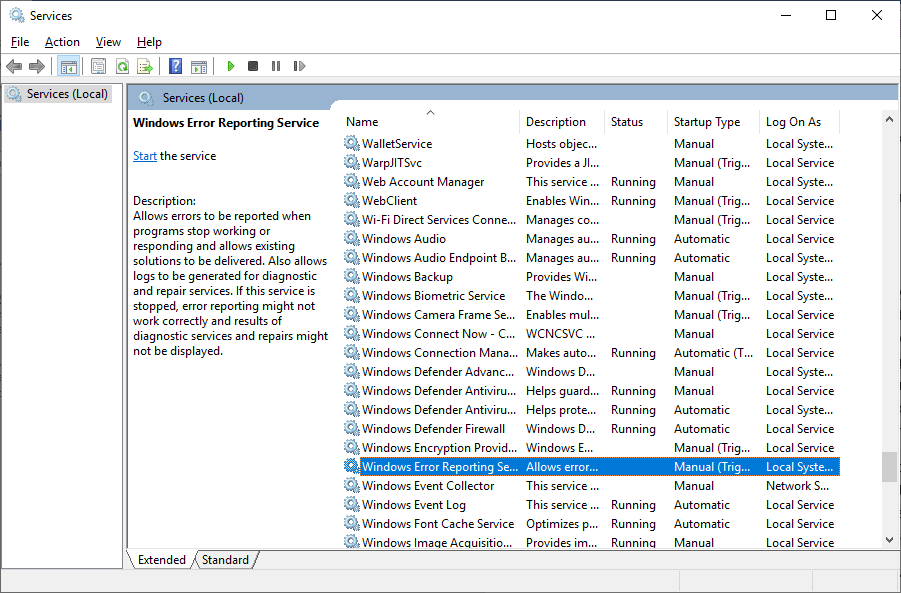
1. Click Windows + R to open run dialogue box. Now in run prompt type services.msc to open Windows Services.
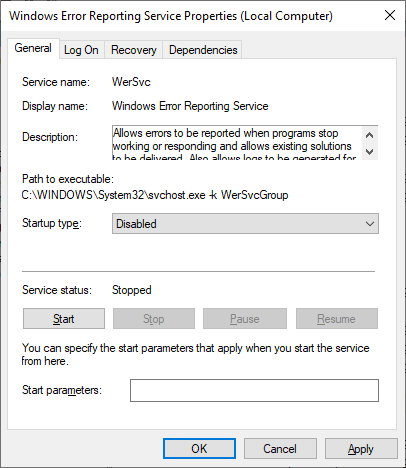
2. Now search for Windows Error Reporting Service and double click on it.
3. In the new window that opens set the start type of this service to Disabled and stop the service by clicking on Stop in the service status option. Click Ok to save the changes.
Since you have now stopped the service for Windows Error Reporting, you will no longer be prompted with a message on the crash of any application.
So, guys, these were the three simple methods to stop Windows Error Reporting service in Windows 10 PC. If you know any other ways, do not forget to share with us in the comment section below.


Leave a Reply