Windows 11 has a great appearance but sometimes users want to personalize it as per their choice. Changing the default settings of Windows 11 can change the look altogether. If you are a person who does not want to work on Windows 11 which is similar to every Windows 11 computer, then we have discussed some changes in this blog and you can make these changes in your Windows 11 to make it look different.
The steps discussed in the blog are very easy and do not require much time and effort and thankfully no money is needed to make these changes.
Also Read: Best Rainmeter Skins to Customize Your PC
How to Customize Windows 11 Look in 2025
1. Using different themes in Windows 11
This is the first step to changing the appearance of Windows 11. This is the easiest and quickest way by which you can change the Windows 11 look and can make it appear the way you want either a vintage edition or a gamers computer or a nature lover etc.
To change the Windows 11 theme, click on the blank space on the desktop and select personalization from the menu, and navigate to the Themes section.
Alternatively, open Settings>Personalization>Themes. From here choose your favorite theme.
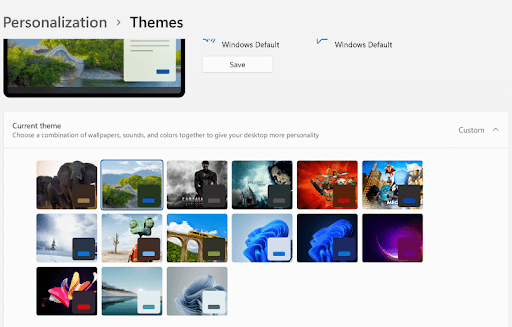
Before applying a theme to Windows 11, you can see the preview and select the theme accordingly. Changing the theme will also change the wallpaper and the color scheme of Windows 11. This will give you an altogether new look. In Windows 11, when a new theme has been applied, the cursor and sound are also changed. Isn’t that interesting?
Also Read: Windows 11 Widgets Not Working?
2. How to get more themes
There are several themes available by default but if you do not like any of the default themes, then you can browse for more windows 11 themes on the Microsoft store.
To browse more themes, you need to click on the Browse themes button beneath the previews of the built-in themes. Then you will be redirected to Microsoft Store and from here you can choose a theme of your choice which is available for free and paid.
Once you have downloaded and installed the new theme to Windows 11, your computer will get a new look with a changed wallpaper, color, etc.
Also Read: 10 Best Windows 10 Themes
3. Choose dark/light mode
In the Personalization section, click on Colors to enable dark mode in the computer from the menu ‘Choose your mode’. This will add colors to your computer, including all the apps and windows by default.
As per my experience, I prefer using dark mode because it reduces vibrant colors and allows me to work on a computer for long hours without any pain in the eyes.
Light mode is great if you like to see a computer in vibrant colors which looks pretty good in appearance.
Also, you can enable transparency settings and choose a color of your choice to highlight borders around the windows and applications.

4. Personalize Windows 11 background
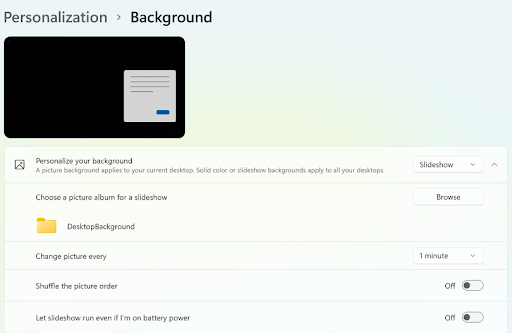
You can personalize your background and change the look of Windows 11 by adding the background image of your choice. Right-click the Start button, select7 Settings and head to Personalization, and then select Background within Settings.
Here you can choose the picture of your choice by clicking on the Browse photos.
You can also select a slideshow to change the background image automatically and also you can add many pictures to see in the background.
5. Select color of your choice
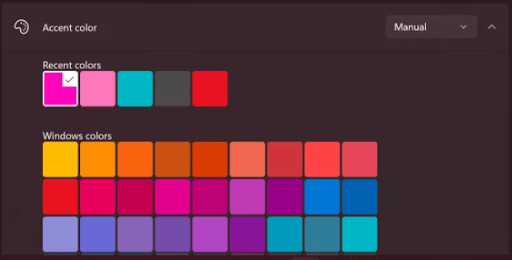
Click on the Start button, select Settings and head to Personalization, and click on colors to select the color of your choice for Windows 11 appearance. This will add grace to your computer and will make it more attractive than you think.
6. Enable night light
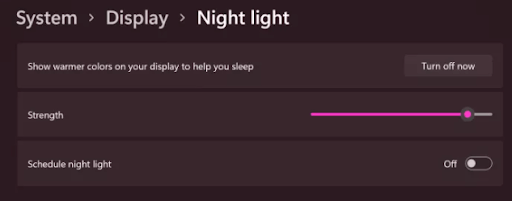
The night light feature is useful to reduce eye strain during long working hours. To enable it, right-click on the blank area on the desktop and click on Display settings. Now select the Brightness & color section. Here, turn on the night light to get warmer colors which are useful in reducing eye strain. You can also schedule the night light as per your preference and working hours.
7. Change Taskbar location
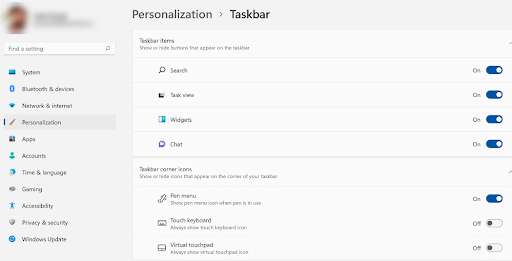
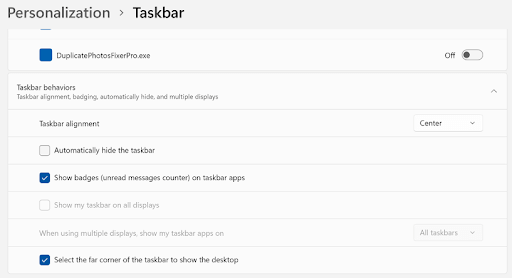
The taskbar is by default aligned at the bottom of the screen and users are habitual of using it in the same position. To change the appearance of your computer, you can change the position of the taskbar and set it on the left, right, and top of the screen.
You can also choose to hide the taskbar when not needed which will automatically disappear as you move the cursor away from it.
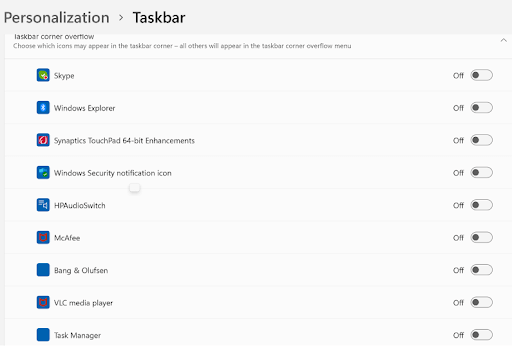
To enable this, you need to click on the Start button, select Settings and head to Personalization, and check for the Taskbar. In this section, you can do all the above-mentioned, changes as per your choice.
8. Hide desktop icons
Generally, we have a habit of opening any app or any file from the desktop, and for this, we create icons on the desktop. When you have a desktop full of icons, it looks untidy. You change the appearance of Windows 11 you can hide the icons and make the desktop neat and clean.
Click anywhere on the black screen of the desktop and select View. From here, you can choose the option Hide desktop icons
![]()
9. Customize start menu
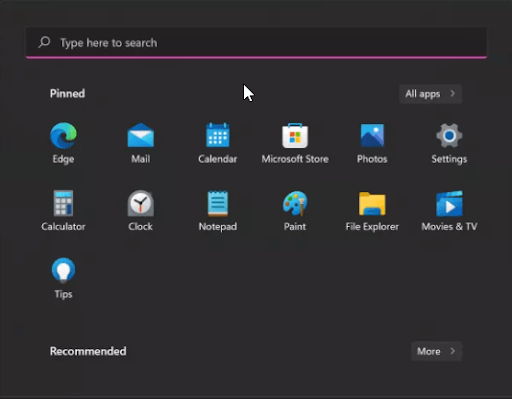
The start menu is always loaded with all the apps and shortcuts we use often, therefore, giving it a desirable look will make it more trendy. Right-click the Start button, select Settings and head to Personalization. Here click on ‘Start to the right’ and then with the help of three toggles you can choose whether or not to include recently added apps, most used apps, and recently used items in the start menu.
Apart from this, navigate to the Folders section and with the help of toggles choose your preferred choice of additional, handy shortcuts that should be included in the Start menu.
Conclusion:-
In this blog, we have discussed some ways by which you can change the look of Windows 11 and can make it look different from the default Windows 11. These steps are very easy to perform and also no money is required to make these changes as these can be done by changing some settings. If you want to change the appearance of your Windows 11, then go through these steps and let us know about your creativity in the comment section below.


Leave a Reply