Whenever you install a fresh copy of Windows 10 on your computer, you get an option to choose your preferred language. Later which becomes the Display as well as the System language of your Windows 10 PC.
But, if at any given point of time you would want to change Windows 10 system language then what? Does this mean you’ll re-install Windows or is there a work around? The answer to this question is without reinstalling Windows, you can easily change system language in Windows 10. To know how this can be done, you’ll need to read further.
Also Read: How to Setup Find My Device in Windows 10
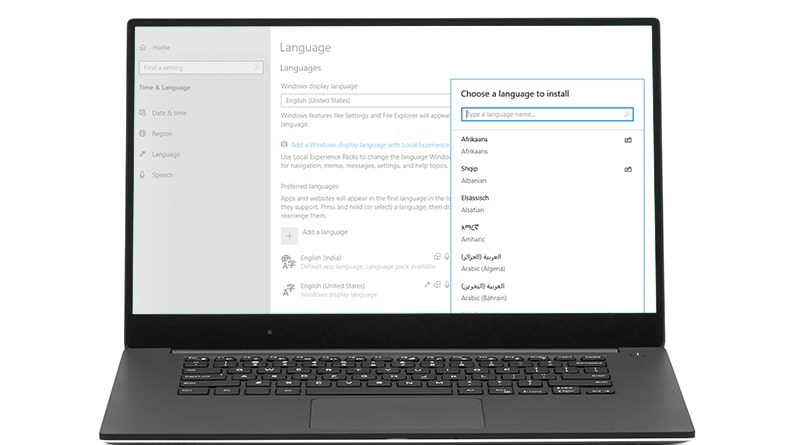
How to Change System and Display Language in Windows 10
Windows 10 provides various languages from which you can choose your preferred language. Steps to change display and system language in Windows 10.
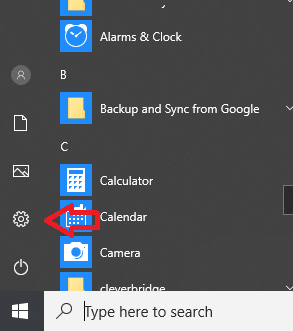
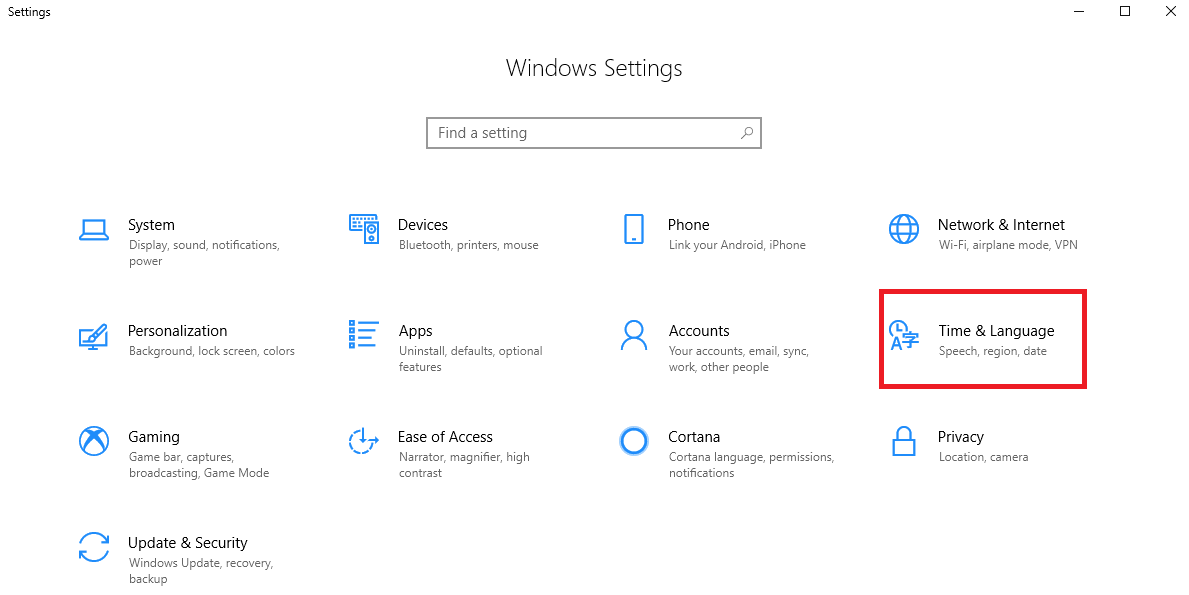
1. To get started click on the Windows Start button > click on gear icon to open Windows Settings.
2. In the Windows Settings click on Time & Language option.

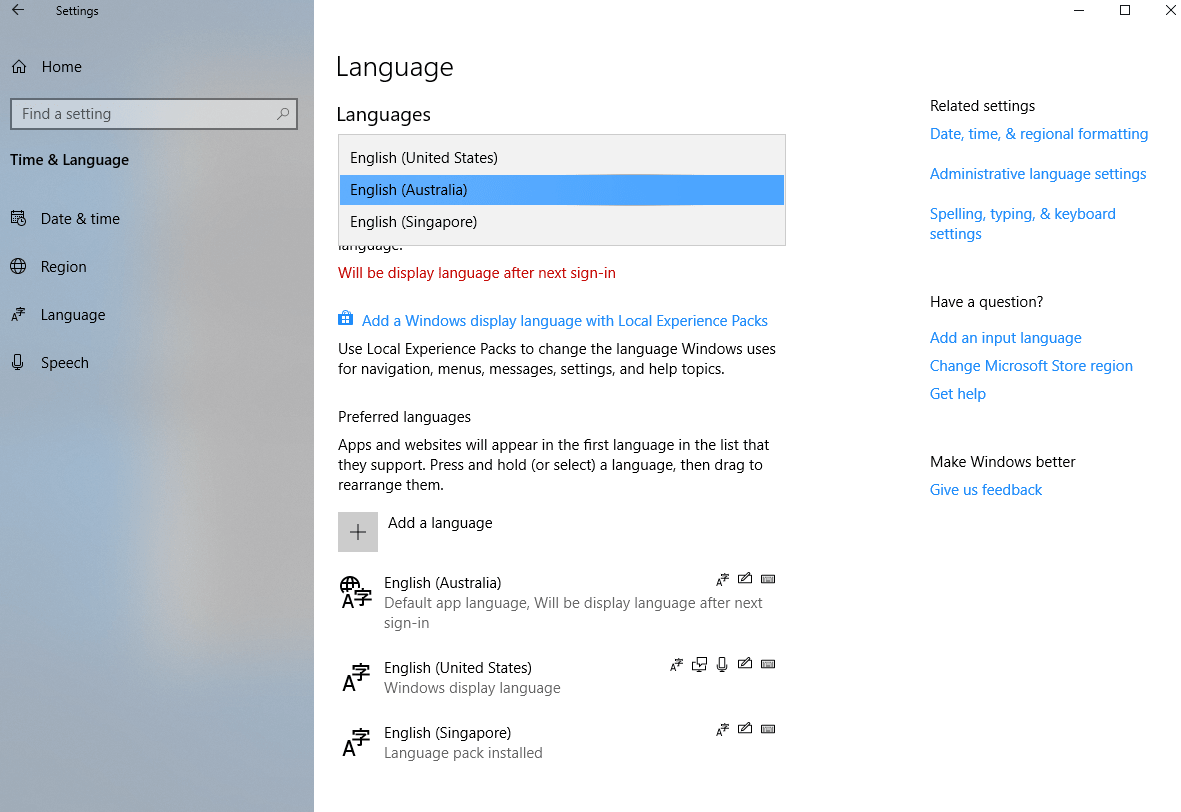
3. In the new window that open click on Language located in the left pane.
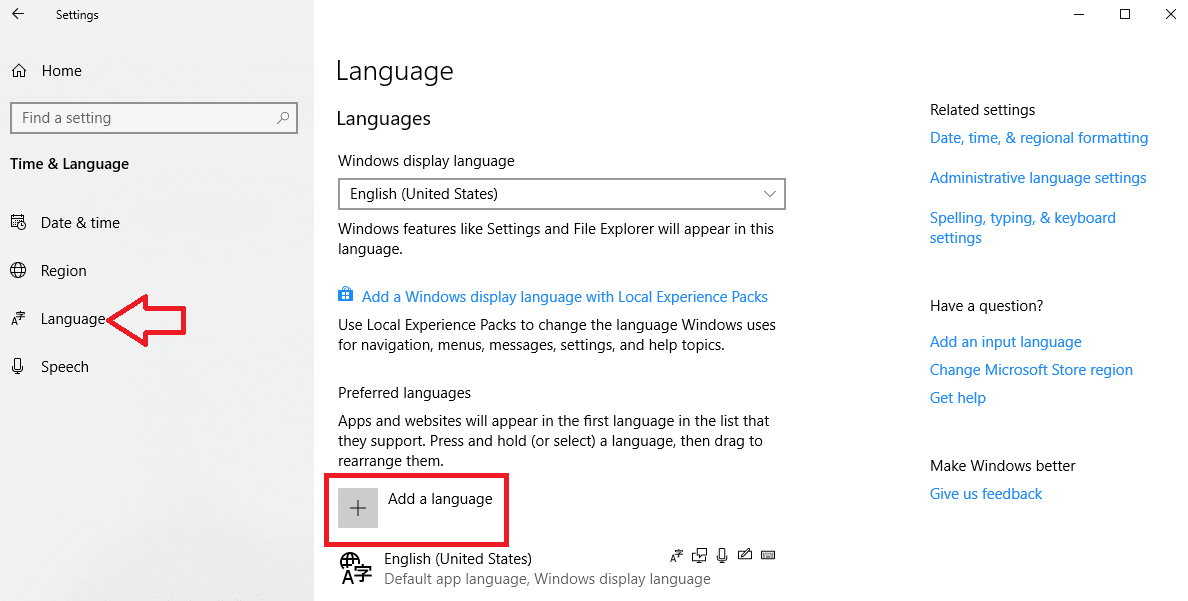
4. Now in the right panel, click on the Add a language option.
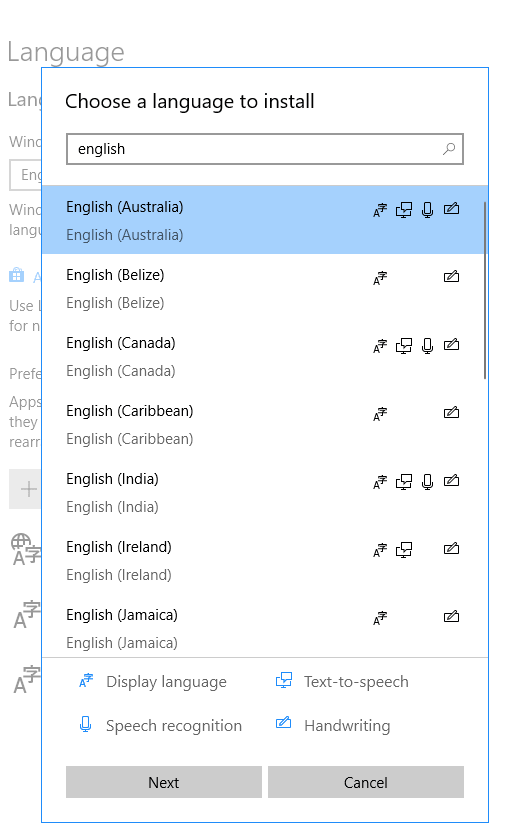
5. The next step now is to select the language you wish to add. Since Windows 10 provides you with different language option to add, search for the language. Once selected click Next to proceed.
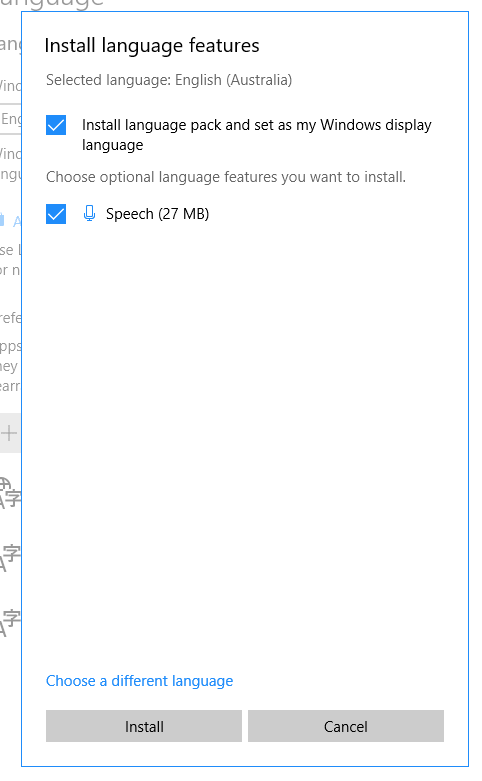
6. On this screen make sure option Install language pack and set as my Windows display language is checked marked. If not, check to mark the option and click on the Install button to proceed.
7. This way, language pack for the selected language will be installed on Windows 10. Moreover, since we selected the option Install language pack and set as my Windows display language, the display language of your computer will automatically change to the selected one, next time you sign in to Windows.
Using these steps you can install various language packs.
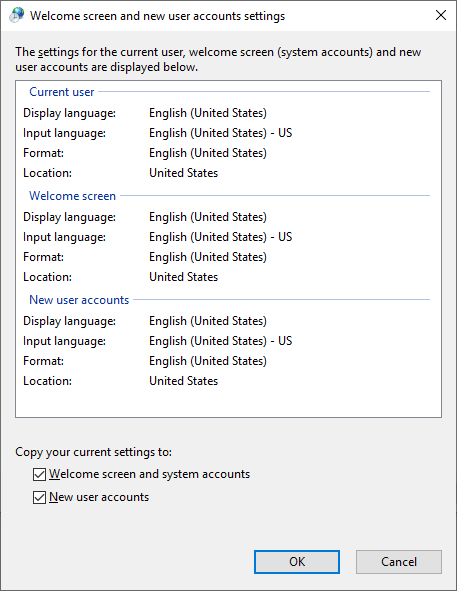
How to change Language of Welcome Screen and New User Accounts.
Now, that you installed and applied language pack, language of login screen, welcome screen, user accounts and start menu should change. But if this doesn’t happen you’ll need to follow steps explained below to change the language.
Steps to change Language of Welcome Screen and New User Accounts:
1. Click the Windows start button > select gear icon to open Windows Settings.

2. Here, click on Time & Language option.
3. Now, from the left pane select Language followed by Administrative language settings in the right panel, under Related settings section.

4. Here, click on Administrative tab > Copy settings under Welcome screen and new user accounts section.
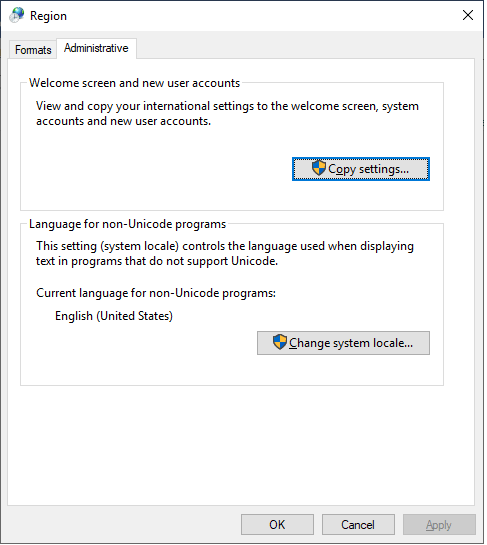
5. Now check mark the options Welcome screen and system accounts and New user account. Click OK to copy your current settings.
Using these simple steps you can easily change display as well as the system language of your Windows 10.
Note: If you use single Microsoft account to sign in to different Windows 10, then change in the language of one PC will automatically change the display language of another computer. Because systems are synced.
Must Read: How to Optimize Windows 10 PC for Best Performance
Therefore, to change the display language of only 1 PC turn off language syncing. To do so open Settings > select Accounts. Now from the right pane click on Sync your settings and toggle off Language preferences in the right pane. This change of language on 1 system will not affect the other one.
So, guys, that’s all from our side. Hope you will now be able to change the display as well as the system language of your Windows 10 PC without any hassle. If you find this article helpful, share it with your friends and family.
FAQ
How do I change the display language in Windows 10?
To change Windows display language, press Win + I keys to open Settings. On the Settings window, select Time & Language. From left pane select Region & language. In the right pane select Add a language under Languages option. On the pop-up window, select the language of your choice and follow the on-screen instructions to complete the process.
How do I change the language on Microsoft display?
To add a display language or change system language in Windows 10, open an Office program, such as Word. Go to File > Options and select Language. Now select Install additional display languages from office.com under Office display language. Select one of the languages in the Add an authoring language and select Add. Now you need to download and run the installation file. You will find added language under Office display languages.
How to add an authoring language?
To add an authoring language, open an Office program, such as Word. Now click on File > Options and select Language option. Click Add a Language under Office authoring languages and proofing. Select language of your choice in the Add an authoring language and select Add. Next you need to download and run the installation file. Now you will be able to see added language in the Office authoring languages list.
How to set preferred language on Windows 10?
To set preferred display language in Windows 10, go to Settings > Time & Language > Language. Now select Add a preferred language under Preferred Languages section. Search for the language of your choice and download language package from the results. Press Next. Select Set as my display language option and follow the on-screen instructions to complete the process.
Recommended Readings:
How to Disable Automatic Update on Windows 10
Fix “Windows 10 Update Pending to Install” Issues
Best Method To Schedule Shutdown on Windows 10


Leave a Reply