Like many other peripheral devices, a printer is an essential part for your computer. With advanced printing features, you can find printers in all budgets. If you are using a printer on your PC and it is malfunctioning due to unknown reasons, then it is time to fix it following a few simple steps. It includes connecting printers again, updating printer drivers, and other necessary tweaks in system settings. Let’s discuss how to fix Windows cannot connect to the printer issue on your system.
You may encounter “Windows cannot connect to the printer” error due to various reasons. It may completely block your printing task. When your printer refuses to work, you may find various errors causing it. Some of these errors include:
- Operation failed with error 0x0000007e.
- Operation failed with error 0x00000002
- Operation failed with error 0x0000007a
If you have found one of these errors while connecting to your printer, then it’s time to fix it following below mentioned methods.
Methods To Connect Windows To Printer:
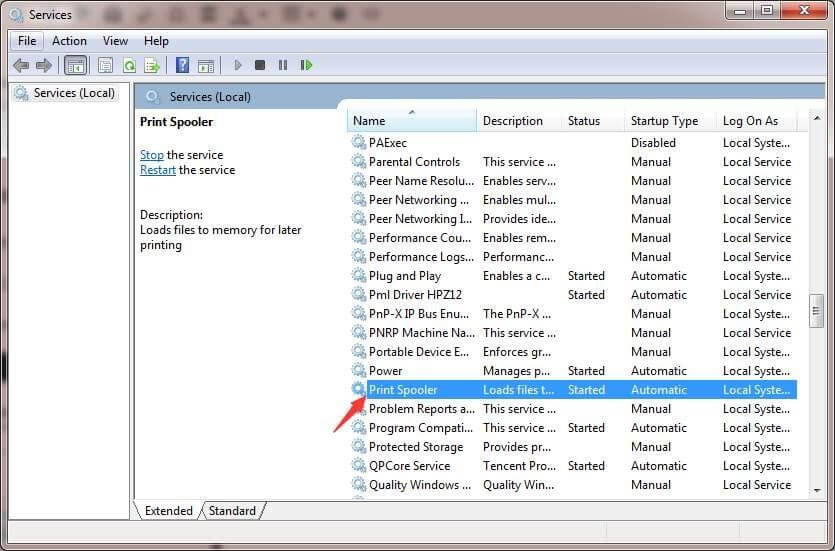
Method 1: Restart Print Spooler Service

The first method includes to stop Print Spooler service and then to start it again . To do this, follow these steps:
- Press Win + R keys to open Run dialog box.
- Type msc and press Enter.
- On the Services window, search and double-click on Print Spooler service.
- Press Stop button under Service Status option.
- Once you have stopped it, press the Start button to start the service again.
- Press OK button.
That’s it. Connect your printer again and see if the problem is fixed.
Also Read: How to Solve ” Computer Not Recognizing Printer” Error
Method 2: Create a New Local Port
To do this, follow these simple steps:
- Open Control Panel.
- Select Devices and Printers
- Press Add a Printer option from the upper left corner of the window.
- When prompted login as an administrator.
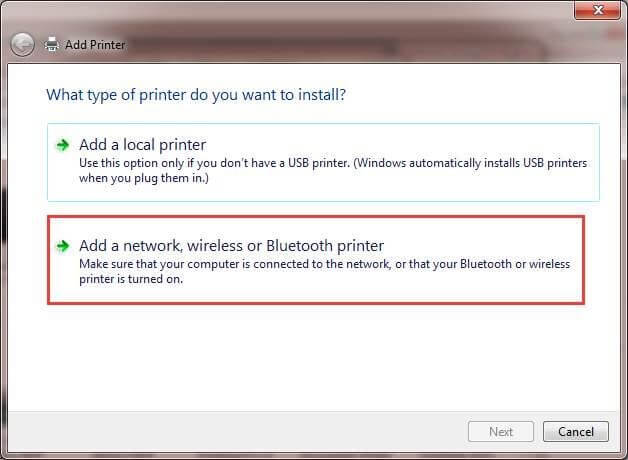
- On an Add Printer window, choose Add a network, wireless, or Bluetooth printer

- Now you need to choose Create a New Port At the same time, you need to select Local Port in the drop-down menu next to Type of Port. Once done press Next.
- Next is to enter a port name when prompted.
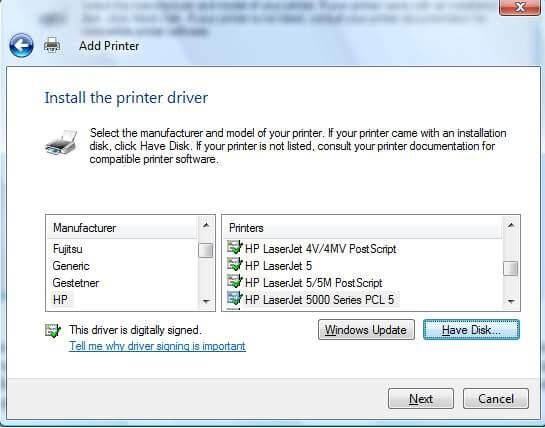
- Choose the printer model and press Next.

Follow the instructions given on-screen to complete the process.
Read More: How to Fix Offline Printer Issue on Windows 10
Method 3: Update Printer Drivers
Drivers are an essential part of any computer. It helps OS connect hardware devices on your system. To fix Windows cannot connect to printer issues, you can try to delete the existing drivers and then update drivers of your printer. To do this, you need to follow a two-step process. First to remove printer using settings and second to delete printer drivers. To remove printer using settings, follow these steps:
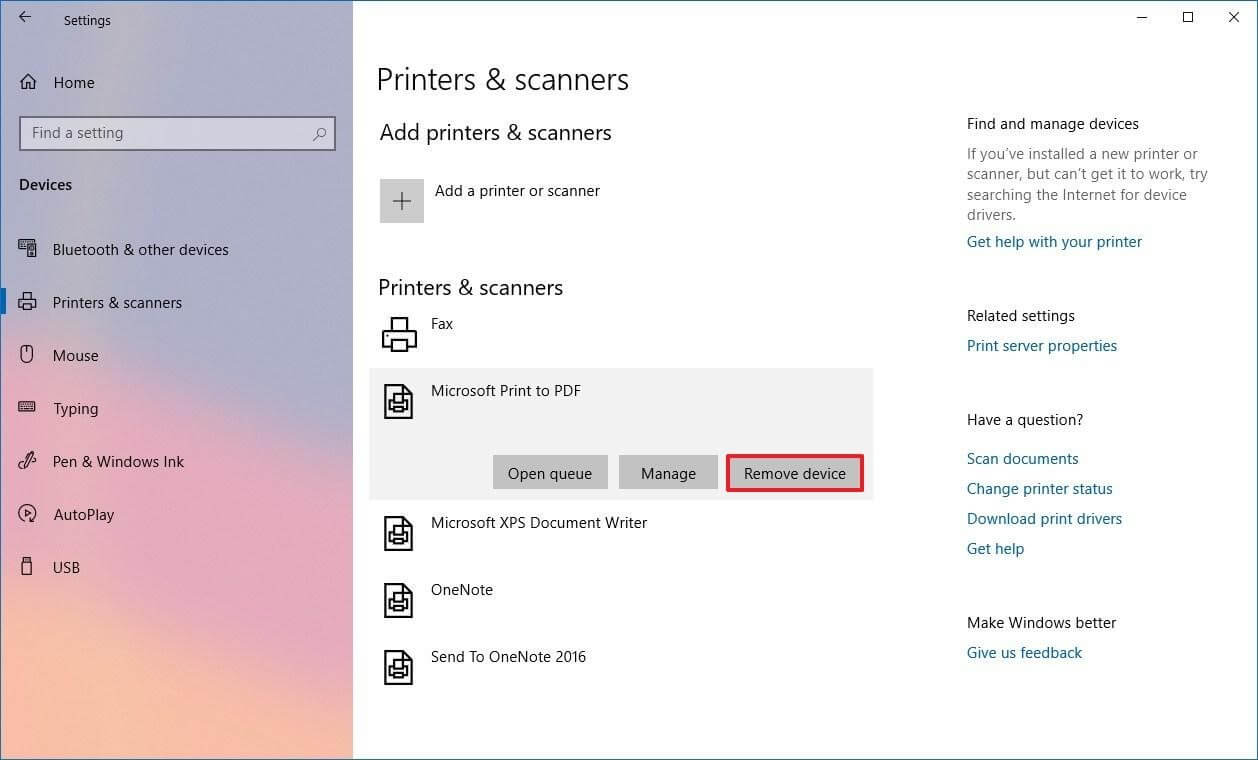
- Open Settings > Devices.
- Select Printers & Scanners.
- Select the printer under “Printers & Scanners” that you want to remove.
- Press Remove Device
- Click Yes to complete the process.

Have a look: Best Free Driver Updater Software For Windows 10
Delete printer drivers
Now that you have removed the printer from your system, it’s time to delete the printer driver. To do this, you can use Print Management option. Follow these steps to delete the printer driver.
- Open Control Panel > System and Security > Administrative Tools.
- Next is to double-click on Print Management option.
- Click on Custom Filters option and expand it.
- Select All drivers.
- Select the driver that you want to delete, right-click on it and select Delete option.
- Click Yes to complete the process.
Now that you have deleted the printer driver, reconnect your printer and it will automatically reinstall the up-to-date printer driver. In case it fails to do so, you can try to update the driver manually by heading to the Device Manager. You can also use best driver updater tools to do it instantly. These smart tools help you update all outdated drivers automatically to save time.
So, these are a few quick steps you can follow to fix Windows cannot connect to the printer issue. These are thoroughly tested methods and proved to be working. Do try these steps to fix the annoying issue on your PC. It not only helps you fix the said error, but it also helps you fix related printer errors automatically as well. Don’t forget to share your experience in the comments below.
Next Read:
How To Add & Connect Wireless Printer In Windows and Mac


Leave a Reply