
Skype is one of the most used VoIP and messaging application that not only helps homer users to connect with their family but also enterprises to get in touch with their clients and customers. Though, the seamless connectivity is one of the features of Skype that provides it a distinctive place among its competitors. However, many users have reported a common problem where they were unable to send messages over Skype on Windows 10 PC. If you are one amongst them then this article will help you in resolving the problem.
Fix for Skype Unable to Send Messages on Windows 10:
Sometimes, this problem may occur if you are experiencing connectivity issues with your network. In such cases, the problem itself get resolved once the internet connectivity is up and running. However, if your Internet connection is working fine and you are still unable to send messages on Skype then you have to try the below-listed troubleshooting steps.
Reboot your System:
Before proceeding with any other resolutions, let’s begin with the simple step to reboot your machine. Quit all running applications, save your work and restart your system. Now run Skype application as an administrator and check whether the issue is fixed or not. If not, then move on to the next resolution step.
Ask Help from your System/Network administrator for Permissions:
If you are unable to send messages on Skype from your office or workplace, the possibility is that your company has restricted use of Skype in office premises. This can be done either by making changes in group policies or Windows registry.
Must read: Most Useful Windows Run Commands You Should Know
Therefore, to fix this issue you have to contact the system admin of your company to provide permissions for sending messages via Skype.
Disable your Proxy Servers:
Many a times, proxy servers also hamper functionalities of certain Windows apps like Skype. If you are using a proxy server then try disabling it. To do so, please follow the steps below:
1. Click on the Windows Start button and open Windows Settings by clicking on the gear icon.

2. Now in the Settings window click on Network and Internet.
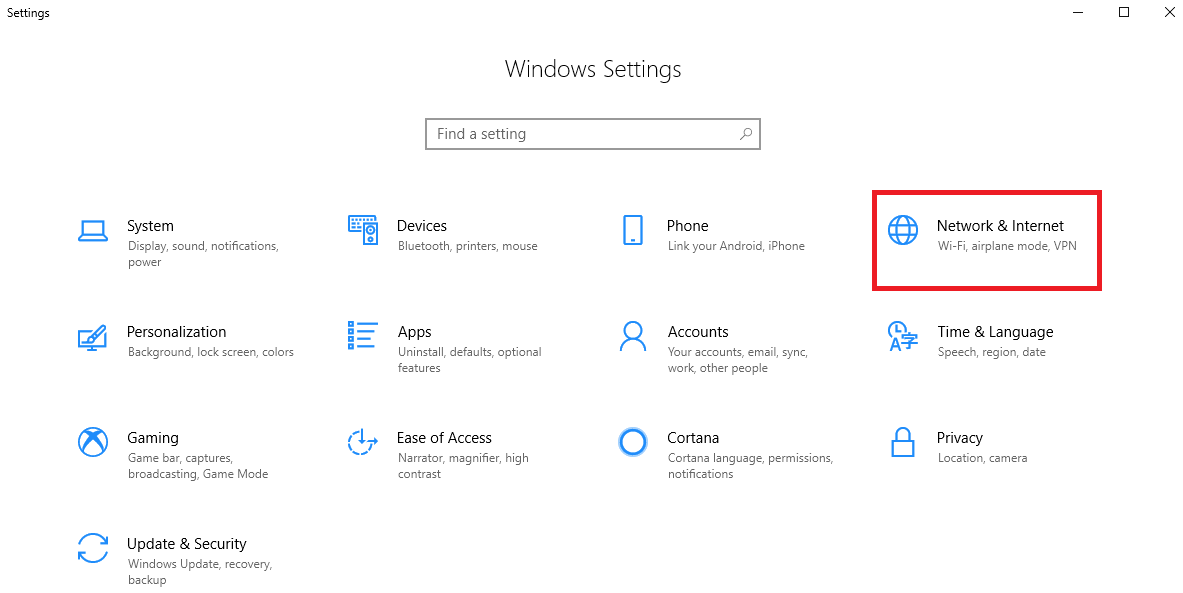
3. In the new Window that opens click on Proxy in the left pane.
4. Toggle on the button for Automatically detect settings. Also, toggle off the settings Use a proxy server in Manual proxy setup.

5. Reboot your computer for the changes to take effect.
Try using specific Skype commands:
If you are facing problem in sending messages on Skype in Window 10 to a specific user, then these special commands will prove handy. To get started open the chat window for that specific user whom you are unable to send messages on Skype. Now, type in the following commands one after another and press Enter, after typing each command.
- First, type in /dumpmsnp and hit Enter.
- Now type /MSNP24 and again hit Enter.
- After typing both the commands, sign-out from your Skype account and then sign-in back again.
- Once signed in to Skype again open the chat window for that specific user and type in following command and press Enter.
/remotelogout - Now reboot your system to confirm that your problem is fixed or not.
PS: All the above-listed commands that you type in will not be received by the user on another side since they all are special Skype commands.
Uninstall if you have More than One Version of Skype Installed:
Have you installed more than one version of Skype on your PC? If yes, then immediately remove one of the Skype versions, as multiple versions of Skype conflict with each other and hamper the effective functionality of Skype.
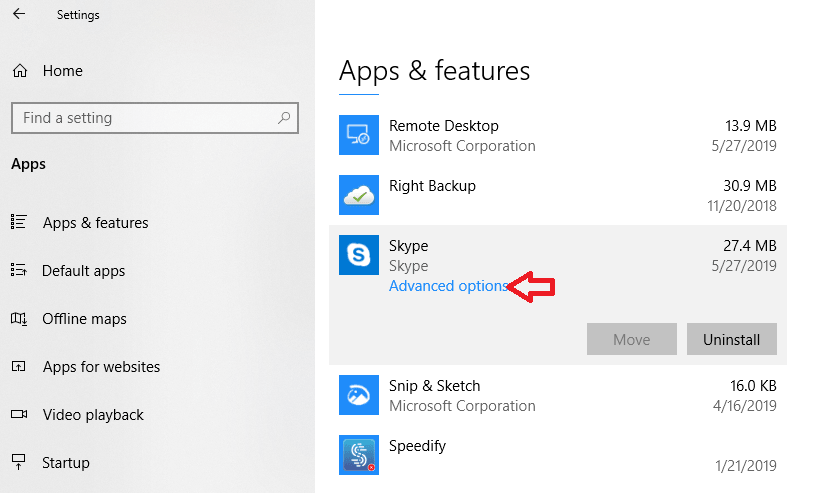
1. To remove Skype, click on the Windows Start button and open Settings by clicking on the gear icon.

2. In the Settings, Window click on Apps > Apps & features.

3. Now from the detailed list of applications uninstall one of the versions of Skype.

Check for Skype Servers Status:
Although Skype servers experience minimum downtime but can experience it especially for maintenance. Therefore, if you are experiencing difficulty in sending messages on Skype then it may be because the servers are down. However, this is the rarest of the rare issue but still possible.
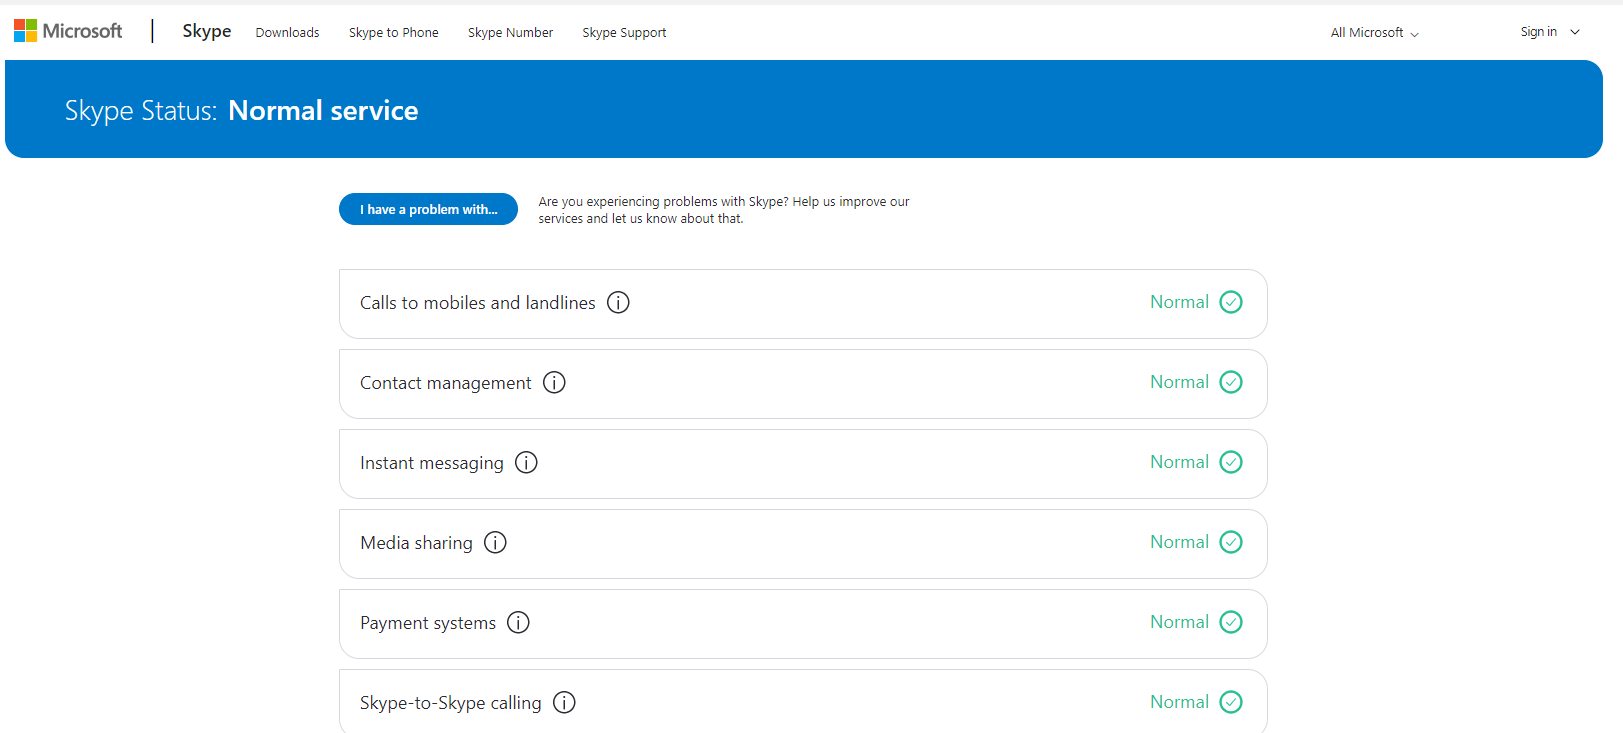
The good thing is that as a user you can yourself check the current status of Skype services and servers at their official website.
Here you can find some incidents when some of the services of Skype experienced downtime.
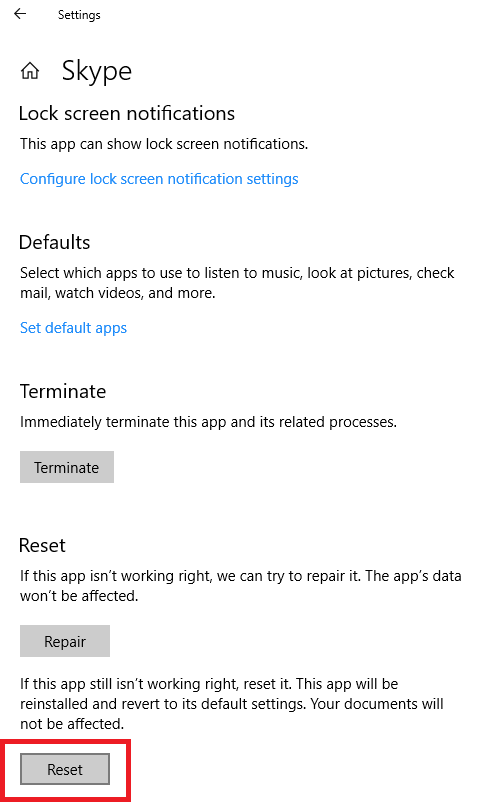
Reset Skype to its Default Settings
If all the above solutions fail, then the last step that you could try is reset Skype to its default settings. It can be done by following the steps below:
1. Click on the Windows Start button and open Settings.

2. In the Settings Window click on Apps > Apps & features.

3. Now from the detailed list of applications click on Skype to expand and select Advanced options.
4. In the next window that opens, click on the Reset button to revert Skype to its default settings.
So, guys if you too are facing problem in sending the message on Skype on Windows 10 PC then these troubleshooting steps will surely help you out.


Leave a Reply