Screen recording on an Android smartphone can serve various purposes. Whether you want to record an epic game moment, an informative webinar, or a moment with friends on a video call, screen recording can be a handy tool. In this article, we’ll start by discussing the need for screen capturing on smartphones.
And, further, we’ll dive into the quickest way to record your Android screen using the built-in screen recording feature & explore third-party apps that offer advanced tools for an enhanced screen-capturing experience.
Windows users who are curious to learn about recording screen on PC can check out this article: Best Screen Recorder Software For Windows 11, 10 PC (Free & Paid)
Quickest Way To Do Screen Recording On Android
Most Android devices and tablets come with built-in functionality to record screen. For this, all you need to do is:
Please note – The steps to record a screen on an Android device may differ depending on the model. If your Android smartphone doesn’t support the screen recording feature, you can use a third-party app, something we have discussed a little later in this post.
STEP 1 = Swipe down twice from the top of your Android screen to expand the Quick Settings menu.

STEP 2 = Now, look for the “Screen Recorder” tile.
STEP 3 = As soon as you tap on the Screen Recording option, you will see a floating icon where you can choose to record the full screen with audio or without it. Hit the “Start” button to begin!
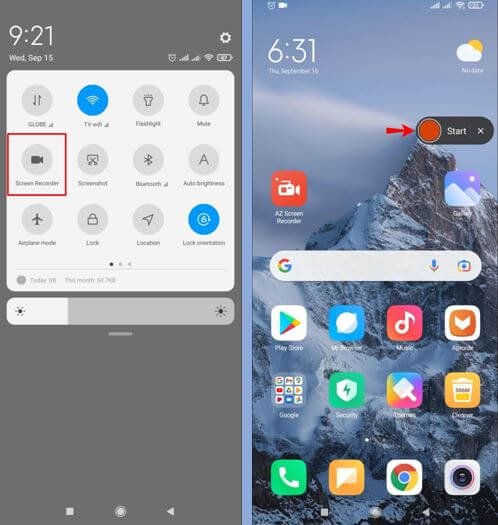
A countdown will appear & you are all set to capture your screen on Android. You can manage the controls to pause or stop the screen recording as per your needs.
Must Read: How To Record a Phone Call on Android
How To Perform Android Screen Capture Using A Screen Recording App?
Apart from the built-in method mentioned above, there are several third-party apps available on the Google Play Store that offer advanced screen recording features.
Let’s take the example of Screen Recorder:Videos & Reels by Systweak Software. The application offers a wide array of features for HD screen recording on Android.
It comes without any limitations and customizes the tools according to your needs and preferences. Besides recording, Screen Recorder:Videos & Reels also provides the ability to capture screenshots in the highest quality.
To get started, all you need to do is:
Step 1 – Install the app from the from the button down below.
Step 2 – Once you have installed the app, open it and give it the necessary permissions.
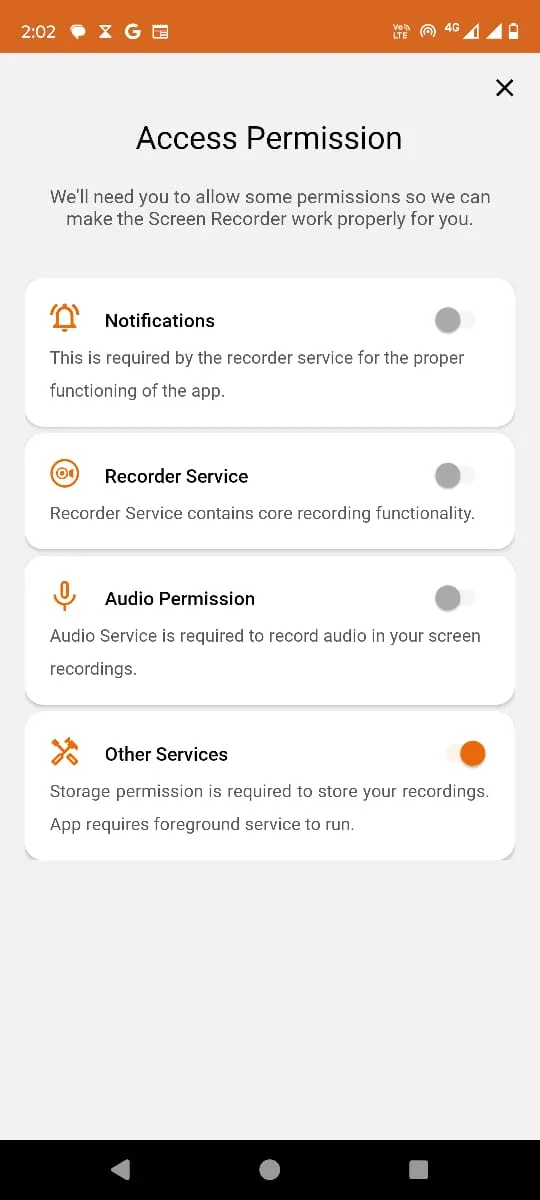
Step 3 – You can directly start recording the screen or tweak the Settings as per your needs. Let’s discuss both scenarios.
1. Start recording immediately –
- To initiate recording, tap on the record button at the bottom of the screen.
- Tap on Start now when the prompt appears.
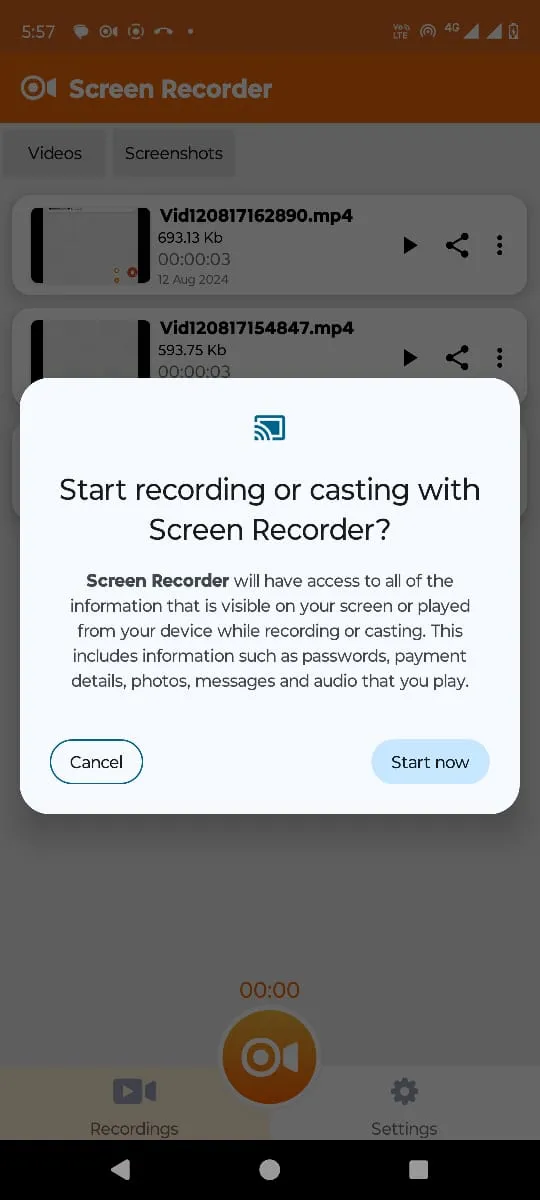
2. Tweak Settings before recording screen
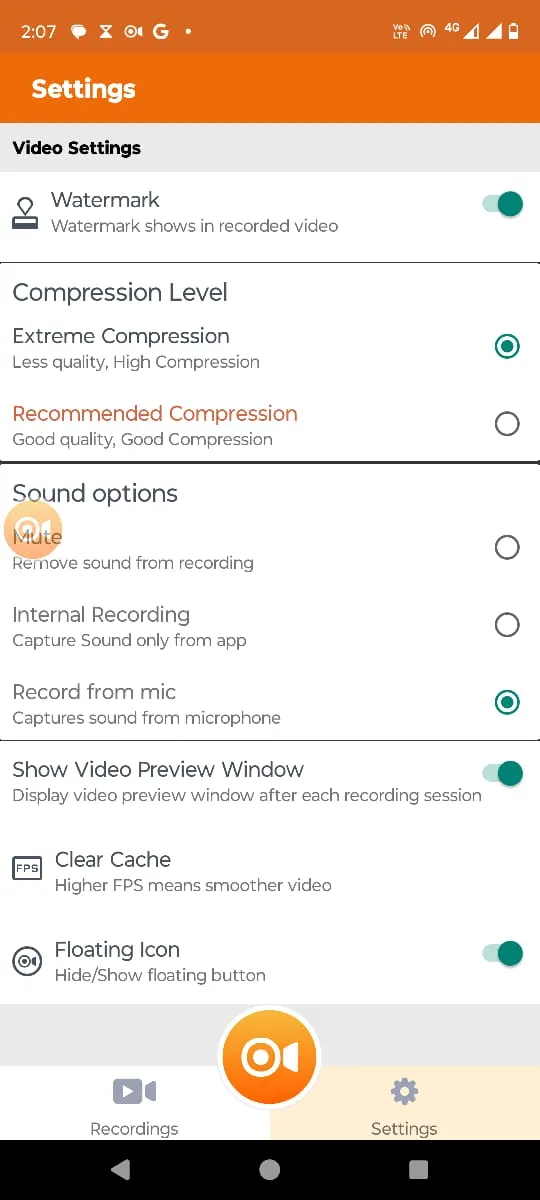
- If you don’t want to start recording right away, and instead would like to change some settings, tap on the Settings icon at the bottom right corner of the interface.
- On the Settings section you can adjust the following settings –
– Enable/ disable the watermark.
– Choose compression level.
– Select internal/ external audio.
– Enable Floating Icon.
– Clear Cache to achieve higher FPS.
– Enable annotation with which you can draw/ paint on your screen. Once enabled, a paintbrush icon will appear on the screen.
You can get more information about each of these options in this complete review.
Step 4 – If you have enabled the Floating Icon from the Settings, you can move it on the corners of the interface. Once you tap on it, you can record the screen, go to the home screen, and take screenshots. Once you are done recording, stop the recording and it will be saved on your device.
Step 5 – You can easily manage all your screen recordings and screenshots right from the home screen of the app.
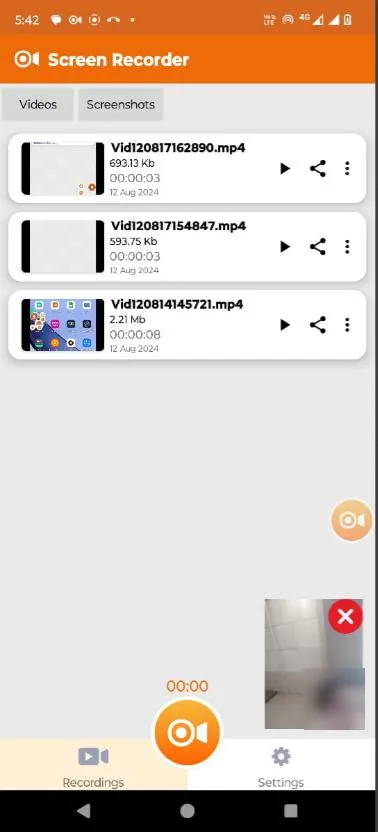
You can play your screen recordings, and share them on various platforms. You can even delete them if need be to free up storage.
MUST READ: How To Enable Screen Recording Feature On iOS
How Can Screen Recording Be Helpful?
Well, screen recording is a versatile functionality that can be beneficial in various scenarios.
1. Create Tutorials & Video Demonstration Guides
If you are a tech-savvy person you would be interested in making tutorials to walk users through app features or capture on-screen actions to demonstrate specific tasks.
2. Record Gameplays
If you want to highlight your achievements or create engaging content for your gaming audience on platforms like Twitch and YouTube, screen recording can help!
3. Reporting A Bug Or Issue
If you encounter an error or bug, recording it on your Android screen can provide developers with valuable information to identify and fix the problem.
4. Content Creation
If you’re a social media influencer, screen recording would help you to create engaging videos for platforms like TikTok, Instagram, or YouTube.
Conclusion | Android Screen Recording Was Never This Easier!
Screen recording has become an essential feature for many Android users. Whether you’re creating tutorials, capturing gameplay footage, or reporting bugs to developers, knowing how to screen record on Android can be incredibly useful.
If you have to do a simple screen recording to share with your friends you can go with the in-built feature. In case you want to do HD screen recording for professional purposes, then we advise you to take the help of third-party screen recording applications.
Screen Recorder:Videos & Reels is worth giving it a try to record yourself while recording your Android screen.
We have mentioned some great options in the category, if you know or use any other good screen recording app, please drop your suggestions in the comments section below!
Till then, Happy screen recording!
Next Read:
How to Screen Record YouTube Videos With Sound
How To Record Skype Calls Like A Pro


Leave a Reply