Touchpads are very useful because they make everyday tasks easier by providing speed in working and navigation on the screen. But the case may not be the same every time because you might have to prepare a document with all necessary facts and details to be inserted for official purposes but while typing your touchpad becomes a barrier. While typing on a long document, we always fear accidentally touching the touchpad which might cause some issue or can replace the pointer positing.
Therefore it is suggested to disable the touchpad when you have enough to write. This will not divert the focus, and you will be able to perform your task in time with great efficiency. Users have to keep one thing in mind before disabling the touchpad: that they have a mouse wired or wirelessly connected to the laptop. It is checked because some laptops do have a direct button to enable the touchpad.
Also read:- How to enable virtual touchpad in Windows 10
Steps to disable the touchpad in Windows 10:-
1. Disabling touchpad through Windows Settings
In Windows 10 if you wish to make any changes, then the first thing you should do is to open the Settings app. In the settings app, you can make these changes quickly.
2. Open Settings by clicking on the Windows Start button

3. Select Devices and look for Touchpad

4. Now turn off the touchpad toggle switch. The touchpad is disabled now.
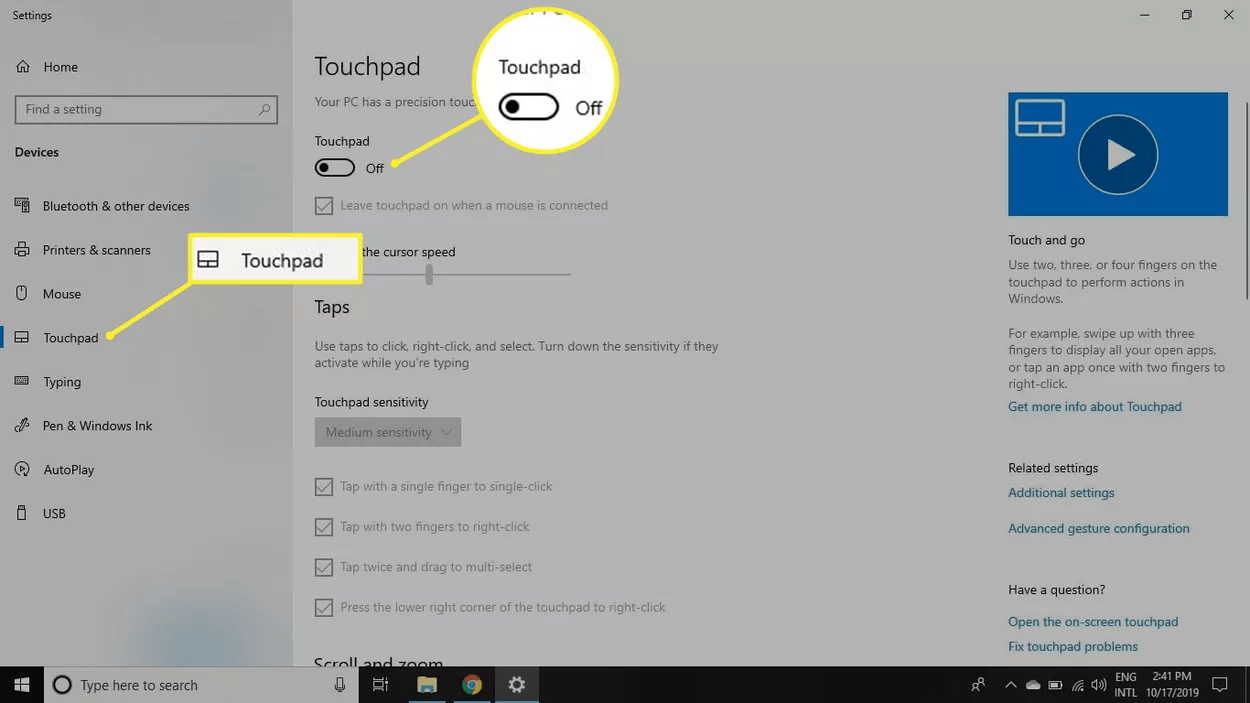
Note:- If you see the option touchpad sensitivity settings that means you can not disable it from Settings.
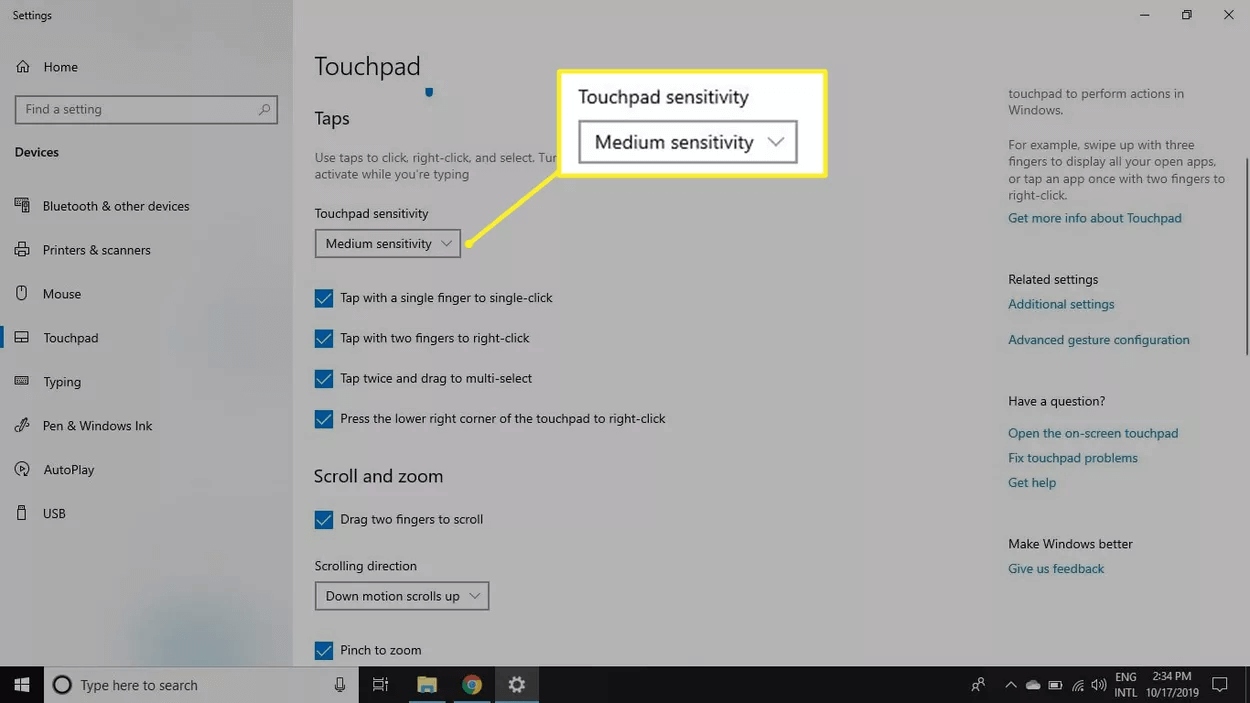
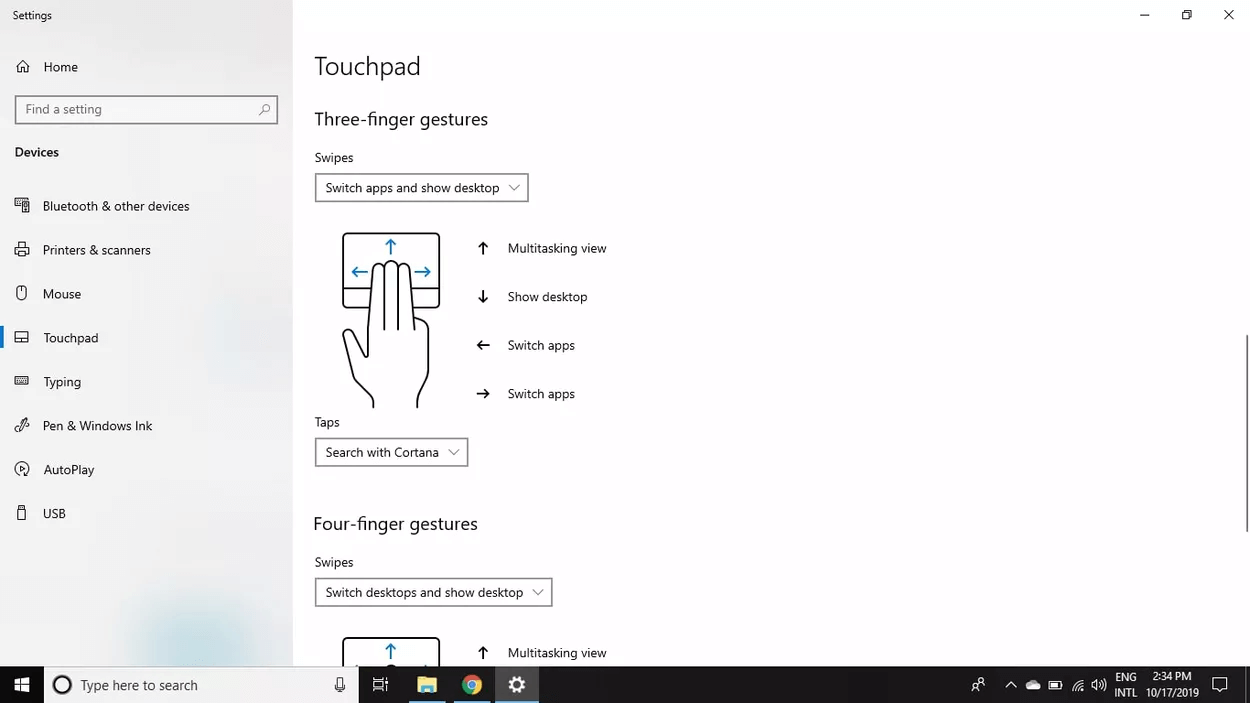
5. Further, if you want more changes on the touchpad, then you have some options when you scroll down further. You get 3 and 4 finger gestures on the touchpad and you can easily give your commands to each move.
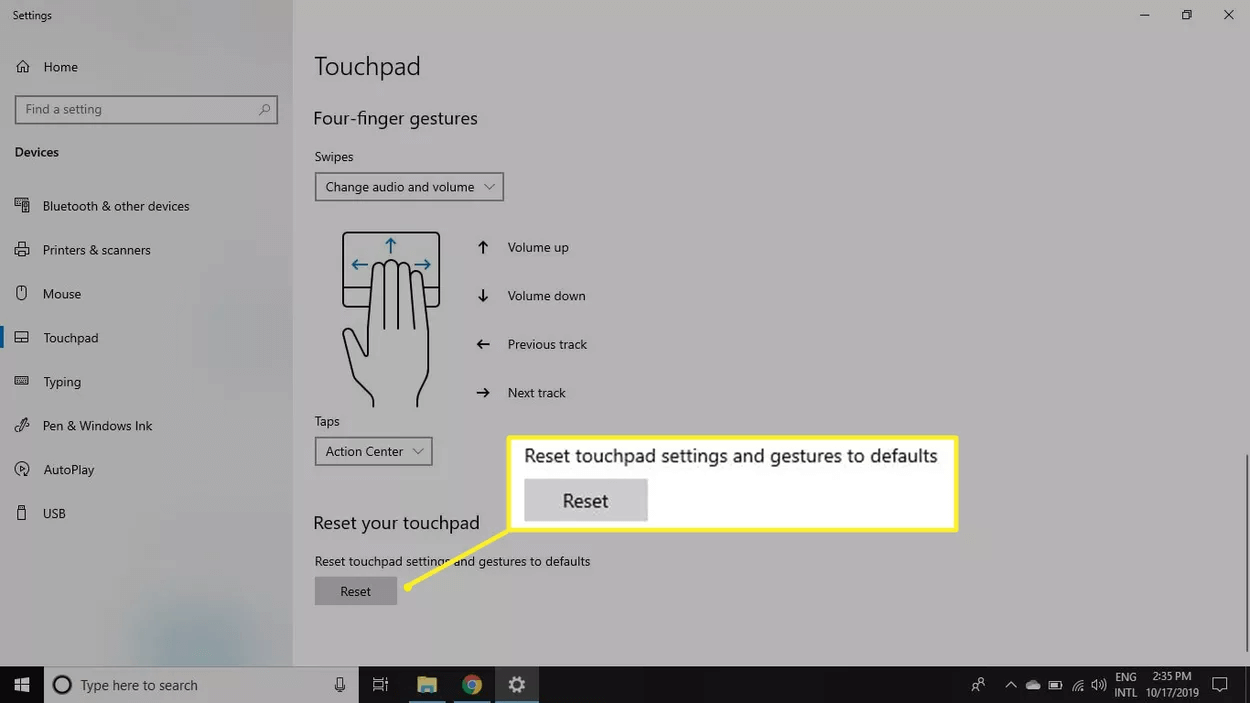
If you just wanted to try these new settings for a shorter period, then you can reset the settings to default after they are being used by clicking on the Reset tab at the bottom.
Note:- This is the most simple way to disable the touchpad which is used by all the users. If you want to apply the same changes to the touchpad, then you can do it in Device manager also.
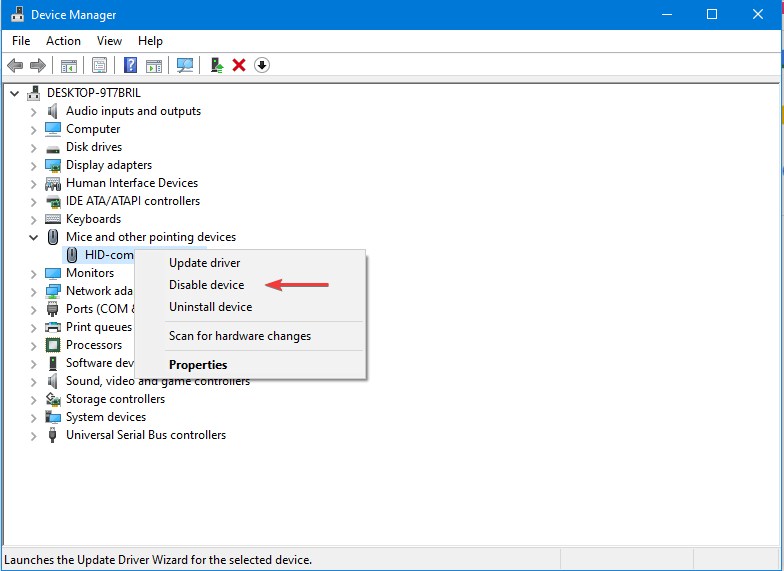
To disable the touchpad by device manager, you have to open Device Manager by clicking on the search bar near the start button.

Once the Device Manager opens, then you have to look for Mice and other pointing devices. Now right click on Mice and other pointing devices and select Disable Device. After you have clicked on the Disable device, the touchpad will stop responding and you can enjoy your writing efficiently.
Another method to disable Touchpad is via Windows Registries if any of the above-mentioned methods fail. We recommend users opt for this way only if the above possible methods are not working for them.
- Press Windows + R to open the command box
- Type Regedit and press OK
- Press YES to allow user control access
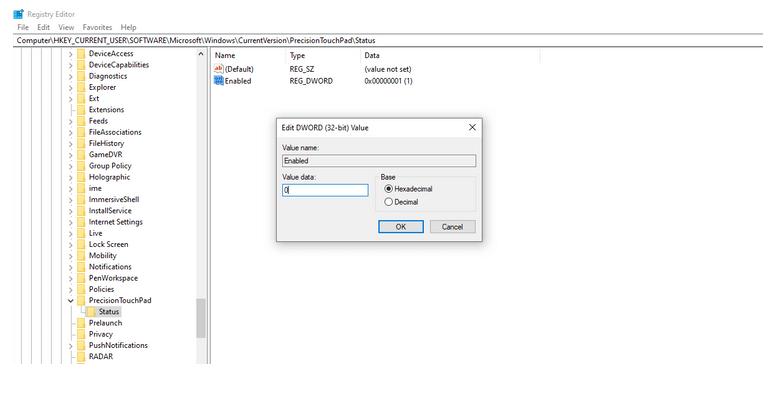
- Now copy-paste the below command:-
Computer\HKEY_CURRENT_USER\SOFTWARE\Microsoft\Windows\CurrentVersion\PrecisionTouchPad\Status
- Double tap on Enabled entry to change the value data and change the value to + in place of 1.
- Now the touchpad will not work until you change the values again to 1 from 0.
Conclusion:-
Although touchpads are of great use for every user because they save time while navigating the screen. However, this functionality needs to be disabled sometimes by the user when they have to write lengthy articles in a document or have to do some office work that requires more typing. In such cases, touchpads sometimes create problems by accidentally making the pointer move at any place on the screen. To stop this interference, it is advised to disable the touchpad for some time till the work is done and again the touchpad can be activated by dedicated buttons or by applying the default settings again.
If you know any other way to disable the touchpad, then please share it in the comment box below.


Leave a Reply