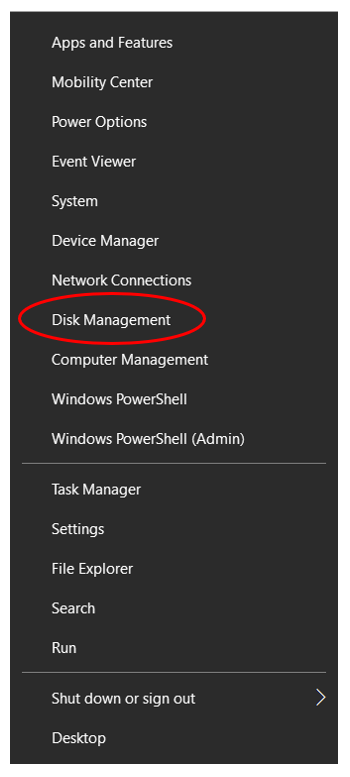
Disk Management is an awesome tool that comes built-in with Windows 10. It is used to manage the hard drive space on the computer. It involves creating new disk partitions, extending and shrinking the already created drives, removing partitions, etc. Disk management can be excessed by right clicking on the Windows icon at the left-hand bottom of the screen.
Although the tool is pretty intuitive in itself, some first-time user may find it difficult to use. Also, because it deals with the hard drive partitions, it is better to make sure that you are doing the right thing because any wrong step can result in you losing all of your data permanently.
How to Delete Partition Using Disk Management?
If you are new to Disk Management tool and you want to know How to delete partition using Disk management or you just want to be sure about your method, here is a step by step guide to help you delete partition on Windows 10:
Step 1: Go to the drive you want to delete permanently.
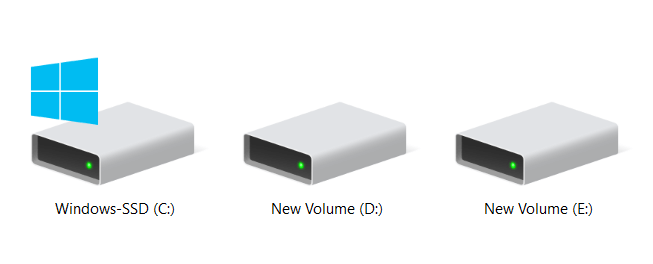
Step 2: Copy all the data present in the drive to another drive or external hard disk. Do this even if you are sure that the drive that you want to delete is empty because if there was anything that may be of use, it won’t be recoverable.
Step 3: Open Disk Management by right-clicking on the start icon at the bottom left-hand corner of the screen and choosing Disk Management from the list.

Step 4: Right click on the drive you want to delete in the list and click Delete.
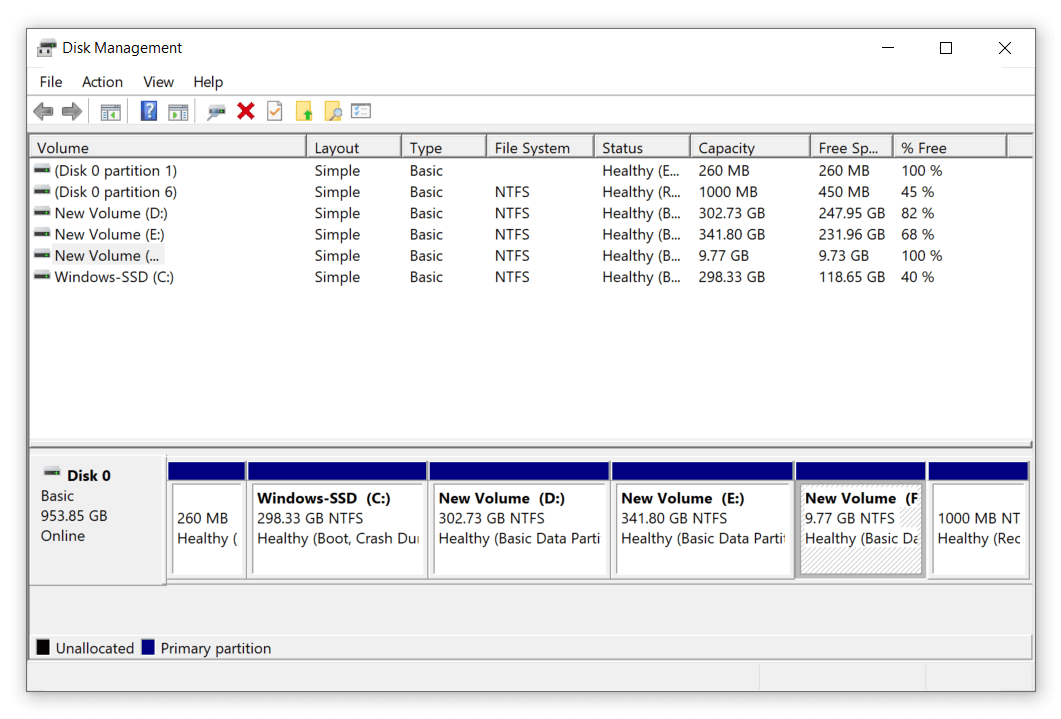
It is this simple to delete Partitions in Windows 10 using Disk Management Tool. However, you may find the error where the Delete button is greyed out when you right click on the drive or even if it is clickable, you can’t delete the partition. This is a very common error that occurs if you have been using the drive for a while to store all kinds of files.
Though in this situation most bloggers would suggest you use a third-party software, there is absolutely no need for you to buy and install a third-party software on your computer to delete partitions.
There are two common reasons that it occurs:
1. Page Files:
Page files are the files created by the CPU to be usable by the Random Access Memory (RAM) of the device in order to fulfill the requirement of the CPU. These files are created when the RAM is full and can’t hold anymore files. In this situation all these files are then stored in the other hard drives for the quick operation of the task. Though these files are meant to be temporary and useful, they are the primary cause of error in deleting partition in most cases.
2. System Files:
System files are the files that are the part of the Operating System of the device. These files relate to the core functioning of the device and hence, the device with such files shouldn’t be deleted because, very often, this would result in crashing the system and wrecking the Operating System up.
Ways to safely Delete Disk Partitions in Windows 10:
While we suggest that you completely drop the idea of deleting the drive with the system files unless you install a fresh copy of Windows in another drive, we do have ways to help you out with the page files.
The problem where you can’t delete partition or remove partition because of Page Files has two solutions, the second one has the greater chance of working but the first one should be followed first to try and resolve the problem easily.
Method 1: Formatting:
Formatting the drive is one of the obvious solutions to the problem. Though formatting a drive has a very high chance of going through because of the presence of Page files in the drive, it may work sometimes. Formatting the drive is simple and most people know how to do it.
If you are new to Windows, you can format the drive by right-clicking on it and choosing Format to format the drive. On the next page, you may choose whether to quick format or not.
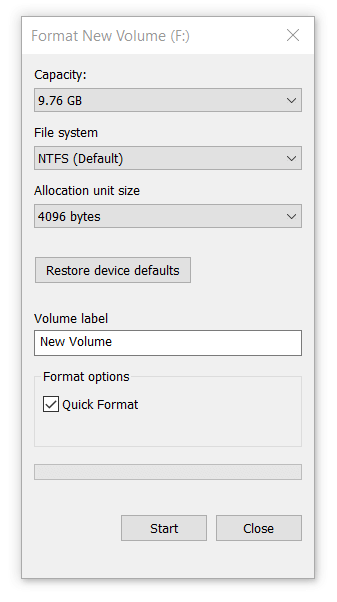
If upon selecting Start, you see the error that the formatting couldn’t be completed because the Drive is in use, jump to Method 2.
Method 2: Turning Page Files Off:
In order to turn the Page Files Off, follow the steps given below:
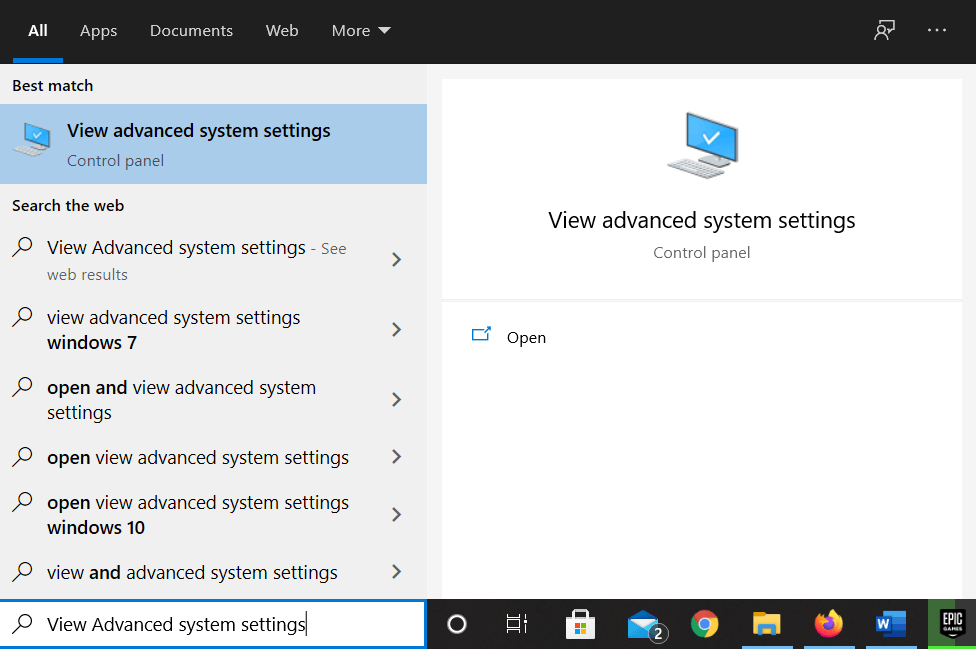
Step 1: Search for “View Advanced System Settings” in the start box on the Taskbar.
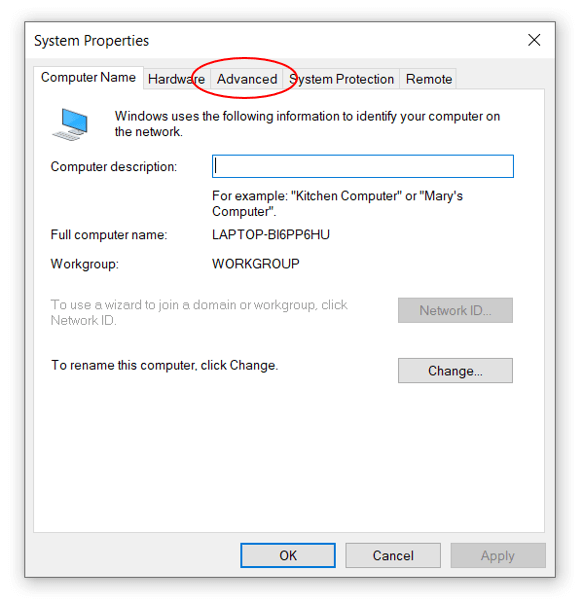
Step 2: Head to the Advanced tab.
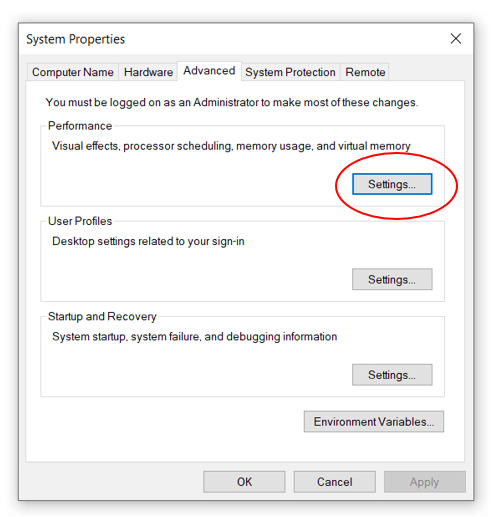
Step 3: Click on Settings.
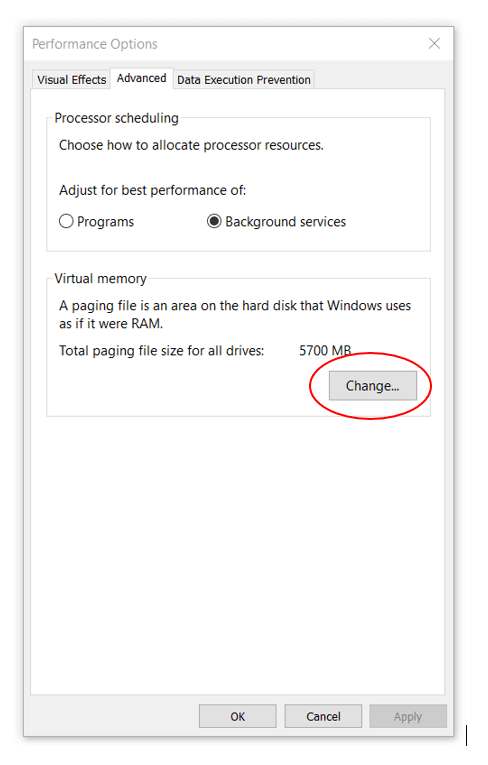
 Step 4: Head to Advanced in the new tab as well.

Step 5: Click on Change to change Page Files related settings.
Step 6: Uncheck the Box Automatically manage paging files for all drives.
Step 7: Select the Drive and choose No Paging File in order to remove paging files from the drive.
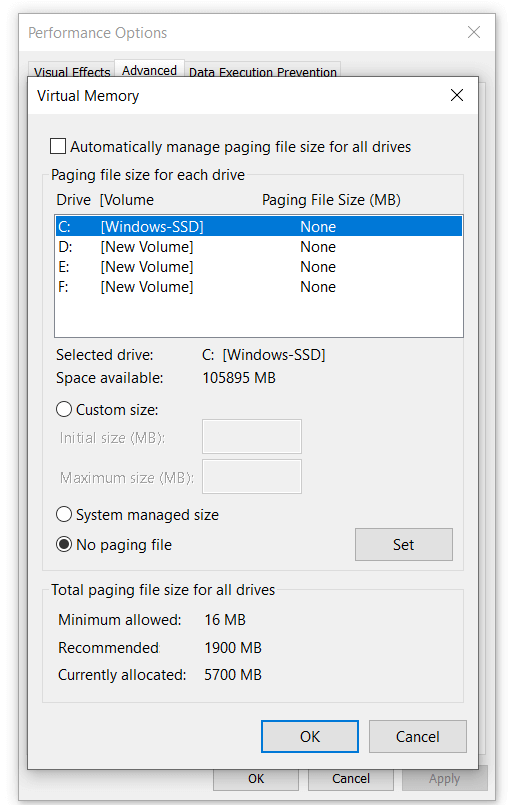
Step 8: Click OK and APPLY settings. The system will ask you to restart the computer in order to apply the new settings.
Once done with restarting, you will be able to delete the files normally and that’s how you can resolve the problem where you can’t delete partitions on Windows 10.
Hope we were able to provide the information you were looking for. Do let us know if you found the information useful, we love hearing from you.
Next Read
How to Create Recovery Drive in Windows 10
5 Ways To Speed Up Slow USB Transfer In Windows 10
Fix: Device Driver Was Not Successfully Installed On Windows 10


Leave a Reply