So, you have had your fair share of intense battles and adrenaline-pumping moments in Valorant. But now, for some reason—maybe you need to free up space or just take a break from the game—you’ve decided to bid farewell to this tactical shooter.
Fear not! Uninstalling Valorant from your Windows 11 or Windows 10 system is a straightforward process. In this comprehensive guide, we’ll walk you through the steps to ensure a clean and hassle-free removal.
Whether you’re freeing up space, troubleshooting issues, or simply moving on to other games, we’ve got you covered with easy-to-follow instructions.
So without further ado, let’s get started.
Why Uninstall Valorant?
Before we dive into the nitty-gritty, let’s quickly address why you might want to uninstall Valorant:
Space Crunch: Valorant takes up a considerable chunk of your hard drive space. Freeing up that gigabyte-hogging game might be a wise move if you’re running low on storage.
Performance Issues: Perhaps Valorant isn’t playing nice with your system, causing lag, crashes, or other performance woes. Uninstalling and reinstalling can sometimes resolve these issues.
Taking a Break: Even the most dedicated agents need a breather. If you’re stepping away from Valorant temporarily, uninstalling it ensures you won’t be tempted to jump back into the fray.
If you are here, it might be because you are encountering difficulties uninstalling Valorant and encountering an error like this poor fellow here.

This issue arises because uninstalling Valorant like any other game may not completely remove it from your system. The primary culprit behind this is the Riot Vanguard anti-cheat software.
Unlike typical software, simply uninstalling Valorant may not fully remove it from your PC, thanks to Vanguard’s protective measures.
This can pose a challenge for gamers who aren’t careful in following the correct steps.
How Do I Uninstall Valorant from My PC or Laptop?
Follow the instructions below to delete Valorant from your computer. With the help of these instructions, Valorant can be completely removed from your computer without any issues. Before we jump into the steps, it’s important to understand that uninstalling Valorant involves two separate components:
- Riot Vanguard: This anti-cheat software runs in the background to ensure fair play. It needs to be disabled before uninstalling the main Valorant game.
- Valorant Game Files: These are the core files that make up the game itself.
We’ll tackle each component one by one for a smooth and complete uninstall.
Step 1: Disable the Riot Vanguard
- Open the System Tray located on the far right corner of your taskbar (the area with the clock).
- Look for the small arrow pointing upwards. Click on it to reveal hidden icons.
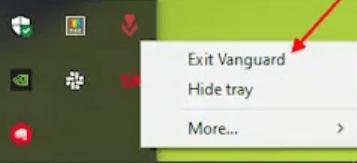
- Find the Riot Vanguard icon (a red shield symbol). Right-click on it and select “Exit Vanguard.”

Read Also: How To Enable Taskbar End Task On Windows 11?
Step 2: Uninstall the Riot Vanguard
- Press the Windows key on your keyboard or click on the Windows icon in the taskbar.
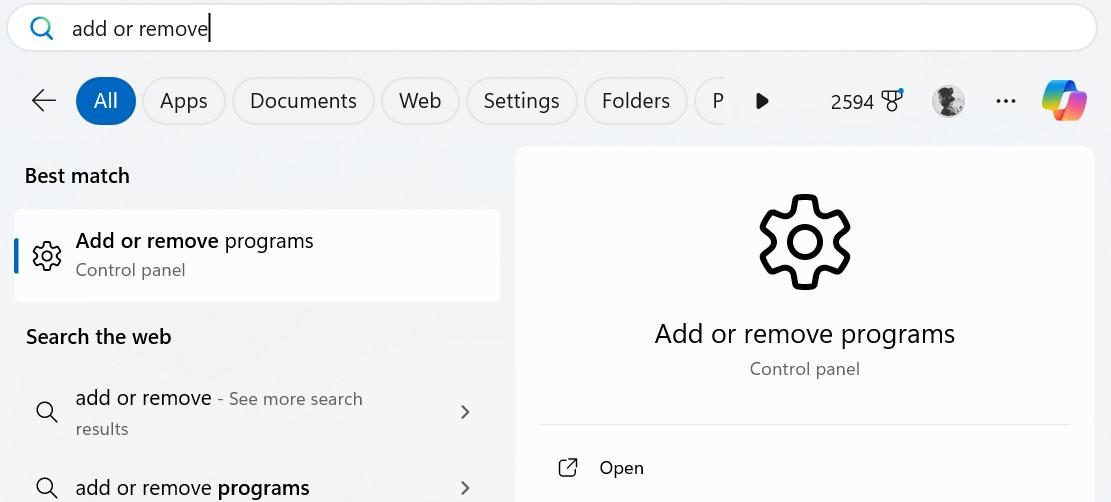
- In the search bar, type “Add or remove programs” and hit

- In the list of installed programs, scroll down and find “Riot Vanguard.”
- Right-click on it and select “Uninstall.“

- Follow the on-screen instructions to complete the uninstallation of Vanguard.
Step 3: How to Uninstall Valorant
- Now that Vanguard is gone, we can uninstall the main Valorant game.
- Go back to the “Add or remove programs” section as mentioned in Step 2.
- Find “VALORANT” in the list of installed programs.
- Right-click on it and select “Uninstall.”

- Follow the on-screen instructions to complete the uninstallation of Valorant.
Step 4: Remove Leftover Files (Optional)
While the uninstall process should remove most of the game files, there might be a few leftover bits scattered around your system. Here’s how to remove them (this step is optional but recommended for a truly clean uninstall):
- Press the Windows key + R to open the Run dialog
- Type “%appdata%” (without the quotes) and press Enter. This will open the AppData

- Inside AppData, navigate to the “Local” folder.
- Look for a folder named “Riot Games” and delete it.
Repeat steps 1-4, but replace “%appdata%” with “%programdata%“. This will open the ProgramData folder. Inside ProgramData, look for a folder named “Riot Games” and delete it (if it exists).
Read Also: Most Useful Windows Run Commands You Should Know
How to Uninstall Valorant: A Step-by-Step Guide
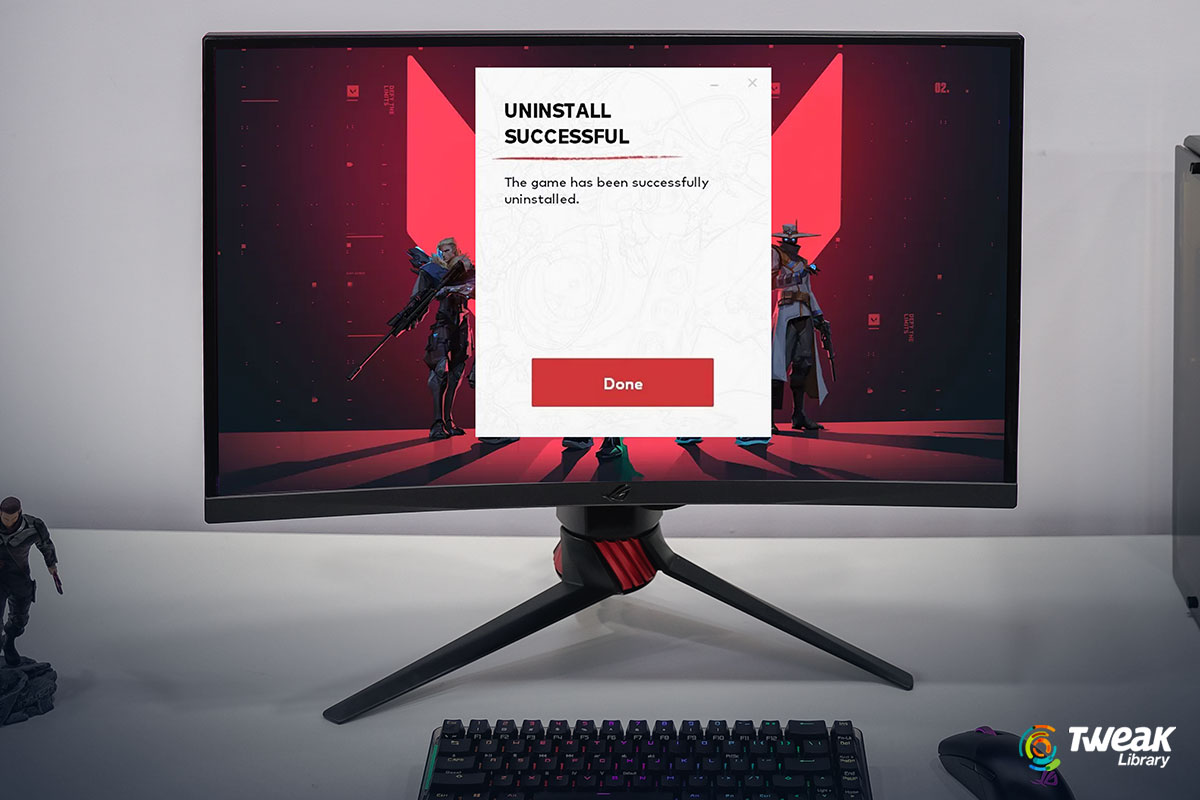
Congratulations! You’ve Successfully Uninstalled Valorant. Now you have some free space to explore other gaming adventures, or simply enjoy the satisfaction of a clean uninstall. Remember, if you ever decide to return to the world of Valorant, you can always head over to the official Riot Games website and download the game again.
FAQs –
1. How do I uninstall Valorant from my computer?
Valorant requires a separate uninstall for its anti-cheat (Riot Vanguard) and the game itself. Follow our guide for a step-by-step breakdown!
2. How to uninstall Valorant from the Riot Client?
Valorant cannot be uninstalled directly from the Riot Client. Use the “Add or remove programs” function in Windows settings.
3. I can’t uninstall Valorant. What should I do?
Ensure Riot Vanguard is disabled before uninstalling Valorant. If issues persist, consult the troubleshooting tips in our guide.
4. Is there a specific method to uninstall Valorant completely?
Yes! Our guide details how to uninstall both Riot Vanguard and Valorant, followed by optional steps for removing leftover files.
5. Can I reinstall Valorant after uninstalling it?
Absolutely! You can download and reinstall Valorant anytime from the official Riot Games website.


Leave a Reply