If you want to free up some valuable disk space by moving your iTunes folder to Dropbox or you want to share your music collection with your friends via Dropbox link, then you need to follow a few quick steps mentioned in this article. Here, we have discussed different methods to move iTunes library to Dropbox.
Can you share the iTunes Library with your friends?
Yes, you can do it. To do this, you need to move iTunes Library to Dropbox. Once moved you can share the Dropbox link with your friends to enjoy your collection. You can share this link anywhere on social media platforms, via email, or messages. They can enjoy your collection even if they don’t have a Dropbox account.
Can you play audio or video files on Dropbox?
Yes, you can do that. To do this, you need to create a Dropbox account. You can play these files from the Preview page.
How to move iTunes library to Dropbox?
You can do this by following multiple quick methods. Let’s discuss some of these methods here.
Method 1: Share a library/playlist from iTunes via Dropbox
To do this, follow these steps:
Find a playlist from iTunes that you want to share.
- Select all the files and drag & drop selected files to the desktop.
- Close iTunes.
- Next you need to select all files from the desktop. Right-click on highlighted files and compress them to the folder.
- Once you have archived the files, rename it if needed.
- Now head to Finder > Dropbox. You need to drag and drop the archived folder here.
- Once the archived file is uploaded, right-click on it and choose Dropbox to open it here.
Once done, you can easily share the newly created link with your friends.
Method 2: Backup and restore iTunes Media Folder
You need to follow this method in multiple steps. Let’s discuss more here.
Step 1: You need to consolidate the iTunes library
The first thing you need to do is to consolidate your iTunes library. To do this, follow these steps:
- Open iTunes.
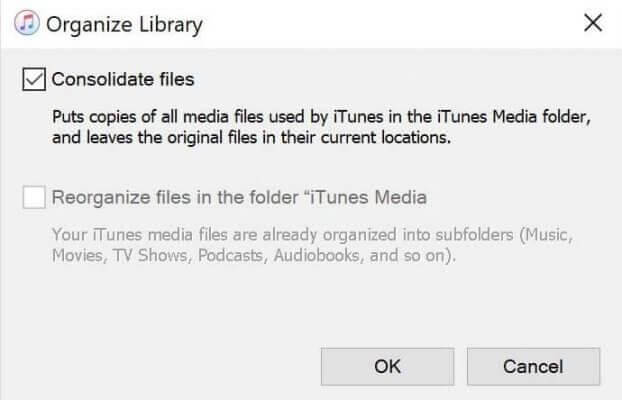
- Head to File and select Library and then Organize Library
- On the Organize Library window, you need to select Consolidate Files option and click OK.

Step 2: Back up iTunes library and media files
Next step is to back up iTunes library and all your media files so that you can restore them later. To do this, follow these steps:
- Close iTunes.
- Find iTunes folder on your system storage.
- Right-click on it and select Copy.
- Now you need to right-click and select Paste on your external drive.
All the files stored outside of your iTunes Media folder will be added to the iTunes Media folder when you consolidate them. It helps you move iTunes to cloud storage such as Dropbox.

Step 3: Find the iTunes Media folder
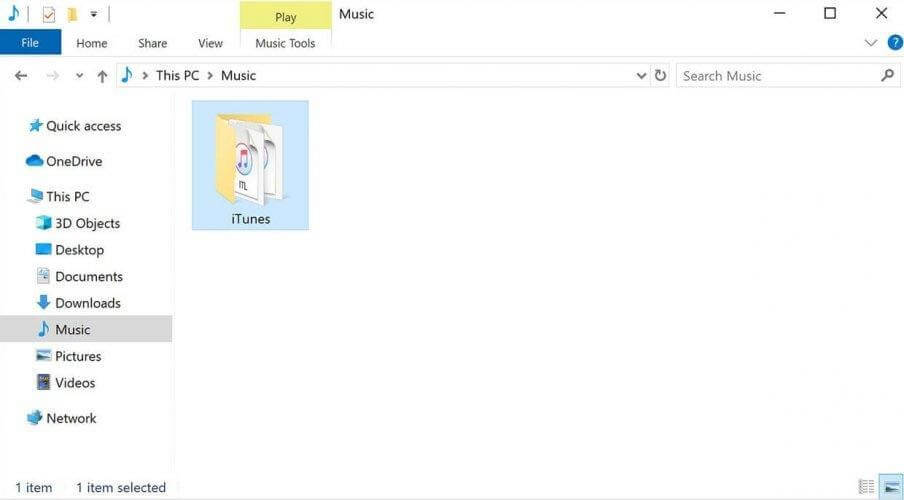
Open iTunes folder to open iTunes Media folder as it remains there by default. To do this, head to User and select Music folder. Here go to iTunes > iTunes Media.
In case you can’t find iTunes Media folder, follow below mentioned steps to locate it:
- Open iTunes.
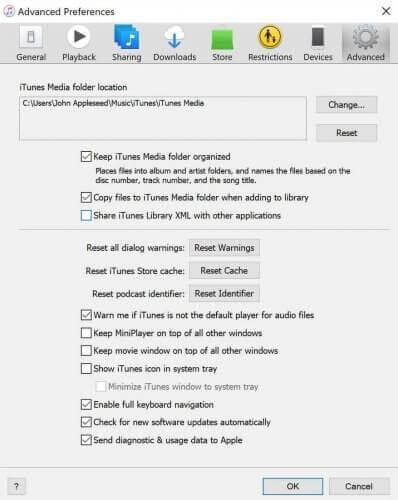
- Now you need to select Edit > Preferences from the menu bar. You can find it at the top of the iTunes window.
- On the Preferences window, select Advanced
- You can find the location of your iTunes Media folder under the iTunes Media folder location

Step 4: Restore iTunes library from Backup
Next step is to restore iTunes library from the backup you have created. To do this, follow these steps:
- Quit iTunes.
- Select This PC/This Computer and find and choose the external drive.
- Once you have opened the external drive folders, find and select iTunes folder here.
- Once selected, right-click on it and select Copy.
Next is to select the location on your computer where you want to restore iTunes library. Once selected the location, right-click and select Paste.
- You need to press and hold down the Shift key when you are opening the iTunes folder.
- Here, you will find a message to Choose iTunes Library, you need to click Choose Library
- Next is to select and open iTunes folder from the location you have copied it.
- You need to select iTunes itl file from this folder.

The quick backup and restore process could help you easily move iTune library to Dropbox. Do try steps mentioned here and don’t forget to share your experience in the comments below.
Next Read:
Backup iPhone/iPad Data On Your Computer using iTunes
How to Password Protect a Dropbox Folder?


Leave a Reply