
Undoubtedly, Windows 10 is a user-friendly operating system with its own pro and cons. But which operating is free from it? If you’re in love with Windows 10 and do not want to leave it, but want to try macOS, you can do so. But how?
The safest way without leaving safe boundaries of your current operating system is using a virtual machine.
Virtual machine is an emulation of a computer system, it behaves like an actual computer by imitating dedicated hardware.
In this how to install macOS Mojave on Windows 10 tutorial you’ll learn how to create a Hackintosh.
So, let’s begin without going into details.
Pre-requisites to create macOS Mojave on Windows 10
You’ll need to download and install certain essential tools before we begin.
VMware Player Intel APFS Mojave 10.14.3
VMware Player Patch Tool (Both Files Required)
2. MacOS Mojave
Once all the above-mentioned files are downloaded, extract them using an archive tool like WinRAR or WinZip. In the extracted folder, you’ll see a .VMDK file. This the file that contains the operating system.
How to Create a macOS Virtual Machine Using VMware Workstation Player
You can not only create a macOS Mojave on VirtualBox but can also use VMware to create a virtual machine. Before doing so, remember VMware requires patching before macOS Mojave virtual machine runs.
Patching VMware Workstation Player
We hope you’ve downloaded VMware Player Patch Tool. That being done, now you need to extract the contents of the zip file.
Tip: Save all the downloaded files at one location and extract them on the same drive. As VMware root folder and extracted files are on C:\ extract all on the same driver. As it will work best.
While extracting patch file ensure VMware is not running. To cross-check head to Task Manager by pressing CTRL+SHIFT+ESC. Here, under Processes tab look for Vmware, if you find it select > End Task.
Once done head back to patch folder > right-click the win-install command script > Run as Administrator. This will open the Command Prompt window, where patch script will run. While the process is running, keep an eye on the screen and ensure there is no “File not Found” messages.
Note: “File not found” or a “system cannot find the file specified” message appears while installing VMware Workstation Player when the patch file is saved in a location different to the default folder.
Once the patch runs completely, open VMware and start creating macOS Mojave Virtual Machine.
Steps to create macOS Mojave Virtual Machine
1. Open VMware > New Virtual Machine > Next > Custom > Next.
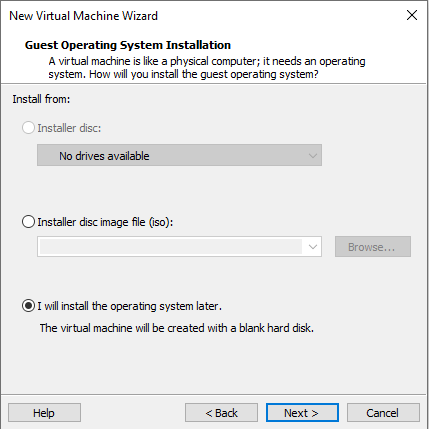
2. Select Create a New Virtual Machine > I will install the operating system later > Next.
3. Select Apple Mac PS X > under Version click the down arrow to select macOS 10.14. In case you do not see Guest operating system or macOS options, this means the patch didn’t install correctly. So, reinstall the patch and then follow the steps.
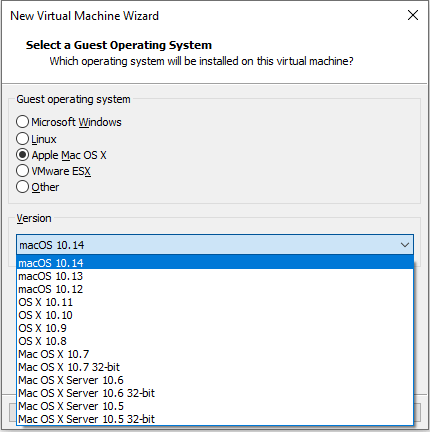
Give a name to your macOS Mojave virtual machine and copy the file path as you’ll need it later to make some edits.
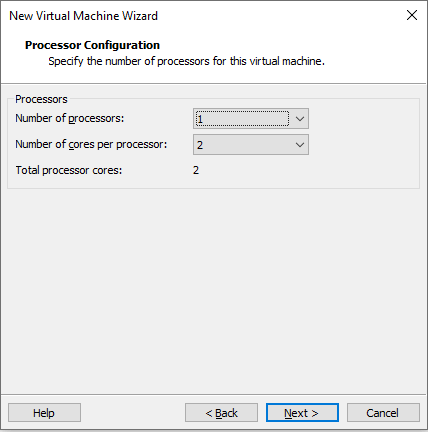
4. On the next screen, change Number of processors to 1 and change Number of cores per processors to 2 > Next.
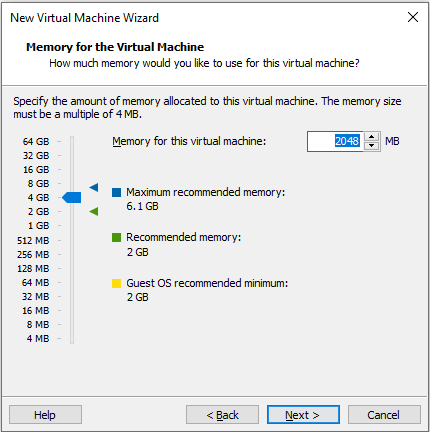
5. Next, allocate the memory > Next. We suggest allocating 4GB.
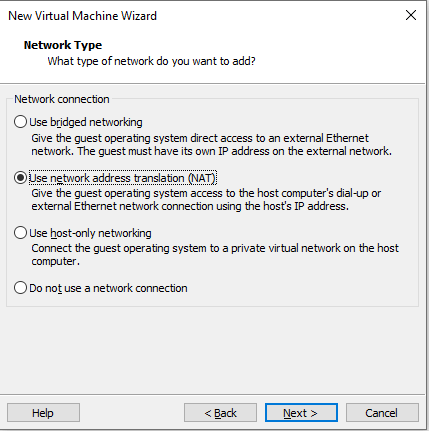
6. After this, select Use network address translation (NAT) to connect. However, if you don’t want network connectivity select Do not use a network connection > Next.
7. Avoid changing recommended I/O controllers, disk type > Next.
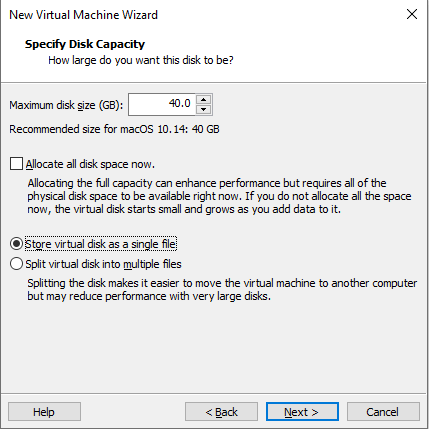
8. Now, select Create a new virtual disk > Next. Do not change the recommended disk size. Select Store virtual disk as a single file > Next.
9. To finish creating macOS Mojave virtual machine specify the location where you wish to disk file > Next > Finish.
Wait, do not start the virtual machine.
Before we start the virtual machine, you’ll need to edit the certain settings. To edit macOS Mojave Settings follow the steps below.
Steps to edit macOS Mojave hardware specifications:
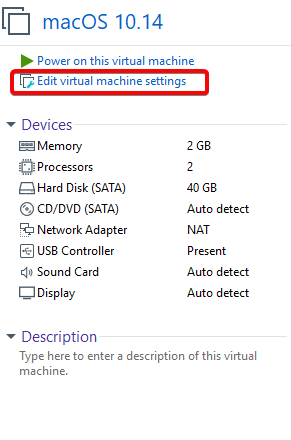
1. Open VMware > select macOS Mojave virtual machine > Edit virtual machine settings.
2. Let VMware run on default virtual machine memory. We recommend using 4 GB.
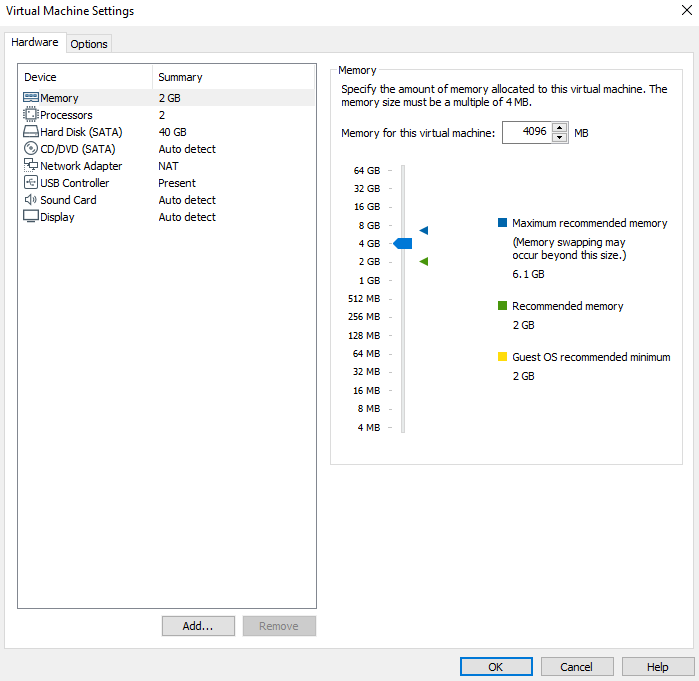
3. Under Processors, if you see the number of cores more than 2 edit them and make it 2 under core processors.
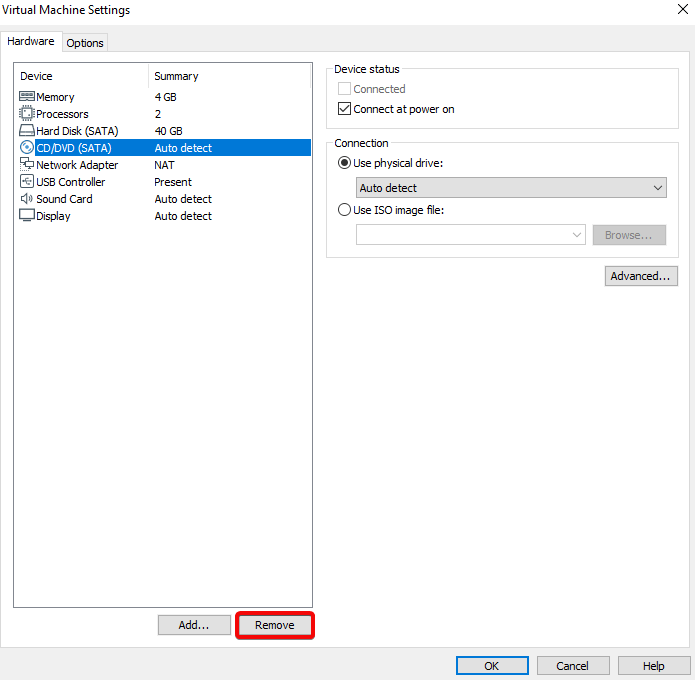
4. Next, under Hard Disk (SATA), if there is an already create disk remove it. Select SATA > Remove.
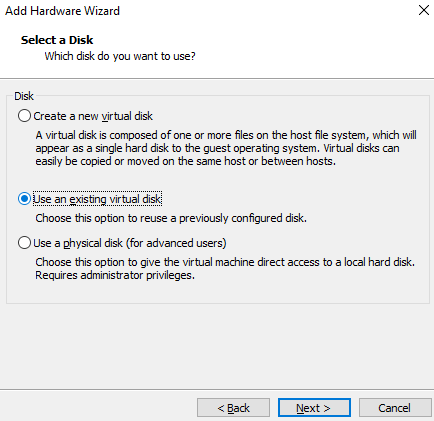
5. Now, select Add > Hard Disk > Next > SATA (Recommended) > Next > Use an existing disk. Browse to the location of existing macOS VMDK and hit ok.

Edit the macOS VMX file
You are now one step away from using your Mac Mojave virtual machine. To make the final edits close VMware and follow the step by step instructions below:
1. Go to the location where you saved macOS virtual machine. Its default location is: documents folder on your C drive.
2. Now, navigate to macOS.vmx > right-click > Open with > Notepad.
3. Scroll to the end and add: smc.version = “0”
4. Save the change and Close Notepad.
You are nowall set. Open VMware select your macOS Mojave virtual machine, and enjoy using it.
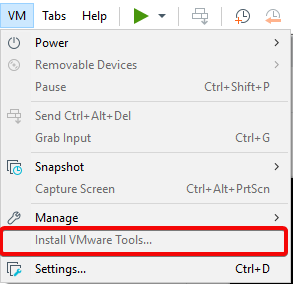
Since we are using VMware version 15 you can install VMware tools from within. To do so, head to VM tab in your VMware > Install VMware tools.
Troubleshooting
Sometimes when the patch file isn’t processed properly you may encounter error message like:
“Mac OS X is not supported with binary translation”
“VMware Player unrecoverable error: (vcpu-0)”
If you receive “Mac OS X is not supported with binary translation” you’ll need to activate virtualization in your BIOS/UEFI configuration.
If you receive the message “VMware Player unrecoverable error: (vcpu-0)” this means you forgot to add smc.version = “0” in the .vmx file. So head back and add it.
So these were the simple steps to run macOS Mojave on Windows 10. If you follow the step by step, then nothing can go wrong. Please leave us a comment to let us know all went well. However, if you faced any problem do let us know.


rohit aggarwal
thanks for the information