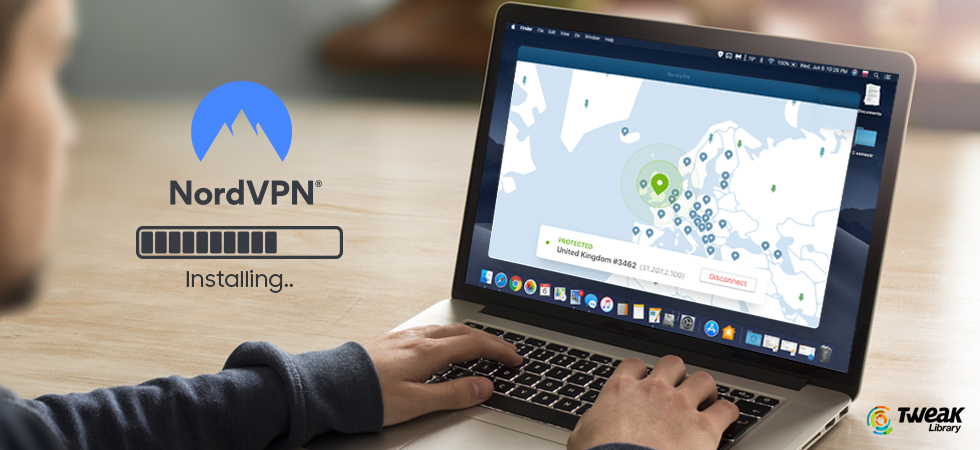
The first step towards securing your online footprints, browsing traces, and accessing geo-blocked sites is to set up and use a VPN. For this nothing can be better than NordVPN. This application offers over 5000 servers in 60 countries. Further with the help of concealed servers, NordVPN works smoothly in countries where Internet access is restricted like China, the Middle East, and others.
NordVPN works on all major platforms: Windows, macOS, iOS, and Android. In addition to this NordVPN also supports Linux and other exotic platforms like Raspberry Pi. Not only this NordVPN provides all three standard protocols – OpenVPN, PPTP and L2PT including proxy servers and much more.
Doesn’t this all sound interesting? Of course, Yes, then let’s read further and learn how to install and setup NordVPN on Windows 10 and Mac.
Note: To connect with NordVPN server using NordVPN native application is recommended. This will give you access to advanced features like Double VPN, automated Kill Switch, Onion Servers and a lot more.
How to download and install NordVPN that uses OpenVPN on Windows 10?
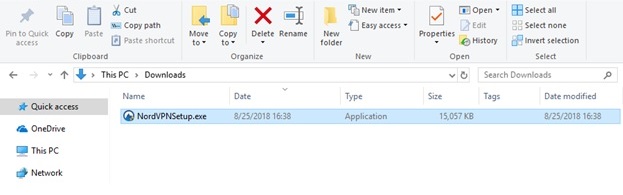
1. To download and install NordVPN you will first need to download it. To do so click on the button below or visit the website.

2. Once downloaded head to Downloads folder > double-click NordVPNSetup.exe installation file to install it.
3. This will pop up a window asking “Do you want to allow this app to make changes to your device?”. Click Yes. (This will depend on your Windows settings.)
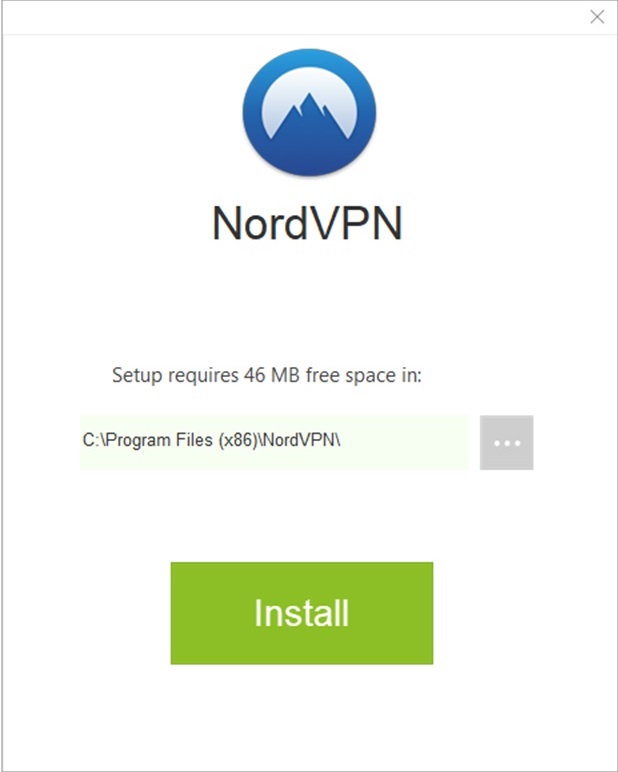
4. After this, you will see the installer window. Click Install.
Note: You need to have a minimum of 46MB free space on C drive.
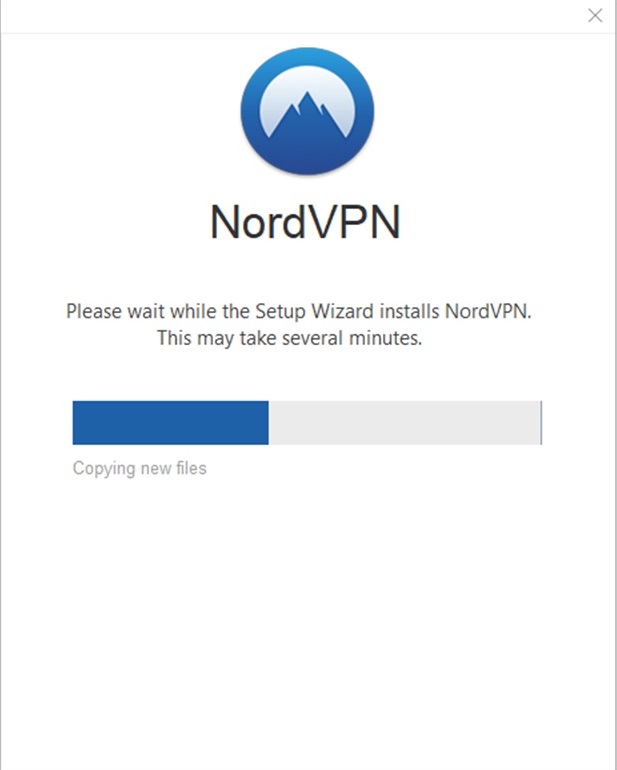
5. The installation process will start once you click on the Install button.
6. Once installed, you will see NordVPN application along with a shortcut of NordVPN app displayed on your desktop.
![]()
Now that you have NordVPN installed on your Windows 10 machine, it’s time to setup NordVPN application on Windows 10.
How to set up and use NordVPN on Windows 10?
If you are using Windows 7 or later then using NordVPN is very easy. Let’s learn how to set up and connect with NordVPN for the first time.
Steps to set up NordVPN on Windows 10
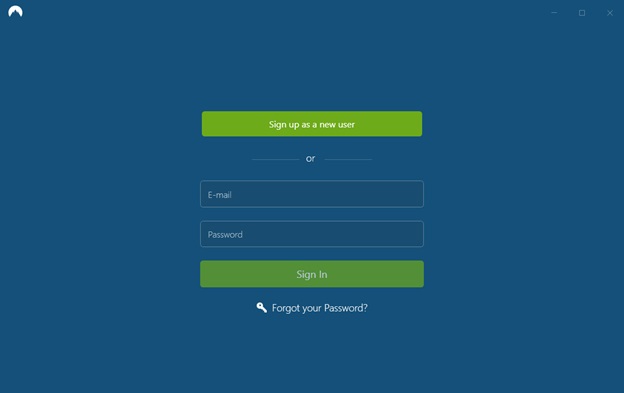
1. Double click on NordVPN shortcut placed on your desktop. Wait for NordVPN to load. Once loaded enter your details and click Sign In.
However, if you are using it for the first time you will need to create an account. To do so click on Sign up as a new user.
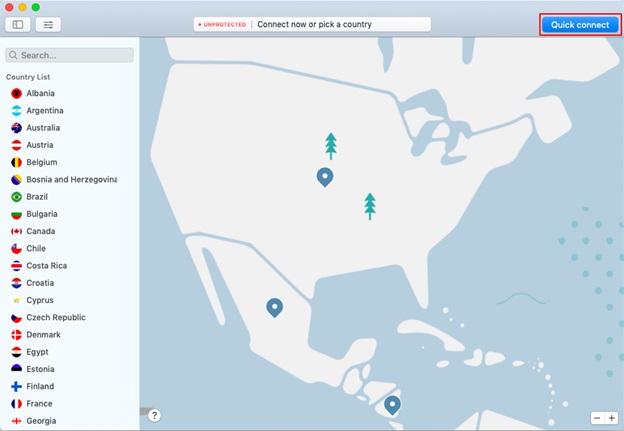
2. Once you are signed in you’ll see the welcome screen of NordVPN. At the top left corner of this screen, you’ll be able to find the Servers and Settings option.
At the bottom, you’ll get the Quick Connect button, which will allow you to connect with the recommended server. Quick Connect algorithm finds the best option for you for that time using the complex algorithm.
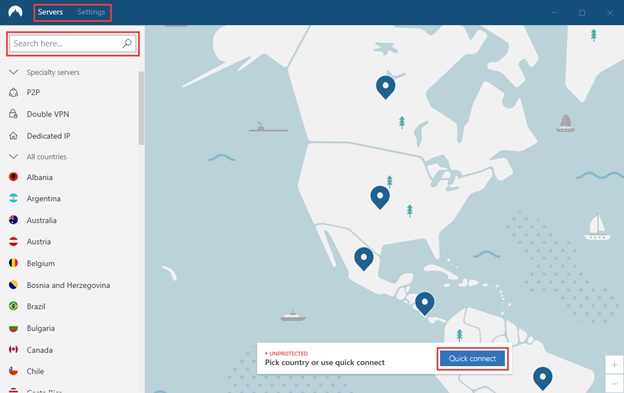
3. To connect with the server in a specific country click on the pin located on the country on the map.
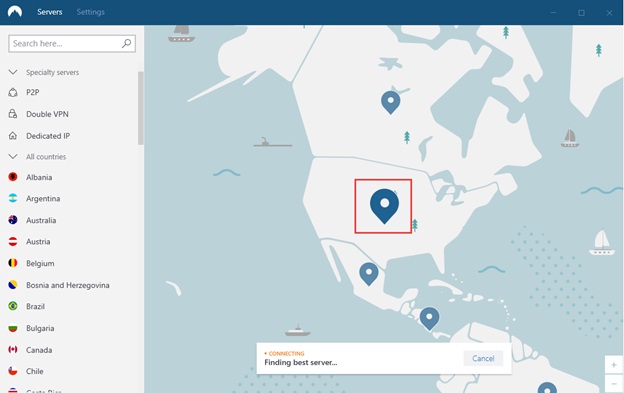
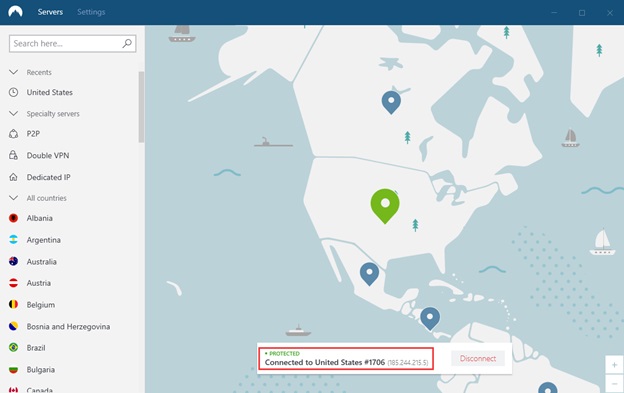
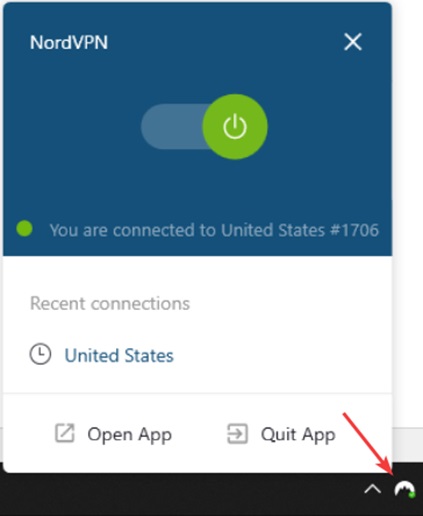
4. Once you are connected to the server, the pin will change to green color and Quick Connect will show you the status as connected displaying your IP address.
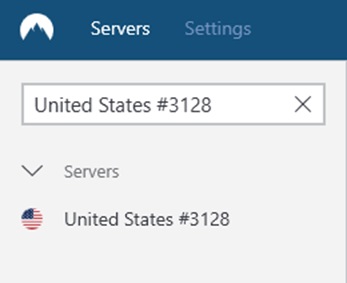
5. To search for a specific server use Search here… box placed in the left pane at the top.
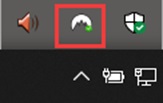
6. Once connected, you can exit the app but this will not disconnect NordVPN connection. You can see it running in the system tray. It can also be hidden in the system tray area. To see that click the up arrow you’ll be able to find it there.

7. To get the basic functions, right-click the icon placed in the system tray icon. From here you can both connect and disconnect.
In addition to this, you can manage your connections by selecting different servers. To do so follow the steps below:
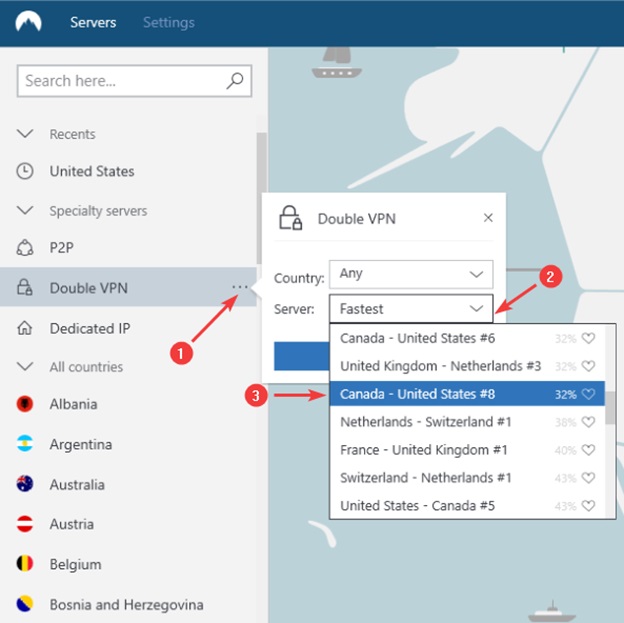
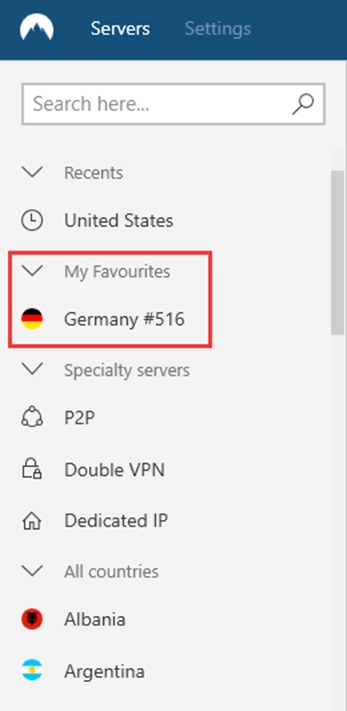
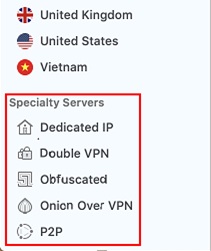
- When you look at the left sidebar you will be able to list of countries and different VPN options from where you can select specific server according to your choice.

To use Double VPN click on the three-dot menu and select the country with Double VPN server. In addition to this, you can also see the percentage of each server. Higher the percentage means more people are connecting to that server.
- To add a server to your favorites list click on the heart symbol next to the server.
- Once the server is marked as favorite, you’ll see it under My Favourites. This will help you to quickly connect with your favorite servers.


Moreover, you can configure the application to your liking through Settings.
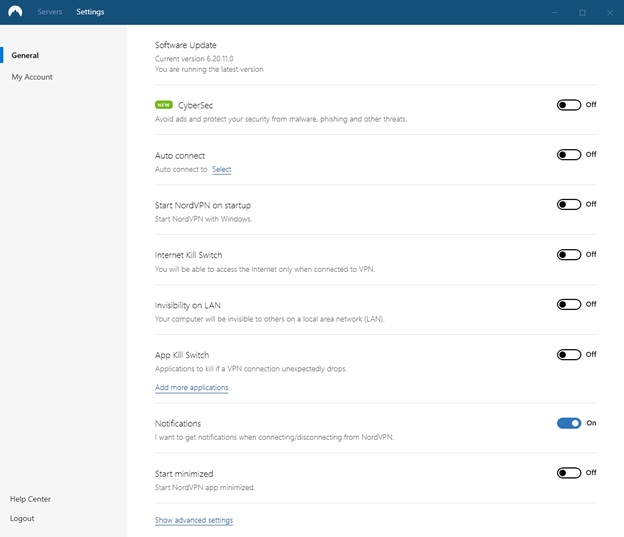
- To stop intrusive ads, block malware sites, phishing links and other online threats enable.
- To connect with a server automatically as the application starts enable Auto connect.
- To launch NordVPN at bootup enable Start NordVPN on startup.
- To get internet connectivity only when connected to NordVPN, enable Internet Kill Switch.
- To make your PC invisible on LAN enable Invisibility on LAN.
Note: Once this feature is enabled you will not be able to access devices connected on your local area network like a printer.
- To terminate application in case of unintended disconnection enable App Kill Switch.
- To get Windows notifications every time you connect or disconnect from a server. Enable Notifications.
These steps will help you download and install NordVPN on Windows 10.
How to download and install NordVPN on Mac?
1. Download OpenVPN version of NordVPN from the website or click on the button below:
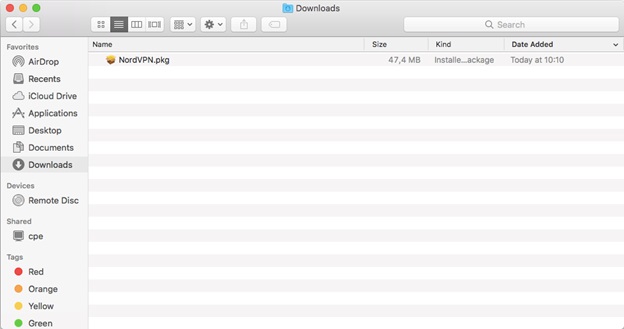
2. Head to your Downloads folder > double-click downloaded NordVPN.pkg file.
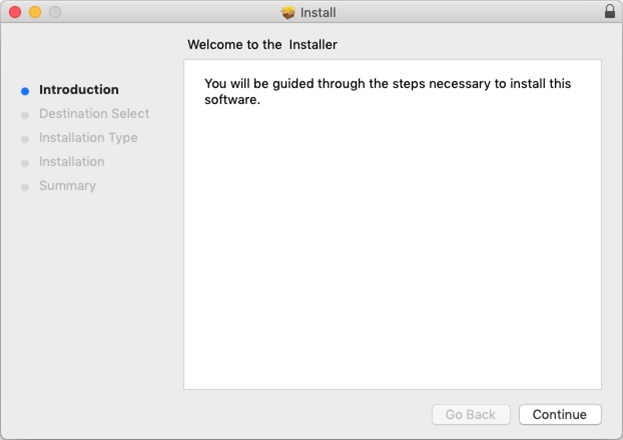
3. This will open the install window, follow on-screen instructions to install NordVPN.
These simple steps will help you install NordVPN on your Mac machine.
Using and setting NordVPN on Mac:
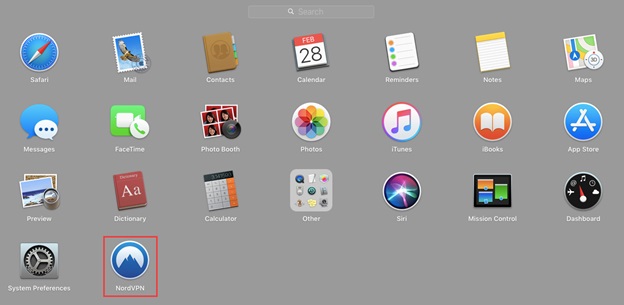
- To use NordVPN head to Launchpad. Search for NordVPN icon > click on it to launch NordVPN.
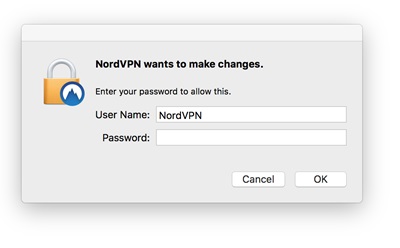
- You’ll now see a window that will ask you to grant permission to install Helper. Enter the Mac password in this window to allow NordVPN to create a VPN tunnel.
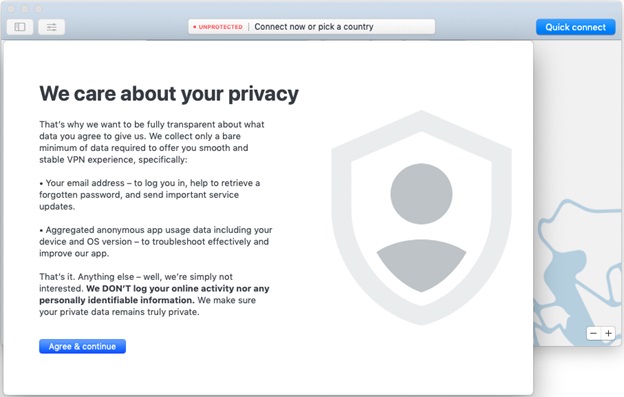
- Click on Agree & Continue to use NordVPN on Mac.
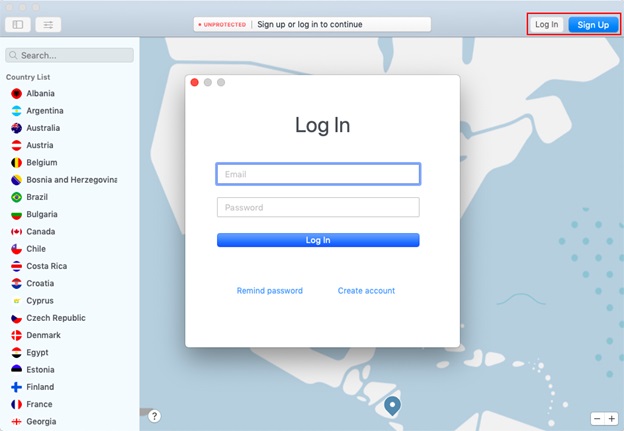
- Once done, you’ll now be able to use NordVPN. If you already have an account click on Login. However, if you are using it for the first time click on Sign Up.
How to connect to a server using NordVPN on Mac?
1. To connect to a server click on the Quick Connect button.
Note: Quick Connect uses a complex formula and combines the server parameter to automatically connect you with a server recommended for you.
2. You’ll now be able to see a country list on the left and a map. Using the country list on the left sidebar you can navigate through servers and access servers.

3. To connect to a specific server, type in the name of the server in the Search… the field at the top left the corner of the app.

How to choose between different servers and manage favorites?
To choose between different servers offered by NordVPN, head to the left side-bar. Here you can find a list of the specialty sever and country-wise, server list.
Select them as per your requirements.
1. To connect to a specific server, click on it. In addition to this, if you want to connect to a specific region click on the three dots to get the list. Select the region and click on Quick Connect.
2. To add a server to your favorites, click on the heart icon next to its name.
3. This will put all your favorite servers under My Favourites.
Preferences:
1. To access NordVPN features, click on Preferences.
Here, you will see a list of advanced features like Connect on the launch, Custom DNS, CyberSec, or Kill Switch. Use them as per your requirements.
Using these simple steps you can easily set up and run NordVPN on your Windows 10 and Mac machine.
If this leaves with you the questions like:
Can I install NordVPN on my router?
Yes, you can install NordVPN on your router and trust us it is the safest bet. However, if you want to install NordVPN on your Apple TV, then that won’t be possible for now. Moreover, once you install NordVPN on your router remember you can connect up to 6 devices.
How to Sign Up for NordVPN?
To Sign Up for NordVPN follow the steps below:
1. Head to NordVPN website > click on the Get It Now button.
2. This will redirect you to the plan page. Select the one that suits you.
3. Now enter your email address.
4. Next, select the payment method. If you select Credit Card you will need to enter the card’s CVV and Postal Code.
5. After this, depending on the payment methods you have selected proceed and click on the Continue button.
6. Once the purchase is made, click on the confirmation mail sent to your email address.
You are now all set to login to your NordVPN account.
NordVPN allows you to access the Internet privately and securely. So what are you waiting for? Get your copy of NordVPN today and use it to secure your online footprints.


Leave a Reply