Ever said “I lost your contact details” to someone? Now you need not to! Technology has become so advanced that we can’t use these meaningless excuses. Here we have covered tips and tricks to keep all your contacts safe and device independent. No matter if you use your iPhone or an Android device, all you need to do is sign in with your Google contacts and import and export contacts all your saved contacts on any device.
We are going to discuss different scenarios and different types of migration. From Gmail to Android, from Gmail to iPhone, from Android to iPhone, iCloud to Google or vice versa. This will help you to recover deleted contacts during critical circumstances.
If you are using multiple Android / iPhone devices or you’re planning to go for a new smartphone, you can be certain that all your Google contacts will be available on all your devices associated with the same Google account. However, if you have contacts left over the phone’s local storage or SIM card, you won’t be available to access those contacts on other devices. To solve this conundrum below you can find an easy and step-by-step process to import and export contacts on the same Google Account and get them on all your devices at the same time.
Also Read: How to Switch from Android to iPhone
Export Contacts from Device to Google Account
Below is a step-by-step guide on how to transfer contacts assuming that you have a device associated with the same Google account.
Android Device
SIM to Google Account
Exporting contacts from your SIM to your Google account is quite an easy and quick process which will save you a lot of time and frustration in the future. That means when you plan to use a new smartphone, all you need to do is to log in to your Google account and all your personal and professional contacts will be ready to use on a new device.
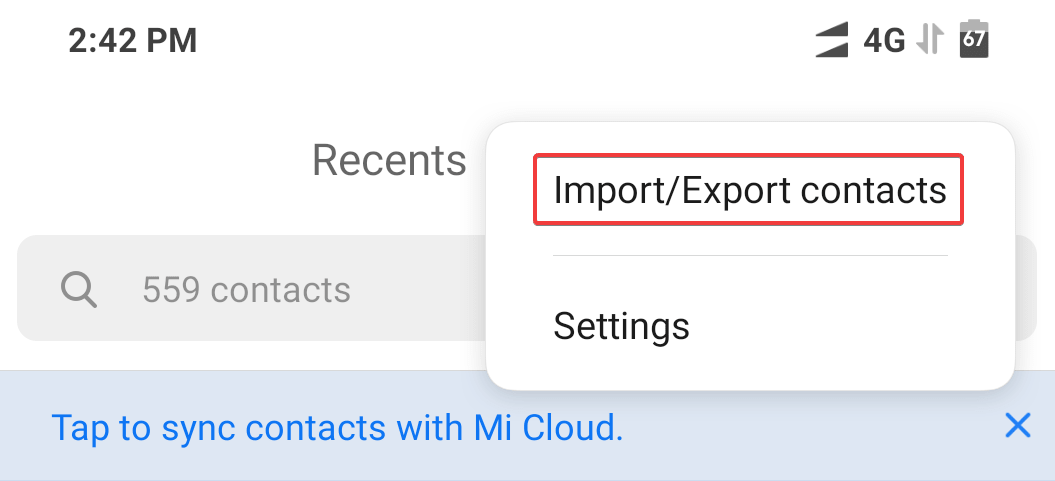
Step 1. Open Contacts on your device -> Tap the three dots at the top right-hand corner to open the menu -> select ‘Import/Export’ OR ‘Import/Export Contacts’.
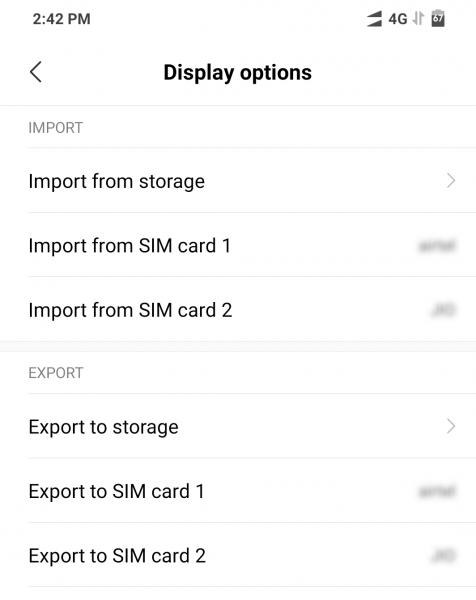
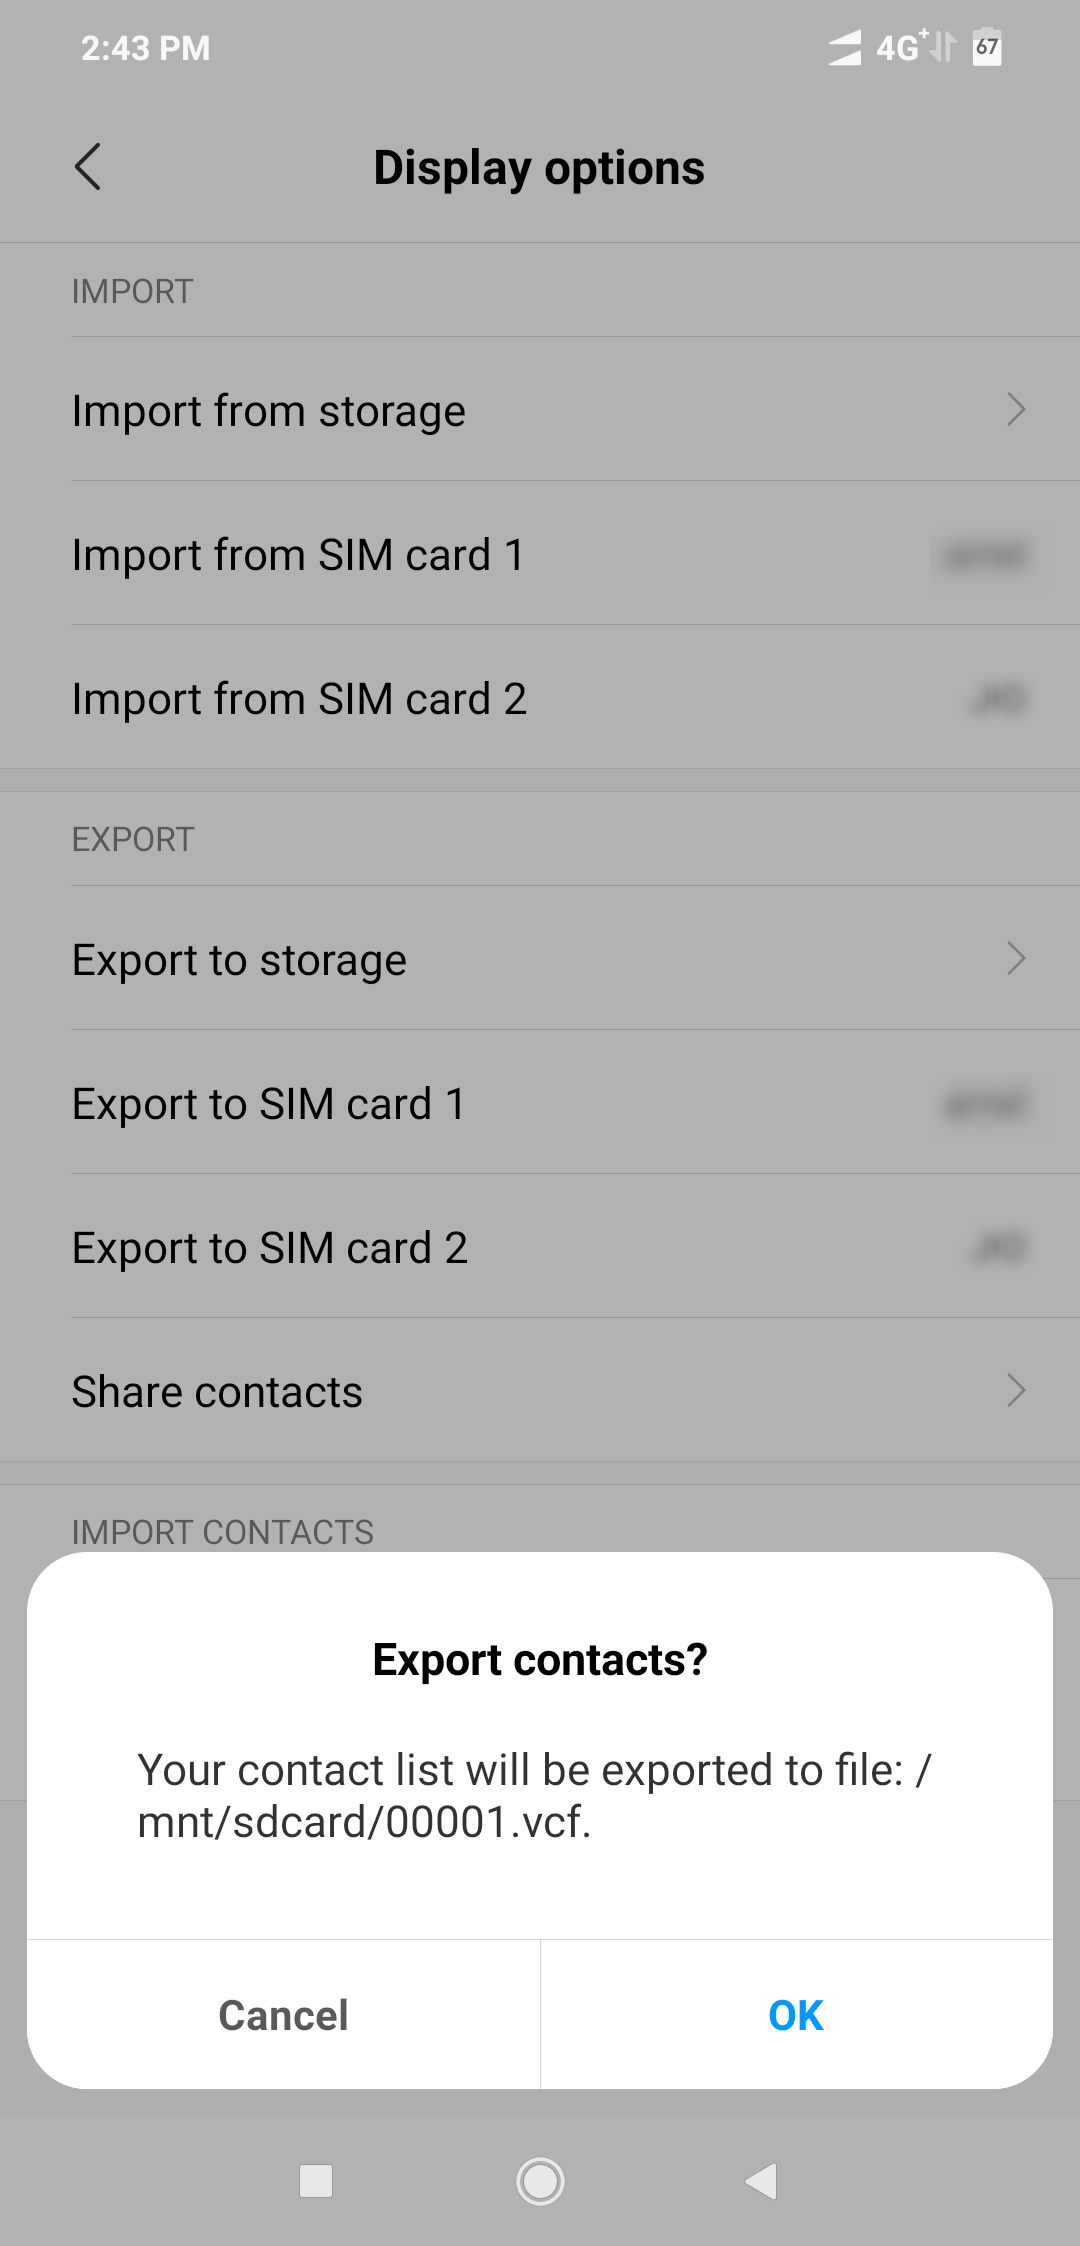
Step 2. Select ‘Export from SIM card’, which will export Names and Numbers saved on your smartphone’s SIM card in (.CSV / .VCF) File on your selected location. -> Give a file (name.csv) and tap on Save / Export. Generally, it gets exported to device storage.
Phone Storage to Google Account
Now it’s time to import the exported file from device storage to Google account.

Step 3. Open Contacts on your device -> Tap the three dots at the top right-hand corner to open the menu -> select ‘Import/Export’ OR ‘Import/Export Contacts’.
Step 4. Tap on ‘Import vCard File’ and locate and tap the vCard file to be imported from the device storage and let the import process complete.
Importing Contacts on a PC / Laptop
If you have the Google account open on a Laptop / PC, you may also follow the following steps.
From your smartphone, send that exported (.CSV / .VCF) file on your email and download it on your PC.

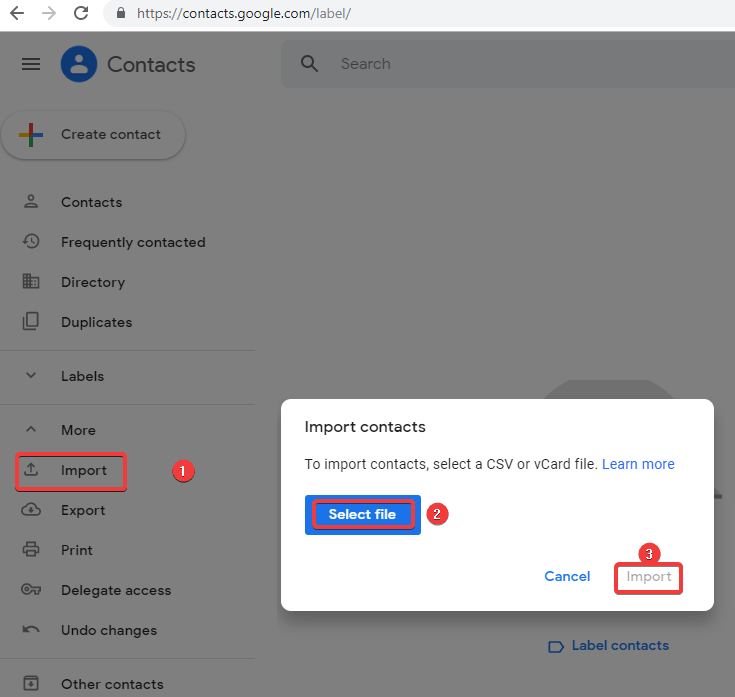
Step 1. Open contacts page in your Google account by clicking on the ‘Google Apps’ option (9 dots on the top right of the screen) and click on ‘Contacts’.
Step 2. Once you have the page open, you need to click on the ‘Import’ option on the left-hand-side panel. It will ask you to select a file (.CSV / .VCF) to import contacts. Select the downloaded file and click on the ‘Import’ button to initiate the process.
iPhone Device
SIM to iPhone / Google Account
If you have got a new SIM and want to get contacts from your old SIM on your iPhone, you may follow these steps to get contacts from old SIM to your iPhone or Google contacts.
Step 1. Remove your new SIM card from iPhone and insert your old SIM card.
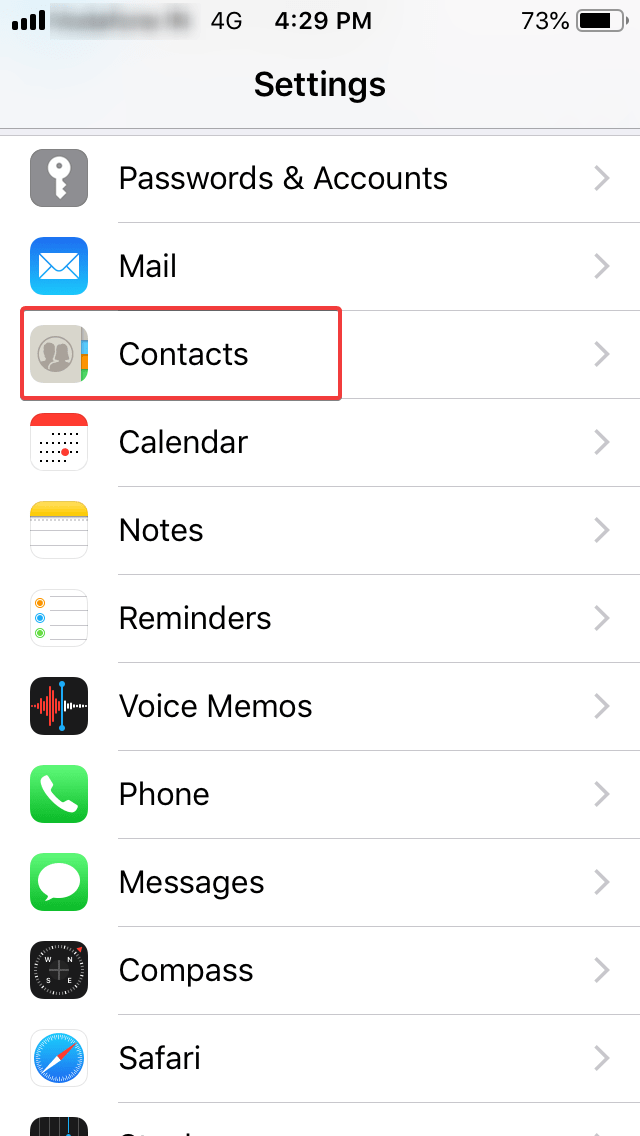
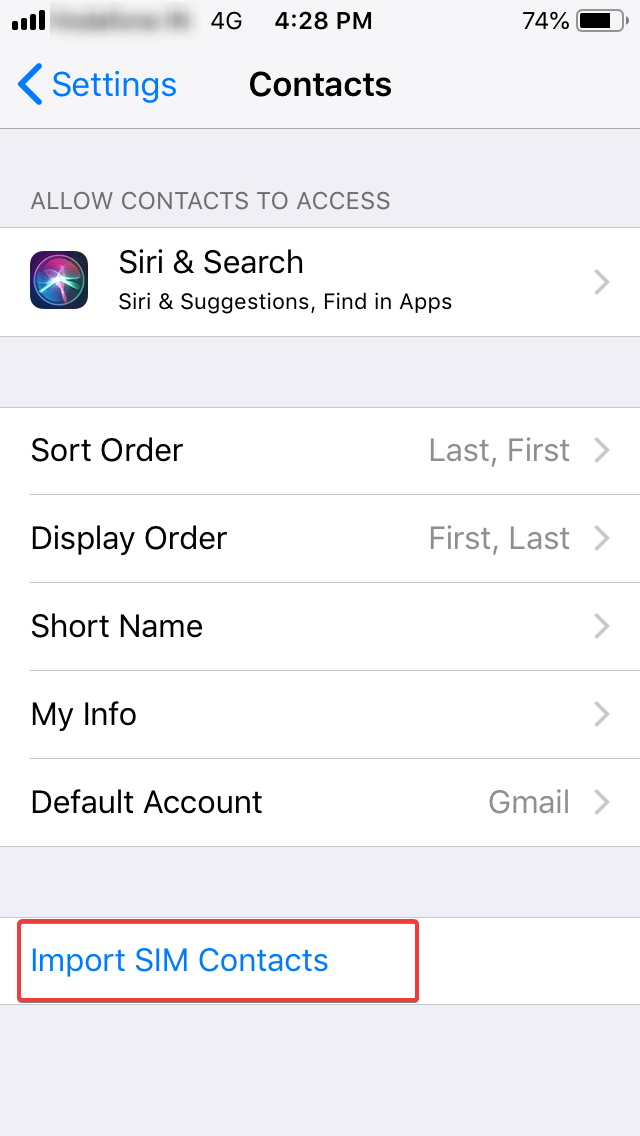
Step 2. Tap on ‘Settings’ -> and select ‘Contacts’ -> Tap on ‘Import SIM Contacts’.
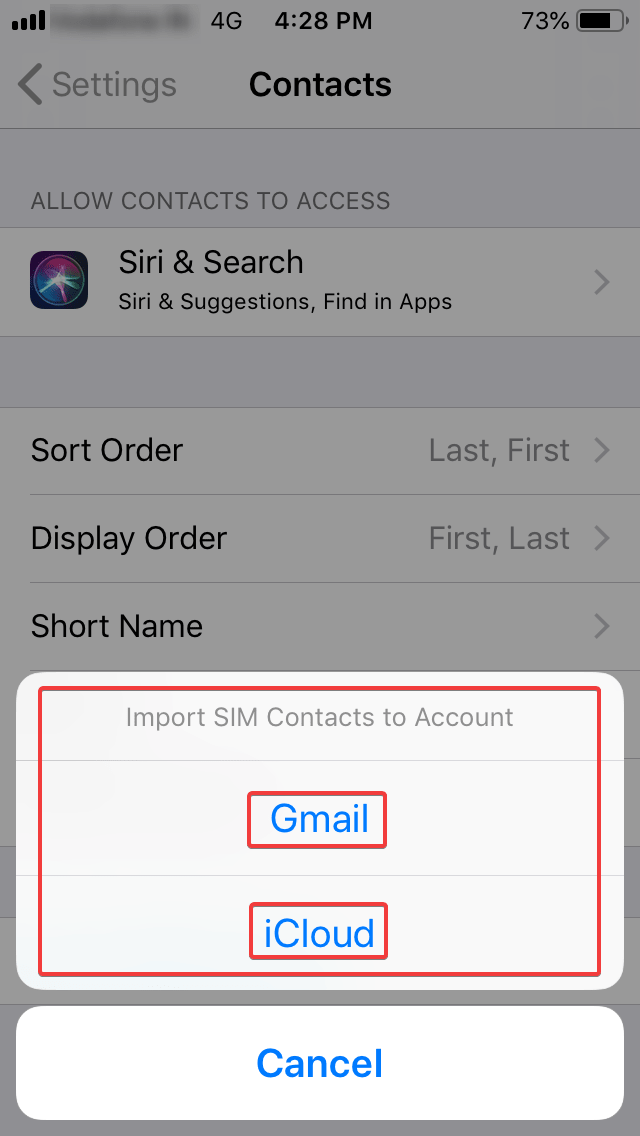
Step 3. Select the account to be imported and let the import process be completed.
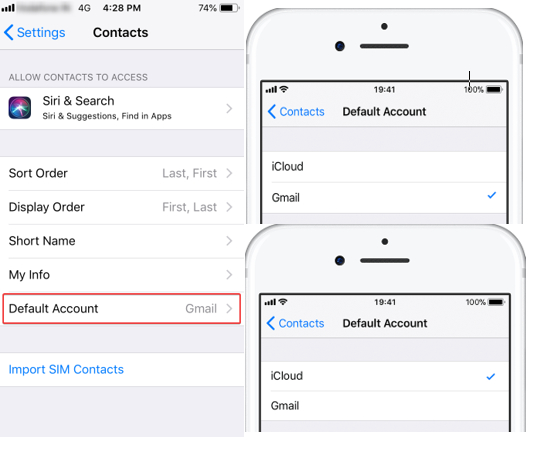
Step 4. Now you may remove old SIM and insert the new one back in your iPhone and check for the updated contacts. Imported contacts should be available in your default account (Gmail / iCloud). You may switch between accounts from below options.
Tap on ‘Settings’ -> and select ‘Contacts’ -> go to ‘Default Account’ and select your default account.
iCloud & Google Account Sharing
To export contacts from iCloud to a Google account, you can follow these steps.
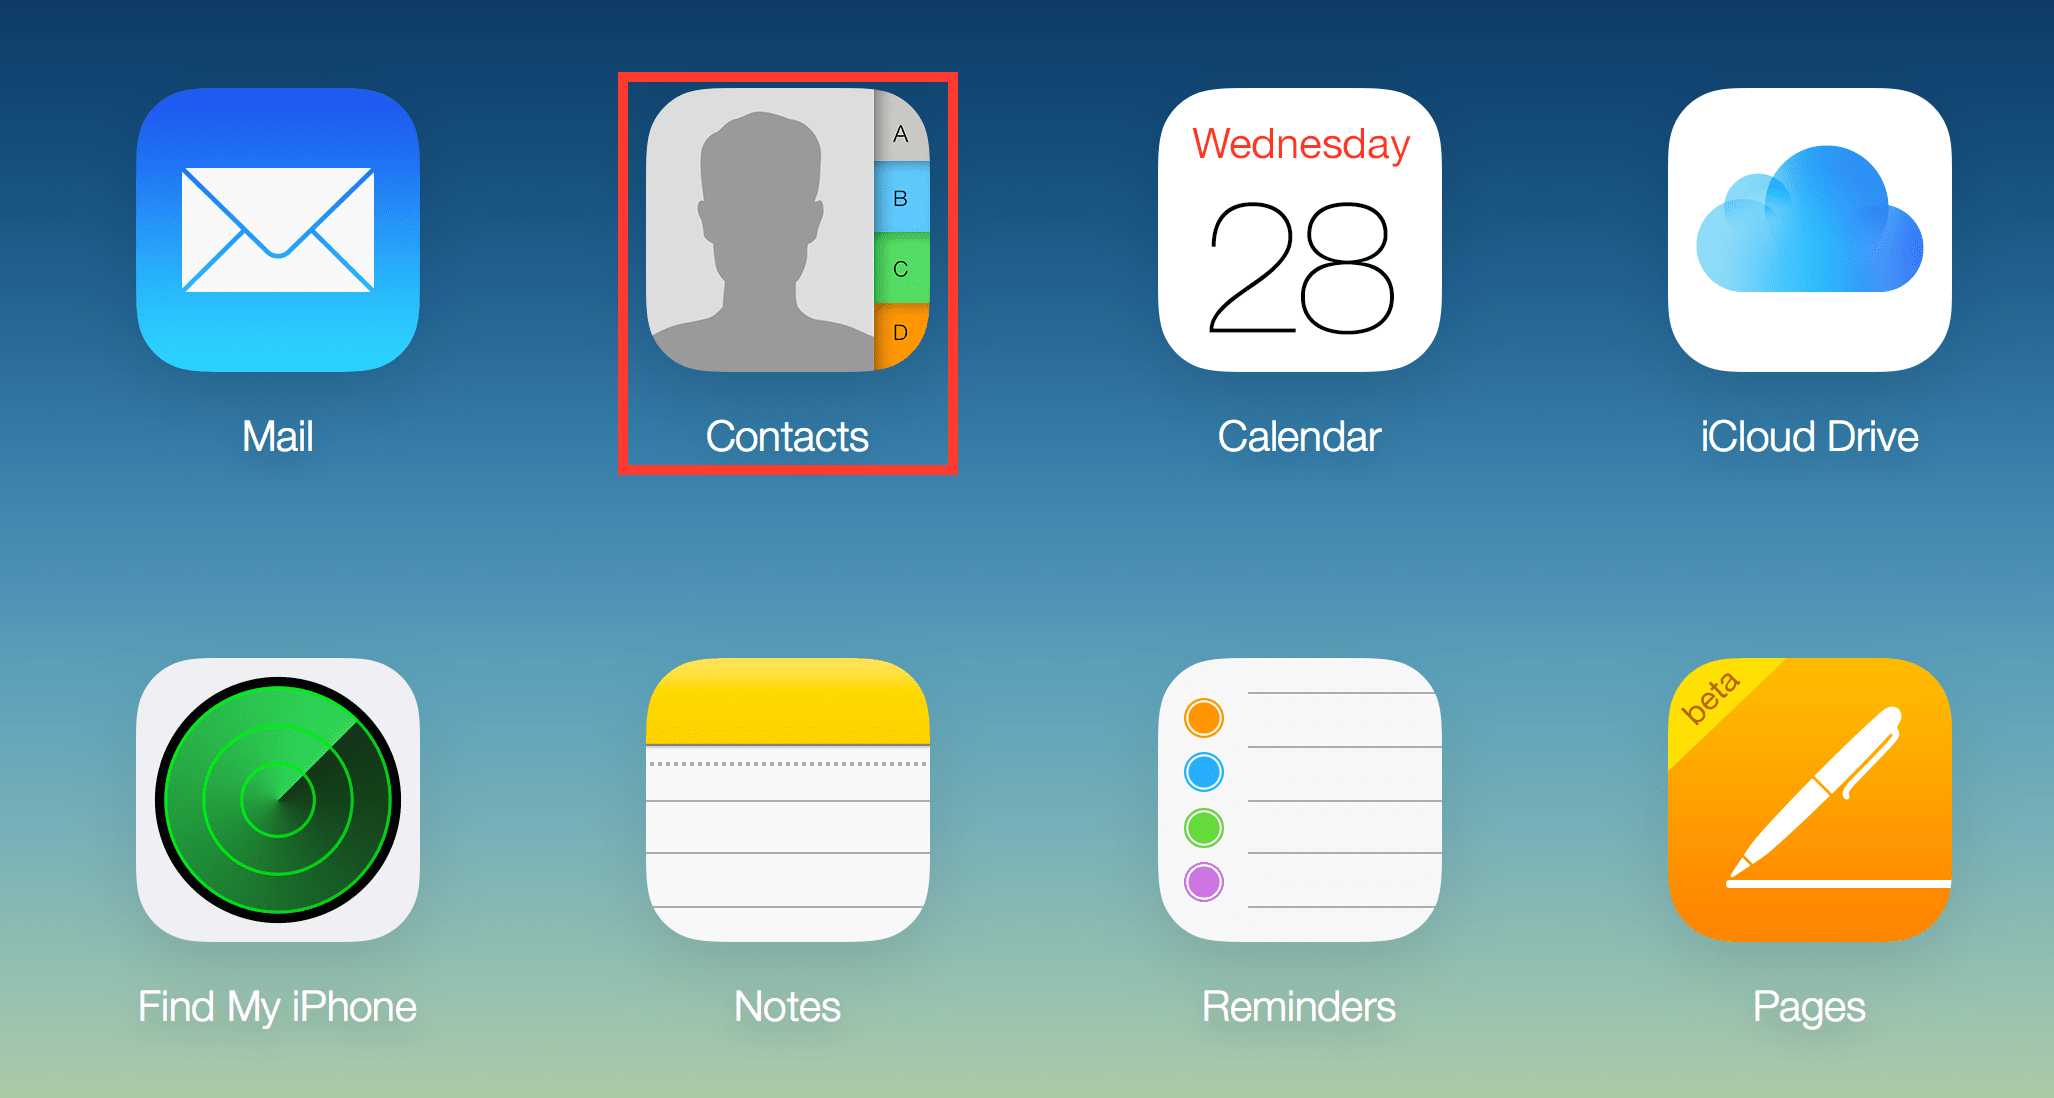
Step 1. Log in to your iCloud account on a Laptop or a PC.
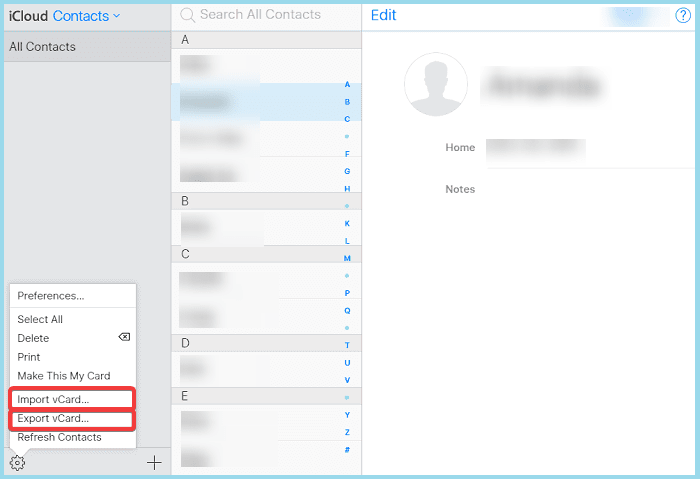
Step 2. Go to ‘Contacts’ and click on the ‘Settings’ icon on the bottom left corner.
Step 3. Click on Import vCard if you wish to get your Google account contacts to be imported on iCloud. Click on Export vCard if you wish to get your iCloud contacts to be imported on Google account. Both the options will ask you to browse the .VCF file and act accordingly.
Conclusion
So here we have covered how to import and export contacts from device to Google account & export contacts from SIM to sync contacts at one place. Now you need not worry about deleted contacts as you are aware of the options to backup contacts on Google account. You can anytime recover deleted contacts or from a lost phone as you already have a backup of contacts on your Google Contacts account.
For more such tips, tricks and tech related updates subscribe to Tweak Library and if you are more into tech-related videos do watch and subscribe to our YouTube channel.
Recommended Readings:
Best Apps To Fix Multiple Contacts On Android And iOS
How to Backup & Sync Device Contacts with Google Accounts
Troubleshooting Duplicate Contacts Problem on Android


Leave a Reply